| Last additions - D3 - Added electrical bits - single DIN radio |
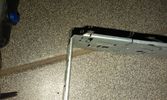
48 viewsI still needed to cut some small bits away from the DIN in order to have the facia cover fit nicely.20 Jul 2013
|
|
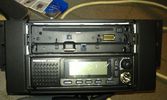
75 viewsThe Pioneer DEH X9500BT on top with the CB President Johnson II beneath.
I had to cut the bottom part of the CB 2 DIN conversion kit in order to have the supplied cover with the facia in place as it should.
I eventually didn't use the supplied facia of the radio as it's bottom part was covered by the CB's kit.20 Jul 2013
|
|

62 viewsFinal setup, everything in place after about one full day of work, which included removing quite some bits I had installed before.20 Jul 2013
|
|

60 viewsNormal usage, only the radio's on and controlling the connected iPod.20 Jul 2013
|
|

67 viewsRadio and CB activated. Tried to have the radio's colour similar to the CB.20 Jul 2013
|
|
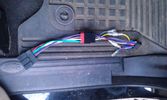
56 viewsThe OEM 2 ISO harness. Notice the red and yellow, which are important for my radio. Not having the red connected simply didn't activate the radio (so I wonder what the radio does with the permanent 12V)20 Jul 2013
|
|

64 viewsAdded a lead coming from the 12V outlet in the front console. That one is activated only when the ignition is set to I. So that's actually what is referred to as accessories in the manual of the radio. The OEM connector for the head unit did not have any similar lead. The yellow is permanent 12V, the red (on the converting OEM 2 ISO) is the accessories 12V.20 Jul 2013
|
|

35 viewsThe facia had some bits sticking out which fit quite nicely with the supplied double DIN support. As I was going to use the DIN supports supplied with either the radio and the CB, I needed to remove those bits sticking out. They made the DIN support bend as well.20 Jul 2013
|
|
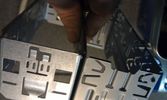
38 viewsWhen adding two single DIN supports together, you get quite a gap at the front.
This gap was way too much in my case, as it turned out that both supports started to bend when putting them both in the facia. Not that good, so I decided to cut off the upper part of the lower DIN support.20 Jul 2013
|
|
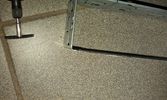
35 viewsThe result after the dremel hit the DIN support20 Jul 2013
|
|
|
|
|
|