| Search results - "BODY" |
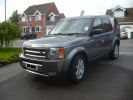
Disco 3 TDV6 GSLE75 viewsLimited Edition. Parking sensors front & rear, Full body skirts with chrome trim fog lights, Twin chrome tail pipes,
|
|
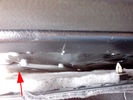
Riparazione attuatore sponda posteriore - Tailgate actuator repair38 viewsL'attuatore si trova dietro la pellicola nera incollata alla carrozzeria che va strappata.
The actuator is located behind the black film glued to the body must be torn.
|
|
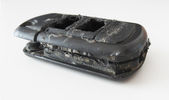
Tagliare lungo il perimetro della chiave - Cut along the key perimeter18 viewsI gusci sono saldati ad ultrasuoni. Con il disco tagliare lungo il perimetro della chiave in corrispondenza della giunta: lo spessore è di circa mm.3. Io non sono andato fino in fondo per evitare di danneggiare qualcosa, una volta inciso il solco per mm.2,7 ho fatto leva col cacciavite e ho strappato il materiale restante.
The body is ultrasonically welded. With the disc cut along the perimeter of the key in correspondence of the joint: the thickness is approximately 3mm. I have not gone all the way down
|
|

Thread upload3 viewsImage uploaded in new thread
|
|

Thread upload3 viewsImage uploaded in new thread
|
|

Thread upload3 viewsImage uploaded in new thread
|
|

5D on body with d3 in the back!100 views
|
|

5D on body91 views
|
|

FOR SALE - ONE OFF Land Rover Disco 3 37 viewsOne of a kind Landrover Discovery TDV6 HSE LUX Model 5 door automatic 4x4 diesel evo blue. Upgrades: sidesteps, roof rails, privacy glass, front and rear heated seats/elec seats, landrover tv and headphones, 7 seater black leather, piano black dash/steering wheel, built in fridge, 6 disc changer, sat nav and bluetooth, harman kardon premium entertainment pack, by-xenon adaptive headlights , cruise control and front and rear park distance control, panoramic electric glass roof, 22inch alloy wheels, body kit
|
|
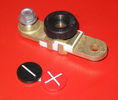
Battery Disconnect side post with + & - caps, top view618 viewsThis disconnect is designed for side post batteries. It can be used on either the + or - terminals. It can also be installed at the "other" end of the battery cable as well. In my install of the Aux battery, I installed this on the negative ground cable where the cable attaches to the body sheet metal. I have never used it but it seemed like a good idea at the time. The main battery hookup is pure stock.
For the hot side of the Aux battery, an Anderson PowerPole was used inline for the cable between the Aux and connecting to the spare bolt hole at the + post of the Main battery cable.
|
|
body control 161 views
|
|
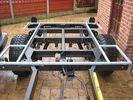
116 views
|
|
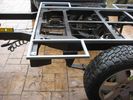
109 views
|
|
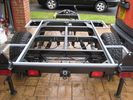
111 views
|
|
110 views
|
|
111 views
|
|
102 views
|
|

Bodykit front / Evoque 20" Wheels79 views
|
|

Bodykit DRL70 views
|
|

Thread upload19 viewsImage uploaded in new thread
|
|
Thread upload0 viewsImage uploaded in new thread
|
|
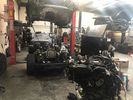
Thread upload10 viewsImage uploaded in new thread
|
|

Thread upload3 viewsImage uploaded in thread 201546
|
|

Thread upload6 viewsImage uploaded in new thread
|
|

206 views
|
|
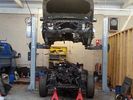
106 views
|
|

D3 Diesel - Body Off52 views
|
|

Body_Off_Diesel.pdf71 views
|
|
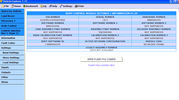
Thread upload0 viewsImage uploaded in new thread
|
|

CAN BUS MESSAGE15 viewsError I get when trying to read the Body Control Module Settings with my MSV2
|
|
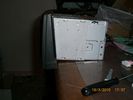
This show that the angel of the radio body is diffrent from the original, hence shall some plasic be removed - I used a dremmel and removed 7 mm of the horizontal bar inside 160 views
|
|
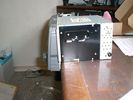
This shows the standard radio body angle161 views
|
|
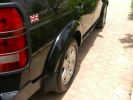
Body-matching wheelarches250 viewsAnother shot of the body-matched wheel arches, sills and door mirror bodies.
|
|
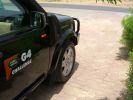
2009 MY?239 viewsThe wheelarches, door sills, and door mirror bodies have all been sprayed to match the body colour. Same as 2009 MY? I think this looks really good, and is so much easier to keep clean than the textured plastic that suffered badly out here from dust/dirt ingraining and UV discolouration.
|
|
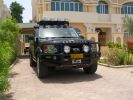
Lookalike 2009? 309 viewsShows RHS wheelarches, sills and door mirrors sparyed to match body colour.
|
|
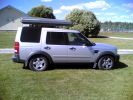
Colour coded body side moldings492 views
|
|

D3 and D4 Underbody Protection inc. bracketry 115 views
|
|
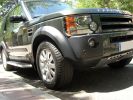
Underbody Protection Plate209 views
|
|
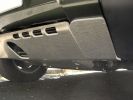
Underbody Protection Plate199 views
|
|
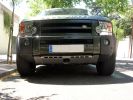
Underbody Protection Plate180 views
|
|
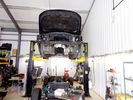
3 views
|
|
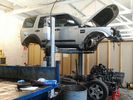
121 views
|
|
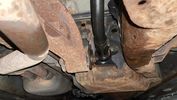
Thread upload1 viewsImage uploaded in thread 164697
|
|

bodywork scratches65 views
|
|
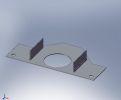
Discovery 3 rear underbody protection112 viewsDiscovery 3 rear underbody protection wich I designed and draw.
|
|
Discovery 3 Underbody protection124 viewsDiscovery 3 Underbody protection
|
|
Discovery 3 Underbody protection111 viewsDiscovery 3 rear underbody protection wich I designed and draw.
|
|

Discovery_3_Body_Off34 viewsDiscovery_3_Body_Off
|
|

Thread upload20 viewsImage uploaded in thread 162369
|
|

Thread upload12 viewsImage uploaded in thread 139047
|
|

Thread upload12 viewsImage uploaded in thread 139047
|
|

Thread upload18 viewsImage uploaded in thread 139047
|
|
Thread upload12 viewsImage uploaded in thread 139047
|
|

Thread upload12 viewsImage uploaded in thread 189350
|
|
Thread upload8 viewsImage uploaded in thread 156210
|
|
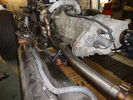
Thread upload33 viewsImage uploaded in thread 95339
|
|
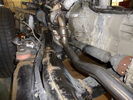
163 viewsDe-cat pipe
|
|

Thread upload7 viewsImage uploaded in thread 159732
|
|

Thread upload8 viewsImage uploaded in thread 159732
|
|
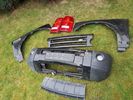
Thread upload8 viewsImage uploaded in thread 159732
|
|
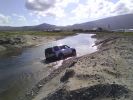
disco 3 on a scary side angle85 viewsdoes\'nt look to bad here, totally different story when your inside it. spare jocks anybody??
|
|
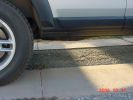
King Springs Lift217 viewsRear underbody Clearance
|
|
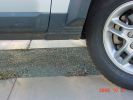
King Springs Lift205 viewsFront underbody clearance
|
|

78 viewsThis metal body seam gets touched by larger rear tyres. If you don\'t have rear AC, you can fold it out of the way. If you do, the two pipes mean you have to leave it alone.
|
|
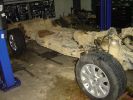
Chassis172 viewsChassis with body lifted off, and engine out
|
|

Body Underside20 views
|
|

Body Off19 views
|
|
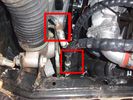
View of both hose connections to power steering system153 viewsBoth connections are shown. My friendly Qantas hydraulic hose expert cut off the elbow and modified it so I can re-install it to the PS rack before warranty work (and certainly before the vehicle is lifted off the body!!).
|
|
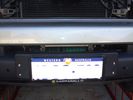
Winch as installed177 viewsLicence plate is held on by winch cable and 4 metal pins which fit into modified bumper body. Winch rope is green
|
|
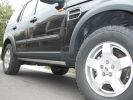
New tyres and undrbody armour fitted229 views
|
|
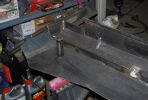
190 viewsGetting closer to the finished product. The steel tube in the middle reaches up to the body mounts on the frame.
|
|
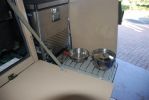
gas stove slides out under fridge110 viewsvery useful mod - youdon\'t have to unpack anythinig to be ready to cook. the stove gas is piped from the rear of the trailer, ie. the standard gas cylinder. pipe goes thru grommets along bodywork, and uder the fridge. works a treat. the door adds shielding in high winds if need be
|
|
Thread upload14 viewsImage uploaded in thread 143895
|
|

Ford Sounder 4L1Z-15K864 A that I installed.12 viewsThis is the Ford sounder, part number 4L1Z-15K864 that I purchased and installed in lieu of the official Land Rover sounder. Note the part number is what is printed on the box (and also my invoice) but the part number on the sounder body is a bit different. I think a new box/invoice related part number is created each time the price of a part is changed. Regardless the Ford sounder was about half the cost of the Land Rover part and sounds the same as the removed factory buzzer.
|
|
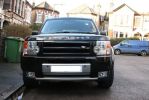
119 viewsfront view
|
|

Throttle Body Coding35 views
|
|

Thread upload199 viewsImage uploaded in thread 162283
|
|

Body off!!50 views
|
|

Front Lamp Guard Bracket with body protection strips134 views
|
|
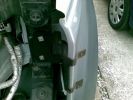
Front Lamp Guard Bracket (with body protection( in place)127 views
|
|

Guava body split4 views
|
|

FT-8900 radio body mount97 viewsYaesu FT-8900 mounted on access door. Multi-way socket on front.
|
|
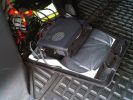
FT-8900 mount97 viewsFt-8900 radio body mounted in luggage area
|
|
All four wheels off224 viewsHopefully the closest I\'ll come to the whole body off!
Note: Those aren\'t my new tyres.
|
|
Blown Turbo127 viewsThe Turbo blew on this D3 with only 30,000k Its a 2007 model and the easiest way to get at the engine was to remove the body which is attached to the body by 10 bolts
|
|
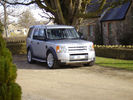
2005 D3 with New Bodykit (from TLO).446 viewsJan 2010
One of the last body kits bagged from TLO in Jan 2010... colour-coordinated in Zambezi Silver by local spray shop... Left the centre section Brunel silver for contrast. Really pleased with the resulting look.
Sadly missed
|
|

Switch is blue colour thing thru the rectangular opening.3177 viewsThe blue coloured plastic bit thru the rectangular opening is the brake light switch. The fist time, I found it easier remove the switch by dropping the horizontal plastic panel, (two screws), and then slipping my hand in and rotating the switch clockwise 1/4 turn. The second time, I was able to remove the switch thru the rectangular opening and did not need to remove the horizontal lower panel. Obviously, I had to remove the sloping knee pad panel, (note sort of hinged at the bottom so pull back from the top.)
Regardless, do not touch the brake pedal - just let it sit where it wants to. One has to first remove the angled knee pad panel that sits under the steering wheel. It can be pulled from the top corner at the door side. Pulling releases a pair of those U shaped metal clips that LR loves so dearly. You have to pull quite hard. The bottom is held by a couple of plastic fingers in a couple of slots so you pull at the top till the two clips release and then rotate the panel and pull upwards a bit.
To remove the switch, you rotate it clockwise and pull outwards. Rotating the switch clockwise automatically retracts the plunger back into the switch body away from the brake pedal arm.
Similarly when you install the new switch, the required 1/4 turn anti clockwise rotation action releases the plunger so it lays up against the brake pedal arm and at the same time, secures the switch in place.
To remove the electrical wires, the switch will drop below the horizontal pad and hang from the wires so unclipping the electrical connector plug is fairly easy to do.
|
|
Before31 viewsBefore I got the body moldings. In the foreground is the first reason for getting a top notch ride.
|
|

underbody guards56 views
|
|

Matt Black Porsche seen in Vienna42 viewsnote the body kit and the paint but the best bit is the cable tie keeping the number plate on.
|
|

Anybody got waffle boards?25 views
|
|
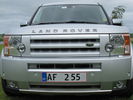
Body Styling - front29 views
|
|
Under body wiring633 viewsUnder body wiring on Discovery
|
|
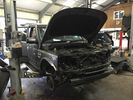
D4 body off13 views
|
|
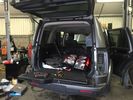
D4 body off14 views
|
|

D4 body off19 views
|
|
D4 body off13 views
|
|

D4 body off14 views
|
|

D4 body off15 views
|
|

Body Kit Bumper & Arches Fitted101 views
|
|
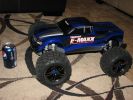
32 viewsNew Christmas toy to try to learn the finer points of speed control over obstacles... Now I just need an LR3 body that will fit this monster...
|
|
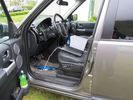
71 viewsUsing Faultmate MSV-2 to reset the body height to the original settings to fit in the normal car deck of the ferry.
|
|
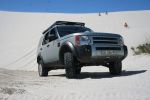
AT2 Grabber in Dunes270 viewsin extended mode, at rest, with AT2 tyres. Tested at Atlantis Dunes with flying colors.
Mantec non-winch plate visible.
|
|
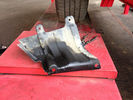
this is how the underbody looks like with my old intercooler hose10 views
|
|

Thread upload10 viewsImage uploaded in thread 174881
|
|

Replacement switch from RRS installed on LR3864 viewsThe switch shown is LR part number YUZ500020, the upper rear hatch release switch that is found on the Range Rover Sport.
The switch body is the same switch as on the LR3 except that there is no wiring disconnect on the LR3. Hence when the switch corrodes and requires replacement, the LR solution is to purchase a new handle and license plate light assembly. I instead cut off the old switch and installed a JAE mating connector to the existing wiring and hence just plugged the RRS switch in.
The replacement RRS switch snaps into the same rectangular space in the same manner as the removed LR3 switch, the difference is the JAE male wiring connector.
|
|

Somebody had one or two many slugs from the Pochin bottle128 views
|
|
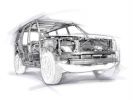
65 views
|
|
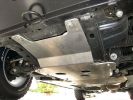
Rasta underbody protection plates448 views
|
|

Land Rover Brake Light switch XKB5001102700 viewsThis is what the switch looks like when removed from the parts box. Note that the plunger is recessed back into the body and when installing, the process of rotating the switch body 1/4 turn anticlockwise releases the plunger so it pops longer and engages the brake pedal. If you look down on the plunger you can see curved slots where the rotation takes place.
Do not try to rotate the new one - play with the one you remove. Also do not press on the brake pedal when removing or installing as you will damage the plunger - this is one of the reasons the plunger is retracted into the body for installation. It is also for this reason that if you try to confirm the operation of the switch contacts with an ohm meter by pressing the plunger, the switch will appear not to function as one might anticipate. Have faith, the switch will however, once installed and the plunger is in full motion.
|
|
disco 3 koolart image on tea/coff mug £6.99 or on white heavy weight sublimation t shirt £10.99 personalised26 viewschange body work color for free...most colors available. t shirts in 5 sizes......
|
|
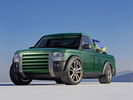
45 views
|
|

Thread upload18 viewsImage uploaded in thread 189350
|
|

LTB00121 - Technical Bulletin - Remove Install Automatic Trasmission Valve Body Assembly70 views
|
|

LTB00207 - Technical Bulletin - Body Side Molding - Installation Procedure59 views
|
|

LTB00278 - Technical Bulletin - Body Assembly Remove & Refit87 views
|
|

Lug Nut part number RRD500290 outline sketch541 viewsThis single sheet pdf provides dimensions of the LR part number RRD500290 lug nut on vehicles from MY 2005 to 2008, (up to VIN 8A450459). From VIN 8A450460, the part number is RRD500590.
Visually, there is no apparent difference between the two part numbers. The dimensions appear identical as well. The shape, size, and profile of the Stainless Steel "hat" appears identical.
There are I presume differences in metallurgy to reduce corrosion and swelling of the hat or perhaps better sealing between the inside surface of the hat and the steel of the lug nut body. The reality is the differences are not immediately obvious however.
A 22 mm six point half inch or larger socket drive fits over the lug nuts. I use a nominal 36" long breaker bar with the 22mm socket - any shorter bar, best you be in shape. Depending upon your source, for both alloy and steel wheels, the lug nut torque value appears to be 103 lbf ft, (140 Nm); others suggest first tighten to 96 and then finish at 110 lbf ft, (130 and 150 Nm).
|
|
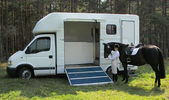
Our last horsebox 'Madge'. Converted by the original body makers near Norwich69 views
|
|

old mouse14 viewsmouse body found while cleaning out bedroom on farm
|
|
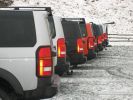
What no people?209 views
|
|

Thread upload18 viewsImage uploaded in new thread
|
|

41 views
|
|
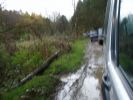
Holding everybody else up (blurry)103 views
|
|
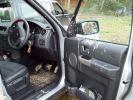
Somebody forgot to close the window!!!199 views
|
|
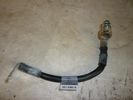
Negative Battery Cable209 viewsThis shows the corrosion from the negative terminal on the Negative to body ground. This is likely due to gas released through the negative post. It appears to be a common problem with the LR3. As a result of this corrosion left unchecked will damage the computer ecu and cables mounted near and below the battery.
|
|
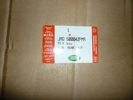
Step 1471 viewsJAG500042PMA body hardware, cowl, cowl grille 1 $64.40
|
|
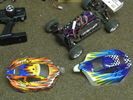
rrc body's8 views
|
|
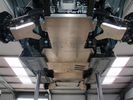
D3 and D4 Underbody Protection178 viewsIncludes:
Sump guard
Centre guard (transfer box, exhaust, fuel tank)
Rear diff guard
A-arm guards
|
|

129 viewsTotal carnage in our village,army,police,ambulance and mountain rescue.Anybody would think it was a natural disaster??
|
|
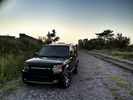
D3 Body Kit225 views
|
|

Need extra lift36 viewsWho says nobody uses the yellow page directories anymore. Proof they still get used!
|
|

Complete underbody protection system photo render172 views
|
|

Complete underbody protection system117 views
|
|

2004 Citroen C8191 viewsMy second 7 seat motor - another big french tank with plastic bodywork in silver, complete with shopping trolley handle on the roof. A 2 ton motore with a 2.0l petrol engine mated to a 4 speed auto box - not good for performance!
|
|
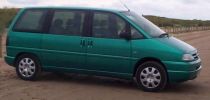
2000 Peugeot 806176 viewsMy first 7 seat motor - a big french tank with tin foil bodywork in a shocking bright metallic green
|
|

Thread upload9 viewsImage uploaded in thread 193131
|
|

Thread upload9 viewsImage uploaded in thread 193131
|
|
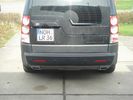
Rear body kit189 views
|
|
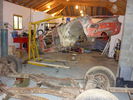
11 views
|
|
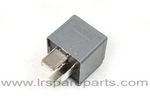
Air Compressor 70 amp replacement relay1394 viewsThere is a software update, 09 April 2010, LTB00270, for the compressor which reduces the shut down pressure to about 205 psig (14 bar). The update is usually done when changing to a new compressor and also includes replacing the R7 relay in the engine compartment fuse box, 07 DEC 2010 LTB00331.
The newer grey case coloured relay, part # YWB500220, shows to be rated at 70 amps, (the relay, not the compressor), however the previous black case coloured relay also indicates 70 amps.
Both the new and replaced relay show on their wiring diagrams to have a parallel voltage spike resistor, (probably 560 ohms), across the coil terminals, #1 and #2. This means one does not just replace the relay with any four prong 70 amp ISO sized relay that one happens upon.
One presumes the grey relay is either upgraded or just being installed for good measure. The relay is common on Ford Fiesta for the seat heater relay, Ford part number 5M5T 14B 192 EA; also Volvo, part number 30765034. The Tyco part number moulded on the grey body is V23136-J4-X62.
|
|

Magnetic body protection 1146 viewsMagnetic body protection
|
|
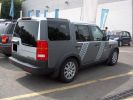
Magnetic body protection131 viewsMagnetic body protection
|
|
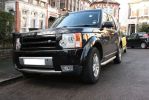
159 viewsSide view of colour coded wheel arches and bumper
|
|
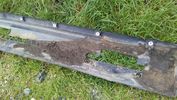
Door Sill10 viewsLook what lurks behind those rugged plastic sill trims. Here's the muck gathered over the years, damp and sitting against the metal body
|
|
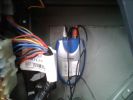
Sounder Module fixed to body panel within LHS cubby hole199 views
|
|
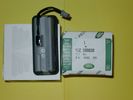
Upper Hatch Release Switch LR Part Number YUZ500020676 viewsThis is the Range Rover Sport switch, Land Rover part number YUZ500020, as it comes out of the box. Note the JAE, (Japanese Aviation Electronics), male wiring connector installed on the end of the power lead.
The rubber cover of the switch is sealed to the plastic body of the switch whereas in the previous switch design, there was no sealing. Also the replaced switch was hard wired into the same harness as the license plate lights - no JAE connector in other words.
|
|
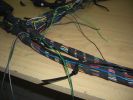
Wire swapping91 viewsPulling out the old cut wires while routing in the new, you can see some already done in the lower loom body. The loom will be re wrapped at the end so i only need to hold it in place periodically at this point.
|
|
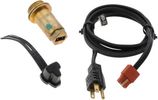
Block Heater and Cord for petrol V8 LR3 North America 120VAC529 viewsThe recommended 120VAC block heater cord is a Temro 3600003. This is a five foot long cord with what is called a Straight connector at the block heater end with holes for two pins; there is also a metal tab located between the two holes serving as the ground conductor. That cord, in addition to having the two pin holes plus ground tab end, is designed for both aluminum and brass heaters as that also matters.
The Land Rover part number for the Block Heater assembly is VUB504640 but is a Temro product not officially marketed by Temro as a Land Rover block heater. The Temro product number is 3100107 which shows as a brass body 30 mm threaded 700 watt 120VAC screw in block heater with a rectangular shaped depression and two pins suitable for the Temro 3600003 cord. Note the word BRASS as it mates with the aluminum OK.
|
|
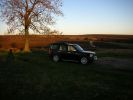
The \'Serengeti\' of The North York Moors891 viewsPicture was taken on a late sunny winters afternoon in the North York Moors National Park. The low light captures the Sky, Tree, and the D3\'s light interior along with the silver exterior detail. Whilst the dark D3 body blends into the foreground. Gives a feel of the South African plains. Think would make a good October or November page??
|
|

93 views
|
|
7 views
|
|
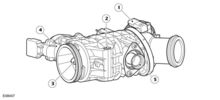
Thread upload17 viewsImage uploaded in thread 143895
|
|

Thread upload9 viewsImage uploaded in new thread
|
|

D3 and D4 Underbody Protection162 views
|
|

D3 and D4 Underbody Protection166 views
|
|

12 views
|
|
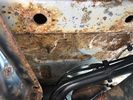
Thread upload11 viewsImage uploaded in thread 188404
|
|
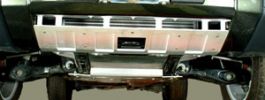
166 views
|
|
86 views
|
|
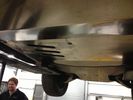
81 views
|
|
77 views
|
|
79 views
|
|
87 views
|
|
98 views
|
|
73 views
|
|

Voss System 203 Connector cut thru, (similar to in valve block).678 viewsThis is a cut thru of a Voss System 203 connector. The top third of it is similar to the connector that holds the three 6mm plastic tubing lines into each of the front and rear valve blocks.
I say top third, as per the other pictures, the 3 has a Voss assembly that threads into the plastic of the valve block, whereas in the cut thru above, the Voss brass assembly is threading into the brass body of a metric threaded adapter for threading into a standard type metric threaded hole. Note also the two one way sloping ridges of the cutting ring, and the two interal O ring seals that mate with the plastic tubing. There is additionally the small squashed O ring to provide a seal related to the external thread of the Voss cutting ring assembly; (similar to the larger O ring for the brass body external thread).
|
|
Amdeal 30ft / 10M USB Digital Microscope Cable Wire Endoscope Camera Video Recording Inspection Pipe Camera - Waterproof, 4 LED Lights28 viewsUnder XP system, can watch video directly without install software. By using our software, can take photo,record video, and save the video in the PC. Such USB microscope widely used to inspect tube, check the body, magnify stamps, coins, antiques, insects, electric circuits, machines, fabrics, food, decorations, etc. Please notice that the wire camera is designed for industrial use, not for medical use.
Camera: 1/6" VGA COMS
Pixel: VGA 300K
Resolution: 640x480,352X288,320X240,176X144,160X120
Capture Resolu
|
|

239 views1 day old and needs a clean
|
|

Thread upload10 viewsImage uploaded in thread 126959
|
|

Electrical Connector Sleeve Replacement ZF 6HP26974 viewsThis 3 page pdf with pictures shows how to replace the sleeve that holds the multipin electrical connector that passes thru the transmission body to the Mechatronic unit.
The install of the sleeve is more difficult than the removal in that one must not rotate the sleeve as damage to the internal pins can result. The pan must be first removed to both remove and install the sleeve.
|
|
|
|
|
|