| Search results - "Clips" |
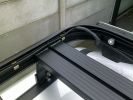
Cabling Front Runner Spots229 viewsThanks to Ifor Williams clips ;)
|
|
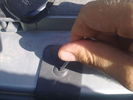
clips undo134 views
|
|
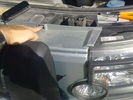
grille clips 1 X 4147 views
|
|
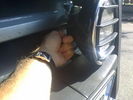
grille clips 2 position148 views
|
|
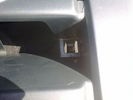
glille clips 2 X 2140 views
|
|
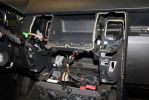
02279 viewsDash center console off and factory head unit out. LR clips suck.
|
|
Thread upload25 viewsImage uploaded in thread 115058
|
|
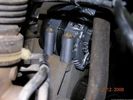
60 viewsOne bolt is visible at the front, but the other two are down the left hand side and best accessed by removing the small plastic guard behind the bumper. I also removed the small metal radiator guard between the bumper and the main sump guard (but that was mostly to retrieve the spanner I dropped!). The only issue with removing the plastic guard is the stupid plastic clips that hold it on may need to be replaced.
|
|
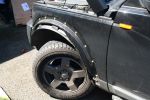
Wheel Arch Trim Removed150 viewsLuckily I didn\'t break any clips
|
|

Clips13 views
|
|

Bin Cover removed showing forward release clips that clip into the two rectangular slots.10 viewsOne has to pull up on the Bin Cover to unlatch the two metal clips, hence why release of the C pillar cover makes the bin cover removal and reinstall easier.
|
|

Clips12 views
|
|
66 views
|
|
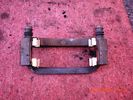
Caliper carrier with new anti rattle clips102 views
|
|

Thread upload0 viewsImage uploaded in thread 181600
|
|
99 views
|
|

Front brake clips23 views
|
|
Speaker grill clip4 views
|
|

Thread upload6 viewsImage uploaded in thread 176763
|
|

Thread upload1 viewsImage uploaded in thread 199620
|
|
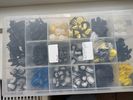
Thread upload6 viewsImage uploaded in new thread
|
|

Various Clips288 viewsBits and Bobs stitched together
|
|
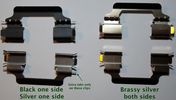
Front brake clips21 views
|
|

Thread upload3 viewsImage uploaded in thread 199620
|
|
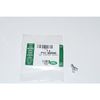
Clip Spring Metal FYC 500040 that holds LR together1748 viewsThe jpg is of the spring metal clip, Land Rover part number FYC 500040 that holds most of our 3 together - well at least most the interior trim parts.
If you are going to remove interior panels, you may as well stock up on a few for replacement as upon panel removal, the clips tend to spring away into deep never to be found voids within your 3.
|
|

Front and Side Clips - Seat Base39 views
|
|

Seat Base cover front and side clips released44 views
|
|
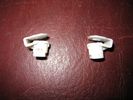
Clips to be removed when fitting a Mantec Plate141 views
|
|
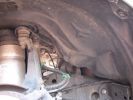
pull out the 3 clips circled in red300 views
|
|
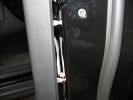
clips on door panel481 views
|
|
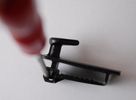
Mat Clips Discovery 4 201318 views
|
|
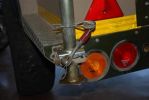
fitted stronger rear strut holders. not a great mod. the holes i drillled for the "R" clips are the best mod, as they stop the legs from sliding up under pressure. requires bracing inside to stop chassis bending103 views
|
|

Thread upload10 viewsImage uploaded in thread 126603
|
|
Thread upload2 viewsImage uploaded in thread 195635
|
|

Thread upload4 viewsImage uploaded in thread 195635
|
|
Thread upload2 viewsImage uploaded in thread 195635
|
|

Thread upload4 viewsImage uploaded in thread 195635
|
|
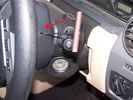
20 viewsFeel for the clip with the hook.
|
|
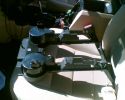
640 viewsCup holder panel showing the 8 locating lugs and clips
|
|
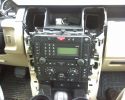
After removal of H-panel95 viewsCrikey, you have to pull HARD to remove this trim!!! Broke one clip and only lost half of it. Fit back with 3 clips ok. Yet to drive it to see if it rattles.
|
|
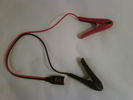
Croc clips59 viewsCrocodile clips with connector without dust/moisture cap.
|
|

Switch is blue colour thing thru the rectangular opening.3177 viewsThe blue coloured plastic bit thru the rectangular opening is the brake light switch. The fist time, I found it easier remove the switch by dropping the horizontal plastic panel, (two screws), and then slipping my hand in and rotating the switch clockwise 1/4 turn. The second time, I was able to remove the switch thru the rectangular opening and did not need to remove the horizontal lower panel. Obviously, I had to remove the sloping knee pad panel, (note sort of hinged at the bottom so pull back from the top.)
Regardless, do not touch the brake pedal - just let it sit where it wants to. One has to first remove the angled knee pad panel that sits under the steering wheel. It can be pulled from the top corner at the door side. Pulling releases a pair of those U shaped metal clips that LR loves so dearly. You have to pull quite hard. The bottom is held by a couple of plastic fingers in a couple of slots so you pull at the top till the two clips release and then rotate the panel and pull upwards a bit.
To remove the switch, you rotate it clockwise and pull outwards. Rotating the switch clockwise automatically retracts the plunger back into the switch body away from the brake pedal arm.
Similarly when you install the new switch, the required 1/4 turn anti clockwise rotation action releases the plunger so it lays up against the brake pedal arm and at the same time, secures the switch in place.
To remove the electrical wires, the switch will drop below the horizontal pad and hang from the wires so unclipping the electrical connector plug is fairly easy to do.
|
|

The clips (one completely broken, one partially, and one ok) that hold the plastic locking mechanism to the camera.31 views
|
|
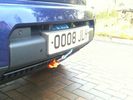
Redg plate mounting127 viewsThe original redg plate mounting was modified. An L-shaped piece of plastic now sticks out rearward from the top of the mounting and this hooks over the back of the top edge of the bumper cover. Then 2 spring clips hold the bottom edge of the mounting in place. Proximity sensor and surround camera seen unaffected.
|
|
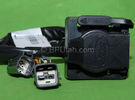
Harness section that runs behind the rear bumper.410 viewsThis is the harness section that clips up inside the rear bumper and includes the circular 7 pin, (6 flat +1 round), NAS socket, and also the 4 pin NAS flat connector.
The two small plug ends connect under the rear left tail light to the harness section that exits from the interior.
The Land Rover part number for the NAS trailer tow kit, (both cables), is YWJ500220.
|
|

LR3 Air Conditioner Drain Tubes behind centre console2132 viewsThis shows the two air conditioner drain tubes located left and right under the radio stack.
The tube on the left side, (steering wheel side, LHD), disattached itself and the carpet on the floor under the gas pedal etc became soaked. I think rain water from outside that comes in the outside cowl vents also exits via the tubes as I first noticed the carpet was wet after parking outside during a big rain storm.
It was relatively easy to slide up and reattach the rubber hose that runs from the rectangular shaped plastic discharge hole(s) of the heater "pan" down along the transmission hump area and thru the floor pan. There is a hose on each side of the transmission hump, but only one hose had let go on my 3. The rubber hoses just slide over the rectangular plastic openings of the two heater housing drain outlets.
To get at each drain hose, remove the vertical sort of triangle carpeted piece below each side of the radio stack. The triangles of carpet will just pull away as each is held on with those metal U clips Land Rover so likes. Dislodge each triangle at least sufficiently to get ones hand in to slide the rubber hose back on.
You will rarely see AC water on the ground as the front drains pour onto a metal underside protection skid plate and the rear drain onto the top of the left rear muffler.
|
|

Lunar Eclipse as seen from Tunisian Desert on 15 Aug 2008 outside my D357 views
|
|

Thread upload12 viewsImage uploaded in thread 135120
|
|
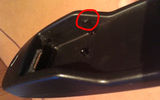
Nokia phone cradle CR3 - missing clips31 views
|
|
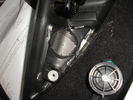
90 viewspremium tweeter before being fitted in recess where old "base" one was. Tweeter clips in place and is also secured with glue (hot gun) as LR do.
|
|

240 views
|
|

broken clips215 views
|
|
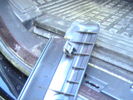
remove metal clips from floor panel and reinstall on to the plastic trim296 viewsIf you leave the clips in place and try to force the trim back in the clips are knocked through the floor unit and it takes an hour to get them out!!
|
|
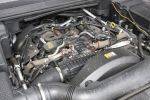
EGR Pipe Clips831 viewsRemove the 2 circled clips to disconnect upper ends of EGR pipes from the stub pipes fitted to the EGR butterfly valve housing.
|
|

201 views
|
|
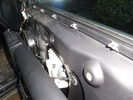
Door Card Removal - Top clips23 views
|
|
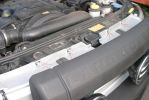
Front Grill Removal405 views
|
|
Front Grill Removal321 views
|
|
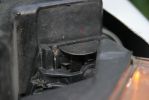
Headlamp fixed361 views
|
|

Thread upload0 viewsImage uploaded in new thread
|
|
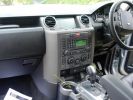
Dash trim removal581 viewsClips are at the bottom only, so pull (very hard) at the bottom and pull towards the gear lever.
|
|

Thread upload11 viewsImage uploaded in new thread
|
|
|
|
|
|