| Search results - "Door" |
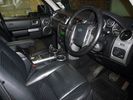
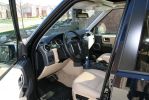
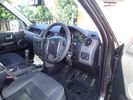
interior drivers door70 views
|
|
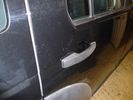
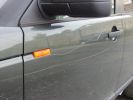
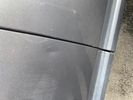
o.s.r. door handle scratches64 views
|
|
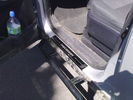
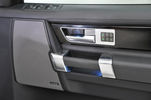
Black chrome - Front door78 views
|
|
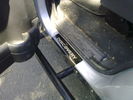
Black chrome - Rear door75 views
|
|
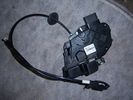
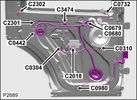
Door latch32 viewsFreelander 2 door latch
|
|
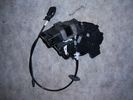
Door latch Drvs O/S27 viewsFreelander 2 door latch.
|
|
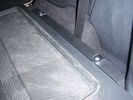
Sliding door bracket floor in closed position26 views
|
|

This picture was taken with garage doors closed.43 views
|
|
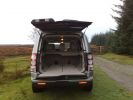
D4 Boot399 viewsRear view doors open
|
|
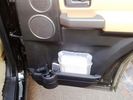
Storage in door pocket, door open73 views
|
|
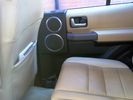
Door storage invisible when door shut65 views
|
|

Tech Bulletin - Recirc Door Squealing12 views
|
|
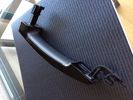
Java Black Door Handle51 views
|
|
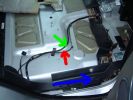
2 ICE Loom - Rear Passenger door65 views
|
|

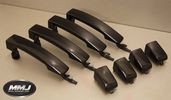
Single Piece Door Handle and Two 2 Piece Door Handle258 views
|
|

Local WA newspaper article on D3 Theft168 viewsThe article is info by police public affairs. They wanted something to keep people locking doors and taking care during the holiday period. There are also TV public service announcements on air in WA featuring my wife confessing to leaving 1 door unlocked leading to the theft.
|
|
Thread upload65 viewsImage uploaded in new thread
|
|
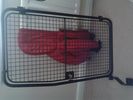
Dog divider door25 views
|
|

Audio control wiring loom LEFT16 viewsLeft Door wiring loom for audio controls
|
|

door loom plugs for window & audio12 viewsthe two plugs for the window & audio contros
|
|

B post door plug14 viewsRear door wiring harness plug to B post
|
|

Rear door audio plug 15 viewsRear door audio plug
|
|

Rear left door audio control loom12 viewsRear left door audio control loom
|
|
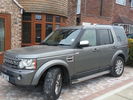
My Disco 4 HSE32 viewsUnwashed...blame outdoor LHR T1 2 week parking!!
|
|

Rear right door audio wiring loom15 viewsRight Loom
|
|

39 views
|
|

Thread upload40 viewsImage uploaded in new thread
|
|

Thread upload44 viewsImage uploaded in new thread
|
|

34 views
|
|
Door trim plastic scrath9 views
|
|
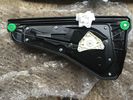
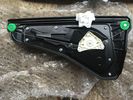
Rear door Window mechanism and motor No grey Plug AAH2227001AA6 views
|
|
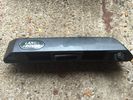
Rear Door handle in Metalic black from 2013-2013 D4 Camera model not same as my 20119 views
|
|
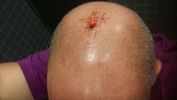
gauged head 15 viewsresult of bending down to pick up LTO tape for robot library and standing backup with door open (
|
|
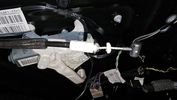
Left rear door3 views
|
|
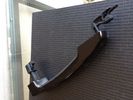
Java Black Door Handle50 views
|
|
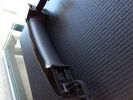
Java Black Door Handle46 views
|
|

Thread upload19 viewsImage uploaded in thread 173658
|
|

Front Heater Doors Description and Operation1396 viewsThis 6 page pdf shows with coloured drawings the air flow thru the front heater as well as discusses the operation of the various air flow doors.
|
|

Alarm System description and Operation1052 viewsThis 9 page pdf explains in detail how the anti-thief, (alarm), system is supposed to operate. The system uses the door ajar switches to provide alarm system signals; as such there are few separate contacts related to the alarm system only.
Page 6 of 9 is of particular interest as it describes the trigger log that is accessible with the dealer T4.
|
|

Old Two Door Aruba Lodge42 views
|
|

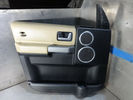
Front Door Trim Panel168 views
|
|

Front Door Card24 views
|
|
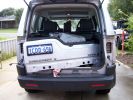
278 viewsRemove the back door
|
|
16 views
|
|
09239 viewsRan the GPS antena up through the rubber gromet in the top center of the boot door jam.
|
|

Fin cell phone aerial drawing190 viewsThe factory aerial for the factory NAV / GPS on my 2005 HSE is within the high mounted stop light lens at the top of the upper hatch door. I do not have the factory installed phone kit, and as such, do not have the fin installed; instead there is just a plastic blanking insert to fill the cell phone aerial wiring hole in the metal portion of the roof; hence this requirement for an "external" cell antenna. For those that do have the fin on their glass roof, the fin is screwed on to a glued on plastic gasket, (sort of), and not bolted thru as per the metal roof 3's.
|
|
Thread upload4 viewsImage uploaded in thread 146587
|
|

FOR SALE - ONE OFF Land Rover Disco 3 37 viewsOne of a kind Landrover Discovery TDV6 HSE LUX Model 5 door automatic 4x4 diesel evo blue. Upgrades: sidesteps, roof rails, privacy glass, front and rear heated seats/elec seats, landrover tv and headphones, 7 seater black leather, piano black dash/steering wheel, built in fridge, 6 disc changer, sat nav and bluetooth, harman kardon premium entertainment pack, by-xenon adaptive headlights , cruise control and front and rear park distance control, panoramic electric glass roof, 22inch alloy wheels, body kit
|
|

Thread upload17 viewsImage uploaded in thread 136302
|
|

Thread upload5 viewsImage uploaded in thread 184740
|
|
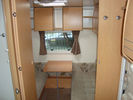
27 viewsthis converts to my sons bedroom and the door shuts across so we dont disturb him at night
|
|

Thread upload6 viewsImage uploaded in thread 143766
|
|
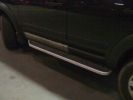
D3 Side Step Repairs165 viewsFinished job all I need to do now is wash it all off. I had already replaced the front door trim using new trim fixers and as you can see it was still dirty.
|
|
Thread upload3 viewsImage uploaded in thread 183462
|
|

Central Door Locking Operation Description1458 viewsThis 17 page pdf explains how the door locks are supposed to operate. Note that on page 9/17, the explanation of the operation of the hood ajar switch is wrong. It operates similar to the door and tailgate ajar switches; that is when a "door" is closed, the switch is closed to maintain a ground back to the CJB. Opening the hood, door, or tailgate removes the ground breaking the circuit and hence allows for an alarm condition.
|
|
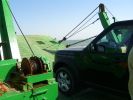
All at sea in an LR3105 viewsThe ferry from the mainland to Mazira Island was packed to the gunnels with vehicles. My LR3 was last on and they left the bow doors partially open for 14 lonnnnng sea miles across the Arabian Gulf!
|
|
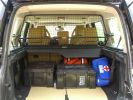
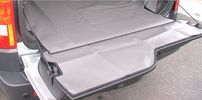
Load space368 viewsShows the SA Front Runner Wolfpack stacking plastic storage boxes that I keep laod straps etc in and the 2nd is tool kit, spare belts, jerry can funnel and tools, plus airline and tyre inflator/deflaotr for ARB on-board compressor, HD jump leads. ARB Winch pack (Orange)with strops, snatch blocks, shackles, gloves, and 2 ARB recovery dampers. Really great 4x4 1st Aid kit from Outdoors warehouse in SA. LRs own loadspace guard - not the best design if you want to store a long load. Mods to be carried out!
|
|
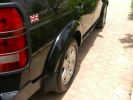
Body-matching wheelarches249 viewsAnother shot of the body-matched wheel arches, sills and door mirror bodies.
|
|
2009 MY?239 viewsThe wheelarches, door sills, and door mirror bodies have all been sprayed to match the body colour. Same as 2009 MY? I think this looks really good, and is so much easier to keep clean than the textured plastic that suffered badly out here from dust/dirt ingraining and UV discolouration.
|
|

Lookalike 2009? 308 viewsShows RHS wheelarches, sills and door mirrors sparyed to match body colour.
|
|

87 views
|
|
Thread upload2 viewsImage uploaded in new thread
|
|
Thread upload19 viewsImage uploaded in new thread
|
|
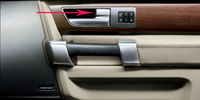
Door handle21 views
|
|

Thread upload18 viewsImage uploaded in thread 147204
|
|
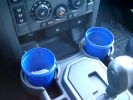
375 ml jam container372 viewsThese are the 375ml Danish Orchard brand jam containers. They fit fairly tightly into the original old style, (2005/6) Land Rover 3 factory cup holders. The extra height provided by the containers can be an advantage. I have a similar assortment of containers in some of the door panel located wine bottle holders to better hold containers of lesser valued products.
|
|

Defrost Vent-Register Blend Door Actuator37 views
|
|

Stuck caravan22 views
|
|
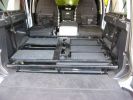
water tank356 viewsFlip up doors for extra storage under sub frame.
L.H.S covered with carpeting.
|
|
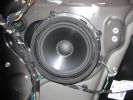
main speaker404 views
|
|
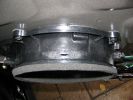
main speaker adapter plate360 views
|
|
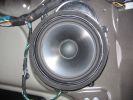
main speaker 2361 views
|
|
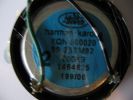
tweeter details389 views
|
|
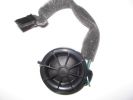
tweeter removed335 views
|
|
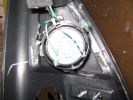
tweeter378 views
|
|
tweeter 2374 views
|
|
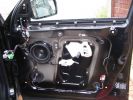
panel off 2575 views
|
|
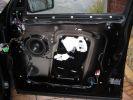
panel off501 views
|
|
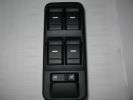
window switch 2402 views
|
|
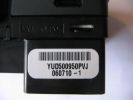
window switch part number364 views
|
|
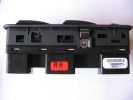
window switch371 views
|
|
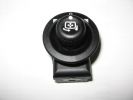
mirror switch457 views
|
|
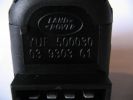
mirror switch part number505 views
|
|
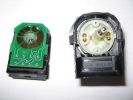
mirror switch apart 2415 views
|
|
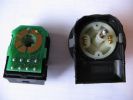
mirror switch apart389 views
|
|
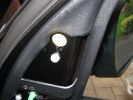
clip on tweeter housing504 views
|
|
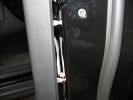
clips on door panel481 views
|
|
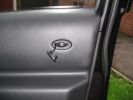
screw behind land rover badge553 views
|
|
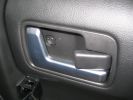
screw in door opener444 views
|
|
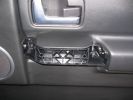
handle removed552 views
|
|
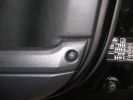
screws in door tray476 views
|
|
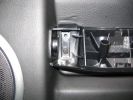
screws behind door handle505 views
|
|
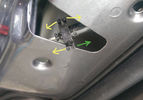
Thread upload11 viewsImage uploaded in thread 33743
|
|

Thread upload9 viewsImage uploaded in thread 33743
|
|

Thread upload33 viewsImage uploaded in thread 133490
|
|

Thread upload30 viewsImage uploaded in thread 133490
|
|

8 views
|
|

Thread upload12 viewsImage uploaded in thread 198619
|
|

Rear doors all working with new trim and panels removed61 views
|
|
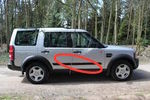
Thread upload13 viewsImage uploaded in thread 150701
|
|
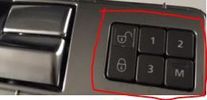
Thread upload21 viewsImage uploaded in thread 157544
|
|

37 views
|
|
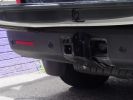
282 views
|
|
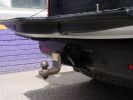
272 views
|
|
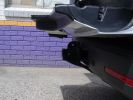
269 views
|
|

714 views
|
|
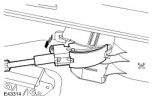
640 views
|
|

7 views
|
|

Door Lock Cylinder223 views
|
|

590 views
|
|
98 views
|
|

726 views
|
|
Thread upload9 viewsImage uploaded in thread 126988
|
|
151 views
|
|
70 views
|
|

Thread upload8 viewsImage uploaded in new thread
|
|

99 views
|
|

Thread upload14 viewsImage uploaded in thread 170479
|
|
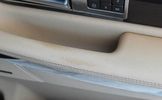
worn drivers door handle27 views
|
|

130 views
|
|
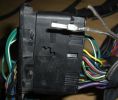
New Speaker Cables.111 viewsThis is the door connector, Main loom to Right, Door side to the left. to the top of the connectors you can see green and Green white wires which are the speaker ones. The door wiring is premium and has two pairs, the main loom was a 1 pair high line, so i am adding the pair you see (one already pinned up) to upgrade the loom to premium.
|
|
82 views
|
|
78 views
|
|

Thread upload6 viewsImage uploaded in new thread
|
|
Thread upload5 viewsImage uploaded in new thread
|
|
![Filename=Doors_2].jpg
Filesize=249KB
Dimensions=1158x762
Date added=23.Jan 2015 Doors_2].jpg](albums/userpics/42204/thumb_Doors_2%5D.jpg)
Thread upload3 viewsImage uploaded in new thread
|
|

117 views
|
|
531 views
|
|
Thread upload21 viewsImage uploaded in thread 118607
|
|
Thread upload11 viewsImage uploaded in new thread
|
|

Thread upload3 viewsImage uploaded in new thread
|
|

Garage door closer12 views
|
|

Thread upload5 viewsImage uploaded in thread 132583
|
|
Thread upload17 viewsImage uploaded in thread 170806
|
|

Thread upload18 viewsImage uploaded in thread 170806
|
|

Thread upload24 viewsImage uploaded in new thread
|
|

Thread upload0 viewsImage uploaded in thread 201737
|
|
Thread upload3 viewsImage uploaded in thread 132583
|
|

Thread upload1 viewsImage uploaded in thread 204950
|
|

Thread upload2 viewsImage uploaded in thread 204950
|
|

Door Seal28 views
|
|

52 views
|
|
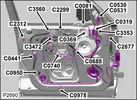
Front passenger side door speakers77 views
|
|

Driver's Side Temperature Blend Door Actuator11 views
|
|
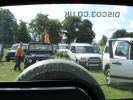
A rapid halt forces the disco 3 drivers to use their doors as airbrakes245 views
|
|
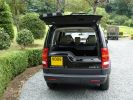
Half rear door open963 views
|
|
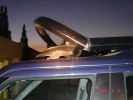
Not the FR rack, but what was left of the Land Rover rack after a door incident218 views
|
|
Not the FR rack, but what was left of the Land Rover rack after a door incident182 views
|
|
Not the FR rack, but what was left of the Land Rover rack after a door incident151 views
|
|
Not the FR rack, but what was left of the Land Rover rack after a door incident173 views
|
|
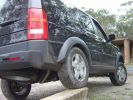
V1: Tinted, door bump strips and no mudflaps!234 views
|
|
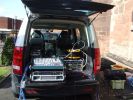
Expensive table?198 viewsOne of the better, if little, publicised advantages of the Disco3 is the split tailgate. Here its serving as the desk area at an outdoor event I was doing sound for. Rain was threatening so the amps got slung back inside rather than sat on the floor, other stuff was either in closed boxes or had to take its chances....
|
|
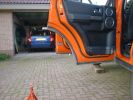
door stops109 views
|
|

Mine\'s right at the far end, as usual a long way from the door63 views
|
|

Company car left out in the cold (one on the left) Yellow pearl belongs to her indoors161 views
|
|
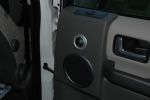
Speaker set up on rear door252 views
|
|
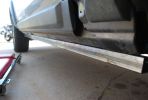
190 viewsSupport Channel bolted up to the door sill
|
|
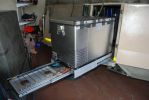
built fridge slider in front door (as opposed to rear) which makes fridge available at the kitchen. Also added drawer for gas stove - stows easily under the fridge when not in use. can be used independantly of fridge, ie. whether fridge is pulled in or ou116 views
|
|
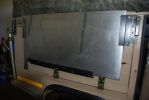
Attached Front Runner table to outside kitchen door101 views
|
|
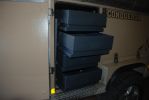
Fitted "echo" drawers in one of the front doors. an almost perfect fit, just a little sheetmetal work needed. the cho guys would probably vomit if they saw this107 views
|
|
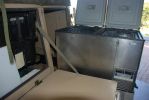
121 viewsthis shows the fridge on the 2 x 180kg sliders. i had to slightly modify the door opening to fir the fridge hinges thru. I just gently bent it, and fitted additional seals, hence it can easily be returned to standard. having the fridge in the kitchen is a major bonus, plus the back door of the trailer is now used for easy access to the cavernous interior, whereas prior to this youhad only access thru the front doors, which are only 500mm wide
|
|
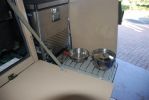
gas stove slides out under fridge110 viewsvery useful mod - youdon\'t have to unpack anythinig to be ready to cook. the stove gas is piped from the rear of the trailer, ie. the standard gas cylinder. pipe goes thru grommets along bodywork, and uder the fridge. works a treat. the door adds shielding in high winds if need be
|
|
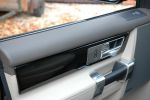
Door inserts - almond with arabica, standard leather385 views
|
|

17 views
|
|

Thread upload4 viewsImage uploaded in thread 146438
|
|
81 views
|
|

216 views
|
|

202 views
|
|

187 views
|
|

196 views
|
|

189 views
|
|
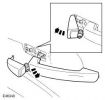
Exterior Front Door Handle..134 views
|
|

Exterior Front Door Handle375 views
|
|

Thread upload15 viewsImage uploaded in thread 119114
|
|

Thread upload16 viewsImage uploaded in thread 119114
|
|

Thread upload17 viewsImage uploaded in thread 119114
|
|
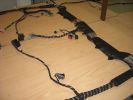
Finished seats area108 viewsThis is a shot of the loom when it was finished from the pass (RHD) door
Both of the seats wiring can be seen, i replaced the conduit on the bottom right and the Yaw rate sensr connector can also be seen in the middle.
|
|
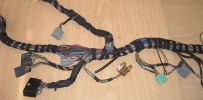
Finished Passenger Kick panel area131 viewsMissing connetor (left most grey) & wiring in, (plastic bracket was broke will use the one in the car) Airbag wires & connector to connector previously cut replaced (on top of grey one to right).
And you can even see the 2 new speaker wires going into the Pass door connector at the very bottom.
|
|
Thread upload14 viewsImage uploaded in new thread
|
|

6 views
|
|

Damaged doorpost left-front/ left-rear20 views
|
|
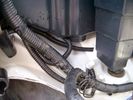
Front Coupler pad to right front under air filter housing 156 viewsThe brighter white "square" behind the black air cleaner drain is the Coupler Pad location I chose for the right front corner. The 1/4", (5mm), black wiring loom carries a single blue colour conductor between the power supply and pad.
A second coupler pad, (white conductor), is located near the left rear tail light. The mounting location is accessible from the rear compartment access "door" where the trailer hitch wiring attaches to the factory loom.
|
|

Door Trim and Wing Mirror Removal and Replacement162 views
|
|

Front Door Window Glass249 views
|
|
Thread upload5 viewsImage uploaded in thread 114491
|
|

10 views
|
|

Gore Tex data sheet on Breather Cap.784 viewsThis is a Gore data sheet on the air vent material that is within the breather cap. The filter material has both hydrophobic and oleophobic properties. That means it keeps water out and the differential oil in.
Also the membrane material is air permeable; that means air pressure is equalized between the interior of the differential and outside air. This is important when the 3 is flying at altitude in the back of a Hercules with the rear door open - that is the rear hatch of the Herc.
|
|
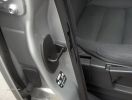
Door seal wearing out257 views
|
|
Thread upload3 viewsImage uploaded in new thread
|
|
Thread upload13 viewsImage uploaded in new thread
|
|

Rear Door Cover4 views
|
|
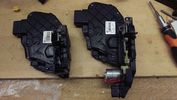
6 views
standard to keyless door lock actuators
|
|
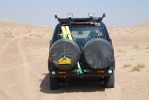
View the Nissans saw106 viewsRecovery strap pre-shackled to the rear recovery eye and secured with a bungey strap to the rear door ladder saves a lot of time when running against the clock - and having to recover a bogged in Nissan!
|
|
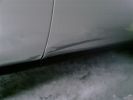
Door damage94 views
|
|
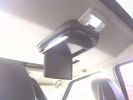
Alpine DVD from rear passenger door205 views
|
|
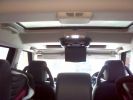
Alpine DVD from rear door214 views
|
|

My new 13my112 viewsHatchbag, rear door protector and seat covers fitted :)
|
|

My new 13my155 viewsHatchbag, rear door protector and seat covers fitted :)
|
|

Doors and dim36 views
|
|

Doors and light31 views
|
|

Series door tops6 views
|
|
GarageDoor121 views
|
|

FT-8900 radio body mount97 viewsYaesu FT-8900 mounted on access door. Multi-way socket on front.
|
|
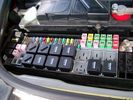
Picture of the engine compartment fuse panel5780 viewsEngine compartment fuse panel located near the battery. This is where F3E, (5 amp), F26E, (20 amp), Fuseable link 10E, (60 amp) and Relay 7E, the now upgraded 70 amp air compressor motor relay, part number YWB500220, (E is for Engine compartment fuse box), are all located. Fuse F35P, (5 amp), is inside the Passenger compartment behind the lower glove box door.
To keep the suspension from going down to the stops when driving, (or parked), it appears that it is only really necessary to remove F26E to depower the exhaust valve and generally keep all the valve block solenoid valves in a closed position trapping whatever air is within the air springs. F3E gets its power thru F26E, so when F26E is removed, the F3E circuit is automatically de-powered. F35P is more interesting in that battery power goes thru the ignition switch and F35P and then into the air suspension control unit. Apparently however, if F26E is removed, removing the F35P is not needed even when the engine is running.
With all fuses still in, if you have a problem, in practice, ideally, the compressor still works and will raise the 3 to an appropriate height. If so, one can then shut the engine off and allow the computers to go to sleep and then you remove the fuse(s). In actual practice, it seems that one need only pull the F26E fuse and can do so with the engine running. All the same, one might consider that the 3 is first a mobile computer, and secondly a 4x4. Computers prefer to go to sleep before the plug is pulled on them, however given that F26E circuit is always alive, then the computer never sleeps. With the fuse(s) pulled, and if you are still up, you can now be a 4x4 instead of a low rider. The whole purpose of the fuse pulling exercise is to depower the one and only system exhaust valve that is physically located within the compressor unit, (to keep it from opening), and secondarily to keep closed the four air spring solenoids within the block valves. This also shuts the air compressor down and stops the air compressor from making air even if the compressor is still good. That is why you initially need the fuse(s) in to allow the compressor to make air if it can.
|
|

Switch is blue colour thing thru the rectangular opening.3177 viewsThe blue coloured plastic bit thru the rectangular opening is the brake light switch. The fist time, I found it easier remove the switch by dropping the horizontal plastic panel, (two screws), and then slipping my hand in and rotating the switch clockwise 1/4 turn. The second time, I was able to remove the switch thru the rectangular opening and did not need to remove the horizontal lower panel. Obviously, I had to remove the sloping knee pad panel, (note sort of hinged at the bottom so pull back from the top.)
Regardless, do not touch the brake pedal - just let it sit where it wants to. One has to first remove the angled knee pad panel that sits under the steering wheel. It can be pulled from the top corner at the door side. Pulling releases a pair of those U shaped metal clips that LR loves so dearly. You have to pull quite hard. The bottom is held by a couple of plastic fingers in a couple of slots so you pull at the top till the two clips release and then rotate the panel and pull upwards a bit.
To remove the switch, you rotate it clockwise and pull outwards. Rotating the switch clockwise automatically retracts the plunger back into the switch body away from the brake pedal arm.
Similarly when you install the new switch, the required 1/4 turn anti clockwise rotation action releases the plunger so it lays up against the brake pedal arm and at the same time, secures the switch in place.
To remove the electrical wires, the switch will drop below the horizontal pad and hang from the wires so unclipping the electrical connector plug is fairly easy to do.
|
|

New door tops now fitted. Just needs new fuel tank, replacement footwells and a spot weld or two on the chassis!! 58 views
|
|

473 views@ home, we have 2 remote controlled garage doors. So I installed the remote controller in the car, added 2 buttons and off we go. Lucky me the controller worked at 12V anyway :D
I'll add a LED onto that one, so I'm sure it works when I press :)
|
|
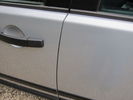
door44 views
|
|

door7 views
|
|
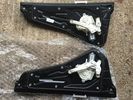
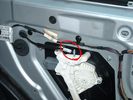
Rear door window motor8 viewsRear door window motor
|
|
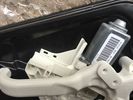
Rear door window motor6 viewsRear door window motor
|
|
Rear door window motor6 viewsRear door window motor
|
|

19 viewsThe new 2 door Rolls Royce
|
|
Rear left Door Arch 17 viewsDamage
|
|
Rear door Arch 15 viewsDamage
|
|
Rear Right door arch 15 viewsDamage
|
|
Left Rear Door arch11 viewsDamaged to the rear left Door arch
|
|
![Filename=IMG_2169 [1024x768].JPG
Filesize=95KB
Dimensions=1024x768
Date added=26.Nov 2007 IMG_2169 [1024x768].JPG](albums/userpics/12685/thumb_IMG_2169%20%5B1024x768%5D.JPG)
D3 Cargo 4138 viewsRear Door
|
|
![Filename=IMG_2190 [1024x768].JPG
Filesize=148KB
Dimensions=1024x768
Date added=27.Nov 2007 IMG_2190 [1024x768].JPG](albums/userpics/12685/thumb_IMG_2190%20%5B1024x768%5D.JPG)
D3 Cargo 8187 viewsBack door open
|
|
Small scratch on off side rear door towards the top43 views
|
|

Dribbles along bottom of door frame/door card27 views
|
|

Dribbling into footwell here from closed door23 views
|
|

Water coming down loom behind door card24 views
|
|
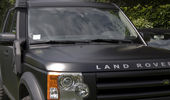
91 viewsMatte Black wrap + Carbon fiber doors
|
|
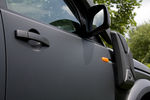
116 viewsMatte Black wrap + Carbon fiber doors
|
|
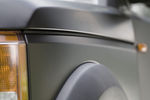
106 viewsMatte Black wrap + Carbon fiber doors
|
|
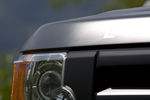
95 viewsMatte Black wrap + Carbon fiber doors
|
|

Clear door indicator lenses7 views
|
|

Thread upload19 viewsImage uploaded in thread 137965
|
|

33 views
|
|

Instrument Panel Blend Door Actuator14 views
|
|
Thread upload12 viewsImage uploaded in thread 17923
|
|

Key in Ignition Electrical Wiring Diagram1051 viewsThis shows the key in ignition wiring, (LGW, 1.5D), running from the key lock cylinder to the Central Junction Box, (CJB), thru 5 amp fuse F40P, located in the fuse box behind the lower glove box door.
You can remove the 5 amp fuse and the good news is that the ignition chime will not sound any longer; the bad news is that a bunch of other circuits that rely on knowing if the key is in or out no longer work.
Also note the Transponder Coil D219 reference.
|
|

369 views
|
|

LA501-014 - Technical Bulletin - Front Door Exterior Trim Detachment84 views
|
|

LA501-024 - Technical Bulletin - Dealer Installed Door Moldings63 views
|
|
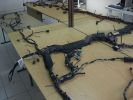
Wiring Laid out shown from other side121 viewsDamaged Disco 3 loom on bottom and new Sport one on top. This angle is as if you were looking at the drivers seat from the front (RHD). You can see the amp wiring centre shot and the rear door wiring to the left all duplicated.
|
|
206 views
|
|

Thread upload1 viewsImage uploaded in new thread
|
|

Thread upload1 viewsImage uploaded in new thread
|
|

Thread upload2 viewsImage uploaded in new thread
|
|

Thread upload1 viewsImage uploaded in new thread
|
|
Thread upload2 viewsImage uploaded in new thread
|
|

LAND ROVER DISCOVERY 3 istruzioni rimozione pannello porta posteriore Rear Door Trim Panel Removal 7E0186 viewsLAND ROVER DISCOVERY 3 istruzioni rimozione pannello porta posteriore Rear Door Trim Panel Removal 7E0
|
|

LAND ROVER DISCOVERY 3 istruzioni rimozione pannello porta posteriore Rear Door Trim Panel Removal 7E0112 viewsLAND ROVER DISCOVERY 3 istruzioni rimozione pannello porta posteriore Rear Door Trim Panel Removal 7E0
|
|
18 views
|
|

166 views
|
|
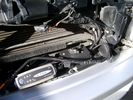
Battery Maintainer switching box plug and CTEK Multi US 3300 charger. 706 viewsThe CTEK Multi US 3300 maintainer is just sitting there for the picture. In addition to topping up both batteries, the CTEK can provide power such that if the batteries were completely dead, there would be power to the door locks and hence, one could most likely still gain access via the remote once the starting battery charged up a bit.
The Land Rover recommended method is via the hidden key hole which is mechanical, however that presumes the mechanism is not frozen from lack of use. As such, the manual lock should be exercised at least once a year to ensure that it still functions.
The blanking plug sitting on top of the plastic box is of the GM Weather Pack series. That is what I like to use for vehicle wiring that is subject to moisture, (or not).
|
|
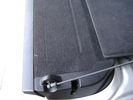
Flexible wire rope fishing leader 0.032" diameter exiting carpet 1948 viewsThis is all you see of the completed mod.
The short little angled "line" about an inch long that looks like a piece of debris and is located a few inches "above" the support cable is actually the wire rope release cable exiting from under the carpeted lift gate cover.
I drilled a very small hole in the carpet and pushed the 0.032" diameter release wire thru and then slipped the loose end under the black plastic.
To release with the lift gate etc closed, from the inside, just pull the loose end free from under the black plastic and gently pull wire about 5mm, (1/4"), and the upper door catch should release. You will have to manually push the upper door out wards to actually effect opening, but you will already be inside the rear cargo area so that part is easy to do.
The assumption is that the lower door latch still works electrically and hence, the lower lift gate half will open as normal by pressing the usual button on the top left of the lower door half.
|
|
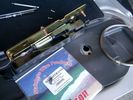
0.032" OD metal fishing leader and lead fishing weight clamped to existing wire rope 2121 viewsI used a size #0 lead fishing weight as a clamp to attach the 0.032" diameter flexible wire rope fishing leader to the release cable.
The pictured weight is the smaller #00 weight, however it did not work very well so reinstalled with the larger #0 size. I clamped to the cable as what breaks is the L retainer that is hidden in the actuator and holds the cable. When the L breaks, it lets go of the cable so you hear the clicking but there is no opening action.
Clamping on to the cable is an attempt to resolve that reality; also if the actuator electrically fails, the release mod should still do the task. Note in the picture the two Torx T15 screws that hold the gold plate to the plastic case and also the two 8mm cap screws that have to be loosened to remove the actuator from inside the door.
|
|
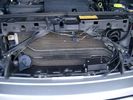
Plastic cover and Box back on in Front of Radiator 637 viewsThe wiring loom is below the cover - nothing is crushed or distorted and all fits back together OK. The black plastic box with the DPDT, (centre OFF), toggle switch is to tie the battery maintainer to each of the two batteries per the Traxide Dual battery install. I can also get power to the power door locks if all fails.
|
|

LR3 Electrochromatic Interior Rear View Mirror wiring diagram.853 viewsIt seems that there are two fuses, F69P and F5P that provide power for the interior rear view mirror. Ten amp F5P is a feed off the reverse gear relay and inhibits auto dimming when reverse is selected. Five amp F69P provides power to the auto dimming circuits and the garage door opener function if optioned.
The pdf can be downloaded and printed out. For on screen viewing, right click on the pdf and select the Rotate Clockwise button.
|
|
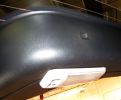
rear hatch light and door release switch391 viewswe\'ll ad a switch "guard" to protect from accidental gear shift popping button. light is slider 3 way so unlikely to be turned on by accident but will be nice down light when hatch is opened out.
|
|

Door Lock Wiring Diagrams1730 viewsNear the bottom of this 5 page pdf on page 224 are shown the pushbuttons and locking mechanisms for the rear hatch and tail gate.
The pdf will open vertically but you can download and print it out or just rotate the image clockwise by right clicking on your screen and selecting the "Rotate Clockwise" button.
|
|

Power Door Lock wiring diagrams530 viewsI thought I would include this 5 page power door lock wiring diagram pdf here as well.
When the pdf loads, if the views are vertical, it may be that you can right click on your mouse and a box will come up that will allow you to rotate the views clockwise so that the sheets are horizontal. Alternatively you can download the file and print each sheet yourself.
|
|

Power Door Lock Wiring694 viewsAbove is a 5 page, (pages 222 to 226), pdf wiring diagram for the power door locks for the LR3.
You can download and print as required. For on screen reading, use the right click rotate feature.
Additional pdf's regarding Locks can be found within the Gallery under the Power Windows and Door Lock Circuits heading.
|
|

Horn Wiring Circuit LR3578 viewsThe is the wiring diagram for the dual horn circuit.
The Horn Relay, (R133), is not a big black thing hidden somewhere but instead what is called a FET, (and it is hidden)!
This is a Field Effect Transistor that is built into the circuit board that is mounted to the back of the fuse box that is located behind the lower glove box door on the passenger side of the 3. The related 15 amp fuse, 12P, is mounted in this fuse box and is often called F12P, where F is for fuse, and P is for Passenger compartment.
This is to help differentiate from another fuse and relay box, (the usual kind), that is located beside the starting battery in the Engine compartment. FxxE is often used in the naming of those fuses.
|
|

Door Mirror mechanisim partial disassembly44 views
|
|

Mirror parts42 views
|
|

Finished Job - Mirror shell replacement44 views
|
|

Mirror Pivot partial disassembly48 views
|
|

Door mirror - outer support arm43 views
|
|

Power and Sense connector on door mirror40 views
|
|
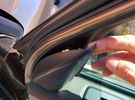
Thread upload6 viewsImage uploaded in thread 128326
|
|

LTB00282 - Technical Bulletin - Front Rear Side Door Latch Diagnostics77 views
|
|

LTB00301 - Technical Bulletin - Front and Rear Door Window Regulator Diagnostics61 views
|
|

LTB00328 - Technical Bulletin - Rear Door Window Regulator - Lower Level Service Repair126 views
|
|
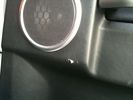
Door card Marks52 viewsMinor mark on off side rear door
|
|
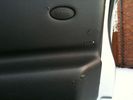
Door card marks50 viewsCouple of small marks on drivers door
|
|

Non-Powerfold Mirror Mount31 views
|
|

Non-Powerfold Mirror Mount31 views
|
|

Non-Powerfold Mirror Mount28 views
|
|
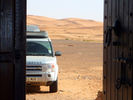
CALENDAR 2011 Entry281 viewsLooking through the doors of the Nomad Palace to the Erg Chebbi dunes beyond, Merzouga, Southern Morocco, August 2010
|
|
193 views
|
|

Thread upload5 viewsImage uploaded in thread 159579
|
|
Thread upload0 viewsImage uploaded in new thread
|
|
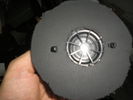
84 viewstweeter in hole cut in "ring" out of door card (hole cut first, then Ring is cut. Note the tie wraps securing tweeter
|
|
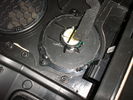
81 viewstweeter secured with tie wrap and glue (hot gun)on "ring" cut from door card. Whole "ring" secured with glue on grille securing ring
|
|
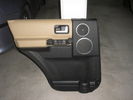
105 viewsdoor card after fitting grille and tweeter
|
|
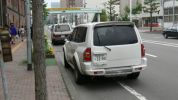
Mitsubishi Pajero185 viewsPainted bumper, wheel arches, and spare removed from back door.
|
|
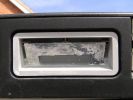
Corroded rear door switch254 views
|
|
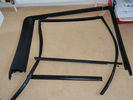
Rear Left hand side door seals28 views
|
|
Drivers door view33 views
|
|
Rash Passenger Side door157 views
|
|
Rear Passenger door speakers58 views
|
|

Passenger Side Blend Door Actuator11 views
|
|

PDC Module25 viewsPDC Module mounted passenger side (RHD) rear door slam
|
|

PDC Module location30 viewsPDC Module located passenger side rear door slam (RHD)
|
|
BMW Style Door Handles21 views
|
|

CC Door Mirrors, RRS 20" Alloys, Door Strips362 views
|
|

door lock actuator1 views
|
|

door lock actuator2 views
|
|

door lock actuator3 views
|
|

door lock actuator3 views
|
|

door lock actuator4 views
|
|

door card under (rear)72 views
|
|
233 viewsRouting of the Trailer unit antennae through the rear door rubber & behind the bumper on the outside of the vehicle
|
|
54 views
|
|
Thread upload6 viewsImage uploaded in thread 145207
|
|
Audio amplifier & DAB unit & Door lock system106 views
|
|
Bracket over pass. door102 views
|
|
Bracket over drivers door96 views
|
|

200 views
|
|

Rear Door Trim Panel Removal.pdf633 views
|
|

74 views
|
|

Rear Door Trim Panel Removal432 views
|
|
0 views
|
|

105 views
|
|
Thread upload3 viewsImage uploaded in new thread
|
|
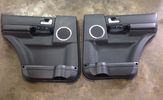
Thread upload3 viewsImage uploaded in thread 114491
|
|
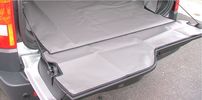
Thread upload5 viewsImage uploaded in new thread
|
|

Door latch64 views
|
|

Thread upload16 viewsImage uploaded in thread 140304
|
|
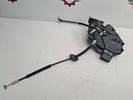
Thread upload13 viewsImage uploaded in thread 190462
|
|
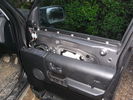
Door Card Removal27 views
|
|
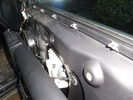
Door Card Removal - Top clips23 views
|
|

Drivers Door Speaker Connection20 views
|
|

Drivers Door Speaker Connection20 views
|
|

19 viewsDrivers Door Speaker connection
|
|

Drivers Door Powerfold wing mirror connection blocks28 views
|
|

Drivers Door wing mirror fixing bolts21 views
|
|
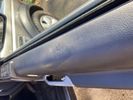
Thread upload22 viewsImage uploaded in new thread
|
|
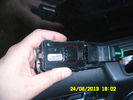
Door switch flipped35 views
|
|
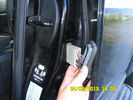
B pilar connector door38 views
|
|
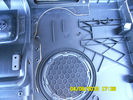
Front door card33 views
|
|
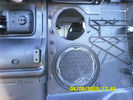
Front door mid speaker cutout behind36 views
|
|
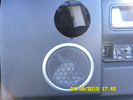
Front door mid speaker cutout38 views
|
|
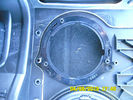
Front door speaker ring34 views
|
|
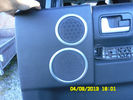
Front door grille36 views
|
|
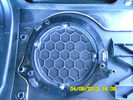
Front door grille behind37 views
|
|
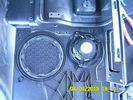
Front door mid speaker42 views
|
|
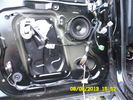
Front door inside39 viewsThis is inside the front door
|
|

100 views
|
|
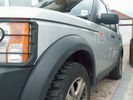
Passenger Guard, Wing and Door Damage70 views
|
|
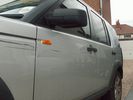
Passenger Wing and Front Door Damage68 views
|
|
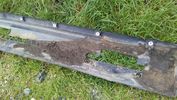
Door Sill10 viewsLook what lurks behind those rugged plastic sill trims. Here's the muck gathered over the years, damp and sitting against the metal body
|
|
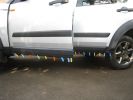
RLD Sill Seal or Spray Guard 2165 viewsFitting extra Seal to stop spray getting between sill and door
|
|
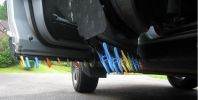
RLD Sill Seal or Spray Guard210 viewsFitting extra Seal to stop spray getting between sill and door
|
|
Thread upload31 viewsImage uploaded in new thread
|
|

Superinjunction85 viewsBefore Ryan Giggs was exposed as the two faced, nice as pie in public yet screwing any that moves behind closed doors hypocrite he is it was public knowledge that the woman in the story was some slapper from Big Brother but the footballer could not be named. Here we see TNT magazine's top story about her saying the footballer can't be named. Directly underneath is a link to a "related story" was a link to "Ryan Giggs, wife and kids celebrate Manchester United victory"
|
|

TA04-415 - Technical Bulletin - LA01 - DOOR SPEAKERS INOPERATIVE232 views
|
|
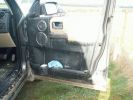
TazDaz door panel after unfortunate splashing incident164 views
|
|
Thread upload27 viewsImage uploaded in thread 92518
|
|

Three Discos (including Next Door Neighbours)126 views
|
|
Two Door D395 views
|
|
door trim22 views
|
|

RRS Rear Door89 views
|
|

Rock Slider with door open22 views
|
|
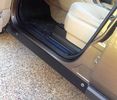
Rock Slider with door open20 views
|
|

Small World282 viewsWent to Paris last weekend, turned out of hotel and this was next door!
|
|
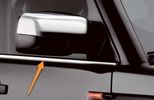
door waist rail trims13 viewsdoor waist rail trims
|
|

cellar door84 views
|
|

Thread upload6 viewsImage uploaded in new thread
|
|
|
|
|
|
|