| Search results - "Exhaust" |

Bent exhaust20 views
|
|

Larini Exhaust291 views
|
|
Larini Exhaust & LR letters378 views
|
|
Larini Exhaust321 views
|
|
Exhaust Flange 259 views
|
|
Exhaust Flange 156 views
|
|

15 Exhaust System19 views15 Exhaust System
|
|
8 FBH Loom71 views
|
|
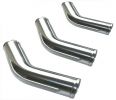
EXHAUST EXTENSIONS98 views
|
|

Bolt holding exhaust silencer behind the front wheel26 views
|
|
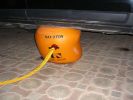
80% inflation193 views
|
|
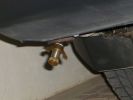
The fantastic exhaust bung215 viewsExhaust bung supplied from UK courtesy of a Disco3 forum member.
|
|
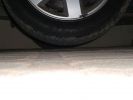
Rear wheel clear by 15mm at 80% inflation170 views
|
|
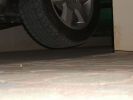
Front wheel off 80% inflation173 views80% inflated and both front and rear wheels are off with suspension in extended mode
|
|
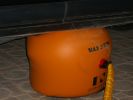
Up she goes!162 viewsPArtial inflation
|
|
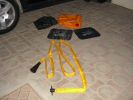
The kit as supplied180 viewsContains carry bag, 2 protector mats, exhaust jack and 7m reinfoced woven hose with bayonet connector to bag (inc non-return valve) and rubber cone for exhaust fitting
|
|

The bag all the kit comes in161 viewsDM Exhaust jack carry bag
|
|

357 viewsIf you look closely you can see the fuel burning heater exhausting!
|
|
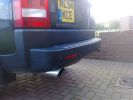
Griffin Performance Exhaust139 views
|
|
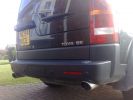
Griffin Perfromance Exhaust172 views
|
|

My old Landcruiser183 viewsApart from a battery and an exhaust I spent nothing on it.
|
|
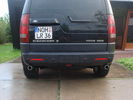
Exhaust Club Member168 views
|
|
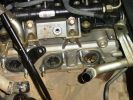
Dead engine135 viewsExhaust ports showing where leaked coolant has gone into the manifold and filled the turbo
|
|

229 views
|
|

211 views
|
|
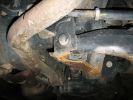
Exhaust Damage_2271 views
|
|
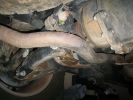
Exhaust Damage264 views
|
|
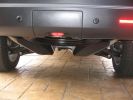
337 views
|
|

09MY exhaust151 views
|
|
33 views
|
|
39 views
|
|

exhaust pipe4 views
|
|

17 views
|
|
83 views
|
|

Thread upload7 viewsImage uploaded in new thread
|
|

9 views
|
|
exhaust 3 views
|
|

8 views
|
|

Thread upload8 viewsImage uploaded in new thread
|
|
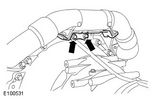
Exhaust Crossover Pipe157 viewsThis is the pipe that i am looking for.
|
|

Wynns EGR3 Spray Instructions91 views
|
|
Thread upload22 viewsImage uploaded in thread 115058
|
|
Thread upload21 viewsImage uploaded in thread 115058
|
|
Thread upload19 viewsImage uploaded in thread 115058
|
|
Thread upload4 viewsImage uploaded in thread 175852
|
|
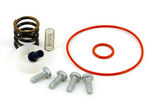
Thread upload21 viewsImage uploaded in thread 123657
|
|
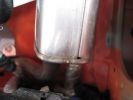
FBH ..hole in exhaust 111 views
|
|

Thread upload70 viewsImage uploaded in thread 137226
|
|

EXHAUSTS113 views
|
|

Inlet & exhaust gaskets2 views
|
|

Inlet & exhaust gasket6 views
|
|
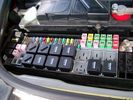
Picture of the engine compartment fuse panel5780 viewsEngine compartment fuse panel located near the battery. This is where F3E, (5 amp), F26E, (20 amp), Fuseable link 10E, (60 amp) and Relay 7E, the now upgraded 70 amp air compressor motor relay, part number YWB500220, (E is for Engine compartment fuse box), are all located. Fuse F35P, (5 amp), is inside the Passenger compartment behind the lower glove box door.
To keep the suspension from going down to the stops when driving, (or parked), it appears that it is only really necessary to remove F26E to depower the exhaust valve and generally keep all the valve block solenoid valves in a closed position trapping whatever air is within the air springs. F3E gets its power thru F26E, so when F26E is removed, the F3E circuit is automatically de-powered. F35P is more interesting in that battery power goes thru the ignition switch and F35P and then into the air suspension control unit. Apparently however, if F26E is removed, removing the F35P is not needed even when the engine is running.
With all fuses still in, if you have a problem, in practice, ideally, the compressor still works and will raise the 3 to an appropriate height. If so, one can then shut the engine off and allow the computers to go to sleep and then you remove the fuse(s). In actual practice, it seems that one need only pull the F26E fuse and can do so with the engine running. All the same, one might consider that the 3 is first a mobile computer, and secondly a 4x4. Computers prefer to go to sleep before the plug is pulled on them, however given that F26E circuit is always alive, then the computer never sleeps. With the fuse(s) pulled, and if you are still up, you can now be a 4x4 instead of a low rider. The whole purpose of the fuse pulling exercise is to depower the one and only system exhaust valve that is physically located within the compressor unit, (to keep it from opening), and secondarily to keep closed the four air spring solenoids within the block valves. This also shuts the air compressor down and stops the air compressor from making air even if the compressor is still good. That is why you initially need the fuse(s) in to allow the compressor to make air if it can.
|
|

exhaust 1316 views
|
|
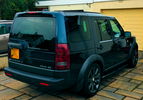
Almost there62 viewsA couple of other tweaks to add to the D Wagon and she will be as I want her. Still to match the side vent and Supercharger grill paint and considering a rear bumper valance and twin exhaust kit conversion. That should do the "Anti-Bling" nicely.
|
|
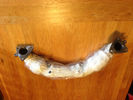
exhaust cross over pipe44 views
|
|
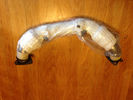
exhaust cross over pipe46 views
|
|
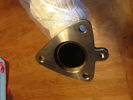
exhaust cross over pipe66 views
|
|
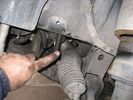
access behind webasto exhaust49 views
|
|
exhaust - well covered992 views
|
|
Split intercooler hose100 viewsCaused black exhaust smoke when power was applied
|
|
Exhaust valve231 views
|
|
Pilot exhaust valve228 views
|
|

Pilot exhaust valve solenoid214 views
|
|

Exhaust valve plunger195 views
|
|

Exhaust valve 255 views
|
|
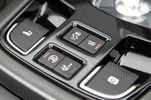
24 views
|
|
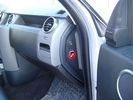
Air Suspension ECU Fuse 35P Shut Off Switch2635 viewsA more distant view of the shut off rocker switch in the ON position which is the normal position for when all is working as Land Rover intended.
Ideally, (but not totally necessary), the F35P circuit should be powered or de-energized after the various computers have gone to "sleep".
Similarly, removal of the F26E or F3E fuses is preferable after the computers have all gone to sleep but it appears that no real damage will be done if the fuses are removed while the system is energized. Pulling F26E is the main full time fuse that powers the air suspension computer. As such, once F26E is removed, pulling F3E is not really required.
Power for the compressor goes thru the 60 amp fusible link and relay, however control of the relay is via the air suspension computer so depowering the air suspension computer effectively depowers the air compressor and the internal exhaust valve relay/port.
|
|
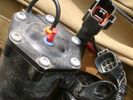
Compressor Electrical Plugs 1406 viewsThis shows the two electrical connectors; the two pronger is the power to the compressor, and the multi-pin connector carries control signals. Also the temporary red plug is where the 6 mm tubing from the centre valve block connects. This line carries both the compressor and exhaust air to and from the springs.
|
|
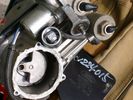
Compressor Exhaust and Inlet 1534 viewsThe two temporary black plugs cover off the 8mm and 10mm push fit lines to the air inlet and exhaust lines. Also visible is the worn threaded stud that I think was the initial failure mode.
|
|

Excessive_Exhaust_Smoke22 viewsExcessive_Exhaust_Smoke
|
|

Excessive_Exhaust_Smoke_EN_-_Application_of_Bulletin19 viewsExcessive_Exhaust_Smoke_EN_-_Application_of_Bulletin
|
|
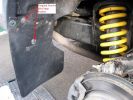
Fitting Land Rover Series 3 Rear Mud Flaps to a Disco 3/4 - A956 viewsUsed Original Screws plus two extras, Had to cut around exhaust. Once first done, laid them back to back and used first as a template to drill and cut second. Used a 5.5mm drill for the holes in the flap for the original screws and a 7mm drill to make the new holes in the plastic wheel-arch trim and lining to take the two-part trim clip (see my gallery for a picture of this style clip) - this photo of the new flap shows two screws but I modified that design to avoid using screws which corrode with time. Ignore the fact the pics are taken on a D3 Coiler, it makes no difference.
|
|

Thread upload1 viewsImage uploaded in new thread
|
|
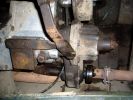
The oily bits. PTO unit on back of transfer box. Exhaust had to be \'modified\' to fit.161 views
|
|
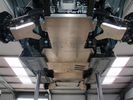
D3 and D4 Underbody Protection178 viewsIncludes:
Sump guard
Centre guard (transfer box, exhaust, fuel tank)
Rear diff guard
A-arm guards
|
|
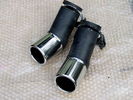
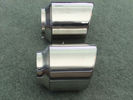
Exhaust Trims68 views
|
|
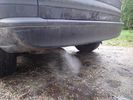
Water from the exhaust20 views
|
|
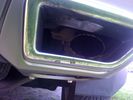
Rear exhaust159 views
|
|
Thread upload37 viewsImage uploaded in thread 103279
|
|
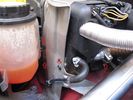
Bolts to remove left bracket of FBH with exhaust pipe23 views
|
|

Exhaust Manifold Removal - RHS 89 views
|
|
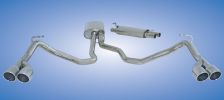
Hi flow exhaust I found on some site - maybe not very "available" though.305 views
|
|

27 views
|
|

Thread upload6 viewsImage uploaded in thread 123559
|
|
![Filename=Technical Service Bulletin SB034 SB036 Vehicle Enhancement Program[1].pdf
Filesize=959KB
Dimensions=0x0
Date added=17.Jun 2010 Technical Service Bulletin SB034 SB036 Vehicle Enhancement Program[1].pdf](images/thumb_pdf.jpg)
Technical Service Bulletin SB034 SB036 Vehicle Enhancement Program2390 viewsOn page 6 and following are the Land Rover service bulletin instructions as to how to install delivery valve and exhaust valve repair kit JPO500010; also a list of previous compressor model numbers as related to the 3. The new delivery valve is easy to install, the exhaust, not so easy. Note that this in not the more recent TSB that reduced the operating pressure of the compressor via a software fix and also recommended replacement of the air compressor 70 amp relay. See the F35 album near the bottom for the relay material.
|
|

remapped, decatted, custom exhaust, and allisport himount intercooler38 views
|
|

Thread upload21 viewsImage uploaded in thread 156644
|
|
|
|
|