| Search results - "Interior" |
interior drivers door70 views
|
|
interior boot... guess whats coming up for sale...57 views
|
|
interior65 views
|
|
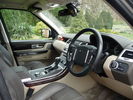
Aribica interior8 views
|
|
Seat base interior131 views
|
|

09 D3 interior shot75 views
|
|

A few mods later27 viewsPro-Speed rock/tree sliders
LED side lights
LED interior lights
|
|
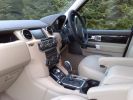
D4452 viewsD4 interior
|
|

D4395 viewsInterior console
|
|

Thread upload10 viewsImage uploaded in thread 155810
|
|
Interior Lamp29 views
|
|

Interior Lamp22 views
|
|
Austin Mini - interior7 views
|
|

Thread upload18 viewsImage uploaded in thread 129885
|
|

Interior 417 views
|
|

Interior 313 views
|
|
Interior 220 views
|
|
Interior 14 views
|
|
Interior Lighting189 views
|
|
8 viewsdisco 4 interior
|
|
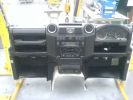
357 views2007 Defender interior
|
|

Air Conditioning and Heater Control Components2425 viewsThis is a 21 page pdf that really explains how the air system is supposed to work. Discussed are the exterior ambient air sensor, where and how it operates; the interior temperature sensor as well as humidity sensor.
|
|

Interior finish0 views
|
|
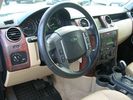
Interior shot with walnut finish57 views
|
|
Thread upload23 viewsImage uploaded in thread 107036
|
|
Thread upload23 viewsImage uploaded in thread 107036
|
|

Front Door Card24 views
|
|
rrs interior5 views
|
|

Thread upload27 viewsImage uploaded in thread 117009
|
|

CL INTERIOR85 views
|
|

interior68 views
|
|

Annex interior38 views
|
|

BCM_Power_Interior_Lights29 views
|
|
BMW 530d SE Steptronic Interior139 views
|
|
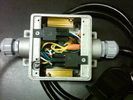
Box open showing Hella Relays and Putco Load Resistors749 viewsInterior of the box - note the two gold coloured 6 ohm 50 watt load resistors are a bit distant from the other items so as to provide some separation for dissipation of the heat generated.
Rather than a moulded plastic weather resistant box which I would have preferred, I used a bulky and much heavier metal weather tight style electrical box so the metal can act as a heat sink.
|
|

Black Deposits to interior of Brake Light Switch2861 viewsThere are two contacts, one on each side of the vertical plunger under the copper metal. The set of normally open contacts on the left side that carries the power for the brake light filaments, (15 amp fuse F15P), is apparently not heavy enough as the contacts deteriorate and generate the black residue.
The set of normally closed contacts on the other side appear to be sized OK. There is not as much current, (5 amp fuse F66P), flowing thru the contacts to the ABS module, however the contacts are likely adversely affected by the black residue produced by the other deteriorating set of contacts.
One presumes/hopes that the newer replacement switch now has contacts heavy enough to carry the brake light power. It would be ideal if the ABS set of contacts were sealed from the brake light contacts to prevent contamination of the normally closed set of contacts.
|
|

Brake Light Switch, Find, Remove, and Install Instructions 7853 viewsThis is a two page doc outlining where to find the brake light switch, how to remove it, and then install the new one.
Note, do not move the brake pedal when removing or installing the switch. Let the brake pedal hang where it wants to. The switch design is actually cunning, and as such is supposed to make the removal and install fool proof. Hence if you think too much about it, you can wreck the new switch.
If you want to inspect the interior of the switch, wait until you have removed the old switch. You can then just unsnap the blue from the white to get it apart. Inside, the switch is quite simple, (no circuit boards), but it will probably show black dust from failing contacts.
I think the reason the switch fails is that the Normally Open, (NO), contacts of the brake light contacts were made too light to carry the current load for make and break of the tail light filaments. I also think the black dust created then fouls the Normally Closed, (NC), second set of contacts for the ABS circuit. As such, the Normally Closed contacts become intermittent in operation and display as a fluctuating open and closed circuit condition to the ABS system when the ABS should be seeing a steady closed circuit. Hopefully the replacement switch contacts are more robust and may be as I recently replaced my switch again just as a matter of maintenance. While in a redesign, ideally the NC contacts should be sealed or at least separated from the NO contacts, when I inspected the removed switch, this time there was no black dust present.
Probably the removed switch will have a Land Rover oval logo moulded into it, the new one, FOMOCO.
|
|
Alpaca Cloth Interior222 views
|
|
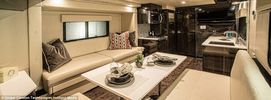
Thread upload3 viewsImage uploaded in thread 188033
|
|

Interior Trim268 views
|
|

Interior Trim367 views
|
|
Thread upload8 viewsImage uploaded in thread 203496
|
|
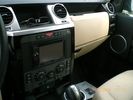
Painted interior94 views
|
|
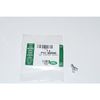
Clip Spring Metal FYC 500040 that holds LR together1747 viewsThe jpg is of the spring metal clip, Land Rover part number FYC 500040 that holds most of our 3 together - well at least most the interior trim parts.
If you are going to remove interior panels, you may as well stock up on a few for replacement as upon panel removal, the clips tend to spring away into deep never to be found voids within your 3.
|
|

bespoke interior89 views
|
|
Near side showing interior227 views
|
|
Thread upload13 viewsImage uploaded in new thread
|
|
more interior chrome trim169 views
|
|
interior chrome trim157 views
|
|
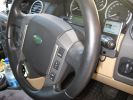
Steering wheel audio controls and iPod dock120 viewsFollowing the instructions I found on Disco3.com.uk it was a breeze the fit the steering wheel audio controls. The iPod dock was a bit more fiddly (took me several hours). Works a treat!
|
|

Steering wheel audio controls and iPod dock103 viewsFitted an iPod dock and steering wheel audio controls. Got then both from Nick at Yeoval Landrover in the UK at a fraction of the price that the Aussie dealer wanted.
|
|
668 views
|
|
737 views
|
|
430 views
|
|
329 views
|
|
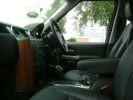
Interior124 viewsThat wood trim is going - to be replaced by piano black before I pick it up
|
|

Interior75 views
|
|

Thread upload12 viewsImage uploaded in thread 149996
|
|

Thread upload10 viewsImage uploaded in new thread
|
|

Nearside close up shot with boot trim removed252 views
|
|
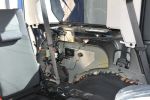
Nearside shot with boot trim removed292 views
|
|
Interior Summer 2011157 views
|
|

7 views
|
|
Thread upload6 viewsImage uploaded in new thread
|
|

7 views
|
|

Thread upload7 viewsImage uploaded in new thread
|
|

7 views
|
|

Thread upload6 viewsImage uploaded in new thread
|
|

7 views
|
|

Thread upload6 viewsImage uploaded in new thread
|
|

7 views
|
|

Thread upload6 viewsImage uploaded in new thread
|
|

7 views
|
|

Thread upload6 viewsImage uploaded in new thread
|
|

7 views
|
|

Thread upload5 viewsImage uploaded in new thread
|
|
Tundra Interior85 views
|
|

16 views
|
|
104 views
|
|

108 views
|
|

108 views
|
|

Discovery interiors1658 views
|
|
Interior for sale42 views
|
|

Interior for sale43 views
|
|

Interior for sale44 views
|
|
my new interior...75 viewsThanks to my friends at transcal.... stunning job chaps
|
|

Thread upload2 viewsImage uploaded in new thread
|
|
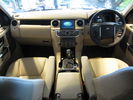
Discovery 4 HSE, Interior60 views
|
|

Interior57 views
|
|
Interior from front162 views
|
|
Interior from rear148 views
|
|

4 views
|
|
66 viewsThe interior after shot.
|
|

Somewhere in the interior, UAE16 views
|
|
Interior192 views
|
|
Ebony HSE Interior472 views
|
|
Ebony HSE Interior502 views
|
|
Ebony HSE Interior547 views
|
|
Ebony HSE Interior622 views
|
|
Disco 3 Interior with DVD screens1341 views
|
|
interior261 views
|
|
Interior LEDs22 views
|
|
Interior LEDs17 views
|
|

Front Interior 21st June 2011173 views
|
|

Interior 21st June 2011196 views
|
|

middle interior 21st June 2011189 views
|
|
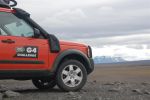
calendar entry 2009528 viewsHigh in the Iceland Interior June 2008 - F88 to Askjar Volcanoe - The mountain is called the "Queen of the Mountains - Herðubreið" Car is G4 Challenge Event Car from 2006 - Team Germany / Spain - Stage 3/4 Bolivia
|
|
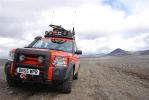
calendar entry 2009583 viewsHigh in the Iceland Interior June 2008 - Car is G4 Challenge Event Car from 2006 - Team Germany / Spain - Stage 3/4 Bolivia
|
|
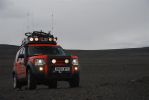
calendar entry 2009543 viewsHigh on the Iceland Interior - On the Road to Askja - G4 D3 Discovery V8 HSE - Team vehicle from 2006 G4 Stage 3/4 Bolivia -
|
|
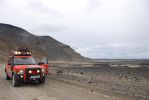
calendar entry 2009541 viewsRoad F88 to Askja - Iceland Interior June 2008 - Car is a G4 challenge event car from 2006 - Stage 3/4 Bolivia - Team Germany / Spain
|
|

calendar entry480 viewsHigh in the Iceland Interior June 2008 - View towards the Vatnajökull Glacier range - Car is G4 Challenge Event Car from 2006 - Team Germany / Spain - Stage 3/4 Bolivia
|
|
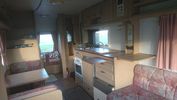
Spacious Interior, plenty of kitchen working space105 views
|
|
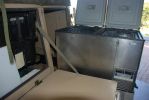
121 viewsthis shows the fridge on the 2 x 180kg sliders. i had to slightly modify the door opening to fir the fridge hinges thru. I just gently bent it, and fitted additional seals, hence it can easily be returned to standard. having the fridge in the kitchen is a major bonus, plus the back door of the trailer is now used for easy access to the cavernous interior, whereas prior to this youhad only access thru the front doors, which are only 500mm wide
|
|

Interior Trim471 views
|
|

Interior Trim166 views
|
|

13 views
|
|

Gore Tex data sheet on Breather Cap.784 viewsThis is a Gore data sheet on the air vent material that is within the breather cap. The filter material has both hydrophobic and oleophobic properties. That means it keeps water out and the differential oil in.
Also the membrane material is air permeable; that means air pressure is equalized between the interior of the differential and outside air. This is important when the 3 is flying at altitude in the back of a Hercules with the rear door open - that is the rear hatch of the Herc.
|
|
rear interior45 views
|
|
rear side interior43 views
|
|
front interior45 views
|
|

Yaris interior9 views
|
|

Ivory Interior32 viewsPre delivery - 15/2/14
|
|
Thread upload11 viewsImage uploaded in thread 163880
|
|
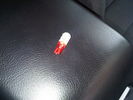
Red Interior Cabin Bulb71 views
|
|

Red Interior LED\'s Fitted97 views
|
|
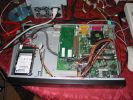
515 viewsInterior of the PC
|
|

Interior front59 viewsCockpit of my Discovery 4
|
|

Power sockets24 viewsI moved the two power sockets over from D3 to D4, both with ebony interior. One Merritt socket for fridge, and another standard socket for recharging devices.
|
|

Interior108 views
|
|

led interior light78 views
|
|

150918 First sighting - interior64 views
|
|

Interior 346 views
|
|

Interior 245 views
|
|

Interior 136 views
|
|
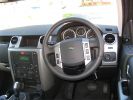
Interior Close MY200879 views
|
|

Interior Wide MY200877 views
|
|
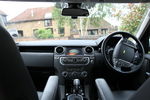
Interior58 views
|
|
Interior57 views
|
|
Interior2156 views
|
|
Interior1137 views
|
|

interior and seat covers17 views
|
|
Interior466 views
|
|
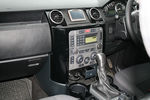
Centre console in black63 viewsnew mount installed for tom tom, thanks to Brucey for the use of his skills
|
|
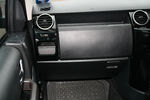
N/S vent in black56 views
|
|
53 views
|
|
57 views
|
|
60 viewsCharger for tom tom, cable running behind H trim
|
|
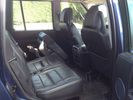
interior rear 118 views
|
|

Front drivers side interior facing back40 views
|
|
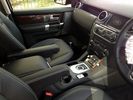
Front drivers side interior59 views
|
|
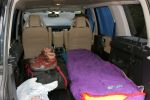
Plush interior for a "Tent"294 viewsThe inside of the tin tent, Note the blinds for the clear glass windows.
|
|
RRS INTERIOR YUK!114 views
|
|
Alpaca Interior .... nice271 views
|
|
Interior 421 views
|
|

Interior 326 views
|
|
Interior 220 views
|
|
Interior 122 views
|
|
132 views
|
|
862 views
|
|
724 views
|
|
729 views
|
|
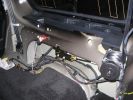
off side rear panel removed965 views
|
|
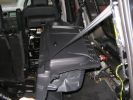
off side rear panel removed885 views
|
|

30 views
|
|

clearout interior light2 views
|
|

interior lighting58 views
|
|
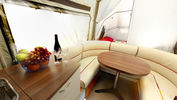
Thread upload10 viewsImage uploaded in thread 163880
|
|
Brunel Metallic Interior178 views
|
|
Thread upload49 viewsImage uploaded in thread 122752
|
|
Ebony interior253 viewsWith the armrests on the S version manual seats...
|
|
Almond/Arabica with Grand Black Laquer Trim492 views
|
|

142 views
|
|
116 views
|
|

Thread upload35 viewsImage uploaded in new thread
|
|

Thread upload5 viewsImage uploaded in thread 128412
|
|

Thread upload6 viewsImage uploaded in thread 137190
|
|

Thread upload14 viewsImage uploaded in new thread
|
|

Thread upload6 viewsImage uploaded in new thread
|
|

Thread upload6 viewsImage uploaded in thread 158514
|
|

Thread upload9 viewsImage uploaded in thread 164399
|
|

Thread upload1 viewsImage uploaded in new thread
|
|

Thread upload0 viewsImage uploaded in new thread
|
|
interior200 views
|
|

HSE Interior148 viewsBlack Leather interior with upgraded Steering Wheel and Wood Trim
|
|

57 views
|
|

InteriorReleaseCable22 views
|
|

Thread upload17 viewsImage uploaded in new thread
|
|

Thread upload3 viewsImage uploaded in thread 175089
|
|

Thread upload0 viewsImage uploaded in thread 199927
|
|

Thread upload10 viewsImage uploaded in new thread
|
|
Thread upload6 viewsImage uploaded in thread 150295
|
|

Thread upload3 viewsImage uploaded in thread 175089
|
|

Thread upload0 viewsImage uploaded in thread 199927
|
|

Thread upload11 viewsImage uploaded in new thread
|
|
Thread upload6 viewsImage uploaded in thread 158514
|
|

Thread upload0 viewsImage uploaded in thread 199927
|
|

Thread upload12 viewsImage uploaded in new thread
|
|
Thread upload9 viewsImage uploaded in new thread
|
|
Thread upload7 viewsImage uploaded in thread 136159
|
|

Thread upload10 viewsImage uploaded in thread 150295
|
|

Thread upload17 viewsImage uploaded in new thread
|
|
Thread upload6 viewsImage uploaded in new thread
|
|
Interior bling78 views
|
|
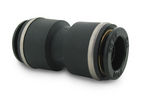
John Guest DOT all plastic fitting717 viewsThis is a picture of the John Guest DOT all plastic union. If you look closely, you can see the DOT imprinted in raised letters on the end of the fitting. This is of a 1/4" connector rather than the 6mm that the 3 requires.
The picture is similar to the air suspension pneumatic fitting union that Land Rover sells as replacement part # STC8580. This is for 6mm OD tubing size. The STC8580 comes with what are called "Collets" at each end that cover up the press to release feature underneath. See the John Guest web site www.johnguest.com under the Pneumatics section and also in Downloads for their catalog for install and remove instructions.
The actual "air brake spec" fitting that Land Rover provides has an interior 4mm OD ferrule that slips inside the 4mm ID of the nominal 6mm tubing. I have not yet been able to obtain the John Guest part number for the LR fitting, only the LR part number. This part number was generated for the RR Classic air systems.
|
|

John Guest (LR part # STC8580) push in straight 6mm tubing to tubing connector730 viewsThis picture is similar to the air suspension pneumatic fitting union that Land Rover sells as replacement part # STC8580. This is a 6mm OD tubing size push in to install straight tubing to tubing fitting. The STC8580 comes with what are called "Collets" at each end that cover up the press to release feature underneath. See the John Guest web site www.johnguest.com under the Pneumatics section and also in Downloads for their catalog for install and remove instructions.
The actual fitting that Land Rover provides has an interior 4mm OD ferrule that slips inside the 4mm ID of the nominal 6mm tubing. Hence the fitting depicted and part number are not actually correct. I have not yet been able to obtain the John Guest part number for the LR fitting.
The fittings that show in this doc are what I call food service fittings rather than transportation or Air Brake fittings. The part LR sells, (STC8580), is the Air Brake type for transportation.
|
|
Interior from left180 views
|
|

Almond Arabica interior216 views
|
|
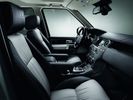
Thread upload27 viewsImage uploaded in thread 125438
|
|

Thread upload3 viewsImage uploaded in new thread
|
|
Thread upload17 viewsImage uploaded in thread 110148
|
|
Thread upload19 viewsImage uploaded in thread 110148
|
|
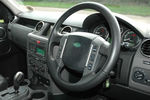
Dash board63 views
|
|

Thread upload2 viewsImage uploaded in new thread
|
|
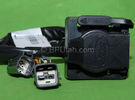
Harness section that runs behind the rear bumper.410 viewsThis is the harness section that clips up inside the rear bumper and includes the circular 7 pin, (6 flat +1 round), NAS socket, and also the 4 pin NAS flat connector.
The two small plug ends connect under the rear left tail light to the harness section that exits from the interior.
The Land Rover part number for the NAS trailer tow kit, (both cables), is YWJ500220.
|
|

Harness that connects inside left rear compartment.445 viewsThis is the harness section that connects behind the left rear interior access panel and exits thru the large grommeted hole to below/behind the left rear tail light.
Note the two rubber grommets on the harness as there is both an interior metal skin and an exterior metal skin behind the left tail light assembly.
The two light grey connectors plug into two existing connectors near the top of the rear left interior access panel. The two darker connectors plug into the second piece of harness.
There is no little separate fuse box either with the NAS spec harness. The fuse box is included with the UK 13 pin dual plug units. If there was a fuse box, it would be on this portion of the harness.
|
|
Thread upload4 viewsImage uploaded in thread 172661
|
|
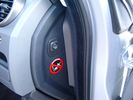
Air Suspension ECU Fuse 35P cut off switch.3821 viewsThis shows the SPST rocker switch mounted in the blank plate installed in lieu of a manual passenger side air bag shut down switch - now automatic via passenger seat pressure switch. Fuse 35P (5 amps) is located in the interior fuse box behind the lower glove box and protects the ignition power supply to the Air Suspension ECU. When the SPST switch is moved to the OFF position, the RAISE /LOWER switch on the centre console is not powered, and hence does not function. As such, some signals from the wheel height sensors and CPU are ignored. By itself however, removing F35P will probably not stop the 3 from self dropping, particularly after the engine is turned off.
Fuse F3E, (5 amps), located in the engine bay fuse box by the starting battery protects the circuit that provides feedback to the Air System ECU indicating that the Compressor Relay has successfully operated and that the Air Compressor is or should be operational, can also be removed, (but is probably not totally necessary), as it gets its power thru F26E. Hence Fuse F26E, (20 amp), also located in the engine compartment fuse box is the fuse that must be removed. This fuse protects the circuit that provides full time battery power to the Air System ECU. When in place, current thru the fuse powers the periodic re-levelling action, (usually lowering a bit with that brief air release noise), that often occurs when the vehicle is parked and the engine is off.
Removing F26E fuse will stop the auto levelling action and also inhibit any other down to the stops signals, (engine running or not). When F26E is removed, no power can flow thru to F3E, hence removing F3E is more for insurance than an absolute requirement. The same with F35P, removing F26E removes primary full time power from the Air Suspension ECU, and hence removing the F35P fuse should not really be required either as long as F26E has been removed.
|
|

Still Picture - grab from video to show full length interior rear sunroof198 views
|
|

225 views
|
|

Interior Video Showing Full Length Rear Sunrood inside rear165 views
|
|

Video Showing Full Length Interior Rear Alpine Roof323 views
|
|

LR3 Electrochromatic Interior Rear View Mirror wiring diagram.853 viewsIt seems that there are two fuses, F69P and F5P that provide power for the interior rear view mirror. Ten amp F5P is a feed off the reverse gear relay and inhibits auto dimming when reverse is selected. Five amp F69P provides power to the auto dimming circuits and the garage door opener function if optioned.
The pdf can be downloaded and printed out. For on screen viewing, right click on the pdf and select the Rotate Clockwise button.
|
|

Air Suspension Wiring Sheets3037 viewsThese two sheets show the wiring and fuses related to the operation of the air suspension system. Fuses F3E, F26E, and F35P are shown as well as the interior up down switch and the wheel height sensors.
As with all pdf's, you can rotate them to view plus download and or print out as you wish.
|
|

LR3_front_interior26 views
|
|
5243 views
|
|

Thread upload5 viewsImage uploaded in new thread
|
|

Thread upload20 viewsImage uploaded in new thread
|
|

Thread upload4 viewsImage uploaded in new thread
|
|

Thread upload30 viewsImage uploaded in thread 142640
|
|

Bespoke Interior6 views
|
|

Interior - Tom Tom fitting and Parrott8 views
|
|

Thread upload20 viewsImage uploaded in new thread
|
|

Thread upload19 viewsImage uploaded in new thread
|
|

Thread upload20 viewsImage uploaded in new thread
|
|

Thread upload14 viewsImage uploaded in new thread
|
|
Thread upload19 viewsImage uploaded in thread 140302
|
|

Thread upload1 viewsImage uploaded in thread 163880
|
|
Thread upload5 viewsImage uploaded in thread 163880
|
|
Thread upload2 viewsImage uploaded in thread 163880
|
|

Thread upload0 viewsImage uploaded in thread 163880
|
|
Thread upload3 viewsImage uploaded in thread 163880
|
|
Thread upload2 viewsImage uploaded in thread 163880
|
|

Tints 5 Interior view149 views
|
|
interior8 views
|
|
interior10 views
|
|

D3 Interior (alpaca)43 views
|
|
Commercial interior 2181 views
|
|
Commerical interior178 views
|
|
front interior30 views
|
|

Interior27 views
|
|

Interior 283 views
|
|

Interior 178 views
|
|

Interior3131 views
|
|

Interior93 views
|
|
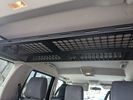
interior high shelf15 views
|
|
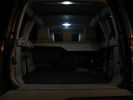
With just normal interior lights (but HID\'s High Intensity LED Replacement)78 views
|
|

14 views
|
|

Thread upload0 viewsImage uploaded in new thread
|
|

74 views
|
|

Interior front1 views
|
|

42 views
|
|

39 views
|
|

41 views
|
|

43 views
|
|

Thread upload6 viewsImage uploaded in thread 196635
|
|
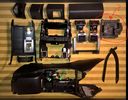
Thread upload2 viewsImage uploaded in thread 197099
|
|

Thread upload18 viewsImage uploaded in new thread
|
|
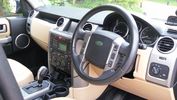
Interior - Alpaca leather172 views
|
|
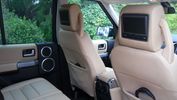
Interior - rear - Rosen DVDs181 views
|
|
Thread upload44 viewsImage uploaded in thread 92518
|
|
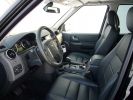
Interior222 viewsThe interior of my new Disco 3
|
|
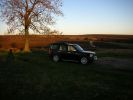
The \'Serengeti\' of The North York Moors891 viewsPicture was taken on a late sunny winters afternoon in the North York Moors National Park. The low light captures the Sky, Tree, and the D3\'s light interior along with the silver exterior detail. Whilst the dark D3 body blends into the foreground. Gives a feel of the South African plains. Think would make a good October or November page??
|
|

Interior16 views
|
|
![Filename=unione 1 [50].jpg
Filesize=307KB
Dimensions=2748x960
Date added=27.Nov 2007 unione 1 [50].jpg](albums/userpics/12685/thumb_unione%201%20%5B50%5D.jpg)
Interior view188 views
|
|

101 views
|
|

97 views
|
|

Interior 8 viewsInterior Dash
|
|

Thread upload3 viewsImage uploaded in thread 179296
|
|

Nissan X-Trail 2.2dci SVE Interior135 views
|
|
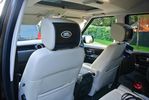
Ebony and Ivory Interior - Rear Screens215 viewsToms new favourite toy!!
|
|
|
|