| Search results - "LAS" |
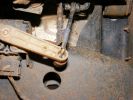
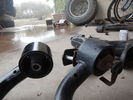
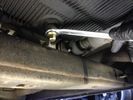
754 viewsNew control rod is carbonfibre/fibreglass hollow tube, with a rubber grommet fitted to one end (screwed and epoxy-ed) and steel rod bent into shape at the other (epoxy-ed).
|
|
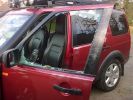
Broken Glass346 views
|
|
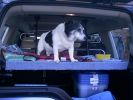
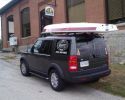
168 viewsthis is Albert 15 years old, showing the virtues of travelling club class, in the rear of a disco 3
|
|
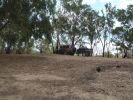
02 Last Photo before the little wheel problem saga222 viewsThis is my D3 with trailer on the banks of the Darling River, literally "back of Bourke" (the regional definition of the start of the Australian Outback). We were the first vehicle in a week to try and drive this route from Bourke to Wilcannia on the account of floods (first water in 7 years). Little did we know that 3 hours later there\'d be a bit of a wheel and tyre problem appearing...
|
|

Silverstone Classic Media Day177 viewsAttended the media day for the Silverstone Classic, took 3 cars to display & tell 300 journalists what we do at the show.
David Coultard was one of the drivers who were taking the journalists around the track.
|
|

Silverstone Classic Media Day60 views24 races, 1000+ classic race cars .... from Ferrari to Metro and everything in between.
|
|
Our last moments together before her new owner came to collect her...78 views
|
|

Yarwell Big Splash30 views
|
|

1-34 FormulaShell Multi-Vehicle A T F85 views
|
|
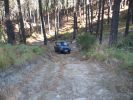
Gredos 4.196 viewsRuta por el barranco de las 5 villas.
|
|
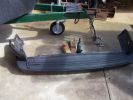
Plastic cover off235 views
|
|
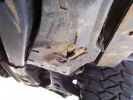
Compressor cover damage757 viewsAnother shot of the hole in the plastic cover
|
|
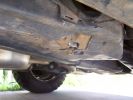
damage to compressor cover759 viewsHit a rock in Harvey and lost the compressor function. Went straight through the original plastic cover.
|
|
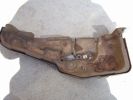
Compressor original cover657 viewsThe rock punctured straight through the plastic cover, snapped the soft compressor bracket and tore open one of the loom plugs.
|
|
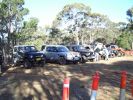
Start of Round 2189 viewsLined up with some of the Class B entries
|
|
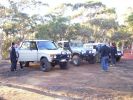
Round 2 start194 viewsSome of the Class C and D cars
|
|
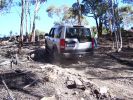
Last hill climb247 viewsA lot steeper (and slipperier) than it looks!! On the way to a Class A nad B win.
|
|
Some class on the track303 views
|
|

Well 51, the last well280 views
|
|

FAME AT LAST112 views
|
|

12.3 kg164 viewsKlasierie dam bordering Kruger park.
|
|
![Filename=15082008064 [640x480].jpg
Filesize=73KB
Dimensions=640x480
Date added=15.Aug 2008 15082008064 [640x480].jpg](albums/userpics/12862/thumb_15082008064%20%5B640x480%5D.jpg)
In Disgrace100 viewsThis is where its been for 3 weeks &3 days waiting for the parts to arrive from England. later that afternoon we aere able to take her home. Civilation at last :)
|
|

16 views
|
|

Thread upload5 viewsImage uploaded in new thread
|
|
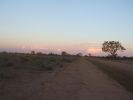
18 Brake "repairs" finished at sunset296 viewsWe just finished the repair at sunset and were driving slowly with 3 brakes. Oddly the D3 didn\'t behave any differently at 50 km/hr than it did normally. We had 4 instances of hitting the (3) skids for kangaroos before arriving in Wilcannia 3 hrs later. The brake light warning was making very distinctive noises and flashing randomly, though.
|
|

Ready to winch a friends disco 4 194 viewsback of the picture you can just see another freinds (luvbus) disco 3 acting as balast to stop the disco 4 pulling me down hill
|
|

Kielder Classic Car Run 201818 views
|
|
Kielder Classic Car Run 201816 views
|
|

13 views
|
|
Land Rover splash logo2827 views
|
|

On top at last351 viewsPhoto at the sumit of Arigna mountains, as part of one of the stages in the 2009 4x4challenge in aid of Temple St childrens hospital. Tough gettin there especially as we towed a Deafner90 up behind us that had bursted an expansion bottle. But the D3 powered on up regardless.
|
|
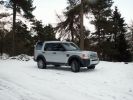
Silver and privacy glass looks great in the snow in the Goyt Valley76 views
|
|
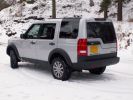
Silver and privacy glass looks great in the snow in the Goyt Valley72 views
|
|
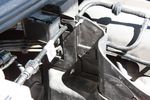
110 viewsBolts through the plastic box. These function as studs for the traxide brain to be mounted to.
|
|

Nav flash update39 views
|
|

Nav new splash30 views
|
|
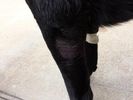
94 views72 hours post bite, 24 hours after treatment with laser therapy.
|
|
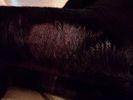
96 views72 hours post bite, 24 hours after treatment with laser therapy.
|
|
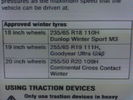
h rating tyres 19/20"22 viewsfound it at last. knew I had seen H rated in LR manual for 19/20"
|
|
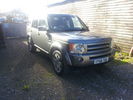
At work shining in the sunsheeeine181 viewsWashed it last night and applied Permanon Car Supershine Nano coating
|
|
Door trim plastic scrath9 views
|
|
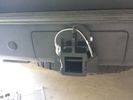
Rhino Hitch429 viewsCover fitted over the 75A Anderson plug with Rhino Hitch fitted which is a Class IV hitch. https://www.facebook.com/DifferentialPartsUS
Fits the Disco 3, Disco 4 and Range Rover Sport
|
|
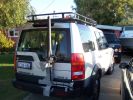
Finished at last445 views
|
|
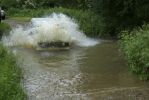
_DSC0199202 viewsRob\'s big splash
|
|

3 old friends79 viewsLaser & Pepper with Oscar (JMC's) on the Cairn
|
|

Billing Off-Road Course Water Splash43 viewsLottie\'s first off-road experience at the Billing off-road course with MikeS providing some vital guidance!
|
|
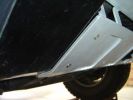
sits 5mm proud due to sandwiched plastic108 views
|
|
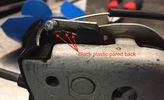
Close-up of lock showing emergency cable and pared back plastic tab141 views
|
|

Best in class 2008 4X4 Australia153 views
|
|

60 viewsColdweathers, classic 90 blew up its expansion bottle, he was glad of the ride to the top but funnily enuf didnt want a tow to the bottom, some say it may have been due to the fact that his 90 looked like it had been taken jet sking on the back of a D3
|
|

Even in Oman they have water splashes!105 viewsThe sheer joy of driving through fresh water in a mountain wadi. Rare enough to find running water when it isn\'t raining, but to drive through too is a real bonus for us Middle Eastern ex-pat drivers!
|
|

My Working Girls24 viewsLast day of the season 2012 picking up.
|
|

Thread upload12 viewsImage uploaded in thread 165269
|
|

12.3 kg131 viewsKlasierie dam bordering Kruger park.
|
|
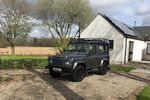
2015 Tdci (last one now gone)11 views
|
|
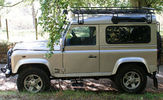
My last 90 the day I bought it, in 2007. Sold Nov. 201064 views
|
|

Thule euro classic 903 on removeable tow ball292 views
|
|

90BHP at VA Crossing (DSL Photo)82 views
|
|
A couple of juicy steaks and a nice red...231 views
|
|
A Class with D3 and SLK134 views
|
|
A Class & D3127 views
|
|
A Class115 views
|
|
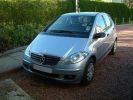
A Class127 views
|
|
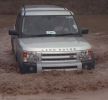
In the water splash191 views
|
|
Thread upload23 viewsImage uploaded in thread 149203
|
|
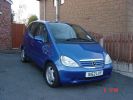
Wifes A Class 1.7 tdi Elegance Manual100 views
|
|
69 views
|
|

Land Rover Aerial Fin images for both Glass and Metal Roof Disco3 / LR3864 viewsAs well as the two different fins, this pdf also shows the plastic blanking plate for glass roof vehicles where no fin is installed.
The glass roof fin is secured by two security screws from the top into a plastic frangible glue on gasket. The hope is that when struck, the fin will shear off and not crack the glass roof. Re the metal roof design, the fin is secured from underneath via two nuts.
The pdf also shows the various electrical bits related to the antennas. In the UK, the fin would house not only a cell phone antenna but the TV and satellite radio antenna electronics as well; in the States, the Sirius sat radio antenna and a G type cell phone antenna if the phone kit was installed would reside within the fin. The SAT NAV GPS antenna is located within the High Mount Brake Light plastic mounted to the upper rear hatch.
|
|

Fin cell phone aerial drawing190 viewsThe factory aerial for the factory NAV / GPS on my 2005 HSE is within the high mounted stop light lens at the top of the upper hatch door. I do not have the factory installed phone kit, and as such, do not have the fin installed; instead there is just a plastic blanking insert to fill the cell phone aerial wiring hole in the metal portion of the roof; hence this requirement for an "external" cell antenna. For those that do have the fin on their glass roof, the fin is screwed on to a glued on plastic gasket, (sort of), and not bolted thru as per the metal roof 3's.
|
|
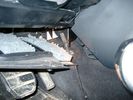
Air Conditioner Drain Hose on Drivers Side (LHD)2298 viewsThe corrugated rubber bit above and to the right of the gas pedal is the drain hose that goes down thru the carpet and floor sheet metal.
While it is bit hard to figure out from the jpg above, there is a rubber "strap" attached to the top of the corrugated hose that one uses to pull on to drag the hose up back around the black plastic heater "pan" drain. The same drain hose arrangement is on the other side as well.
One could I suppose run a plastic snap tie around the vertical pull strap if one was concerned about the hose slipping off again. See also the other jpg sketch which is from the Land Rover manual.
|
|

Alaska White FL2239 viewsAlaska White Freelander 2 - pending a shot of a Disco 3 or 4!
|
|

FOR SALE - ONE OFF Land Rover Disco 3 37 viewsOne of a kind Landrover Discovery TDV6 HSE LUX Model 5 door automatic 4x4 diesel evo blue. Upgrades: sidesteps, roof rails, privacy glass, front and rear heated seats/elec seats, landrover tv and headphones, 7 seater black leather, piano black dash/steering wheel, built in fridge, 6 disc changer, sat nav and bluetooth, harman kardon premium entertainment pack, by-xenon adaptive headlights , cruise control and front and rear park distance control, panoramic electric glass roof, 22inch alloy wheels, body kit
|
|
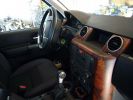
Last picture of my "old" previous Disco - wood224 viewsHope I won\'t miss the wood in the new one ;-)
|
|
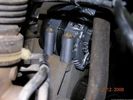
60 viewsOne bolt is visible at the front, but the other two are down the left hand side and best accessed by removing the small plastic guard behind the bumper. I also removed the small metal radiator guard between the bumper and the main sump guard (but that was mostly to retrieve the spanner I dropped!). The only issue with removing the plastic guard is the stupid plastic clips that hold it on may need to be replaced.
|
|

Thread upload10 viewsImage uploaded in thread 136352
|
|

Thread upload9 viewsImage uploaded in thread 140561
|
|
Thread upload1 viewsImage uploaded in new thread
|
|

Thread upload2 viewsImage uploaded in thread 142922
|
|
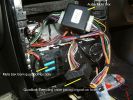
154 viewsInstall Hands free HCB-700 in A class
|
|
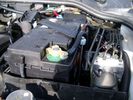
Aux Battery showing ground cable bolt "upside" down 1579 viewsIn order to obtain sufficient height clearance to get the plastic cover back on, I had to install the ground cable to the underside of the battery post connector.
Note the battery vent hose, (approx 5 ft required) is run down into where the windshield washer fluid container is located. There is not much electrical or metal in that area to be corroded by battery gas plus the open end of the vent hose tends to be protected from dirt and stays clean as well.
|
|
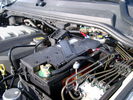
BCI Group 40R Deka 640RMF battery showing vent hose run forward to windshield washer reservoir area 1432 viewsRecessed post "Euro profile" battery to "match" OEM and stock Land Rover bracket; note that the Traxide SC80-LR module is mounted at an angle to allow for the main cable to sit under the cover so cover still closes.
The battery is a nominal 7", (180mm), high, but sits on a 1" battery spacer set under to raise the bottom front end of the battery such that the approx 11", (290 mm), length of the BCI 40R battery rises above the angled plastic nibs at the forward end bottom of the case front; hence sufficient space, (1/4", 5mm) remains at the brake reservoir end.
Also the 40R battery does not have hold down "flanges" on each end; on the sides yes, but not the ends so no additional length is required.
When I had to replace the 40R, this time I installed the shorter, (9.625"), taller, (7.5") Interstate BCI 47 / DIN H5 battery which eliminated the spacer on the bottom and better fit the stock LR tie down bolt lengths. Deka also has a BCI 47 / DIN H5 that would work fine as well.
|
|

A Pillar Black Plastic cover install pdf - new type.1039 viewsThis 3 page LR pdf explains how to install the newer A pillar plastic covers and avoid instant water leakage as a result of the new design.
|
|
42 views
|
|
Hella ballasts206 views
|
|
Thread upload23 viewsImage uploaded in new thread
|
|

Thread upload28 viewsImage uploaded in thread 119365
|
|

Buzzer located under black plastic cover.12 viewsThe white electrical connector clicks into the buzzer housing that is shown protruding from under the black plastic cover. There is a little tab on the white plastic that has to be squeezed to release the connector. In other words, do not pull on the two conductors.
|
|

White plastic pin that has to be partly removed to assist in release of buzzer cover.11 viewsThe white coloured plastic pin is located near the C pillar and has to be partly pulled out to release the black plastic buzzer cover.
|
|

Bin cover removed to expose plastic moulding covering buzzer.10 viewsI guess this moulding is helping to retain the bin cover when in place rather than to "protect" the buzzer but that is also what it seems to do. In any case, unscrew the two large screws and lift moulding off exposing the buzzer.
|
|
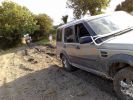
Mud at Last205 views
|
|
Blakey at VA Crossing (DSL Photo)78 views
|
|

52 views
|
|
191 views
|
|

Crazy Paving67 viewsThe last place you would expect to find a nice bit of block paving. The 513m summit of Monkside on the DISCO3.CO.UK Kielder day 2009.
|
|
3 old pals55 viewsLaser, Oscar and Pepper on the Cairn
|
|
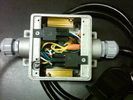
Box open showing Hella Relays and Putco Load Resistors750 viewsInterior of the box - note the two gold coloured 6 ohm 50 watt load resistors are a bit distant from the other items so as to provide some separation for dissipation of the heat generated.
Rather than a moulded plastic weather resistant box which I would have preferred, I used a bulky and much heavier metal weather tight style electrical box so the metal can act as a heat sink.
|
|
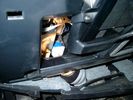
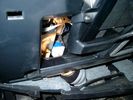
Brake Switch Visible thru Opening4977 viewsThe blue and white bit is the switch; the sort of gold appearing box,(it is really black), you will not see in your 3 as it is a Smooth Talker brand amplifier for my Blackberry phone antenna. This install is detailed in the SmoothTalker phone antenna section of my gallery.
One way to remove and install the switch is to lower the "horizontal" panel above the brake pedal as shown where the flashlight head is located. To actually remove the switch, you slide your hand thru the gap and rotate the switch clockwise 1/4 turn while watching thru the rectangular opening. Installation of the new switch is the reverse of above - 1/4 turn counterclockwise.
Before you remove the switch, note its orientation - horizontal with electrical wires to the left. That is the way it should look after replacement as well.
The second time I replaced the switch, I did it all thru the rectangular opening and did not remove the horizontal panel - that is experience helping out.
The knee kick you have to remove regardless. It is sort of hinged at the bottom so you just pull at the top and sort of rotate the knee panel and then pull upwards for two plastic "fingers" to clear the slots they reside in.
|
|
Smooth Talker Amplifier Box mounted below near steering column.180 viewsThe gold look box due to the lighting, (actually black), is the antenna amplifier located near the steering column. It can be put anyway but this seemed an OK location as I ran the antenna connector cable rearward from here to the back corner of the 3 and then up to the underside of the roof glass at the rear. The blue/white thing is the brake light switch that often must be replaced. See the Brake Light Switch file within this Gallery regarding the switch replacement.
|
|

Black Deposits on Brake Light Switch Plunger2760 viewsThis jpg I got off another forum and is typical of what one will see when one opens up the removed brake light switch. The black powder is residue from arcing of one of the pair of contacts within.
Hopefully the newer switches with the FOMOCO logo moulded into the plastic are improved from the Land Rover logo marked early units, however I doubt it.
The Ford part number is SW-6572 and/or 7E5Z-13480-A as used on the 2006 to 2009 Ford Fusion's and Mercury Milan's; the Land Rover part number is XKB500110. Cost of switch could be about twenty five dollars. A previous LR part number for the switch was XKB500030, so hopefully the newer LR part number, XKB500110, reflects some improvement in reliability.
It is possible that the new switches are better as I installed a replacement 72,000 km, (45,000 miles) later, at 195,000 km (121,000 miles). When I took the removed switch apart to inspect, it was clean inside. There was no black dust - the switch looked like new, hence they must be improved now.
|
|
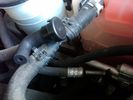
Breather line with factory cap cut off.2324 viewsIf you expand the jpg by clicking on it, in the bottom right corner if you look closely, one can see the black plastic factory vent tubing with the OEM cap cut off.
Note the tubing is cut at a 45 degree angle facing to the rear. Also shown in the top right is the cut off portion sitting on the coolant water hose and on the top left also sitting on the coolant hose, the new to be installed Gore manufactured replacement breather cap.
|
|
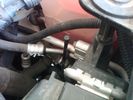
Vertical Breather Hose before cutting off OEM cap.1780 viewsThis shows the plastic vertical breather tubing and OEM cap prior to being cut off. The tubing is located on the driver side at the front near the radiator. One cuts about 3/4" to 1" off from the top. The TSB says 20mm.
I tried blowing thru the cut off piece and was not very successful. The cap seemed plugged. I am beginning to think that there was a very good reason for Land Rovers's Technical Service Bulletin, (TSB).
|
|

Thread upload144 viewsImage uploaded in thread 174456
|
|
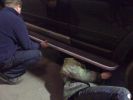
D3 Side Step Repairs169 viewsNearly finished - just the last two rivets to put in. We used a very basic and cheap hand rivet gun which can be bought in places like Halfords for about £10.00 and usually come with a supply of rivets to do the job.
|
|
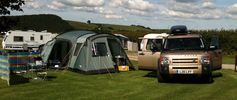
Camping in Devon last year.126 views
|
|
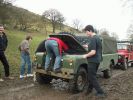
Betsy receiving some tratment after splashing through a puddle179 views
|
|

Thread upload18 viewsImage uploaded in thread 128900
|
|

Thread upload12 viewsImage uploaded in thread 128900
|
|
Thread upload12 viewsImage uploaded in new thread
|
|

Thread upload17 viewsImage uploaded in thread 174727
|
|

Thread upload14 viewsImage uploaded in thread 174727
|
|

Thread upload16 viewsImage uploaded in thread 193260
|
|

Thread upload15 viewsImage uploaded in thread 200682
|
|

74 viewsMS excel sheet for monthly mileage report will give average fuel consumption.(most cells have formulas to help fill in from previous line)
on first sheet add details you want on monthly sheets. during use the data needed to be added is ending reading on clock, places visited (if you want).
how much fuel when you purchased it also fuel in tank at start and end of month
|
|
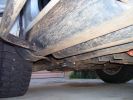
Sill protectors802 viewsThese replace the plastic sill protectors. 4mm mild steel plate, bolted through the existing holes in the side and underside.
|
|

Alaska White Disco 4100 views
|
|

Alaska White Disco 499 views
|
|
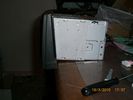
This show that the angel of the radio body is diffrent from the original, hence shall some plasic be removed - I used a dremmel and removed 7 mm of the horizontal bar inside 160 views
|
|
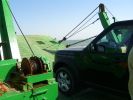
All at sea in an LR3105 viewsThe ferry from the mainland to Mazira Island was packed to the gunnels with vehicles. My LR3 was last on and they left the bow doors partially open for 14 lonnnnng sea miles across the Arabian Gulf!
|
|
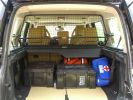
Load space369 viewsShows the SA Front Runner Wolfpack stacking plastic storage boxes that I keep laod straps etc in and the 2nd is tool kit, spare belts, jerry can funnel and tools, plus airline and tyre inflator/deflaotr for ARB on-board compressor, HD jump leads. ARB Winch pack (Orange)with strops, snatch blocks, shackles, gloves, and 2 ARB recovery dampers. Really great 4x4 1st Aid kit from Outdoors warehouse in SA. LRs own loadspace guard - not the best design if you want to store a long load. Mods to be carried out!
|
|
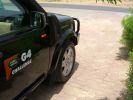
2009 MY?239 viewsThe wheelarches, door sills, and door mirror bodies have all been sprayed to match the body colour. Same as 2009 MY? I think this looks really good, and is so much easier to keep clean than the textured plastic that suffered badly out here from dust/dirt ingraining and UV discolouration.
|
|

Thread upload4 viewsImage uploaded in thread 194599
|
|
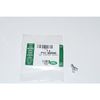
Clip Spring Metal FYC 500040 that holds LR together1748 viewsThe jpg is of the spring metal clip, Land Rover part number FYC 500040 that holds most of our 3 together - well at least most the interior trim parts.
If you are going to remove interior panels, you may as well stock up on a few for replacement as upon panel removal, the clips tend to spring away into deep never to be found voids within your 3.
|
|
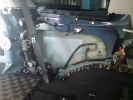
Thomas compressor160 viewsCompressor mounted ontop of the rear wheel arch behind the plastics.
|
|
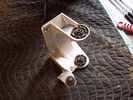
Air Compressor mounting bracket new907 viewsFound this jpg on a forum - thought it was good and is what one breaks when one jacks on the plastic air compressor cover.
|
|

Thread upload2 viewsImage uploaded in new thread
|
|

Cooling system hoses - 4.4L petrol V81110 viewsThese are the cooling system hoses on the 4.4L petrol V8. The little odd shaped bleeder hose, (LR006158), shown in the top right hand corner can give problems. There is a plastic tee with a threaded air bleeder outlet located in the middle of the hose. The plastic tee can or will fail due to I guess heat distress.
A BIC pen can serve as a field fix, however for your parts kit, a nominal 3/8" ID hose size brass hose barb inline connector plus a couple of hose clamps is suggested. Better yet is a threaded hose barb brass coupling or a tee and bleeder valve to allow bleeding of the line. Land Rover now makes the plastic bleeder valve that breaks available as a separate part, # LR027661, where 0 is a zero. As such, one can now purchase that part only for addition to your field fix parts kit.
|
|

Detroit Fluid DOT air line fittings718 viewsThe picture shows the internal ferrule that is characteristic of the DOT / TUV accepted fittings for highway vehicles. Most often these fittings are metal however the Land Rover John Guest 6mm straight connector is all plastic and has the internal ferrule.
|
|
Rimini Red - Decision made438 viewsSo excited, hence camera wobble!!, having a differnt colour at last after only 7 Silver Discos
|
|
160 views
|
|

My drive for the last 10 weeks!175 views
|
|
CounterAct Power Supply mounted 248 viewsPicture is blurred, however power supply is 3M two sided tape to the flat black plastic of the second battery compartment just under the antilock brake pipes to the fender side of the brake fluid reservoir. The white wire to the left rear coupler pad runs thru the firewall hole near the steering column. The blue wire to the right front coupler runs across and above the engine following the other wiring looms that cross the vehicle.
|
|
CounterAct Power supply mounted under brake lines.194 viewsThis top view shows where I located the power supply. It is attached with 3M sticky to the black plastic surface that is located under the brake lines.
When the system is operating properly, the red LED pulses about twice per second.
Some users claim they can hear a very slight hum or whine coming from the unit. My unit seems silent.
|
|

C pillar cover removed to facilitate removal of bin cover.9 viewsNote the "ribbon" behind the top left corner of the C pillar cover. This is something to do with the curtain air bags, hence do not mess with it. I dislodged the cover to make it easier to pull up and extract the black plastic bin moulding. It is not necessary to totally remove it and would be what I call a big deal - seat belt, air vent and ducting as well as that curtain concern.
|
|
73 views
|
|

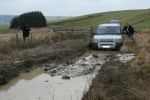
I found some water288 views
|
|
D349 views
|
|
Thread upload19 viewsImage uploaded in thread 104797
|
|
18 views
|
|
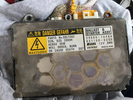
Thread upload21 viewsImage uploaded in thread 148416
|
|
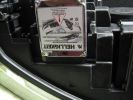
D4 hid ballast221 views
|
|
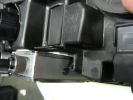
D4 hid ballast 2194 views
|
|

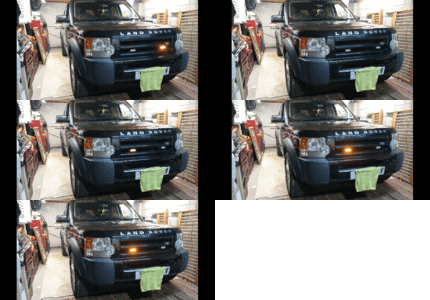
D4 Being Prepped for LAS26 viewsThis is a Disco 4 (unknown spec) being prepped up at my workplace for the LAS, having new comms kit put in and stuff. What you can't see from this angle is that the front grille and headlights have been taken out.
|
|
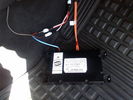
D4 Bluetooth AH42 10F845 AA module connected to 12VDC and MOST1210 viewsThis jpg shows the MOST bus connected to the AH42 10F845 AA module used in the D4 as well as +12VDC power from F58P connected. The power is split with a Y harness as the IHU (radio) for some reason required +12VDC power to the C2115-10 "mute" pin to keep the radio/CD audio from muting all the time.
With power on the pin, the radio audio does mute as it should when the cell phone rings and the hands free connects. The brown conductor feeds to C2115-10 and the blue to the module.
The module tucks up and hides behind the grey plastic section covering the forward portion of the passenger side tranny hump for left hand drive vehicles; for RHD, it would be located on the left side.
The pairing code is 2121 with this setup and not 1234 or 0000.
|
|

Disco3 on the move in Dangalli Conservation Park - at speed (south of Yunta)178 viewsMusic heard in video is from the stero blasting away inside the Disco - and yes...that was a cattle grid being crossed at the start :-)
|
|

Deka Battery Dimension Data617 viewsThe battery size that I installed for my auxiliary was a BCI 40R battery as it was for me the easiest to fit and was also a cranking battery. The case profile was such that no tie down fins were located on either bottom end, (sides yes), and length wise, it was only about 11" (290 mm) long. As such, I did not have to grind the nibs at the front bottom of the plastic surround.
I did however raise the bottom of the battery above the angled nibs as I set the battery on a 1" (25mm) high plastic spacer. The total height, (battery plus spacer), was about 8" (200mm) so the battery top still fit under the Land Rover factory cover.
For the Aux battery, when I replaced the 40R, I installed an Interstate BCI 47 which is similar in size to a DIN H5. I was therefore able to eliminate the vertical spacer as the Group 47/H5 is the same height as the DIN H7/H8 stock LR spec starting battery. As such, the standard battery tie down bolts can be used without modification. The Group 47 battery is 9 11/16" long x 6 7/8" wide x 7 1/2" (190mm) high.
|
|

Thread upload17 viewsImage uploaded in thread 170233
|
|

Thread upload21 viewsImage uploaded in thread 170233
|
|
Camping Chanteloup213 views
|
|
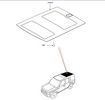
Glass Roof36 views
|
|

256 viewspulled off the factory plastic and found 2 6inch cracks in the drivers side top in front of head light
|
|
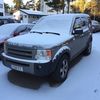
Disco 3 - Snow at last and Vredestein Wintrac 4 Xtreme10 views
|
|
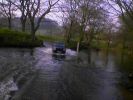
Me fording in Grosmont381 viewsMe have a splash in aford at grosmont north yorkshire was only 18 inches deep nothing big.
|
|
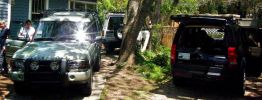
2004 D2, 1996 D1, 2007 D3262 views- possibly last reunion of all 3 as D2 goes to Minnesota, D1 stays in NC, LR3 goes to Seattle.
|
|
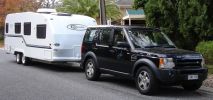
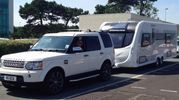
The Test Rig274 viewsDiscovery TDV6 SE - Adriatic Blue, Alpaca
Caravan - Future System Full Fibreglass (one piece) 21ft (6.10m)internal length
|
|
Thread upload9 viewsImage uploaded in new thread
|
|
Thread upload1 viewsImage uploaded in new thread
|
|
Thread upload2 viewsImage uploaded in thread 187533
|
|

Thread upload4 viewsImage uploaded in thread 193020
|
|

Thread upload6 viewsImage uploaded in new thread
|
|
Thread upload22 viewsImage uploaded in new thread
|
|
Thread upload21 viewsImage uploaded in new thread
|
|
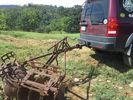
LR3 to plow your garden298 viewsI found this jpg where a current LR owner is using his LR3 for a similar purpose as the original Series units were designed to do - that is serve as a tractor for plowing a field or I suppose a garden.
In this case, I note the hitch is one of those that attach to the factory tow loop, (Rhino Hitch), rather than the factory product that inserts from the bottom and hangs down - (like a plow), but all the time. One of the other jpg's in this album shows the two factory variations plus a third jpg shows a closeup of the Rhino Hitch.
|
|
Don't forget the plastic clip63 viewshttp://www.disco3.co.uk/gallery/albums/edit/preview_8ffce58e.JPG
|
|

Thread upload4 viewsImage uploaded in thread 187408
|
|
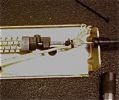
Actuator box underside 63 viewsUsed a clove hitch with plastic zip tie with 1/8" Kevlar rope
|
|
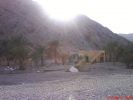
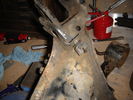
Some of the damage remaining from Hurricane Gonu - this was caused by flash flooding in the wadi86 views
|
|
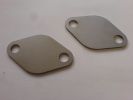
EGR Blanks - mild steel 1.5mm laser cut117 views
|
|
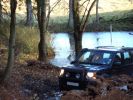
DSL Water Splash128 viewsDunkeld LRE
|
|

Water Splash698 views
|
|
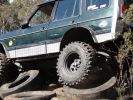
Tyre hill 3217 viewsC class V8 Disco made it through using the "grunt" approach
|
|

569 viewsMy father's last wish was to ride in my car one last time, and as such I believe him to be the first person to be carried to his funeral in a Disco 3.
My father's coffin was 6'5" and he was safely carried in the back of my Disco, and for once didn't complain about my driving. Air suspension helped enormously, being set to off-road height, to ease getting him in and out safely.
|
|

Last river crossing - leaving the Deua National Park103 views
|
|
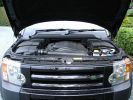
Engine836 viewsand other bits of plastic
|
|
distance from rack to end of glass roof is about 37mm329 views
|
|
Slimer in the mud splash344 views
|
|
Got tinted glasses made today398 views The foil is Lumar 20 %
|
|
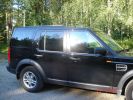
Got tinted glasses made today329 views looks like factory made, perfect fit
|
|
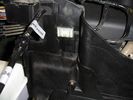
Twist the white plastic in either direction 45 degrees and pull - this is where the SC80 will go81 views
|
|
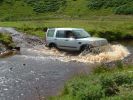
Splash at Drumclog.167 views
|
|
Shiny new cable114 viewsConnected to the solenoid, and looking quite smart. I hope this will last longer than the old one.
|
|

210 viewsLining up for the last two runs - only one make of vehicle left in the comp!
|
|
233 viewsSizing it up for the last run of the night
|
|
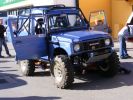
Spec\'d out Suzuki in Open Class153 views
|
|
Damaged area66 viewsPic shows plastic breather fitting with the corner ground away. When tank reached full fuel is pushed out under forecourt pump pressure. The second occurrence shows similar damage.
|
|
Left hand side of internal 40 Litre water tank163 viewsView from floor looking towards tank. Top white cover is 50mm plastic pipe cap. It protects the tank vent valve. Dispensing hose is at lower corner of tank
|
|
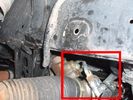
Further detail of attachment of the winch hoses to power steering system145 viewsThis is under the right (looking forward) lower plastic radiator cover.
|
|

400 viewsCloser view of leftside impact absorber. Note the thin piece of plastic I placed between the absorber and the cooling system component. Note air suspension hoses covered by protective tubing at bottom of photo.
|
|
125 views
|
|
119 views
|
|
114 views
|
|
105 views
|
|
105 views
|
|
98 views
|
|
84 views
|
|
100 views
|
|
102 views
|
|
101 views
|
|
99 views
|
|
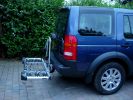
Thule euro classic 903 on removeable tow ball312 views
|
|

Thule euro classic 903 on removeable tow ball270 views
|
|

Thule euro classic 903 on removeable tow ball312 views
|
|
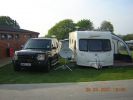
New van - set up at last146 viewsFirst trip away with new tin tent
|
|
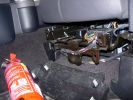
Mounting a non-LR fire extinguisher535 viewsShowing the plastic cover removed. I will make up a metal plate or bar so that the extinguisher frame can be mounted directly to this framework under the seat.
|
|
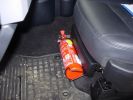
Mounting a non-LR fire extinguisher410 viewsSimply fixed it to the plastic cover for now, but will remove cover and mount further back later - just need to make up a metal plate first.
|
|
Alaska98 viewsDenali
|
|
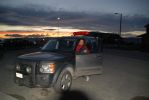
Alaska185 viewsHomer
|
|

185 viewsSnow gums - burnt by last summer bushfires - near the summit of Mt Skene.
|
|
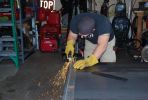
164 viewsUsing the plasma cutter to trim up slider plates
|
|
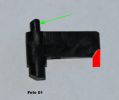
Foto 1 - particolare incriminato142 viewsIl problema del portello di rifornimento che non si chiude pi� � causato dalla rottura di un'appendice della linguetta che fa da guida al movimento (riprodotta in rosso). Un meccanismo simile al click delle penne biro. Un particolare del costo di qualche millesimo (valore della plastica) che in una macchina da �50.000,00 (per lo meno la mia) si sarebbe preferito in fusione di alluminio.
|
|
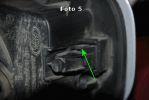
Foto 5 - molletta di ritegno particolare158 viewsLa freccia verde indica la molletta di plastica che tiene in sede il particolare rotto. Nella parte inferiore se ne trova un'altra che trattiene il perno inferiore pi� grosso.
Ogni lavoro � fatto a rischio e pericolo di chi lo fa, non mi assumo alcuna responsabilit� per eventuali danni causati a persone o cose.
|
|
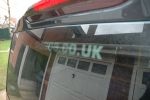
disco 3 stickers489 viewsnot visible thru the privacy glass - doh!!
|
|

Glass Roof Blanking plug365 views
|
|

G4 fording splash123 viewsG4 taken on 2008 GToN www.gton.co.uk
|
|
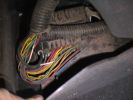
Wiring in left hand rear wheel arch, behind plastic shroud.728 views
|
|
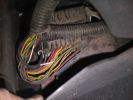
Left hand rear wheel arch, behind plastic shroud.720 viewsThis is the standard wiring.
|
|
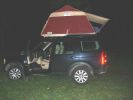
First Night709 viewsfor more than 10 years I'm using my roof tent on a lot of different cars (Mitsubishi L300, Mitsibishi L200, LR 110 Td5, Disco 2 Td5).
Now, on last friday I finished to fitt the tent of the original LR Expedition roof rack.
It was a hard job because I wont neither to change the possition of the GPS antenna nor I was interessted to fitt a second one.
|
|
![Filename=euroclassic903[1].jpg
Filesize=47KB
Dimensions=615x496
Date added=03.Apr 2007 euroclassic903[1].jpg](albums/userpics/11664/thumb_euroclassic903%5B1%5D.jpg)
thule132 views
|
|
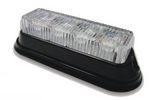
EVS Gen. 3 LED flasher66 views
|
|

17 views
|
|

Flash File Loader ECU selection85 views
|
|

Flash File Loader help81 views
|
|
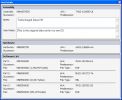
Flash File Loader Pop up Info Box76 views
|
|

Flash File Loader Model Selection80 views
|
|

90 views
|
|
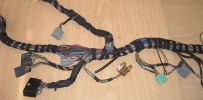
Finished Passenger Kick panel area131 viewsMissing connetor (left most grey) & wiring in, (plastic bracket was broke will use the one in the car) Airbag wires & connector to connector previously cut replaced (on top of grey one to right).
And you can even see the 2 new speaker wires going into the Pass door connector at the very bottom.
|
|

Last Decsent55 views
|
|
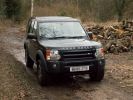
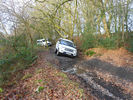
Some mud in the tyre treads at last!278 viewsThe D3 behaved herself beautifully on this little lane/track near me
|
|

112 views
|
|

Flash Flooding134 views
|
|

Flash Flooding115 views
|
|
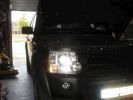
90 views
|
|

Fluid, Filter/Pan Combo removal and install5982 viewsThese are the LR instructions re removal and install of the plastic pan/filter combo for the ZF 6HP26X transmission on the 4.4L petrol V8 LR3.
The instructions tend to ignore the reason you have to lift the right hand side of the engine about 40 mm. This is because of a frame cross member that interferes with dropping down of the plastic pan. The real problem is a vertical "oil filter spout" that rises out of the filter/pan combo up into the transmission. The spout is the suction pipe for filtered transmission oil back up into the tranny.
On the metal pan versions, the filter is separate from the pan, hence the filter remains with the tranny when the metal pan is dropped. The filter is then removed or installed independent of the metal pan, hence with the metal pan, there is no need to lift the engine.
If one is removing the plastic pan so as to install the metal pan, then some do not lift the engine but just drop the plastic pan enough to gain access to saw off the vertical plastic spout - it is a one time procedure.
Be aware however that the metal pan uses a flat gasket and the plastic pan uses a O ring like perimeter gasket that sits in a half round groove in the tranny casing. Also the metal pan uses 21 shorter torx M6x22.5 metric cap screws for the perimeter bolts. The plastic pan uses longer M6x28.5 torx metric cap screws.
|
|
Front coupler pad to right front under air filter housing 160 viewsCoupler Pad is attached to the flat metal surface just behind the rectangular drain off of the air filter housing. The last 3 inches (75mm) of the 1/4" (5mm) black flex wiring loom was then threaded over the last bit of wiring. One of the other jpg's is less washed out and shows the coupler pad a bit better.
|
|

Front Door Window Glass249 views
|
|

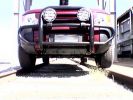
Front_clearance_offroad_mode754 views275/65/18 Cooper Discoverer STT mud tires - minimum clearance between front wheel and crappy plastic wheel arch. Although it lokos tight, there is actually more room between the tire and arch than the pictures shows.
|
|
New Orange Ruftracks Plasma Rope69 views
|
|
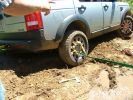
Furrow122 viewsThe rear tyre has descended into the furrow and the vehicle is now safer at last.
|
|
Thread upload11 viewsImage uploaded in thread 106767
|
|

glass frames and consoles37 views
|
|

Thread upload17 viewsImage uploaded in thread 117381
|
|
Thread upload11 viewsImage uploaded in new thread
|
|
Thread upload11 viewsImage uploaded in new thread
|
|

40 views
|
|
Thread upload4 viewsImage uploaded in new thread
|
|

Thread upload6 viewsImage uploaded in thread 200758
|
|
Glass Scratch20 views
|
|

30 views
|
|

24 views
|
|

31 views
|
|

27 views
|
|

Google Classic48 views
|
|

18 views
|
|
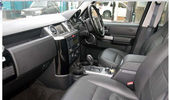
New Dash59 viewsIs this black plastic stuck on or is it actually part of the dash console cover?
|
|
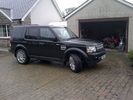
MY D4136 viewsxs, black, 20 alloys, tinred glass, shot roof rails ebony leather, piano black trim, electric/armrest seat, panoramic roof, harmon kardon, rear camera and tow bar.
|
|

Thread upload11 viewsImage uploaded in thread 133366
|
|

Ballast cover53 views
|
|

Thread upload24 viewsImage uploaded in thread 163276
|
|

Thread upload29 viewsImage uploaded in thread 163276
|
|
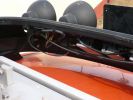
Hella 4000 Ballasts203 views
|
|

106 views
|
|
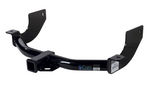
Curt Manufacturing brand hitch, assembled but not installed.290 viewsThe Curt Manufacturing hitch is an alternate to the Land Rover removable "plow" hitch. Once bolted in place, the Curt hitch is always there.
The Curt part number is 13456. It is a Class III hitch with a 2" square receiver and designed for a maximum 600 pound tongue weight.
The hitch hangs below the rear bumper but does not stick out past the bumper; also the "donut" spare tyre can still be installed / removed; am not so certain about a full sized fully inflated spare.
|
|

Curt Manufacturing Installation instructions Class III345 viewsThese are the instructions for installation of the Curt Hitch.
|
|

Last leg into Inverness, via Aviemore (glow in the distance ) .. Starting to flag !140 views
|
|
Sure that wasn't there in front of me when I parked up last night ????156 views
|
|
Splashing in puddels56 views
|
|
Splash59 views
|
|

Parts diagram for 2007 D3 TDV6 HSE glass top aerial fin43 views
|
|
Iconix at VA Crossing (DSL Photo)72 views
|
|

Thread upload16 viewsImage uploaded in thread 124868
|
|
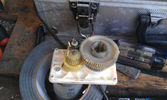
inside motor and plastic wheels epb200593 views
|
|
A Victorian Railways D3 Class Locomotive.248 viewsThe 5\'2\'\' gauge of Victorian Railways (Australia) fits a D3 perfectly.
Taken at grain handling facility at Moolert Victoria.
|
|
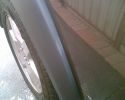
polish on the plastic trim165 views
|
|
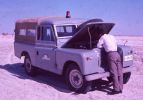
End of the line at Ras Al Khaimar72 viewsI am led to believe that this example was left overnight on the beach broken down - by morning the natives had stripped every last piece of usefull equipment out of it, engine and all and dragged it across the creek back to their village
|
|
New D3 Black, side steps, tow bar and privicy glass.225 views
|
|

Thread upload5 viewsImage uploaded in thread 172117
|
|

4 x Genuine Complete Lashing Eyes For Expo Rack46 views
|
|
Oops18 viewsPulled free at last!
|
|
D3 satnav last original disc24 views
|
|

Evoque Revere220 views
|
|

Installing Ballast Resistor to Vehicle loom164 views
|
|
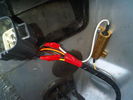
Installing Ballast Resistor to Vehicle loom173 views
|
|

My Ball80 viewsLaser was happy
|
|
1609 viewsThese plastic bit\'s need to go as well
|
|
1736 viewsIndustrial elastic a stanless clip and a winch mount the number plate back in place
|
|
Showing the HID ballast units575 views
|
|
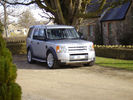
2005 D3 with New Bodykit (from TLO).446 viewsJan 2010
One of the last body kits bagged from TLO in Jan 2010... colour-coordinated in Zambezi Silver by local spray shop... Left the centre section Brunel silver for contrast. Really pleased with the resulting look.
Sadly missed
|
|

Switch is blue colour thing thru the rectangular opening.3177 viewsThe blue coloured plastic bit thru the rectangular opening is the brake light switch. The fist time, I found it easier remove the switch by dropping the horizontal plastic panel, (two screws), and then slipping my hand in and rotating the switch clockwise 1/4 turn. The second time, I was able to remove the switch thru the rectangular opening and did not need to remove the horizontal lower panel. Obviously, I had to remove the sloping knee pad panel, (note sort of hinged at the bottom so pull back from the top.)
Regardless, do not touch the brake pedal - just let it sit where it wants to. One has to first remove the angled knee pad panel that sits under the steering wheel. It can be pulled from the top corner at the door side. Pulling releases a pair of those U shaped metal clips that LR loves so dearly. You have to pull quite hard. The bottom is held by a couple of plastic fingers in a couple of slots so you pull at the top till the two clips release and then rotate the panel and pull upwards a bit.
To remove the switch, you rotate it clockwise and pull outwards. Rotating the switch clockwise automatically retracts the plunger back into the switch body away from the brake pedal arm.
Similarly when you install the new switch, the required 1/4 turn anti clockwise rotation action releases the plunger so it lays up against the brake pedal arm and at the same time, secures the switch in place.
To remove the electrical wires, the switch will drop below the horizontal pad and hang from the wires so unclipping the electrical connector plug is fairly easy to do.
|
|
2x 20l water. Fibreglass holder through bolted using t-nuts168 views
|
|
Handwinch lashed to platform (weight down low) 185 views
|
|
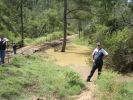
Chief instructor (left) and another instructor explaining water crossings204 viewsWhilst no one tested the waters this time (they did last week with another group) you can just see the stick floating in the water (near second instructor's right elbow). Satisfied that the rains hadn't changed the depth dramatically, they let us through - those that elected to take the water crossing of course.
|
|
Disco has splash at the crossing204 views
|
|
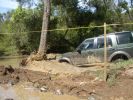
Last D3 through the deep crossing229 viewsThe water was stirred up by this time (didn't start off too clean due to heavy rains in the previous week) water was between 500 and 600mm deep depending on where the driver crossed. Away from the tree was slightly deeper but most drivers chose that line to be well clear of the tree.
|
|
Laser frost bitting (sailing) Rhode Island, USA51 views
|
|

SNOW AT LAST53 views
|
|

Loch Glashan54 viewsTypical 40 tonne road
|
|
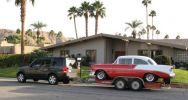
Towing my 56 Chevy264 viewsI towed my Classic Chevy about 650 miles from Palm Springs to Reno, including over the Sierra Nevada mountain pass (7,085 feet (2160 meters)) and the LR3 pulled very well.
|
|

Paddock dog guard - secured266 viewsa J-bolt hooks around the lashing point on the floor
|
|

Above Glashan58 viewsTypical muddy bit in forest
|
|

The clips (one completely broken, one partially, and one ok) that hold the plastic locking mechanism to the camera.31 views
|
|

Where the plastic housing attaches to30 views
|
|

Glass on seat56 views
|
|

I think it snowed last night Dad....17 views
|
|
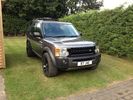
D3 last one...29 views
|
|

Survivor431 viewsWhere are my plastic mouldings?
|
|
Last minute advice106 views
|
|

Wurt Plastic repair kit used as glue.32 views
|
|

Snowy Holmfirth70 viewsB/g set to be b/w on iPhone using ColorSplash
|
|

Camping SAN YEN160 views
|
|

Camping Chanteloup154 views
|
|
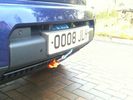
Redg plate mounting127 viewsThe original redg plate mounting was modified. An L-shaped piece of plastic now sticks out rearward from the top of the mounting and this hooks over the back of the top edge of the bumper cover. Then 2 spring clips hold the bottom edge of the mounting in place. Proximity sensor and surround camera seen unaffected.
|
|
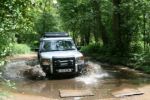
Jason Splashing54 views
|
|
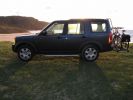
Sunset in the Western Isles 3653 viewsCalender 2008 Entry
Taken on the beach at Kneep on the west coast of Lewis, Outer Hebrides - May 2007. Backlit Disco with low shadows. Foreground flash fill defines the iconic shape!
|
|

Step drill131 viewsCan drill from 4 - 22 mm in steps, all plastics and sheet metal.
|
|
Atlas Mountains ..........and the kitchen sink48 views
|
|
Atlas Mountains ..........and the kitchen sink709 viewsCalendar 2008 entry
|
|
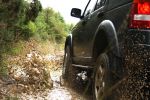
245 viewsCALENDAR 2010 : Tanters makes a splash in wexford
|
|
rullino elastomero merdoso 4mm37 views
|
|
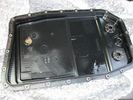
filter pan64 viewsfilter pan broken plastic gland
|
|
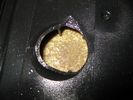
filter60 viewshole where plastic gland was
|
|
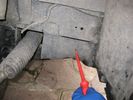
plastic inspection panel lower right weelarch47 views
|
|
Rubbed Wet With Scotch Brite Prior To Plastic Promoter75 views
|
|
Plastic Promoter Applied77 views
|
|
H Trim & Side Vents Plastic Promoted90 views
|
|

outside the showroom on collection day58 viewsIts all mine....at last
|
|

Home at last58 viewsAs above its home at last...Yippee
|
|
![Filename=IMG_2957 [1024x768].JPG
Filesize=128KB
Dimensions=1024x768
Date added=29.May 2008 IMG_2957 [1024x768].JPG](albums/userpics/12685/thumb_IMG_2957%20%5B1024x768%5D.JPG)
Magnetic protection 299 viewsPannello 20x20 in plastoferrite flessibile, spessoere 2 mm.
Test di resistenza del magnetismo in funzione della velocità, in un punto dove la lamiera assume una forma libera.
100 e passa km/ OK!
|
|
![Filename=IMG_2958 [1024x768].JPG
Filesize=79KB
Dimensions=1024x768
Date added=29.May 2008 IMG_2958 [1024x768].JPG](albums/userpics/12685/thumb_IMG_2958%20%5B1024x768%5D.JPG)
Magnetic protection93 viewsPannello 20x20 in plastoferrite flessibile, spessoere 2 mm.
Test di resistenza del magnetismo in funzione della velocità, in un punto dove la lamiera assume una forma libera.
100 e passa km/ OK!
|
|
lurking classic...12 views
|
|
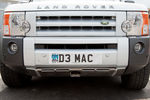
New Sump Guard103 viewsHead on of the new guard fitted last weekend.
The number plate has been Photoshopped! Its the one I\'d love to have, as its my initials - but is not for sale as far as I can see - and I wouldn\'t be able to afford it anyway! :)
|
|
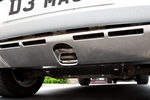
New Sump Guard112 viewsFinally got round to fitting my new sump guard last weekend. Looks the part - finding out if it works will be found out on 13th June, when I go to LRE Snowdonia!
|
|

This is where my iPod will live, unless I need to take it out to add songs or update playlists.492 viewsI installed a rubber grommit between the cable and the hole to keep it from rubbing on the sharp plastic.
|
|
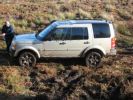
Dry ground at the end of the bog.... at last136 views
|
|

Mobile Phone antenna mount345 viewsView of mount with bonnet open - note stick on patch to protect plastic panel at base of windscreen
|
|
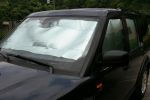
Windscreen Blind171 viewsThe windscreen is particularly hard to come up with an accurate shaped template to make a proper made to measure blind. I gave up.
Here is a make shift arrangement on the inside but I discovered it did little to reflect the heat as once the heat came through the glass it was already inside the car. Doh! Stretching it across the outside of the screen had a much better effect.
|
|
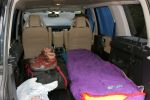
Plush interior for a "Tent"294 viewsThe inside of the tin tent, Note the blinds for the clear glass windows.
|
|
Draining the last bit out of the sump15 views
|
|
115 viewsRR
|
|
Glastonbury teepee field26 views
|
|

Queues for Glastonbury 201126 views
|
|
Plastic insertion sleeve10 views
|
|
The new seal slides easily off the plastic insertion sleeve onto the crankshaft11 views
|
|
Scottish Cross Country Championship 2012 - Round 6 - Forest Estate151 viewsScottish Cross Country Championship 2012 - Round 6 - Forest Estate
Marshalling duties at the last round of the Scottish Land Rover Owners Club comp safari championship
|
|

Thread upload0 viewsImage uploaded in new thread
|
|
138 viewsA Class Hands free phone install HCB-700
|
|

Interstate Battery Dimension sheet643 viewsThis sheet is hard to find - the sheet is not on the Interstate corporate web site but some dealer web sites display it. The pdf shows most of their available batteries including the H7 and H8 sizes that are the LR North America replacement batteries for the main starting battery. These batteries are of the Land Rover desired "shallow" cycle high discharge current Maintenance Free, (Ca Ca), internal construction, (not AGM, but instead, Wet Flooded Lead Acid with battery "caps" and Ca grid separators).
For the AUX battery , the H6, (BCI Group 48), is probably similar in dimensions to the Varta E12V75N that is popular in Australia. For that battery to fit in the second battery compartment, you must grind out the angled nibs on the inside front bottom of the LR black plastic surround, something I did wish to do and hence installed a Group 40R on a spacer. Alternately, one can choose an Interstate BCI Group 47 which is similar to a DIN H5 for the AUX location. I did this when I had to replace my 40R. No vertical spacer is required and the stock battery tie down bolts and clamp work well.
|
|

77 views
|
|
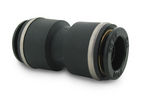
John Guest DOT all plastic fitting718 viewsThis is a picture of the John Guest DOT all plastic union. If you look closely, you can see the DOT imprinted in raised letters on the end of the fitting. This is of a 1/4" connector rather than the 6mm that the 3 requires.
The picture is similar to the air suspension pneumatic fitting union that Land Rover sells as replacement part # STC8580. This is for 6mm OD tubing size. The STC8580 comes with what are called "Collets" at each end that cover up the press to release feature underneath. See the John Guest web site www.johnguest.com under the Pneumatics section and also in Downloads for their catalog for install and remove instructions.
The actual "air brake spec" fitting that Land Rover provides has an interior 4mm OD ferrule that slips inside the 4mm ID of the nominal 6mm tubing. I have not yet been able to obtain the John Guest part number for the LR fitting, only the LR part number. This part number was generated for the RR Classic air systems.
|
|

29 views
|
|
GVIF Box Under seat65 viewsIt had been covered by a plastic cover removed for the photo
|
|

Suzuki making a muddy splash at a Highland 4WD Club trial95 viewsUnfortunately, it got out..
|
|
135 views
|
|
128 views
|
|
150 views
|
|

LA501-015 - Technical Bulletin - Exterior Rear View Mirror Glass65 views
|
|

At last - ladder fitted - 60 minutes including a trip to the local auto shop131 views
|
|

27 views
|
|
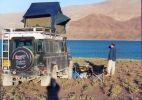
134 viewssomewhere in the high atlas mountains april 2001
|
|

Thermostat Housing LR005631541 viewsWhen the time comes to install a new thermostat, consider installing the whole housing instead.
Advantages are the thermostat is correctly installed, (not as simple as it should be); you get all new plastic and that is important, plus a new coolant temperature sensor and also a new heater coolant bypass valve, the secret part no one realizes is also within.
The cost of the whole assembly is not much more than the cost of a factory thermostat and the effort to replace all is not as difficult as it might seem.
|
|

Thread upload7 viewsImage uploaded in thread 137708
|
|

Thread upload6 viewsImage uploaded in new thread
|
|

Thread upload8 viewsImage uploaded in thread 189957
|
|
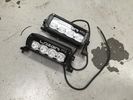
Thread upload14 viewsImage uploaded in new thread
|
|

Thread upload6 viewsImage uploaded in thread 204269
|
|

Thread upload15 viewsImage uploaded in thread 136537
|
|
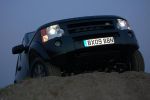
Cresting the hill!58 views
|
|

D4 - I spy yet another camera161 views
|
|

50 views
|
|

51 views
|
|

52 views
|
|

47 views
|
|

43 views
|
|
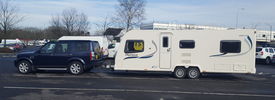
last olympus61 views
|
|

Thread upload20 viewsImage uploaded in thread 140681
|
|
46 views
|
|

43 views
|
|

LED trailer lights adapter for LR3844 viewsThis doc includes a partial list of materials and the instructions/links required to construct an adapter to prevent LED trailer lights from pulsing due to the 3's diagnostic circuits interrogating the signal light circuit.
Using the adapter also facilitates the green flashing of the dash located trailer indicator when the signal lights operate plus inhibits operation of various systems such as the backup sensors, etc.
|
|

Left vent with standard grey plastic455 views
|
|

Clear Plastic Light Guards with film55 views
|
|

LLumar "windscreen" clear Infra Red reduction side window film932 viewsThis is a data sheet on the LLumar brand of what they call Windscreen Film; It is almost clear, (has a bit of a blue tint), and reduces both the Ultra Violet fading and sun burn rays which most all films do as that is easy, plus more significantly, the Infra Red heat rays. That is rare as it is not so easy or cheap to do.
AIR80BLSRHPR (blue) is what the IR rejection film is listed as in the brochure that I used. http://www.llumar.com/en/AutoWindscreen.aspx
I had it applied to the front side windows as well as the front sun roof. One can feel the difference when the sun is low and streaming thru the side glass or high and coming thru the sun roof. Rolling a side window down is the simplest test of effectiveness re the rejection of the heat energy.
|
|

LLumar AIR80 Air Blue 78 windscreen film IR reduction metal oxide341 viewsThis pdf summarizes the characteristics of the various types of window glass film available from LLumar. www.llumar.com
I had the Air 80 metal oxide sort of clear film, (windshield film they call it), installed on the front driver and passenger side windows to reduce the Infra Red penetration and hence heating effect on the front occupants. The film is barely visible from either inside or outside, however there is a noticeable reduction in heat penetration when sitting inside. In short, my arm does not get cooked.
Cell phone and GPS etc seem unaffected by the metal oxide film.
I also had the film installed on the three sun roof portions as well.
|
|

LR3 Air Conditioner Drain Tubes behind centre console2135 viewsThis shows the two air conditioner drain tubes located left and right under the radio stack.
The tube on the left side, (steering wheel side, LHD), disattached itself and the carpet on the floor under the gas pedal etc became soaked. I think rain water from outside that comes in the outside cowl vents also exits via the tubes as I first noticed the carpet was wet after parking outside during a big rain storm.
It was relatively easy to slide up and reattach the rubber hose that runs from the rectangular shaped plastic discharge hole(s) of the heater "pan" down along the transmission hump area and thru the floor pan. There is a hose on each side of the transmission hump, but only one hose had let go on my 3. The rubber hoses just slide over the rectangular plastic openings of the two heater housing drain outlets.
To get at each drain hose, remove the vertical sort of triangle carpeted piece below each side of the radio stack. The triangles of carpet will just pull away as each is held on with those metal U clips Land Rover so likes. Dislodge each triangle at least sufficiently to get ones hand in to slide the rubber hose back on.
You will rarely see AC water on the ground as the front drains pour onto a metal underside protection skid plate and the rear drain onto the top of the left rear muffler.
|
|
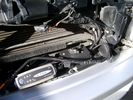
Battery Maintainer switching box plug and CTEK Multi US 3300 charger. 708 viewsThe CTEK Multi US 3300 maintainer is just sitting there for the picture. In addition to topping up both batteries, the CTEK can provide power such that if the batteries were completely dead, there would be power to the door locks and hence, one could most likely still gain access via the remote once the starting battery charged up a bit.
The Land Rover recommended method is via the hidden key hole which is mechanical, however that presumes the mechanism is not frozen from lack of use. As such, the manual lock should be exercised at least once a year to ensure that it still functions.
The blanking plug sitting on top of the plastic box is of the GM Weather Pack series. That is what I like to use for vehicle wiring that is subject to moisture, (or not).
|
|
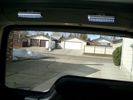
Boot lighting, looking to rear - hatch closed 543 viewsView shows the lights mounted in the rear on an early spring day.
In operation, the lights are tilted so that they shine downwards. The lights are mounted high enough up that one cannot see the LEDs from the front thru the rear view mirror; also the LEDs are so directional, that no light is thrown on the side glass.
Each assembly contains 15 LEDs, however the reflector is such that the LEDs appear to double.
|
|
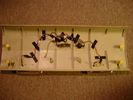
Boot lighting panel, wiring side up 284 viewsThis shows the back side of the plastic cover panel on which the two LED lights are mounted.
Also of note is the SPST rocker switch to switch the new lights off independent of the the Land Rover W5W light.
The new light pair will only power up if the Land Rover light is powered and hence dims and automatically goes off along with the Land Rover light.
The Black wire is ground, the Purple wire is +12VDC.
|
|
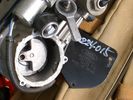
Compressor Con Rod Broken 1753 viewsThe model number of this compressor is RQG500060; the model number of my replacement compressor was LR015303, the unit that was apparently being installed on the D4 vehicles as of Spring 2010. As of Fall 2011, the new replacement part number is LR023964, the same as in the 4's.
Note the number hand written on the black plate. All the compressors seem to have some number hand written on them - hand built I presume, and every unit perhaps evolving a bit differently as LR struggles to build a compressor that will last. I guess Hitachi, (the manufacturer), should be given credit for that.
|
|
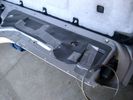
Dust Seal duct taped back together 2281 viewsThis shows the dust seal duct taped back together; also the surplus wire rope exiting from the actuator area prior to being cut to length.
I do not think the sticky plastic membrane is a dust seal, but more of a cable protector to cover up the wiring bundle that is effectively sticking to the underside of the flexible membrane.
|
|
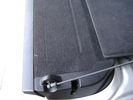
Flexible wire rope fishing leader 0.032" diameter exiting carpet 1950 viewsThis is all you see of the completed mod.
The short little angled "line" about an inch long that looks like a piece of debris and is located a few inches "above" the support cable is actually the wire rope release cable exiting from under the carpeted lift gate cover.
I drilled a very small hole in the carpet and pushed the 0.032" diameter release wire thru and then slipped the loose end under the black plastic.
To release with the lift gate etc closed, from the inside, just pull the loose end free from under the black plastic and gently pull wire about 5mm, (1/4"), and the upper door catch should release. You will have to manually push the upper door out wards to actually effect opening, but you will already be inside the rear cargo area so that part is easy to do.
The assumption is that the lower door latch still works electrically and hence, the lower lift gate half will open as normal by pressing the usual button on the top left of the lower door half.
|
|

Carpet Panel Removed showing Bass Speaker and Dust Shield 1734 viewsSomething is wrong with the orientation, however this shows what you see when the carpet is removed.
The dust shield, (under which the actuator is located), in the picture is as yet uncut. The white bit is the underside of the plastic lower lift gate carpeted cover panel.
The round thing is the woofer speaker for the Harmon Kardon radio. When the radio is working, one can see the speaker moving, but not much bass sound actually seems to emanate from the speaker.
|
|
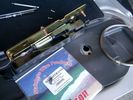
0.032" OD metal fishing leader and lead fishing weight clamped to existing wire rope 2122 viewsI used a size #0 lead fishing weight as a clamp to attach the 0.032" diameter flexible wire rope fishing leader to the release cable.
The pictured weight is the smaller #00 weight, however it did not work very well so reinstalled with the larger #0 size. I clamped to the cable as what breaks is the L retainer that is hidden in the actuator and holds the cable. When the L breaks, it lets go of the cable so you hear the clicking but there is no opening action.
Clamping on to the cable is an attempt to resolve that reality; also if the actuator electrically fails, the release mod should still do the task. Note in the picture the two Torx T15 screws that hold the gold plate to the plastic case and also the two 8mm cap screws that have to be loosened to remove the actuator from inside the door.
|
|
Dust seal cut; note electrical conductors right under dust seal 1628 viewsShows what is underneath when the dust seal is cut. Note the electrical conductors.
I used a box knife to cut the plastic and it was at first easy; then I seemed to hit something and fortunately I stopped - it was the wires - lots of them stuck right to underside of the sticky seal material.
Also shown are the two 8mm nuts in slots that you only have to loosen to release the gold actuator assembly.
|
|

NAS 7 Pin Round Socket + 4 Pin Flat Socket oriented as installed.752 viewsThis is the layout you see when you look into the NAS Land Rover sockets as installed at the rear of the LR3/4. The flat 4 pin socket is located under the round socket.
Wiring order is relative to the slot on the round socket, and hence the same as the other jpg where the slot is shown at the top.
The CJB monitors the front and rear turn signal lamps and can detect if more than four lamps are fitted, (the side turn signal lamps are not monitored). This is another reason for using genuine LR bulbs as off shore bulbs can have varied and out of spec resistance values.
When a trailer is detected, the trailer warning indicator in the instrument cluster is supposed to flash green in synchronization with the turn signal indicators.
If one or more of the turn signal lamps on the vehicle or the trailer are defective, the trailer warning indicator will cease to flash any longer. This is to alert the driver to probably bulb failure.
If the trailer has LED lamps installed, and no LED adapter circuitry is used, most likely the trailer will not be sensed and systems such as the backup sensors will not be disabled.
|
|
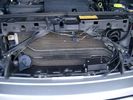
Plastic cover and Box back on in Front of Radiator 638 viewsThe wiring loom is below the cover - nothing is crushed or distorted and all fits back together OK. The black plastic box with the DPDT, (centre OFF), toggle switch is to tie the battery maintainer to each of the two batteries per the Traxide Dual battery install. I can also get power to the power door locks if all fails.
|
|

30 views
|
|

Mirror Shell - plastic rivet head revmoval43 views
|
|

Mirror shell replaced - notice self tapping screws52 viewsMirror shell replaced - notice self tapping screws to replace "plastic rivet heads" and also washers on inner screw to prevent screw piercing mirror housing due to short hole.
|
|
Thread upload23 viewsImage uploaded in new thread
|
|
![Filename=LR3_Radio_Removal[1].pdf
Filesize=190KB
Dimensions=320x240
Date added=04.Feb 2014 LR3_Radio_Removal[1].pdf](images/thumb_pdf.jpg)
Radio Removal from Radio Stack572 viewsThis shows how to remove the radio from the stack. Basically you remove the H surround first and then at least loosen all the Torx 20 screws left and right sides from the top down starting at the narrow unit that the four way flasher/locking buttons are mounted on.
The units kind of interlock, hence some movement of each is required to remove the radio by itself. I find it best to take out the four way flasher/locking buttons assembly first as that allows access to the fibre optic cable connector into the back of the radio head without too much tugging.
|
|

LTB00084 - Technical Bulletin - Glass Roof Panel Blind Difficult to Latch - Repair Procedure138 views
|
|

Thread upload13 viewsImage uploaded in thread 135120
|
|
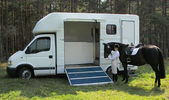
Our last horsebox 'Madge'. Converted by the original body makers near Norwich69 views
|
|
| 551 files on 2 page(s) |
 |
1 |  |
|