| Search results - "Lamp" |

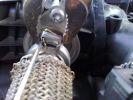
Morsetto - Clamp36 viewsPer la riparazione ho utilizzato un morsetto per fili elettrici.
To repair I used a clamp for electrical wires.
|
|
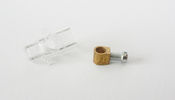
Morsetto - Clamp33 viewsHo smontato il morsetto, il diametro del foro è esattamente quello di quello che rimane del particolare che si è rotto.
I removed the clamp, the hole diameter it's the same of the detail that is broken.
|
|

Morsetto - Clamp42 viewsIl morsetto è della misura esatta della sede dell'attuatore.
The clamp is the same size of the actuator slot.
|
|

Morsetto - Clamp36 views
|
|
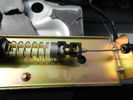
Cavo nel morsetto - Cable in clamp48 viewsHo inserito il terminale rotto nel morsetto: bisogna sforzarlo molto e ho praticato una cava attraverso il foro della vite con una punta in modo che il terminale non possa scivolare.
I entered the terminal broke into the clamp: you have to force it a lot, and I practiced a quarry through the screw hole with a bit so that the terminal can not slip.
|
|
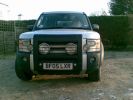
A frame with driving lamps133 views
|
|
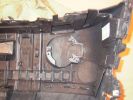
Back of bumper shows pre-fitted fog lamp brackets988 views
|
|
754 views
|
|

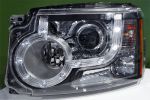
D4 headlamp61 views
|
|

712 views
|
|
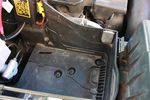
112 viewsDue to the side terminals protruding out the side and affecting the battery clamp, I found the battery will fit better if it could be pushed a few millimeters towards the engine. This lip will have to be removed.
|
|

91 viewsBattery clamp needs to be modified due to the mouldings on the battery top to the side terminals. All that is needed is to cut off the bit as seen.
|
|
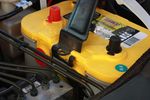
115 viewsModified battery clamp test fitting on battery.
|
|
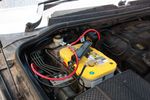
131 viewsBattery clamped down, terminals and cables attached
|
|
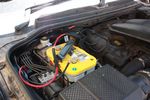
131 viewsAll done. Added some cable sleeving to avoid cables rubbing against battery clamp
|
|
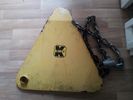
Clamp - outside28 views
|
|
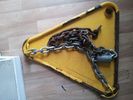
Wheel clamp27 viewsinside
|
|
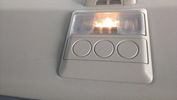
Interior Lamp29 views
|
|

Interior Lamp23 views
|
|
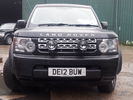
Driving Lamps with home made bracket55 views
|
|
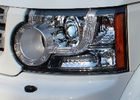
32 views
|
|

30 views
|
|
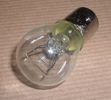
Land Rover Stop Tail Light dual filament bulb nominal 12 volt 21 / 5 watt filaments1427 viewsThis is the Land Rover part number 264590 dual filament bulb, (P21/5), that inserts into the upper two tail lamp receptacles. In the upper one, both filaments function, in the lower one, only the 5 watt tail light filament functions.
I regard it as not a good practice to routinely switch bulbs when the tail light filament, (5 watt), burns out on the lower bulb. The broken filament can jiggle over onto the brake light filament, (21 watt), and short the circuit to ground or something else not predicable.
There are also arguments to say that quality control is better on the Land Rover marketed bulbs than say far east sourced bulbs. Filament construction, and hence resistance can vary and mislead the current sensing circuits monitoring the signal light systems. Also when the bulbs are properly installed, all filaments should be standing vertically and not at any slope.
These are the sort of obscure circumstances that can lead to false trouble messages on the display, dropping to the stops, and subsequent concerns - all over a tail/signal light bulb.
For example, the filament life of both the tail light and the brake light filaments in the P21/5 bulb is significantly less than the USA common 1157 dual filament bulb, (1000/250 vs 5000/1200 hours); brightness in the P21/5 is a bit more, (3cp/35cp vs 3cp/32cp where cp is candle power), but current consumption is oddly less, (0.44a/1.86a vs 0.59a/2.10a where a is amps). It is the quest for efficiency vs maintenance trade off.
|
|
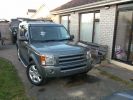
New front bumper with headlamp washers, fogs and PDC complete110 views
|
|

Exterior Lighting (Fog Lamps - Non NAS)13 viewsWiring diagram for non-NAS fog lamps
|
|

Thread upload2 viewsImage uploaded in thread 141879
|
|

Thread upload3 viewsImage uploaded in thread 141879
|
|

11 views
|
|

7 views
|
|
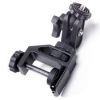
Pedco Ultra Clamp91 views
|
|

Lamp guard broken53 views
|
|

Thread upload6 viewsImage uploaded in new thread
|
|

170 views
|
|

Thread upload24 viewsImage uploaded in new thread
|
|

LR driving lamps mounted on A Bar95 views
|
|
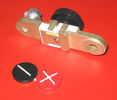
Battery Disconnect side post with + & - caps under view743 viewsThe upper and lower pieces of metal are clamped together but electrically seperate from each other. The connection between the two pieces is via the threaded part attached to the knob. When the knob is turned tight, current will flow between the two sections of metal.
|
|
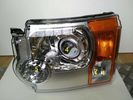
Thread upload3 viewsImage uploaded in new thread
|
|

Thread upload4 viewsImage uploaded in thread 194608
|
|
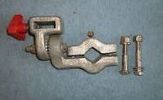
Thread upload6 viewsImage uploaded in thread 114503
|
|
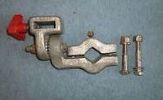
Thread upload8 viewsImage uploaded in thread 114503
|
|
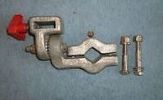
Thread upload7 viewsImage uploaded in new thread
|
|
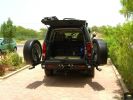
Rear end open330 viewsEccentric latch clamps for wheel carriers are very strong. No rattles on graded roads. Canvas seat covers from \'Escape\' in SA on rear jump seats can be seen, and Front Runner Wolfpack storage boxes - great for toolkit, winch and recovery straps etc.
|
|
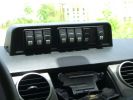
Mud UK switch binnacle453 viewsToo many switches for the roof mounted console, so this binnacle from Mud UK (desigend for the Defender) is an almost perfect match for the leather finished dash in the LR3. Switches, connectors etc bought from them too. From L - R switch functions are:
LH side mounted rack lamps
Driving lamps rack mounted
Spot lamps rack mounted
Bumper mounted driving lamps
RH side mounted rack lamps
Warn winch isolator
Rear mounted rack lamps (reversing)
Telescopic work lamp (fitted behind RH spare wheel)
|
|
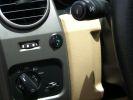
Long Ranger auxilairy fuel tank pump switch and tank gauge308 viewsFitted to the right of the air vent thumbwheel, the neat combination switch and gauge take sup no room at all. Switch locks on or off, but no pump running warning lamp! Contents of the tank are indicated by 5 LEDS, 4 green and 1 red for full, 3/4, 1/2, 1/4 and empty. Pump transfer rate of just 2 litres p/min is disappointing. I transfer on the move when main tank is at 1/4.
|
|
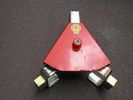
Thread upload22 viewsImage uploaded in new thread
|
|

Cooling system hoses - 4.4L petrol V81110 viewsThese are the cooling system hoses on the 4.4L petrol V8. The little odd shaped bleeder hose, (LR006158), shown in the top right hand corner can give problems. There is a plastic tee with a threaded air bleeder outlet located in the middle of the hose. The plastic tee can or will fail due to I guess heat distress.
A BIC pen can serve as a field fix, however for your parts kit, a nominal 3/8" ID hose size brass hose barb inline connector plus a couple of hose clamps is suggested. Better yet is a threaded hose barb brass coupling or a tee and bleeder valve to allow bleeding of the line. Land Rover now makes the plastic bleeder valve that breaks available as a separate part, # LR027661, where 0 is a zero. As such, one can now purchase that part only for addition to your field fix parts kit.
|
|

istruzioni cambio luce stop204 views
|
|
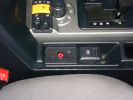
81 views
|
|
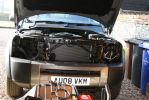
Fitting lamp guards185 views
|
|
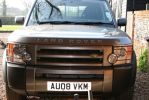
Lamp guards fitted150 views
|
|
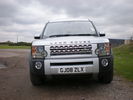
d/4 front grille conversion/ foglamps and chrome bezzells(courtesy of nismo)336 views
|
|
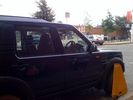
Clamped D365 views
|
|
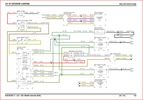
Thread upload19 viewsImage uploaded in thread 162372
|
|

D4 A Bar, driving lamps and lamp guards159 views
|
|
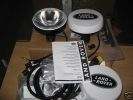
Discovery 4 Driving Lamps Kit - VPLAV0019365 views
|
|
![Filename=D4 lamp guards [1600x1200].JPG
Filesize=328KB
Dimensions=1284x959
Date added=05.Feb 2011 D4 lamp guards [1600x1200].JPG](albums/userpics/13223/thumb_D4%20lamp%20guards%20%5B1600x1200%5D.JPG)
380 views
|
|

D4 with RR Headlamps34 views
|
|
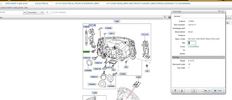
Thread upload24 viewsImage uploaded in thread 118917
|
|

MY14 CJB headlamp connections19 views
|
|
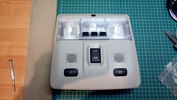
Roof console with mounted switches149 viewsOne switch is for switching the R-750 spot lamps, the other is for additional external lighting using a second Relay kit provided by OEM Plus.
|
|
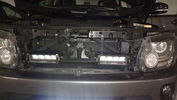
Mounted lamps137 views
|
|
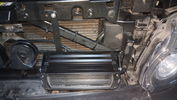
Lamp mounting details129 views
|
|
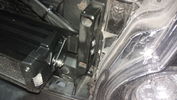
Lamp mounting details136 viewsTwo holes have to be drilled into the frame to fasten the brackets
|
|
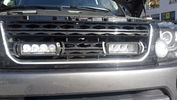
Lamps mounted158 views
|
|

93 views
|
|
67 views
|
|
59 views
|
|

Thread upload18 viewsImage uploaded in thread 147705
|
|
Thread upload10 viewsImage uploaded in new thread
|
|

Thread upload12 viewsImage uploaded in thread 128311
|
|

Driving Lamp Brackets - Fitting66 views
|
|

55 views
|
|
125 views
|
|
clearout driving lights1 views
|
|

Driving Lamps - Fitting75 views
|
|

Thread upload7 viewsImage uploaded in thread 188443
|
|

Thread upload11 viewsImage uploaded in thread 115638
|
|
Spyder LEDs with fog lamps on168 views
|
|
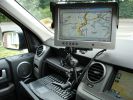
Solo screen mount490 viewsNote that the mounting bracket doubles as a screen mask
Mount is Manfrotto \'super clamp\' & arm
|
|
both lampholders in place298 views
|
|
blanked off lampholder268 viewssorry about the quality!
|
|
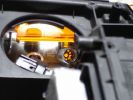
Lampholder with holes, prior to final removal289 views
|
|
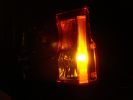
Amber strip light, note hotspot289 viewsShould be better with a 3W lamp
|
|
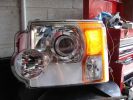
Indicator lamp with low wattage filament illuminated322 views
|
|
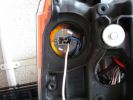
indicator lampholder, white wire connected to unused filament328 views
|
|
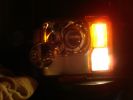
Indicator low power lamp & standard sidelamp illuminated292 views
|
|
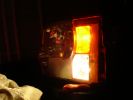
Indicator low power lamp & standard sidelamp illuminated, side view316 views
|
|
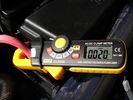
Clamp 20mA21 views
|
|
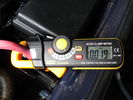
Clamp 19mA28 views
|
|
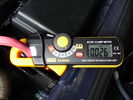
Clamp 26mA31 views
|
|
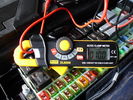
Clamp 10.0A Fuel Pump30 views
|
|
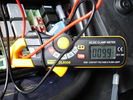
Clamp 9.9A Fuel Pump38 views
|
|
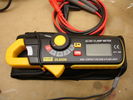
DiLog DL6506 Amp Clamp28 views
|
|
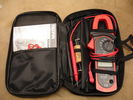
Tecpel DCM-033 DC clamp case and probes29 views
|
|
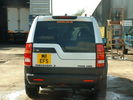
lamp guards45 views
|
|
design with a lamp at night38 views
|
|

design with a lamp at night.35 views
|
|
design with a lamp at night..35 views
|
|
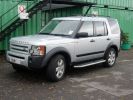
342 viewsSide steps, rubbing strips, lamp guards & roof bars.
Rear windows tinted with darkest \'limo\' tint, side windows with one shade lighter (but still slightly darker than factory option).
|
|
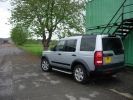
291 viewsSide steps, rubbing strips, lamp guards & roof bars.
Rear windows tinted with darkest limo tint, side windows with one shade lighter (but still slightly darker than factory option).
|
|
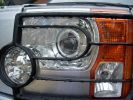
Xenon headlamp190 views
|
|
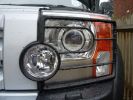
Xenon headlamp197 views
|
|
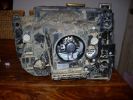
Xenon lamp240 views
|
|
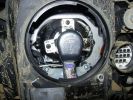
Xenon lamp214 views
|
|
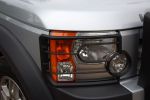
Front lamp guards, look great but offer little protection392 views
|
|

EGR Clamp97 views
|
|
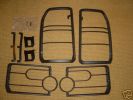
Lamp Guards223 views
|
|

204 views
|
|

Flexible hose clamp plier21 views
|
|

Wiring Diagram Fog Lamps76 viewsR130 is the (R5 relay under the hood) The wire is blue grey that is hot when the high beams are on and opens the relay contact that turns off power to the fog lamps. North America Only
|
|
First showing of Front Lamp Guards on the Discovery 4164 views
|
|
Front Side Lamp Old 501 Bulb370 views
|
|

Official instructions on how to remove the bumper909 viewsWhen removing the front bumper - you start with the front grill, then the headlamps, then the wheelarch trims, then the bumper...
|
|
Front Lamp Guards Fitted205 viewsThe hardest part was extracting the front grill from behind the nudge bar and driving lights!
|
|

69 views
|
|

Official instructions on how to remove the wheel arch trims624 viewsWhen removing the front bumper - you start with the front grill, then the headlamps, then the wheelarch trims...
|
|

H9 lamp socket9 viewsWired directly thru HL Connector
|
|
Thread upload11 viewsImage uploaded in thread 143957
|
|
Thread upload13 viewsImage uploaded in thread 143957
|
|
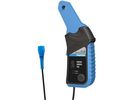
Hantek CC65 Amp Clamp25 views1 mV /10mA = ±(1.5%±5mA) 10mA ~ 20A
1mV/100mA = ±(2%±20mA) 100mA ~ 40A & ±(4%±0.3A) 40A ~ 65A
|
|

High Beams Main Beams Wiring Diagram76 viewsThis is the wire colors and connections for Dipped, Main, and Side Marker lights
|
|
160 views
|
|

Headlamp Adjustment370 views
|
|

RHD Discovery 3 Headlamp Mask120 viewsPrint on A4 paper and its all to size
|
|

331 views
|
|
Thread upload24 viewsImage uploaded in thread 103975
|
|
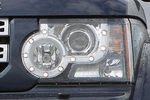
D4 Adaptive Headlamp56 views
|
|

Headlamp62 views
|
|

Thread upload8 viewsImage uploaded in new thread
|
|

Thread upload3 viewsImage uploaded in new thread
|
|

Headlamp Wash27 views
|
|

Thread upload4 viewsImage uploaded in new thread
|
|
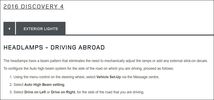
Thread upload4 viewsImage uploaded in thread 204301
|
|
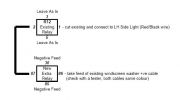
Retro fitted Headlamp Washer Relay Rewiring Circuit Diagram301 views
|
|

Headlamp assembly removal4 views
|
|
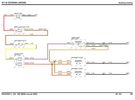
Thread upload15 viewsImage uploaded in thread 133510
|
|

Headlamp Symbol23 views
|
|

26 views
|
|

22 views
|
|

Headlamp condensation fix99 views
|
|
Thread upload15 viewsImage uploaded in thread 127724
|
|

Thread upload12 viewsImage uploaded in thread 127724
|
|

24 views
|
|
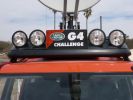
Hella 4000 Compact Xenon Lamps215 views
|
|

high level brake light removal544 views
|
|

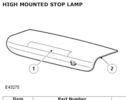
High Mounted Stoplamp Removal.pdf448 views
|
|

Thread upload1 viewsImage uploaded in thread 195748
|
|
Thread upload0 viewsImage uploaded in thread 195748
|
|
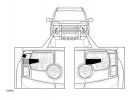
Headlamp Masking Diagram52 views
|
|
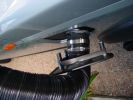
290 views
|
|
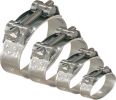
CLAMPS95 views
|
|
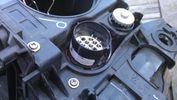
headlamp connector18 views
|
|
Full Fat RR with rack and lamps crossing A4 in Kensington219 views
|
|

Front Lamp Guard Bracket with body protection strips133 views
|
|
Front Lamp Guard Bracket (with body protection( in place)127 views
|
|

Completed headlamp mod90 views
|
|
Headlamp mod108 views
|
|
clamp trim30 views
|
|
PIAA 40 series Driving lights fitted with HID lamps534 views
|
|
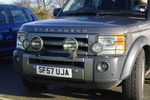
Front driving lamps24 viewsI think they spoil the looks and they are badly corroded inside.
|
|
Looking down at jubilee clamp holding flexible hose to airbox inlet.186 views
|
|
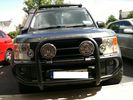
Nudge Bar & Lamps fitted93 views
|
|
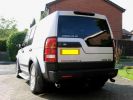
D3 sticker, chrome pipes, lamp gaurds....OMG I am going bling367 views
|
|
Towbar before fiting551 viewsPlace bar in position, clamp, dril holes, bolt up with high tensile bolts
|
|
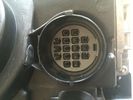
Headlamp unit male pins Xenon B4 cornering light fitting13 views
|
|
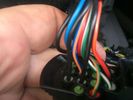
Xenon Headlamp wiring 115 views
|
|
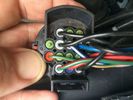
Xenon Headlamp wiring 226 views
|
|
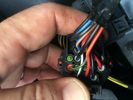
Xenon Headlamp wiring 319 views
|
|

Posizione con lampada 8 LED doppio chip 5000k40 viewsLuce bianca (non azzurra) praticamente identica a quella degli xeno. Illuminazione MOLTO più intensa rispetto al bulbo originale.
|
|

Posizioni con lampada 8 LED doppio chip 5000k43 views
|
|
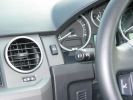
Spot / Driving Lamps Switch383 views
|
|
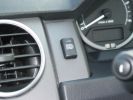
Spot / Driving Lamps Switch440 views
|
|

Front with Winch, A-Bar, Front LIght Guards and Driving Lamps59 views
|
|

Rear Lamp Guard46 views
|
|
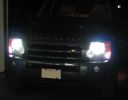
Now the small marker lights have the same bright white/blue color as the headlamps.352 views
|
|

Interstate Battery Dimension sheet641 viewsThis sheet is hard to find - the sheet is not on the Interstate corporate web site but some dealer web sites display it. The pdf shows most of their available batteries including the H7 and H8 sizes that are the LR North America replacement batteries for the main starting battery. These batteries are of the Land Rover desired "shallow" cycle high discharge current Maintenance Free, (Ca Ca), internal construction, (not AGM, but instead, Wet Flooded Lead Acid with battery "caps" and Ca grid separators).
For the AUX battery , the H6, (BCI Group 48), is probably similar in dimensions to the Varta E12V75N that is popular in Australia. For that battery to fit in the second battery compartment, you must grind out the angled nibs on the inside front bottom of the LR black plastic surround, something I did wish to do and hence installed a Group 40R on a spacer. Alternately, one can choose an Interstate BCI Group 47 which is similar to a DIN H5 for the AUX location. I did this when I had to replace my 40R. No vertical spacer is required and the stock battery tie down bolts and clamp work well.
|
|
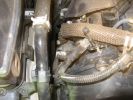
EGR Blanking214 viewsR.H.S PIPE, note the tight space to get your hands in. Loosen pipe clamp below air cleaner for better access.
|
|

Connectors51 views
|
|
Xenon snow155 views
|
|

Headlamp pin-out MY10-13 vs MY14-1733 viewsHeadlamp pin-out MY10-13 vs MY14-17
|
|
68 views
|
|
71 views
|
|

Thread upload13 viewsImage uploaded in thread 141032
|
|
43 views
|
|
63 views
|
|

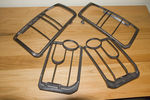
Missing Lampguard Fixings78 viewsI\'m missing these bits from my used lamp guards!
|
|
22 views
|
|
Thread upload27 viewsImage uploaded in thread 116469
|
|

Thread upload12 viewsImage uploaded in thread 154723
|
|

Thread upload11 viewsImage uploaded in thread 169198
|
|

Thread upload1 viewsImage uploaded in thread 193510
|
|
88 views
|
|
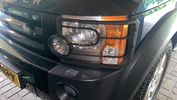
8 viewsLampguards front installed
|
|
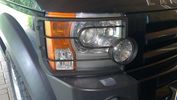
9 viewsLampguars front installed
|
|

Headlamp Plug12 views
|
|

Thread upload14 viewsImage uploaded in thread 122403
|
|
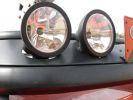
Hella Compact 4000 HID193 views
|
|

20 views
|
|

Thread upload9 viewsImage uploaded in thread 133767
|
|

Thread upload0 viewsImage uploaded in new thread
|
|

Thread upload8 viewsImage uploaded in thread 133767
|
|
70 views
|
|

Thread upload2 viewsImage uploaded in thread 203364
|
|
Thread upload6 viewsImage uploaded in new thread
|
|

Thread upload1 viewsImage uploaded in new thread
|
|
Thread upload3 viewsImage uploaded in new thread
|
|
Thread upload4 viewsImage uploaded in new thread
|
|
Thread upload5 viewsImage uploaded in thread 166460
|
|

Thread upload13 viewsImage uploaded in new thread
|
|
![Filename=ledfog201-osram-led-fog-lamp-kit-[2]-1142858-p[ekm]60x44[ekm].jpg
Filesize=1KB
Dimensions=60x44
Date added=17.Jan 2018 ledfog201-osram-led-fog-lamp-kit-[2]-1142858-p[ekm]60x44[ekm].jpg](albums/userpics/33392/thumb_ledfog201-osram-led-fog-lamp-kit-%5B2%5D-1142858-p%5Bekm%5D60x44%5Bekm%5D.jpg)
Thread upload12 viewsImage uploaded in new thread
|
|
![Filename=ledfog201-osram-led-fog-lamp-kit-[3]-1142858-p[ekm]60x39[ekm].jpg
Filesize=1KB
Dimensions=60x39
Date added=17.Jan 2018 ledfog201-osram-led-fog-lamp-kit-[3]-1142858-p[ekm]60x39[ekm].jpg](albums/userpics/33392/thumb_ledfog201-osram-led-fog-lamp-kit-%5B3%5D-1142858-p%5Bekm%5D60x39%5Bekm%5D.jpg)
Thread upload11 viewsImage uploaded in new thread
|
|
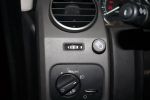
Switch for Hella 4000 Compacts304 viewsDriving lamps are integrated with the high-beams or can be overriden with this switch.
|
|

LR Electric Trailer Brake C2590 Female Connector606 viewsThis female connector, C2590, located up above and near the brake pedal is for the Trailer Electric Brake Controller hookup.
The Black wire in the bottom right is pin #3, the ground. The Blue wire to the left is pin #6, the Trailer Brake Controller output going to the rear trailer socket.
The White #4 wire is the 30 amp fusible link, (Link 6E in the engine compartment junction box), for the Brake Controller 12VDC power feed from the battery. Note that this would make a pretty good power source for CB radios and the like if no electric trailer brakes were required.
Pin #5 is a Green wire from the stop lamp switch, (the control input for the Brake Controller).
This plug is standard on all NAS (LR3) vehicles, but unlikely to be found on the D3 spec units.
|
|
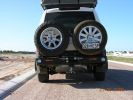
kaymay rear bumper/tire carrier493 viewsthis is on delivery to me.... ;) . it went on easily but i will have it modified to place right wheel more toward middle like disco II. i will only ever use the laft side for jerry can or something, not another tire. i don't like how right tire totally blocks main lamp.
|
|

Rear lamp guard fitting instructions407 views
|
|
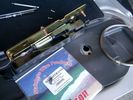
0.032" OD metal fishing leader and lead fishing weight clamped to existing wire rope 2121 viewsI used a size #0 lead fishing weight as a clamp to attach the 0.032" diameter flexible wire rope fishing leader to the release cable.
The pictured weight is the smaller #00 weight, however it did not work very well so reinstalled with the larger #0 size. I clamped to the cable as what breaks is the L retainer that is hidden in the actuator and holds the cable. When the L breaks, it lets go of the cable so you hear the clicking but there is no opening action.
Clamping on to the cable is an attempt to resolve that reality; also if the actuator electrically fails, the release mod should still do the task. Note in the picture the two Torx T15 screws that hold the gold plate to the plastic case and also the two 8mm cap screws that have to be loosened to remove the actuator from inside the door.
|
|

NAS 7 Pin Round Socket + 4 Pin Flat Socket oriented as installed.752 viewsThis is the layout you see when you look into the NAS Land Rover sockets as installed at the rear of the LR3/4. The flat 4 pin socket is located under the round socket.
Wiring order is relative to the slot on the round socket, and hence the same as the other jpg where the slot is shown at the top.
The CJB monitors the front and rear turn signal lamps and can detect if more than four lamps are fitted, (the side turn signal lamps are not monitored). This is another reason for using genuine LR bulbs as off shore bulbs can have varied and out of spec resistance values.
When a trailer is detected, the trailer warning indicator in the instrument cluster is supposed to flash green in synchronization with the turn signal indicators.
If one or more of the turn signal lamps on the vehicle or the trailer are defective, the trailer warning indicator will cease to flash any longer. This is to alert the driver to probably bulb failure.
If the trailer has LED lamps installed, and no LED adapter circuitry is used, most likely the trailer will not be sensed and systems such as the backup sensors will not be disabled.
|
|

lr3-kaymar-closed with 20"405 viewsthe kaymar carrier, designed to allow two tires, sets them both a bit outboard, thus blocking the lamp. that\'s when I realized why they put the fully functional lamps in the bumper (functions: running, brakes, signals, hazard)
I plan to re-weld the locating section more towards the middle of the rear similar to Disco II orrientation.
|
|

Stop Light Lamp Circuit pdf2492 viewsThis pdf shows the brake light circuit for the NAS LR3.
Note that power for the brake light bulbs can come either thru the brake light switch power feed /contacts plus also from the Hill Decent Control, (HDC), system relay located within the Central Junction Box, (CJB) - yes two separate sources of power for the brake light bulbs. This would tend to explain how a brake light circuit concern shows up as a hill decent fault message; also why lesser vehicles without hill decent braking mechanisms, (HDC), never display this sort problem when a brake light bulb or switch acts up. You never have a problem related to a system that does not exist.
Additional evidence of the relationship of the HDC and the tail light circuit is demonstrated by when the HDC actually acts to slow the 3 down, the brake lights automatically illuminate even if the slowing action was merely retarding the engine speed or shifting to a lower gear, (in other words, no foot on the brake pedal).
There is also a tie in to the Cruise Control and hence a failing brake light switch can affect cruise operation or just create false Cruise Control messages. To further complicate the issue, while there are no messages generated, operation of the radiator electro viscous fan can also be negatively affected by the fouled set of secondary contacts within the brake light switch. This is all because the NC contacts within the brake switch send misleading messages to the ECU.
While the ground wire design is similar to other vehicles, note the grounds for the brake light filament and the reverse light filament are common on each side. That means that if one has a non functioning brake light on one side, the reverse light may not also work or that some problem with the reverse lights could back feed into the brake lights. This situation while unusual, can result when grounds are corroded probably due to swimming in rivers and creeks or just routine driving in a marine environment.
|
|

LTB00054 - Technical Bulletin - Headlamp Condensation63 views
|
|
My new Disco, LR side steps,lamp guards & wind deflectors445 views
|
|

Thread upload2 viewsImage uploaded in thread 126682
|
|

Thread upload17 viewsImage uploaded in thread 70979
|
|
Pipe clamp EGR180 views
|
|
Headlight Adjustment32 views
|
|
Spotlamp bracket 1 views
|
|

4 views
|
|
Thread upload6 viewsImage uploaded in thread 185680
|
|

6 views
|
|

Thread upload5 viewsImage uploaded in thread 185680
|
|

8 views
|
|

Thread upload8 viewsImage uploaded in thread 185680
|
|
6 views
|
|
Thread upload6 viewsImage uploaded in thread 185680
|
|

7 views
|
|

Thread upload3 viewsImage uploaded in thread 185680
|
|

Going in to get A bar and driving lamps fitted139 views
|
|
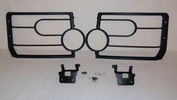
Lamp Guards3 views
|
|
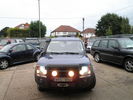
After Work at Challenger 4x418 viewsAdded Hidden Winch Soft bar, Driving Lamps and Raised Air Intake,
Made by Challenger 4x4 in Tongham.
|
|
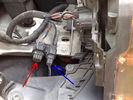
Front PDC Connector106 viewsred pdc
blue lamps
|
|

Headlamp64 views
|
|

18 views
|
|

15 views
|
|

Thread upload6 viewsImage uploaded in thread 161773
|
|
Thread upload5 viewsImage uploaded in new thread
|
|
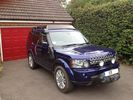
D4 with ProSpeed Rack, RAI, Winch, Auxillary Hella HIDs and Lamp Guards350 views
|
|
Thread upload26 viewsImage uploaded in thread 113434
|
|

Thread upload27 viewsImage uploaded in thread 113434
|
|
Thread upload29 viewsImage uploaded in thread 113434
|
|

clip on light40 viewsthread here
http://www.disco4.com/forum/post817944.html#817944
|
|

Rear Lamp Guards Three Quarter View108 views
|
|

Serious paint marks from rear lamp guards81 views
|
|
Rear Lamp Guards Fitted153 viewsSlightly trickier than the front one
|
|

58 views
|
|

Thread upload2 viewsImage uploaded in new thread
|
|

Rear Lamp Guards Fitting Instructions30 views
|
|
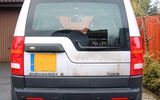
Rev Camera Rear No Plate lamp rear of Vehicle127 views
|
|
33 viewsHess airbagTool headlamp removal
|
|
34 viewsHess airbagTool headlamp removal
|
|
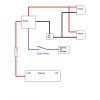
Spot or Driving Lamp Wiring Diagram312 viewsFor wiring non-LR lamps
|
|
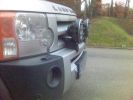
358 views
|
|
354 views
|
|
373 views
|
|

312 views
|
|

284 views
|
|

295 views
|
|

279 views
|
|
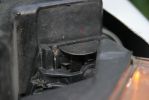
Headlamp fixed361 views
|
|
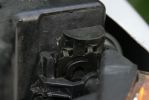
Headlamp Released314 views
|
|

Brakelight Switch26 views
|
|
Thread upload9 viewsImage uploaded in new thread
|
|
Thread upload8 viewsImage uploaded in new thread
|
|

Thread upload22 viewsImage uploaded in thread 185475
|
|

Thread upload25 viewsImage uploaded in thread 185475
|
|

Tecpel DCM-033 DC clamp24 views0.01A to 40.00A or 0.1A to 400A DC
+/-2% +5 counts
|
|

Tekonsha Ford Brake Controller Adapter part number 3035-P275 viewsThis is the adapter cable between the Brake Controller and the existing C2590 female plug located near the brake pedal on NAS spec LR3's. The flat 4 pin plug of the adapter cable connects to the Controller; the rectangular 6 hole male plug to C2590.
There are only four conductors in the adapter cable, but one will see five pins within the Land Rover C2590 plug. The #2 pin is not required for the NAS setup. #2 pin is the circuit between the head lamp switch and vehicle side running lamps required in the civilized world.
The single pin at the bottom in the picture is #3 and on the Land Rover, a Black wire tied to ground. The other pin at the bottom and across to the left is #6, and Blue on the Land Rover. This is the Brake Controller output to the trailer socket at the rear.
#4 is the pin at the top left, and is a White coloured wire from the battery. Pin #5 is from the stop light switch, and is Green on the Land Rover.
Note that the adapter cable colours do not necessarily follow all the above referenced Land Rover colours.
|
|
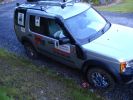
damn clampers are everywhere81 viewsMeehan clan thought clamping the D3 in the event would sufficiently hamper my efforts to bring home some crystal -WRONG
A D3 always brings home some crystal
|
|

The Disco 3 the day I bought it74 viewsSince then here's what's been done
1) New slotted and dimpled EBC rotors and Pads
2) Rover Specialties rock sliders
3) Clear color side markers
4) Front & Rear LR lamp guards
5) Rebuilt both of my Non working Key FOBS by replacing batteries. - I can't believe I didn't even check these when I bought the vehicle.
6) Changed the LR3 emblem to Discovery 3
7) Terrafirma Front Skid Plate
8) Tactical 4x4 Gas Tank Guard
9) ASFIR Rear Diff Guard
10) Here are the things now mounted on Roof Rack
- Full size 18" MTR/Kevlar
- (2) 5 Gallon Jerry Cans mounted in Front Runner holder
- 60" Hi-Lift X-treme Jack
- Shovel
- Magnetic CB Antennae
|
|

D4 Rear Lamp Guards Fitting Instructions46 views
|
|

7 views
|
|

12 views
|
|
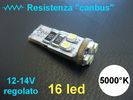
Lampada 8 LED doppio chip 5000k42 views Luce bianca (non azzurra) praticamente identica a quella degli xeno originali. Nessun errore CANBUS.
|
|
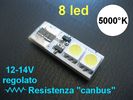
Lampada 2LED doppio chip 5000k46 viewsNella plafoniera del portabagagli rivolta verso il basso fornisce un'illuminazione almeno doppia rispetto al bulbo a incandescenza. Luce bianca (non azzurra).
|
|
45 views
|
|

Thread upload8 viewsImage uploaded in thread 132840
|
|

Spot lamp / driving light DIY install wiring diagram98 views
|
|
109 views
|
|
114 views
|
|
114 views
|
|
140 views
|
|
183 views
|
|
Thread upload12 viewsImage uploaded in new thread
|
|

XQB500080 Driving Lamps14 views
|
|

Glass lifting handle and Manfrotto Super Clamp35 views
|
|
|
|
|
|