| Search results - "Rear" |

Rear Lights D478 viewsD4 Rear Lights
|
|
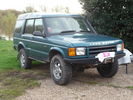
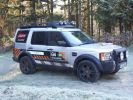
51 viewsD44 front winch bumper. Ali washer bottle. D44 rear h/d bumper. centre diff lock. 235x85x16 pirelli muds. OME +2" springs & shocks. front diff guard. side tree bars. wired for roof CB. Aux fuse block. safari snorkel. extended wading tubes. the list goes on...
|
|

Offroad Training in Linthe, Germany.208 views9 Cars: Suzuki Jimny; Touareg V10 Diesel no difflock; Touareg V6 Diesel rear difflock; Disco 1; Disco 2; Disco 3; RR ´05; RR ´06; Q7.
|
|
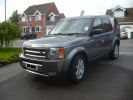
Disco 3 TDV6 GSLE75 viewsLimited Edition. Parking sensors front & rear, Full body skirts with chrome trim fog lights, Twin chrome tail pipes,
|
|
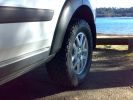
Rear / Standard Links / Standard Height234 views
|
|
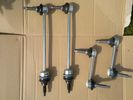
front and rear17 views
|
|
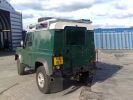
Rear70 views
|
|
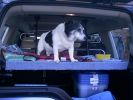
168 viewsthis is Albert 15 years old, showing the virtues of travelling club class, in the rear of a disco 3
|
|
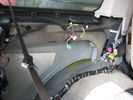
pdc module in rear passenger side44 views
|
|

pdc module in rear passenger side37 views
|
|
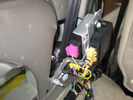
pdc module in rear passenger side38 views
|
|
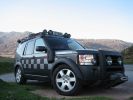
CALENDAR ENTRY 20091191 viewsBonatti grey TDV6 S, ambulance conversion, MTR's, winch, RAI, safety devices roof rack, rear ladder, bash plate, warn lighting, LED lighting throughout.
Owned by me, Rich Bell, Director of Extreme Medical Ltd, providers of medical support to Land Rover events.
|
|

D3 rear 3rd row heater120 views
|
|
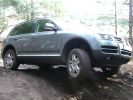
223 viewsThis is the Touareg with the 6cyl engine and rear difflock. did well, useless air-suspension though.
|
|
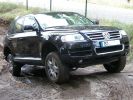
241 viewsThis Toureg is stuck - doesn´t look like it. After 8 hours of driving everyone agreed that with the big 10cyl. diesel engine you should probably oder the rear difflock as well... In this picture the rear left anf front right wheels have no grip, esp or whatever just doesn´t do it.
|
|

complete remote access in position before closing the rear saets129 views
|
|
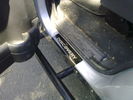
Black chrome - Rear door75 views
|
|
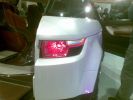
LRX Rear Light Cluster49 views
|
|
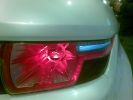
LRX Rear Light Close Up52 views
|
|
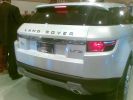
LRX Rear End59 views
|
|

07 Back side of failed tyre340 viewsThis is the back of the blown tyre. It looks like any other worn tyre which has run a bit while flat. Note that we were running on wider 19" RRS wheels (have 4 19" MTRs + 1 old A/T on the original 5 wheels). Also have a rear-mount spare tyre holder which is really convenient with the wider rim and the fact that the tyre was still hot (it had some melted rubber on the other side!!)
|
|
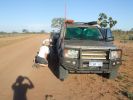
08 D3 stranded with a seized smoking wheel315 viewsAbout 1 hr after replacing the blown tyre, strange noises emanated from the stability control system and speed dropped off. Then I looked in the rear view mirror, and noted a cloud of dust along with a whiff of black smoke. This led to a very quick stop (no traffic on this route for over a week, so no worries about having to signal exiting the road). Took a look and WOW. The right rear wheel was glowing a dull red colour, and burning rubber smoke was wafting from the red glow over the fuel lines.
|
|
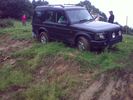
Almost a roll, but not quite...55 viewsI\'d \'launched\' myself at a 6ft hill and got to the top- but at an angle- the offside rear gripped and pulled us around to the right- perilously close to the edge... time for spare undies I think...
|
|
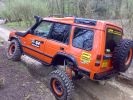
COVER SHOT FOR TOTAL OFF ROAD114 viewsG WAGEN AXELS FITTED WITH HYDRAULIC FRONT + REAR DIFF LOCKS + EXTREAM SUSPENSION SYSTEM FRONT + REAR WARN WINCHES.
|
|
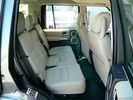
Thread upload8 viewsImage uploaded in new thread
|
|

D3 Brembo Front and Rear Brake Upgrade pg1324 views
|
|
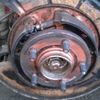
close up view of of rear hub assembly85 views
|
|
Rally Wales 2008 200 views2009 G4 now with black RRS wheels lightforce lights and strobe lights in bumper and rear lights
|
|
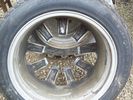
rear view 28 viewsrear view of 20" wheel which "broke" whilst driving
|
|
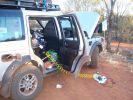
Fuelling up from 200 litre tank replacing rear seat346 views
|
|
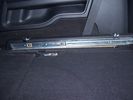
Side runner in position showing front lower than rear.33 views45%
|
|
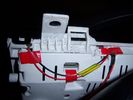
Insrument panel rear 34 viewsShowing wiring for heater and lights on indicator
|
|
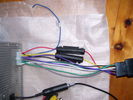
Rear of DD kit72 views
|
|
View From The Rear19 views
|
|
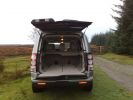
D4 Boot399 viewsRear view doors open
|
|
D4 353 viewsRear seat aircon gone missing
|
|
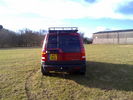
FSrear205 views
|
|

Mercedes E320 Rear Seat20 views
|
|

Thread upload5 viewsImage uploaded in thread 160177
|
|
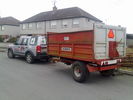
honestly officer....if it was overloaded, it would be sitting on the rear axel ??? heh heh79 viewsfunny how some cops will accept what their eyes tell must be the truth, a trailer load of logs home ....easy peasy, hahahahaha
|
|
52 views
|
|
57 viewsSlight damage to rear window tint, the garage I bought it from "removed" the landrover garage sticker and damaged the tint!
|
|
157 views
|
|

Chassis harness to main harness116 viewsDescription: Chassis harness to main harness
Location: Below LH rear wheelarch
Part No.: YPC909640 Colour: LIGHT GREY Cavities: 18WY
Harness: CHASSIS HARNESS
|
|
48 views
|
|
Suspension dragster mode442 viewsAfter I succesfully changed my wintertyres to summertyres, I found out that the front suspension was on access level and rear at off-road. Situation cleared after I switched engine on.
|
|

Thread upload8 viewsImage uploaded in new thread
|
|
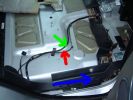
2 ICE Loom - Rear Passenger door65 views
|
|

D3 Brembo Front and Rear Brake Upgrade pg2324 views
|
|

340 views
|
|
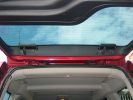
Rear Strobes242 views
|
|
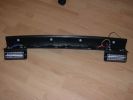
Rear Strobes257 views
|
|
Thread upload33 viewsImage uploaded in new thread
|
|
Thread upload29 viewsImage uploaded in new thread
|
|

Thread upload29 viewsImage uploaded in new thread
|
|
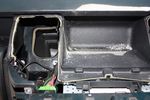
85 viewsDrilling a hole in the rear part of the floor of the dash pocket for the cables to go through
|
|
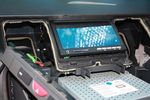
108 viewsTest fitting the screen. The bottom edge of the rear cover of the screen has been already dremeled off in this pic, notable as the circuit board can be seen.
|
|

97 viewsOut at the C pillar. From here wires were threaded through the rear seatbelt anchor point into the commercial box, which is the hub of all the wiring and CarPC installation
|
|
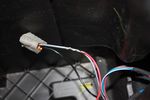
109 viewsThis is the plug for the accessory socket at the rear of the cubby box. On commercial D3 such as this one, there is no accessory socket so this plug is unused. I tapped into the 12V wire as an ignition feed. This will feed a relay coil which opens up power from the aux battery. Like this I can still retro fit and make use of the accessory socket later on.
|
|
80 viewsCarPC closed and ready for mounting. Note the modification to the rear of the case to allow extra USB sockets attached to the motherboard pins.
|
|
rear strobes168 views
|
|
rear strobes118 views
|
|
rear strobes96 views
|
|
rear strobes113 views
|
|
rear strobes99 views
|
|
rear strobes122 views
|
|
anderson connector at rear38 views
|
|
Rear ARB bolts (Near side)46 views
|
|
New rear mud flaps, thanks to Slimer!186 views
|
|

Rear sliding plate guard128 views
|
|

BOOT Rear Audio controls14 viewsBOOT rear audio wires
|
|

BOOT Rear Audio controls16 viewsBOOT audio wires
|
|

B post door plug14 viewsRear door wiring harness plug to B post
|
|

Rear door audio plug 15 viewsRear door audio plug
|
|

Rear left door audio control loom12 viewsRear left door audio control loom
|
|
rear spoiler215 views
|
|
rear duct tape holder19 views
|
|

Rear right door audio wiring loom15 viewsRight Loom
|
|

Rear Screen in headrest 21 viewsscreen fitted after cutting leather
|
|

Rear screens 22 viewsRear screens fitted
|
|

new screens fitted 27 viewsAfter installation
|
|

rear Audio video interface 25 viewsinterface XVO500020
|
|

Opaque switch cover119 viewsKR switch on:off:on used for front and rear spots - but LEDs not visible with coloured switch cover!
(Located in sunroof switch position)
|
|
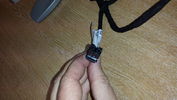
black plug for rear heated seat12 views
|
|
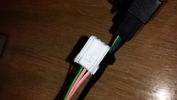
white plug for rear heated seat11 views
|
|
rear camera kaput24 views
|
|

15 viewsRear shelf photos
|
|
![Filename=20140816_223610[1].jpg
Filesize=406KB
Dimensions=2275x1280
Date added=17.Aug 2014 20140816_223610[1].jpg](albums/userpics/25538/thumb_20140816_223610%5B1%5D.jpg)
Rear floor Completed144 views
|
|

Old hub unit rear - Timken17 views
|
|
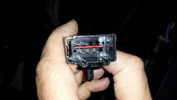
Connector on underseat harness for heated rear seats20 views
|
|
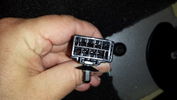
Connector from Main Loom to Heated Rear Seat Harness20 views
|
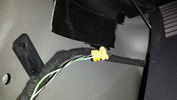
|
Plug behind rear quarter panel trim12 views
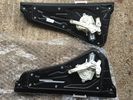
|
|
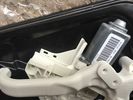
Rear WIndow mechanisms brand new LR0138709 views
|
|
Rear window motor no grey connector11 views
|
|
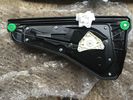
Rear door Window mechanism and motor No grey Plug AAH2227001AA6 views
|
|
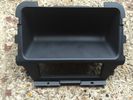
Rear Console trim which i replaced with one with heated rear seats.11 views
|
|
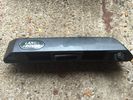
Rear Door handle in Metalic black from 2013-2013 D4 Camera model not same as my 20119 views
|
|
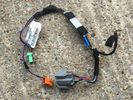
Rear console Loom AH22-14K042-CB - Arm rest for aux audio fridge for fridge14 views
|
|
Rear view camera connection 14 views
|
|

Thread upload4 viewsImage uploaded in thread 166138
|
|

Thread upload16 viewsImage uploaded in thread 148229
|
|
Rear Recovery27 views
|
|
Thread upload4 viewsImage uploaded in thread 163654
|
|
Thread upload15 viewsImage uploaded in thread 135884
|
|
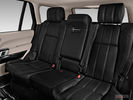
Thread upload5 viewsImage uploaded in thread 198510
|
|

Rear seats3 views
|
|

Rear Seat5 views
|
|
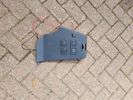
Rear Power Connectors7 views
|
|

Rear heated seat loom and switches4 views
|
|
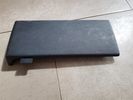
Rear Seat Trim4 views
|
|
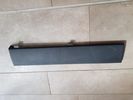
Rear Seat Trim4 views
|
|
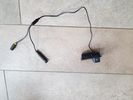
Rear View Camera8 views
|
|

Rear Seat Belts7 views
|
|

Rear Diff drain/fill27 views
|
|
Thread upload18 viewsImage uploaded in thread 172661
|
|
Thread upload3 viewsImage uploaded in thread 199366
|
|
Thread upload6 viewsImage uploaded in thread 199366
|
|

Thread upload4 viewsImage uploaded in thread 194608
|
|
Thread upload2 viewsImage uploaded in thread 194608
|
|

Thread upload4 viewsImage uploaded in thread 199366
|
|

Thread upload1 viewsImage uploaded in thread 199720
|
|

Thread upload9 viewsImage uploaded in thread 209041
|
|

Thread upload12 viewsImage uploaded in thread 209041
|
|
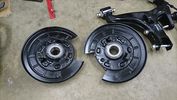
Thread upload7 viewsImage uploaded in thread 187927
|
|

Thread upload4 viewsImage uploaded in thread 198055
|
|
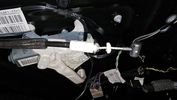
Left rear door3 views
|
|

81 views
|
|

PDC Front and Rear40 views
|
|

C0506R61 viewsDescription: ABS module
Location: Rear of engine compartment - driver side
|
|
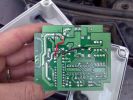
Rear of Superwinch Remote Circuit Board85 views
|
|

265/50x20 rear498 views
|
|
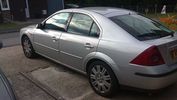
rear23 views
|
|

Rear screen entertainment 17 views
|
|

Rear Shunt Damage38 views
|
|

Rear Shunt Damage46 views
|
|
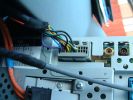
3 Dash Loom Rear of Display56 views
|
|
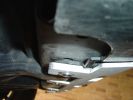
Sandwiched rear tabs (5mm gap from steel crossmember)97 views
|
|

D3 Brembo Front and Rear Brake Upgrade pg3282 views
|
|

Thread upload13 viewsImage uploaded in new thread
|
|
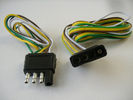
4 pin NAS flat connector from NAS small trailer382 viewsThe connector with the three exposed pins is the end that would commonly be located at the trailer hitch end, (front), of a small NAS lightweight trailer that has no electric brakes. This plug would connect into the flat 4 pin connector at the rear of the 3.
Note the order of the pin functions and wire colours: White is ground; the next pin is for tail/marker lights using the Brown wire; the Yellow conductor is for the left turn signal, and the far pin uses the Green conductor for the right turn signal.
There is no separate brake light conductor as NAS spec vehicles most often combine the brake and signal light functions to the same bulb filament rather separate filaments in different bulbs. The LR factory harness resolves that design difference.
Fortunately, the Land Rover NAS assembly pin order for the 4 pin flat plug maintains the above described conventions.
|
|

D3 Brembo Front and Rear Brake Upgrade pg4328 views
|
|
Brembo rear brakes on D47 views
|
|

Rear Area Climate Control System1161 viewsThis 14 page pdf describes how the rear heating AC system is supposed to operate in conjunction with the front system.
The air transfer ducts are shown as coloured sketches as is the air flow within the rear blower setup.
|
|
Rear ladder with expedition roof and taillight guards58 views
|
|

Thread upload9 viewsImage uploaded in new thread
|
|

D3 Brembo Front and Rear Brake Upgrade pg5259 views
|
|

Running Cable Through Rear - under seats126 views
|
|

Wipers, Front and Rear, plus Washers description and operation.818 viewsThis 17 page pdf describes how the wipers, front and rear, plus the washers are intended to operate. Also described is how the rain sensor is designed to function along with a table of the wiper delay timing parameters.
|
|

501-19 Rear Bumper35 views
|
|

Rear light guards fitting instructions56 views
|
|

Sensor-Height-Rear-LH74 viewsDescription: Sensor-Height-Rear-LH
Location: Below LH rear wheelarch
Part No.: YPC909530 Colour: BLACK Cavities: 3WY
Harness: CHASSIS HARNESS
|
|

Rear Panel Complete97 views
|
|
46 views
|
|

Thread upload12 viewsImage uploaded in new thread
|
|
Rear wiring213 views
|
|

Connector: C2101104 viewsDescription: Rear control valve
Location: Below LH rear wheel arch
Part No.: YPC800230
Colour: BLACK
Cavities: 6WY
|
|
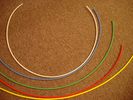
6mm Heat Shrink colours 362 viewsI decided to colour code the tubing so I used 6mm electrical heat shrink.
As there is no apparent colour coding re the 3, I tried to emulate the P38 coding; #1 LR red, #2 RR blue, #3 LF yellow, and #4 RF green. This was not doable as both left side air springs have green coloured tubing coming off the top of the front and rear air springs. I therefore arbitrarily chose the Left Rear to be red; Left Front green; Right Front yellow; Right Rear blue; and for the air compressor supply line, White coloured heat shrink. Since two new lines tie into each air spring line, I made the line between the air spring and the FASKIT, a single solid colour, and the line from the FASKIT to the valve block, White, plus the related appropriate solid colour.
|
|
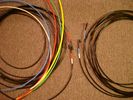
6mm PA12 grade nylon tubing with heat shrink applied 544 viewsShows some of the 6mm air line with heat shrink applied to one end of tubing. Shrink will be applied to the other end once field cut to length. These four tubes, each about 20 ft (6m) long, feed to the rear. Re the front air lines, (not shown), four additional lengths, each about 10 ft (3m) long, are required plus one more 3 metre length for compressor air. The 6mm tubing is a Nylon product specified as PA12. There is also a very similar Transport grade PA11 material, however it seems that PA12 is the more common Transport grade now in use. Also the applicable DIN standard seems to be both DIN 73378 and DIN 74324 for the nylon tubing. The working pressure of the 6mm tubing is about 27 Bar and bursting 82 Bar @ 20C. This is for the 1mm nominal wall thickness material, (4mm ID, 6mm OD).
|
|
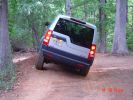
180 views
|
|
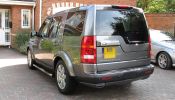
Rear79 views
|
|

D3 and D4 a-arm guards (front & rear)96 views
|
|

Thread upload36 viewsImage uploaded in thread 92518
|
|
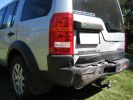
Rear left103 viewsDamage to car after ~60km/h rear end collision
|
|
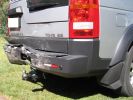
Rear right94 viewsDamage to car after ~60km/h rear end collision
|
|
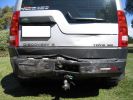
Rear114 viewsDamage to car after ~60km/h rear end collision
|
|

Land Rover Aerial Fin images for both Glass and Metal Roof Disco3 / LR3863 viewsAs well as the two different fins, this pdf also shows the plastic blanking plate for glass roof vehicles where no fin is installed.
The glass roof fin is secured by two security screws from the top into a plastic frangible glue on gasket. The hope is that when struck, the fin will shear off and not crack the glass roof. Re the metal roof design, the fin is secured from underneath via two nuts.
The pdf also shows the various electrical bits related to the antennas. In the UK, the fin would house not only a cell phone antenna but the TV and satellite radio antenna electronics as well; in the States, the Sirius sat radio antenna and a G type cell phone antenna if the phone kit was installed would reside within the fin. The SAT NAV GPS antenna is located within the High Mount Brake Light plastic mounted to the upper rear hatch.
|
|

rear tailgate solution109 views
|
|
rear tailgate solution108 views
|
|
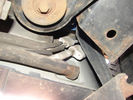
Air Conditioning Pipes (file 2)808 viewsShows location of front-to-rear air con pipes behind NS front wheel. You can just see the Vredestein tyre. The pipe connectors are tucked in behind the wheel arch inner cover. This has to be partially removed for access to bolts holding pipes together.
|
|
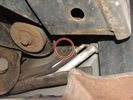
Air Conditioning Pipes188 viewsFront-to-rear aircon HP and LP pipes. The circled bit shows where the bolt securing the support bracket (removed)has sheared off
|
|
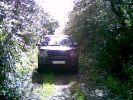
Lunchtime Lane201 viewsNot 200 yards from Manchester Airport can be found a little 1/2 mile lane - did it for the first time today - a few minutes fun in a dreary day
|
|
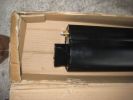
original rear bracket144 views
|
|
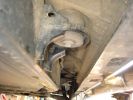
drill 1 hole for rear mounting 145 views
|
|
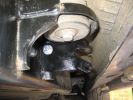
home made bracket for rear mounting147 views
|
|
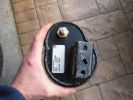
original rear bracket159 views
|
|
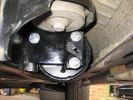
rear bracket fitted 160 views
|
|
tank fitted to rear bracket196 views
|
|
Thread upload14 viewsImage uploaded in new thread
|
|

Thread upload15 viewsImage uploaded in new thread
|
|
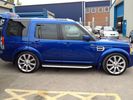
FOR SALE - ONE OFF Land Rover Disco 3 37 viewsOne of a kind Landrover Discovery TDV6 HSE LUX Model 5 door automatic 4x4 diesel evo blue. Upgrades: sidesteps, roof rails, privacy glass, front and rear heated seats/elec seats, landrover tv and headphones, 7 seater black leather, piano black dash/steering wheel, built in fridge, 6 disc changer, sat nav and bluetooth, harman kardon premium entertainment pack, by-xenon adaptive headlights , cruise control and front and rear park distance control, panoramic electric glass roof, 22inch alloy wheels, body kit
|
|
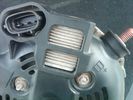
Alternator Plug and B+ terminal918 viewsPictured is the rear of the older Land Rover part # YLE500190 alternator showing the shiny cooling fin of the Regitar VRH2005-142 regulator under.
The first pin in the far left side of the connector is numbered #1 in the LR electrical wiring diagrams and is Battery Voltage Sensing (BVS); the middle pin, #2 receives a Pulse Width Modulated (PWM) signal from the Engine Control Module (ECM), and the right pin, #3 carries a PWM signal back to the ECM. Terminal Pin #2 on the LR wiring diagrams is called Alternator Control or ALT CON; Pin #3 per LR is called Alternator Monitoring or ALT MON.
Pin #1 is similar to what in older designs used to be called A or Batt, but is now called by Denso, S, AS, or Alternator Sensing for this design. Pin #1 also provides power to excite the alternator at startup until the PWM instructions over ride the battery voltage info. Land Rover calls the electronics under the pins a Smart Regulator, ironic, as it has to follow orders from the ECM rather than give the orders - new age thinking I guess. This is different from older design internal regulators that look at just the battery or the electrical buss voltage and then decides itself what to do.
It is almost like we are back to the external regulator designs of old, except that the ECM may decide that instead of telling the alternator to make more power, to load shed, and hence shut down the heated windscreen, seats, or whatever other electrical loads it decides are appropriate. My view is that the "smarts" are in the ECM and that the "regulator" should be regarded if not dumb, then as being a slave to the ECM.
|
|
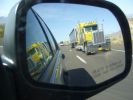
Objects in the rear view mirror are closer than they appear.250 views
|
|
Thread upload0 viewsImage uploaded in new thread
|
|

ARB bush rear special DIY tool25 views
|
|

ARB bushes rear change24 views
|
|
50 views
|
|

67 views
|
|
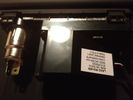
LR Aux Panel (rear)61 viewsBack of LR rear aux input panel
|
|
LR Aux Panel (front)68 viewsLR rear aux panel
|
|
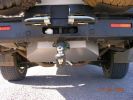
491 views
|
|
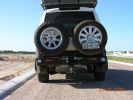
682 views
|
|
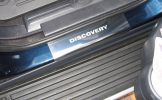
Stainless rear sill covers375 views
|
|

Rear Light416 views
|
|
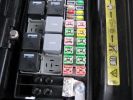
Fuseable link for rear windows 18e (50amp ) bottom right hand red square 143 views
|
|
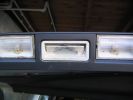
upper tailgate switch without rubber120 views
|
|

151 views
|
|

152 views
|
|

135 views
|
|

132 views
|
|

126 views
|
|
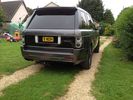
87 views
|
|

Thread upload1 viewsImage uploaded in new thread
|
|

Thread upload0 viewsImage uploaded in new thread
|
|

Thread upload0 viewsImage uploaded in new thread
|
|

Thread upload1 viewsImage uploaded in new thread
|
|
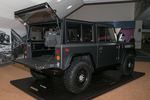
Thread upload7 viewsImage uploaded in thread 180891
|
|
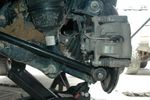
rear suspension bolt201 views
|
|
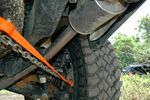
rear suspension bolt229 views
|
|
192 views
|
|
Thread upload34 viewsImage uploaded in thread 77665
|
|

Brake Kit Rear14 views
|
|
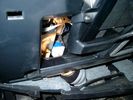
Smooth Talker Amplifier Box mounted below near steering column.179 viewsThe gold look box due to the lighting, (actually black), is the antenna amplifier located near the steering column. It can be put anyway but this seemed an OK location as I ran the antenna connector cable rearward from here to the back corner of the 3 and then up to the underside of the roof glass at the rear. The blue/white thing is the brake light switch that often must be replaced. See the Brake Light Switch file within this Gallery regarding the switch replacement.
|
|
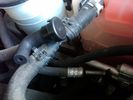
Breather line with factory cap cut off.2319 viewsIf you expand the jpg by clicking on it, in the bottom right corner if you look closely, one can see the black plastic factory vent tubing with the OEM cap cut off.
Note the tubing is cut at a 45 degree angle facing to the rear. Also shown in the top right is the cut off portion sitting on the coolant water hose and on the top left also sitting on the coolant hose, the new to be installed Gore manufactured replacement breather cap.
|
|
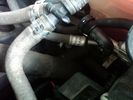
New Breather Cap installed.1709 viewsThis shows the new Gore brand angled breather cap installed. The cap points rearward to the firewall. Also shown is the cut off piece.
The new Gore breather cap is what one now sees on the LR4 and RR Sport.
|
|

Brodit-527662-rear12 views
|
|
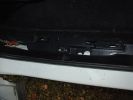
Rear passenger (left) wire harness channel42 views
|
|

Thread upload22 viewsImage uploaded in thread 92518
|
|

Thread upload26 viewsImage uploaded in thread 92518
|
|
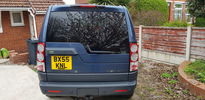
Thread upload12 viewsImage uploaded in thread 126959
|
|

new rear11 views
|
|
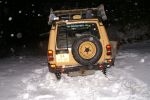
128 views
|
|
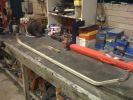
D3 Side Step Repairs156 viewsAluminium trim has been straightend out but need to remove all the old rivets from the rear of the trim.
|
|

475 viewsSide steps, light guards, rubbing strips, roof bars, privacy front and rear
|
|
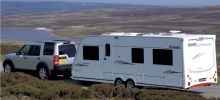
Elddis Crusader Storm256 viewsNot our actual caravan (or car) but very similar! We have a Superstorm which doesn\'t have a fixed bed at the rear like this one does.
|
|
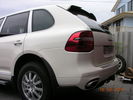
83 views
|
|

Thread upload4 viewsImage uploaded in new thread
|
|

Thread upload12 viewsImage uploaded in new thread
|
|
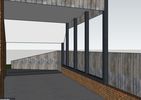
Thread upload4 viewsImage uploaded in thread 203496
|
|
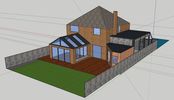
Thread upload6 viewsImage uploaded in thread 203496
|
|
Thread upload4 viewsImage uploaded in thread 207262
|
|

Thread upload1 viewsImage uploaded in new thread
|
|

Mvubu in Botswana 2014119 viewsMvubu 2014 Discovery 4 TDV6 XS, Corris Grey.Snorkel, OL Bull Bar, Winch,OME Heavy Duty Coil Springs,Light Guards,17" Black Wheels,Cooper ST max,Dual Battery+Inverter,Drawer Storage,FR Rear Ladder,Hannibal Roof Rack,80L Excel Long Range Fuel Tank,HiLift Jack Points,75L Water Tank.
|
|
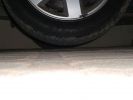
Rear wheel clear by 15mm at 80% inflation170 views
|
|
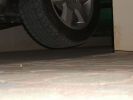
Front wheel off 80% inflation173 views80% inflated and both front and rear wheels are off with suspension in extended mode
|
|
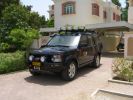
RHS view371 viewsSHows the Front Runner (SA) slimline windcheetah rack which is immensely strong. Takes my 110kg (oh gawd, I must get back on the diet and exercise regime) tramping over it when loading/unloading gear without a problem. Fittings are simply fixed or removed, and IMO very well designed and made. IPF 800 series driving and spots fitted to the front of the rack. IPF cam/reversing fitted each side and to rear of rack for negotiating rocky wadis at night. The G4 stickers were bought off E-bay as a set.
|
|
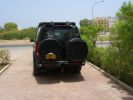
Rear end294 viewsLocally made wheel covers. LH is zipped from bottom to top to fit over registration plate with zip fasteners top and bottom. Rear IPF Reversing /camp lights on rack linked to reverse light circuit.
|
|
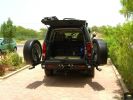
Rear end open330 viewsEccentric latch clamps for wheel carriers are very strong. No rattles on graded roads. Canvas seat covers from \'Escape\' in SA on rear jump seats can be seen, and Front Runner Wolfpack storage boxes - great for toolkit, winch and recovery straps etc.
|
|
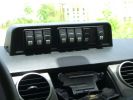
Mud UK switch binnacle453 viewsToo many switches for the roof mounted console, so this binnacle from Mud UK (desigend for the Defender) is an almost perfect match for the leather finished dash in the LR3. Switches, connectors etc bought from them too. From L - R switch functions are:
LH side mounted rack lamps
Driving lamps rack mounted
Spot lamps rack mounted
Bumper mounted driving lamps
RH side mounted rack lamps
Warn winch isolator
Rear mounted rack lamps (reversing)
Telescopic work lamp (fitted behind RH spare wheel)
|
|
Auxiliary power sockets - TracTronics, Australia382 viewsA complete kit including two outlets, wiring etc connected to auxiliary Optima Blue top battery using their very effective SC40 split charge relay. One outlet between rear and front seats, and 2nd alongside loadspace 12v outlet, enables fridge to run when engine is not running, without affecting start capacity or vehicle functions.
|
|
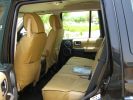
Escape seat covers rear254 viewsJust shwing the good fit of these canvas seat covers made in South Africa. The whole set for a 7 seat HSE £542 with air freight as unaccompanied baggage (inside 5 Front Runner Wolf pack boxes) costing and additional £150 - still a bargain out here!
|
|
LongRanger auxiliary fuel tank358 viewsThe LR fuel tank imported from ARB in Australia with its 115 litre capacity has more than doubled the range of the car. This is important in the desert where fuel consumption increases at times to 10mpg or less. On a cruise on highways, the car now has a range approaching 850 miles. The tank fits neatly, has not affected handling in a detectable way apart from over speed humps, when a little more bounce from the rear suspension is detected! Suspension copes with the additonal loads without any problem.
|
|
176 viewsrear plane
|
|

smoked rear light clusters75 views
|
|

TDV8 to Date249 views2007 (57) TDV8 HSE
Mods:
BAS mapped.. oh yeah..
Colour coordinated lower sills,Java handles, supercharger vents and grill
Hawke smoked repeaters
Halo style HD LED rings in headlights
22" supercharger style diamond cut alloys
2011 LED rear lights
|
|
386 views
|
|
Thomas compressor159 viewsCompressor mounted ontop of the rear wheel arch behind the plastics.
|
|
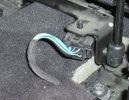
Rear Seat Warm Connector64 views
|
|

Searching The C2084-C004153 views
|
|
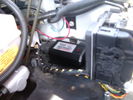
CounterAct Power Supply mounted 246 viewsPicture is blurred, however power supply is 3M two sided tape to the flat black plastic of the second battery compartment just under the antilock brake pipes to the fender side of the brake fluid reservoir. The white wire to the left rear coupler pad runs thru the firewall hole near the steering column. The blue wire to the right front coupler runs across and above the engine following the other wiring looms that cross the vehicle.
|
|

Thread upload2 viewsImage uploaded in thread 198799
|
|

Thread upload1 viewsImage uploaded in new thread
|
|
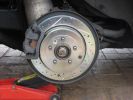
Rear disk 217 views
|
|
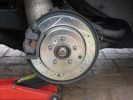
rear disk179 views
|
|
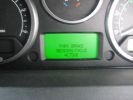
EPB bedding in display 374 views
|
|
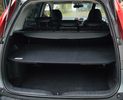
Thread upload12 viewsImage uploaded in new thread
|
|

Thread upload1 viewsImage uploaded in new thread
|
|

Thread upload4 viewsImage uploaded in new thread
|
|

ARB air compressor switch, gauge, outlet.313 views
|
|

inverter and 12v socket263 views
|
|

87 views
|
|
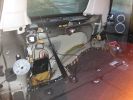
430 views
|
|
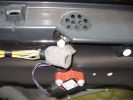
329 views
|
|
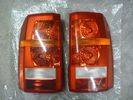
d3 rear lights1 views
|
|

175 views
|
|

d3 rear17 views
|
|

Thread upload6 viewsImage uploaded in thread 139074
|
|

Propshaft Support - Rear view38 views
|
|
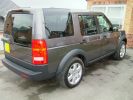
A little TLC and she\'s back to her former glory684 views
|
|
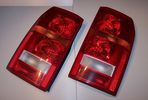
D3 Rear Lights13 views
|
|
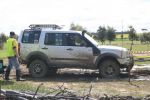
269 viewsBetween stages, minus the rear bumper ...
|
|

84 views
|
|
satnav rear1 views
|
|

D3 Kaymar Rear Bar Fitting Sharing20 views
|
|

Thread upload17 viewsImage uploaded in new thread
|
|

Thread upload18 viewsImage uploaded in thread 101059
|
|
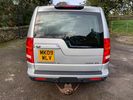
Thread upload1 viewsImage uploaded in new thread
|
|

16 views
|
|

Thread upload12 viewsImage uploaded in new thread
|
|

Thread upload6 viewsImage uploaded in new thread
|
|
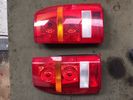
43 views
|
|
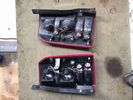
39 views
|
|

Thread upload1 viewsImage uploaded in new thread
|
|

Thread upload3 viewsImage uploaded in new thread
|
|

Thread upload5 viewsImage uploaded in thread 126959
|
|

Big country wheel carrier18 views
|
|
Thread upload4 viewsImage uploaded in new thread
|
|
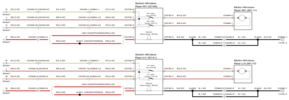
D3_Rear_Window_Wiring19 views
|
|

Seat Base out of car rear view38 views
|
|

Rear Seat Cover retainer - Seat Base43 views
|
|

Rear side clip removal - seat base45 views
|
|

Thread upload27 viewsImage uploaded in new thread
|
|
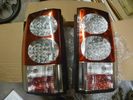
clearout D4 rear lights1 views
|
|

D4 XS Water Ingress205 viewsWater leaking from behind rear view mirror onto dash.
|
|
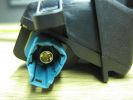
D4 Rear camera connector 142 viewsThis type is used on surround camera system.
|
|
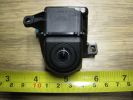
D4 Rear camera front view148 viewsUsed on surround camera system.
|
|
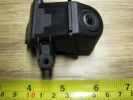
D4 Rear camera side view127 viewsUsed on surround camera system.
|
|
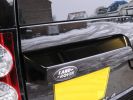
D4 rear handle black badge157 views
|
|

Thread upload14 viewsImage uploaded in new thread
|
|

Thread upload10 viewsImage uploaded in new thread
|
|

Thread upload10 viewsImage uploaded in new thread
|
|
Thread upload25 viewsImage uploaded in thread 123573
|
|
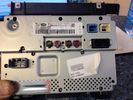
Thread upload5 viewsImage uploaded in thread 120453
|
|
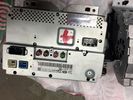
Thread upload19 viewsImage uploaded in thread 123573
|
|
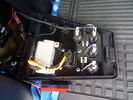
Rear view of panel17 views
|
|

Thread upload18 viewsImage uploaded in thread 147204
|
|

D4_LH_Rear_Light21 views
|
|
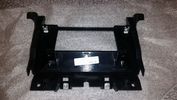
D4 radio surround rear3 views
|
|
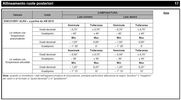
Thread upload6 viewsImage uploaded in thread 178113
|
|
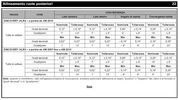
Thread upload6 viewsImage uploaded in thread 178113
|
|
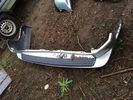
60 views
|
|
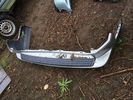
57 views
|
|
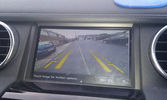
D4 Reverse Camera View37 views
|
|

Discovery 3 and 4 rear ladder110 views
|
|
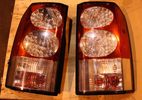
Thread upload11 viewsImage uploaded in new thread
|
|
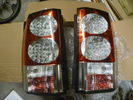
Thread upload1 viewsImage uploaded in new thread
|
|

Thread upload10 viewsImage uploaded in new thread
|
|

Thread upload10 viewsImage uploaded in new thread
|
|
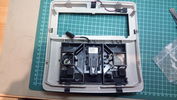
Rear side of finished roof console54 views
|
|
Thread upload24 viewsImage uploaded in thread 110148
|
|

D5 rear seat26 views
|
|
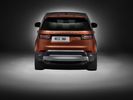
Thread upload12 viewsImage uploaded in thread 160584
|
|
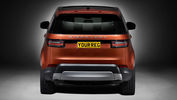
Thread upload16 viewsImage uploaded in thread 159658
|
|
Rear bumper damage274 views
|
|
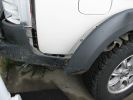
310 viewsBumper and rear quarter dammage
|
|

Defender rear bumper drawing52 viewsLay out for measurements
|
|

Rear diff draining and filling620 views
|
|
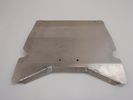
D3 and D4 rear diff guard119 views
|
|

D3 reqar diff lock186 viewsView from right rear tyre well, left rear tire/rim visible on other side. Actuator motor visible
|
|
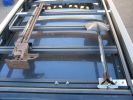
Awning207 viewsThere are many bolt slots in the expo rack, bottom ribs,
side rails on the inside and on top of rear rail.
|
|

Nearside close up shot with boot trim removed252 views
|
|
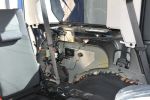
Nearside shot with boot trim removed292 views
|
|
water tank296 viewsRear view.
|
|
Rear lid321 viewsRear storage compartment, under sub frame.
|
|
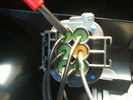
190 viewssignal wire pin 3 on rear of D4 rear light plug fit 6 ohm 50 watt resistor across here and common ground Pin 5 yellow terminal shown in next pic
|
|
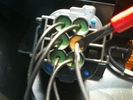
170 viewscommon groung wire pin 5 yellow on rear of d4 light plug
|
|
172 viewsorientation peg on rear of D4 light plug
|
|
199 viewslocating of resistor to rear of D4 led lights and scotch blocks but theres loads of room so the choice is yours
|
|

176 viewssealant used for sticking resistor to rear light and spot fixing the D4 front grill this stuff is superb but needs 24 hrs to cure
|
|
142 views chrome tailgate strip pretty !!!
|
|
54 views
|
|
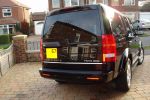
Colour Coded rear bumper139 views
|
|
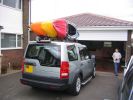
Rear Side (2)344 views
|
|
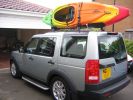
Rear Side View365 views
|
|
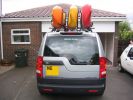
Rear View317 views
|
|
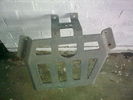
92 viewsASFIR rear diff guard
|
|
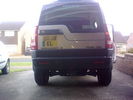
126 viewsasfir rear diff guard and disco3.co.uk sticker ;)
|
|
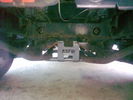
116 viewsasfir rear diff guard
|
|

108 views
|
|

108 views
|
|

124 views
|
|
my car52 views
|
|

104 views
|
|
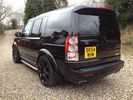
106 views
|
|
Thread upload24 viewsImage uploaded in thread 163428
|
|
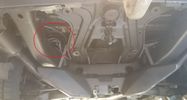
Thread upload6 viewsImage uploaded in new thread
|
|
Thread upload18 viewsImage uploaded in thread 145157
|
|

New D4 Rear Lights114 views
|
|
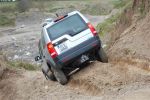
DiscoBlitzen with rear land anchor122 views
|
|
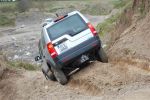
The decent into madness436 viewsDisco on its first day out, the 2nd day I owned it, access to quarry play ground is a little hairy, Ireland Event #8, calendar entry #1
|
|
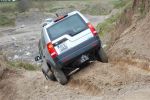
calendar entry 2010314 viewsD3 in longwood quarry, hi-eez available
|
|
Thread upload36 viewsImage uploaded in new thread
|
|
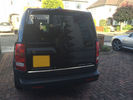
Thread upload25 viewsImage uploaded in new thread
|
|

Thread upload30 viewsImage uploaded in thread 133490
|
|

New D4 Rear Lights107 views
|
|
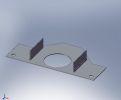
Discovery 3 rear underbody protection111 viewsDiscovery 3 rear underbody protection wich I designed and draw.
|
|
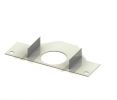
Discovery 3 Underbody protection109 viewsDiscovery 3 rear underbody protection wich I designed and draw.
|
|
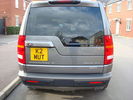
k2mut\'s rear end425 views
|
|
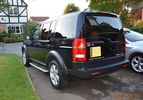
21 views
|
|

Thread upload2 viewsImage uploaded in new thread
|
|

8 views
|
|

Thread upload12 viewsImage uploaded in thread 198619
|
|
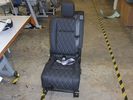
rear seat..72 views
|
|

D4_MY2015_05B_Camera_Equipment_(Rear)30 views05B Camera Equipment (Rear)
|
|

Rear doors all working with new trim and panels removed61 views
|
|

Rear loading with ebay bargin parcel shelf55 views
|
|

Rear loading with panels removed61 views
|
|
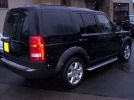
Rear 3/4 shot135 views
|
|
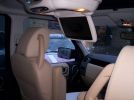
DVD Screen rear155 views
|
|
Other Rear 3/4 view147 views
|
|
Interior from rear148 views
|
|

Thread upload2 viewsImage uploaded in new thread
|
|
93 viewsWiggs's rear end disappearing over the edge.
|
|
Disco 469 viewsRear aircon
|
|

Thread upload71 viewsImage uploaded in thread 175673
|
|

Thread upload77 viewsImage uploaded in thread 175673
|
|
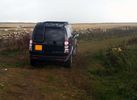
Rear view of Disco with Rack and LR rear ladder241 viewsNear Holland, Stronsay, Northern Isles
|
|
Thread upload5 viewsImage uploaded in thread 144251
|
|

Thread upload67 viewsImage uploaded in thread 171927
|
|

Thread upload2 viewsImage uploaded in thread 209269
|
|
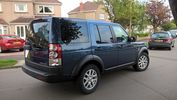
Thread upload71 viewsImage uploaded in thread 171927
|
|

Thread upload4 viewsImage uploaded in new thread
|
|

Thread upload6 viewsImage uploaded in new thread
|
|
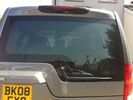
156 viewsVanstyle sunblind rear view
|
|

Thread upload11 viewsImage uploaded in thread 76510
|
|

30 views
|
|
Thread upload0 viewsImage uploaded in new thread
|
|
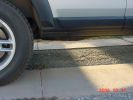
King Springs Lift217 viewsRear underbody Clearance
|
|
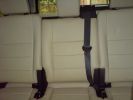
Rear Perforated Seats291 views
|
|
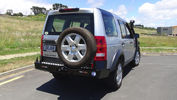
Kaymar Rear Bar123 views
|
|
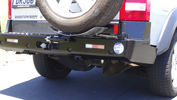
Kaymar Rear Bar139 viewswith Kaymar tyre carrier
|
|
| 1386 files on 4 page(s) |
 |
1 |  |
 |
 |
|