| Search results - "Ring" |

0000 LR Bluetooth dealer Kit install instructions1611 viewsThis 17 page pdf is mostly a series of pictures showing how to install the original Land Rover dealer installed Bluetooth kit for circa 2005 / 2006 three's. Also included are three wiring diagrams sheets related to the pairing code 0000 Bluetooth install.
This pdf is useful if you are now removing the 0000 kit to install the optical 2121 MOST D4 module, an easier install than the 0000 kit ever was.
|
|
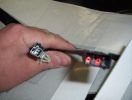
heated seat (base) wiring411 viewsThe Small connector takes the plug from the seat back pad, the larger connector (with red) is fitted into the multiplug casing uder the seat - the male side of this is already pre-wired.
|
|
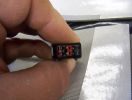
heated seat wiring353 views
|
|
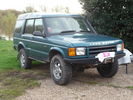
51 viewsD44 front winch bumper. Ali washer bottle. D44 rear h/d bumper. centre diff lock. 235x85x16 pirelli muds. OME +2" springs & shocks. front diff guard. side tree bars. wired for roof CB. Aux fuse block. safari snorkel. extended wading tubes. the list goes on...
|
|
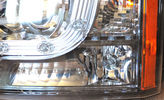
D4 Adaptive Xenon with cornering light89 views
|
|
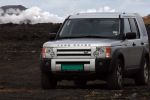
With lava and hot spring at Rekjanes117 views
|
|
394 views
|
|
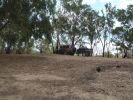
02 Last Photo before the little wheel problem saga222 viewsThis is my D3 with trailer on the banks of the Darling River, literally "back of Bourke" (the regional definition of the start of the Australian Outback). We were the first vehicle in a week to try and drive this route from Bourke to Wilcannia on the account of floods (first water in 7 years). Little did we know that 3 hours later there\'d be a bit of a wheel and tyre problem appearing...
|
|

Removal of the trim around the pedals285 views
|
|
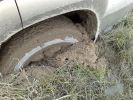
mud almost covering the wheels149 views
|
|
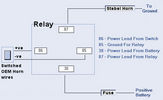
04horn37 views
|
|
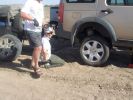
06 Spare tyre on and still suffering from hot wheel nuts296 viewsManaged to get ultra hot wheel nuts back on the spare (using the original 19" D3 wheel, vs the 19" RRS wider wheel which blew - shown in left of photo). Pity we didn\'t note that the disk brake was EXTREMELY hot at this time.
|
|
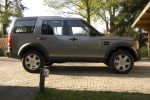
239 viewsoff road stand - hoogste stand van de vering
|
|
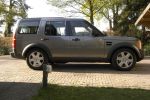
199 viewsacces height - laagste stand van de vering
|
|

Split to bearing to cam shaft retainer22 views
|
|
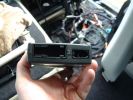
1 Nokia - Connections and loom appearing79 views
|
|
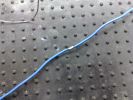
10 Dash Loom42 views
|
|

10 Cracked smoking parking brake drum338 viewsNote the crack in the face of the brake. This showed mangled parking brake springs and other bits. Also a bit of melted rubber was drooling out of the crack. Started to remove the brake caliper and enjoying the flies in 45 deg C heat. Ah, the wonderful Aussie climate in January.
|
|
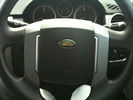
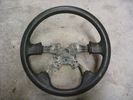
The Before - Standard Steering Wheel73 views
|
|

The Middle - Steering Wheel with Airbag Removed92 views
|
|
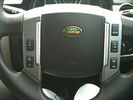
The After - Upgraded Steering Wheel91 views
|
|
new Boots 75 views
|
|
Windich Springs, People not in our group221 views
|
|
Cooking Roast at Pierre Springs225 views
|
|
The roast is ging well, Pierre Springs206 views
|
|
Durba Springs207 views
|
|
Durba Springs203 views
|
|
Durba Springs198 views
|
|

Durba Springs192 views
|
|
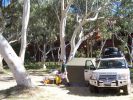
Campsite, Durba Springs222 views
|
|
Sunrise Durba Springs185 views
|
|
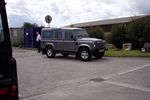
New Defender35 viewsTrade in of old Defender 90 and New Defender 110
Stratstone Pickering - Very friendly, good deal, but....
Same old Stratstone - not complete when collected.
|
|
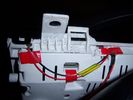
Insrument panel rear 34 viewsShowing wiring for heater and lights on indicator
|
|
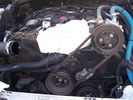
221 viewsRemove the air intake shuttle cut off valve, covering hole with rag
|
|
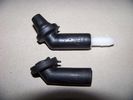
comparing new grommet62 views
|
|
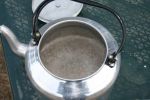
Yup, it was cold!! Water in kettle froze during the night..125 views
|
|
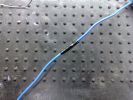
11 Dash Loom40 views
|
|

Llamsrecovery mode installation53 viewsSpring lock inconspicuous
|
|
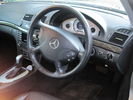
Mercedes E320 Steering Wheel!22 views
|
|

12.3 kg164 viewsKlasierie dam bordering Kruger park.
|
|

12 Half way through removing a jammed disk brake in the Outback297 viewsThis was just before breaking the sledge hammer. Note we luckily carried a spare hammer. Ended up using (or breaking) every tool we had on this little repair job. Bed sheets are a good way of gathering the bits to show for the inevitable warranty claim.
|
|

12S plug from eBay and Ctek lead (provided with MXS-10) - before cutting the ring terminals off.28 views
|
|

Thread upload25 viewsImage uploaded in thread 176268
|
|
Thread upload6 viewsImage uploaded in thread 176361
|
|

Thread upload15 viewsImage uploaded in thread 153386
|
|
Thread upload13 viewsImage uploaded in thread 165627
|
|
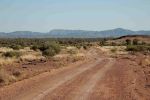
Owen Springs - Towards the West MacDonnell Ranges162 views
|
|

Virgin Snow134 viewsWent for a play in some new snow so I could practice and get my driving style right on close to zero friction surfces. Hard to tell from this photo, but car is parked on a 1:6 slope heading uphill, with hard packed ice under the fresh snow covering. I stopped here to practice my hill starts on ice...I was there for some time :)
|
|
Thread upload16 viewsImage uploaded in thread 184914
|
|
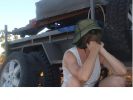
14 "Are we having fun yet?"349 viewsSWMBO is pondering why attempting to drive 3,900 kms across the outback on dirt roads is more fun than, say, spending New Years in Paris......
|
|
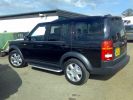
D3 TDV6 HSE101 viewsFirst picturer of my Disco at Mallory Park Race Circiut during a test day for our Racing Bike ;-) I Love It..
|
|

15 First sign of bits of parking brake failure336 viewsNote the complete lack of pad from the parking brake. Not only was there no composite brake material left, but the drum was somewhat twisted and connecting bits all smashed. Also a small drip of melted rubber from wheel bearing parts....
|
|
Cruising North of Alice Springs236 views
|
|
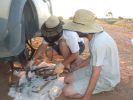
16 All the remains of a D3\'s parking brake373 viewsAfter 4 hours of hammering, finally removed the disk/park brake drum, and nearly all the parking brake bits fell to the ground. Cut rhe remaining brake cable loose as it was wrapped around the hub and a bit melted. Also having 2 jacks + 2 jack stands will support 4 hrs of hammering on the side of my D3.
|
|
Thread upload13 viewsImage uploaded in thread 163764
|
|

10 views
|
|
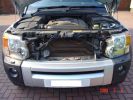
Wondering what to do next.....coffee!!199 views
|
|
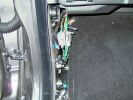
N/S Kickpanel wiring harness for AUX input4291 views
|
|

Local WA newspaper article on D3 Theft168 viewsThe article is info by police public affairs. They wanted something to keep people locking doors and taking care during the holiday period. There are also TV public service announcements on air in WA featuring my wife confessing to leaving 1 door unlocked leading to the theft.
|
|

52 viewsFront suspension rebuilt in 2009 with reconditioned steering rack, new bushes etc..
|
|
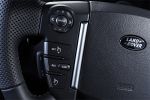
1200 views
|
|

Thread upload3 viewsImage uploaded in thread 154757
|
|

1063 views
|
|
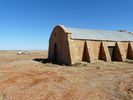
This was Australia's largest Shearing Shed - Cordillo Downs SA26 views
|
|
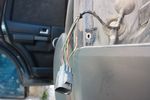
94 viewsReverse wire stripped. I then soldered the wires which I need to this wire and close up with self amalgamating tape. This way I don't damage any original wires (except for the insulation) and it's easily reversible by desoldering
|
|

97 viewsOut at the C pillar. From here wires were threaded through the rear seatbelt anchor point into the commercial box, which is the hub of all the wiring and CarPC installation
|
|
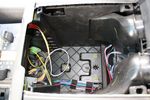
74 viewsStarting the switch wiring
|
|
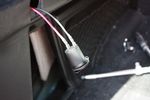
72 viewsWiring for 12V socket attached to socket
|
|
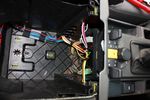
70 viewsAll switch wiring neatly routed to exit hole
|
|
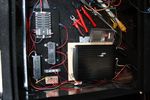
78 viewsElectrical items fitted in place and wiring in progress
|
|
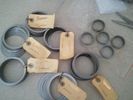
Custom Shim Assortment673 viewsMfd from https://www.facebook.com/DifferentialPartsUS
|
|
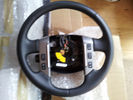
52 viewsHeated Steering Wheel
|
|
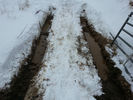
Deep snow covering deep mud15 views
|
|
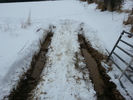
Deep snow covering deep mud15 views
|
|

Audio control wiring loom LEFT17 viewsLeft Door wiring loom for audio controls
|
|

B post door plug14 viewsRear door wiring harness plug to B post
|
|

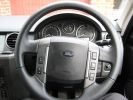
265 viewsSmooth leather steering wheel with cruise and Radio switches
|
|

Rear right door audio wiring loom15 viewsRight Loom
|
|
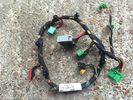
Front Console Wiring Loom AH32-14B079-BC Pic 39 views
|
|
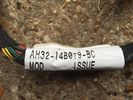
Front Console Wiring Loom AH32-14B079-BC Pic 27 views
|
|
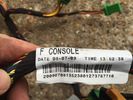
Front Console Wiring Loom AH32-14B079-BC6 views
|
|
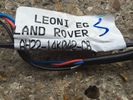
Wiring Loom F Console AH22-14B079-AC Pic36 views
|
|
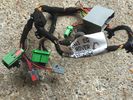
Wiring Loom F Console AH22-14B079-AC Pic211 views
|
|
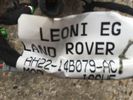
Wiring Loom F Console AH22-14B079-AC7 views
|
|
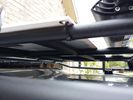
solar panel install356 viewsAt least at this point, I mounted it by using Clear Silicone RTV. This stuff is kind of like glue, but can be removed. If it doesn't hold up after curing and driving, I'll remove it and come up with another plan. I used heavy cable ties on the 4 grommets, in case it lets loose, it won't take out my wiring and the car behind me. 2 Panels are dandy like this, but I don't want to permanently block the roof space. Grape Solar to power my snomaster fridge
|
|
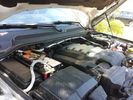
Traxide USI-160 Install515 viewsOverview picture of Traxide USI-160 upgrade install. This was an upgrade from the SC80 which performed flawlessly. The USI-160 had two relays and can deliver more amperage. As a result, the wiring was upgraded to 4/0 Welding Cable (warn) and heat shielding was added. The unit performs flawlessly to support 2 HAM Radios, Fridge, etc. Like me https://www.facebook.com/DifferentialPartsUS
|
|
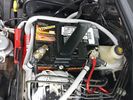
Wiring342 viewsThis is the final wiring configuration. It shows the dual battery wiring, 75A wiring run to the boot, the winch and in the lower right you can see a few turns of coax with a snap on ferrite near the base of a VHF Antenna.
|
|
Sheltering from the weather18 views
|
|
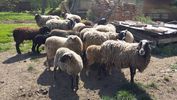
before hair cut11 viewsFlock before shearing
|
|
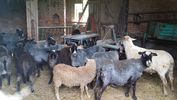
After hair cut6 viewsAdults after Shearing
|
|
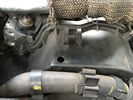
Monitoring hole.4 viewsHole for monitoring the timing belt.
|
|

Brake shoe arm 20 viewsCable retaining spring location
|
|

Brake shoe arm23 viewsCable retaining spring location 2
|
|
![Filename=20200422_141029[6519].jpg
Filesize=130KB
Dimensions=960x1280
Date added=22.Apr 2020 20200422_141029[6519].jpg](albums/userpics/58755/thumb_20200422_141029%5B6519%5D.jpg)
Cornering Light lit up5 viewsAdded H9 65w cornering lights on 4-18-2020
|
|
![Filename=20200422_141048[6517].jpg
Filesize=150KB
Dimensions=960x1280
Date added=22.Apr 2020 20200422_141048[6517].jpg](albums/userpics/58755/thumb_20200422_141048%5B6517%5D.jpg)
Cornering Lights3 viewsAdded H9 cornering lights on 4-4-18-2020
|
|

Thread upload8 viewsImage uploaded in thread 203917
|
|
Thread upload7 viewsImage uploaded in thread 203917
|
|

Thread upload12 viewsImage uploaded in thread 203917
|
|
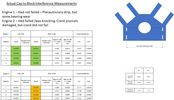
Thread upload8 viewsImage uploaded in thread 203917
|
|

Anti Lock and Traction Control description and operation.1987 viewsNote on page 6 of this 17 page pdf the significance of the Steering Angle sensor mounted on the steering wheel shaft. The paragraph regarding the plausibility check as related to the brake pedal being not depressed is why the clean operation of the second set of contacts on the brake switch matters so much.
|
|

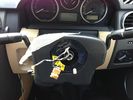
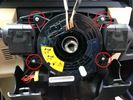
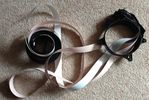
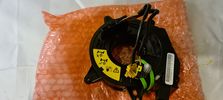
D4MY2012 Clock Spring119 viewsD4MY2012 Clock Spring
|
|

Steering Column detailing Steering Angle Sensor1497 viewsItem 2 in the picture on page 1 of the 9 page pdf shows the location of the steering wheel sensor. Page 5 of the pdf has a paragraph describing the operation of the sensor. When the steering wheel does not point the same direction as the real wheels, then the computers can put the 3 into safe mode and down goes the suspension. See also the 17 page pdf on the Anti Lock and Traction Control pdf.
|
|
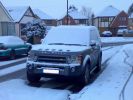
Heated seats, pre-heater, heated screens. Bring it on!264 views
|
|
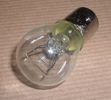
Land Rover Stop Tail Light dual filament bulb nominal 12 volt 21 / 5 watt filaments1427 viewsThis is the Land Rover part number 264590 dual filament bulb, (P21/5), that inserts into the upper two tail lamp receptacles. In the upper one, both filaments function, in the lower one, only the 5 watt tail light filament functions.
I regard it as not a good practice to routinely switch bulbs when the tail light filament, (5 watt), burns out on the lower bulb. The broken filament can jiggle over onto the brake light filament, (21 watt), and short the circuit to ground or something else not predicable.
There are also arguments to say that quality control is better on the Land Rover marketed bulbs than say far east sourced bulbs. Filament construction, and hence resistance can vary and mislead the current sensing circuits monitoring the signal light systems. Also when the bulbs are properly installed, all filaments should be standing vertically and not at any slope.
These are the sort of obscure circumstances that can lead to false trouble messages on the display, dropping to the stops, and subsequent concerns - all over a tail/signal light bulb.
For example, the filament life of both the tail light and the brake light filaments in the P21/5 bulb is significantly less than the USA common 1157 dual filament bulb, (1000/250 vs 5000/1200 hours); brightness in the P21/5 is a bit more, (3cp/35cp vs 3cp/32cp where cp is candle power), but current consumption is oddly less, (0.44a/1.86a vs 0.59a/2.10a where a is amps). It is the quest for efficiency vs maintenance trade off.
|
|

Air con pipe65 viewsIts the brown pipe in the center of the photo. To remove this first you need to remove the "charge air cooler inlet hose" to allow access to the air con pipe securing fixings. But with the "charge air cooler inlet hose" disconnected it can\'t be removed from the veh because the air con pipe is in the way???
|
|

Thread upload21 viewsImage uploaded in thread 142296
|
|
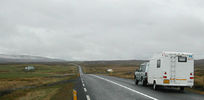
Iceland Ring Road66 views
|
|

9 views
|
|

new spring24 views
|
|

old spring21 views
|
|
Temporary Tailgate Latch149 viewsTailgate jammed shut in Keep River NP (no access due to cargo barrier) 1000 km trip to Darwin dealer. After 3 days opened up and attached string. 2 weeks in Kakadu and Litchfield then back to Darwin when parts arrived
|
|
Thread upload18 viewsImage uploaded in thread 116299
|
|

Air Distribution and Filtering Systems2084 viewsThis is 3 page pdf with coloured drawings of the air distribution ducting for the front air system.
Also included is a sketch of the pollen filter location within the front heater ducting. Note that two types of filters are available: a) the cheaper dust/pollen filter and b), the activated carbon filter that removes smells from the air. Installing the more expensive activated carbon filter means you never smell a cattle truck or chicken farm again. It really works.
|
|

Alternator and Regulator Wiring Diagrams, TDV6 and petrol V8 and V61989 viewsThis is a three page pdf that shows the alternator and regulator wiring for the petrol V6, petrol V8 and TDV6. The pdf can be either printed or by right clicking on the displayed pdf, rotated as required for viewing.
Of interest is that the regulator gets its instructions primarily from the Engine Control Module (ECM) and only secondarily from the vehicles electrical buss. The conductor from the battery thru the 5 amp fuse F20E is to provide initial power to excite the alternator at startup and then secondarily, to instruct it if the PWM signals were not available. Primary instructions to and from the ECM are thru the two other conductors via a digital like Pulse Width Modulated (PWM) signal.
If F20E, the 5 amp engine compartment fuse box fuse is blown, the red alternator light on the dash will be illuminated. This means that the alternator could be OK, but if the F20E fuse is blown, no electricity will be generated. Hence check the F20E fuse if you get a red ALT light or some indication of the alternator not working.
Regarding operation of the red ALT light on the dash, it is not the regulator within the alternator that tells the red light to illuminate, or not, but instead the ECM. This is the reason the red light does not function in the same manner as with older vehicles. With the 3, sometimes you have illumination and sometimes not depending upon what the ECM is thinking. What this means is that you can have an alternator that is failing but the red light does not illuminate as the ECM is compensating for reduced alternator output - maybe by draining the battery and or cutting back on vehicle electrical loads such as shutting off or cycling the radio amplifier or heated seats.
|
|

Entertainment System Wiring Diagrams2331 viewsThe 12 page pdf has the wiring diagrams for the low and high line "radio" and various components such as the amplifier, phone modules,NAV display, antennas and satellite radio and TV.
|
|

Exterior Lighting (Fog Lamps - Non NAS)13 viewsWiring diagram for non-NAS fog lamps
|
|
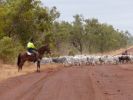
Mustering near Burketown103 views
|
|
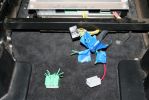
04278 viewsThe green wiring harness is the speaker outputs. Green is + and Green with white stripe is -. We tested all the wires with a 9V battery to figure out which went to what speakers then clearly labeled them as we did.
|
|
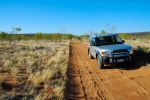
Corrugations on the Owen Springs track219 views
|
|
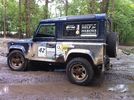
H4H 4x4 European Rally 2012 - Belguim Mud!8 viewsOff roading day during the first week of the rally 2012.
|
|
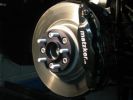
the Matzker wheel spacer - nicely machined. people warn about wheel bearings.375 views
|
|
Thread upload1 viewsImage uploaded in thread 156005
|
|
Rear wiring213 views
|
|

Thread upload27 viewsImage uploaded in thread 117009
|
|
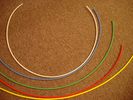
6mm Heat Shrink colours 362 viewsI decided to colour code the tubing so I used 6mm electrical heat shrink.
As there is no apparent colour coding re the 3, I tried to emulate the P38 coding; #1 LR red, #2 RR blue, #3 LF yellow, and #4 RF green. This was not doable as both left side air springs have green coloured tubing coming off the top of the front and rear air springs. I therefore arbitrarily chose the Left Rear to be red; Left Front green; Right Front yellow; Right Rear blue; and for the air compressor supply line, White coloured heat shrink. Since two new lines tie into each air spring line, I made the line between the air spring and the FASKIT, a single solid colour, and the line from the FASKIT to the valve block, White, plus the related appropriate solid colour.
|
|
06257 viewsWires from the wiring harness of the V1000 to hook up.
|
|

7 Steering System14 views7 Steering System
|
|

12.3 kg131 viewsKlasierie dam bordering Kruger park.
|
|
9 Dash Loom43 views
|
|
trailer trash23 views
|
|
AirBag Pins79 viewsNew Wiring at AirBag ECU just need to back out the pins of the old and clip in the new.
|
|
ABS Wiring48 views
|
|

Fin cell phone aerial drawing190 viewsThe factory aerial for the factory NAV / GPS on my 2005 HSE is within the high mounted stop light lens at the top of the upper hatch door. I do not have the factory installed phone kit, and as such, do not have the fin installed; instead there is just a plastic blanking insert to fill the cell phone aerial wiring hole in the metal portion of the roof; hence this requirement for an "external" cell antenna. For those that do have the fin on their glass roof, the fin is screwed on to a glued on plastic gasket, (sort of), and not bolted thru as per the metal roof 3's.
|
|
crappy soldering...98 views
|
|

AFS Retrofit loom info78 viewsinformation about how to build a loom to retrofit AFS
|
|
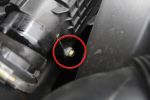
Air Box Lower Securing Bolt1073 viewsThis bolt must be undone in order to remove the air box. It is long and tricky to get out and could be dropped easily.
|
|
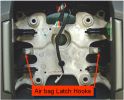
airbag latch hooks342 viewsAirbag retained to steering wheel by 2 latch springs located onto latch hooks of steering wheel
|
|
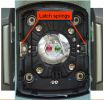
airbag latch springs326 viewsAirbag retained to steering wheel by 2 latch springs located onto latch hooks of steering wheel
|
|
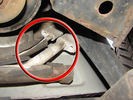
Air Conditioning Pipes (File 1)983 viewsIt\'s the smaller of the 2 pipes that is leaking. Both pipes are encased full length in the foam sleeve. You can see where the support bracket has \'crushed\' the sleeve. The bracket is what holed the small pipe. There is a bracket at each end and one in the middle. You need to remove the suspension reservoir to get to the centre bracket. Be aware that the bolts securing the brackets may be corroded and are likely to shear off on removal!
|
|
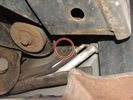
Air Conditioning Pipes188 viewsFront-to-rear aircon HP and LP pipes. The circled bit shows where the bolt securing the support bracket (removed)has sheared off
|
|
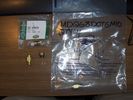
Air parts64 viewsSubstitute airs spring parts - reuseable
|
|
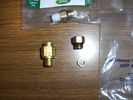
Air Parts57 viewsSubstitue push fit air spring terminators for Disco 3
|
|

Thread upload4 viewsImage uploaded in thread 178588
|
|

Thread upload3 viewsImage uploaded in thread 193523
|
|
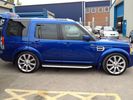
FOR SALE - ONE OFF Land Rover Disco 3 37 viewsOne of a kind Landrover Discovery TDV6 HSE LUX Model 5 door automatic 4x4 diesel evo blue. Upgrades: sidesteps, roof rails, privacy glass, front and rear heated seats/elec seats, landrover tv and headphones, 7 seater black leather, piano black dash/steering wheel, built in fridge, 6 disc changer, sat nav and bluetooth, harman kardon premium entertainment pack, by-xenon adaptive headlights , cruise control and front and rear park distance control, panoramic electric glass roof, 22inch alloy wheels, body kit
|
|

Alternator female plug looking down into top373 viewsThis shows the plug connected to the alternator wiring harness looking down into the top of the plug.
The cavity marked 1 is the AS or BATT SENSE and the wire colour most likely has Brown/Green on it.
The cavity marked 2 is the RC or ALT CON and the wire colour most likely has Red/White on it.
The cavity marked 3 is the L1 or ALT MON and the wire colour likely has Green/White on it.
I say "most likely" as the wire colours are not always the same on all vehicles.
Also the terminal 1 conductor destination is more likely C0570-175 rather than per the jpg.
The #3 pin is located closest to the big B+ terminal.
|
|
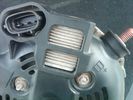
Alternator Plug and B+ terminal919 viewsPictured is the rear of the older Land Rover part # YLE500190 alternator showing the shiny cooling fin of the Regitar VRH2005-142 regulator under.
The first pin in the far left side of the connector is numbered #1 in the LR electrical wiring diagrams and is Battery Voltage Sensing (BVS); the middle pin, #2 receives a Pulse Width Modulated (PWM) signal from the Engine Control Module (ECM), and the right pin, #3 carries a PWM signal back to the ECM. Terminal Pin #2 on the LR wiring diagrams is called Alternator Control or ALT CON; Pin #3 per LR is called Alternator Monitoring or ALT MON.
Pin #1 is similar to what in older designs used to be called A or Batt, but is now called by Denso, S, AS, or Alternator Sensing for this design. Pin #1 also provides power to excite the alternator at startup until the PWM instructions over ride the battery voltage info. Land Rover calls the electronics under the pins a Smart Regulator, ironic, as it has to follow orders from the ECM rather than give the orders - new age thinking I guess. This is different from older design internal regulators that look at just the battery or the electrical buss voltage and then decides itself what to do.
It is almost like we are back to the external regulator designs of old, except that the ECM may decide that instead of telling the alternator to make more power, to load shed, and hence shut down the heated windscreen, seats, or whatever other electrical loads it decides are appropriate. My view is that the "smarts" are in the ECM and that the "regulator" should be regarded if not dumb, then as being a slave to the ECM.
|
|

Amplifier wiring98 viewsChanges for converting High Line to Premium.
|
|
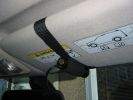
Cam mounted on sun-visor244 viewsI usually place something in between the sun-visor and the roof lining to give the cam a better angle. At Boughrood it was a roll of PVC tape. For Boughrood I also placed a small cardboard box between the cam and the sun-visor to bring the cam away from the dirty section of windscreen.
|
|
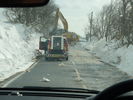
Snow Bank Collapse22 views
|
|

Entering Slindon37 views
|
|

ASC Wiring Diagram31 viewsASC Wiring Diagram
|
|

Riparazione attuatore rotante volante - Steering rotary coupling repairing22 viewsCome riparare l'attuatore rotante del volante quando si accende la spia dell'airbag.
How to repair the steering rotary coupling when airbag warning light turns on.
|
|

Our Trip Apr-Aug 2008135 viewsGosford to: Broken Hill, Innamincka, Birdsville, Alice Springs, Bungle Bungle NP, Broome, Gibb River Rd to Mitchell Falls and then Kunnunurra, Darwin (for tail gate Repair), Normanton (via Roper Bar, Borroloola, Lawn Hill, Burketown), Townsville, down coast to Noosa then inland to home. TRACK TRACE BY TRACKRANGER SOFTWARE ON ASUS UMPC.
|
|
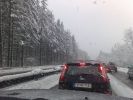
stuck in traffic around Munich during heavy snow164 views
|
|
Aux Input Wiring Harness69 viewsUsed a modified PC CD interface cable to connect to stock female harness. Pins 3(R), 4(L), 5(G)
|
|
301 views
|
|
417 views
|
|
262 views
|
|
263 views
|
|

92 views
|
|

Thread upload13 viewsImage uploaded in thread 138228
|
|
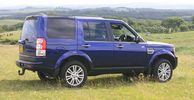
Admiring the view222 viewsLothain 4x4 Response off-road day Bathgate July 2010
|
|
9 views
|
|
9 views
|
|
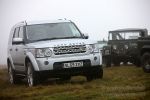
The new with the old694 viewsCALENDAR 2011
The new with the old: a Discovery 4 and a Series 1 during the Scottish Land Rover Owners Club (SLROC) Tyro event at Ballencrieff Farm, Bathgate, Saturday, 5th of December 2009.
|
|

Thread upload2 viewsImage uploaded in thread 201736
|
|

Thread upload12 viewsImage uploaded in thread 163605
|
|
Thread upload13 viewsImage uploaded in thread 140067
|
|
Thread upload16 viewsImage uploaded in thread 140067
|
|
Thread upload0 viewsImage uploaded in thread 201736
|
|

Thread upload2 viewsImage uploaded in thread 201736
|
|

Thread upload4 viewsImage uploaded in thread 194029
|
|

Thread upload5 viewsImage uploaded in thread 209269
|
|

Thread upload4 viewsImage uploaded in thread 209269
|
|

Thread upload5 viewsImage uploaded in thread 194608
|
|

Thread upload13 viewsImage uploaded in thread 189350
|
|

Thread upload15 viewsImage uploaded in thread 163605
|
|

Thread upload14 viewsImage uploaded in thread 163605
|
|
214 views
|
|
201 views
|
|
199 views
|
|
197 views
|
|
185 views
|
|

Bin Cover removed showing forward release clips that clip into the two rectangular slots.10 viewsOne has to pull up on the Bin Cover to unlatch the two metal clips, hence why release of the C pillar cover makes the bin cover removal and reinstall easier.
|
|

Bin cover removed to expose plastic moulding covering buzzer.10 viewsI guess this moulding is helping to retain the bin cover when in place rather than to "protect" the buzzer but that is also what it seems to do. In any case, unscrew the two large screws and lift moulding off exposing the buzzer.
|
|
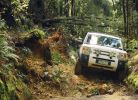
Climbing the rock fall - Bird River Track - West Coast Tasmania932 viewsCalendar 2008 Entry - clearing a path over a rock fall for other Club 4wds.
|
|
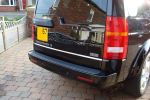
TDV6 lettering removed, LR Supercharged Badge fitted135 views
|
|
142 views
|
|
G4 with trailer124 viewsTaken with digital SLR - slow shutter, narrow ap. zoom during exposure - so I\'m told - great effect just don\'t look at it for too long!
|
|
Thread upload4 viewsImage uploaded in thread 110148
|
|
A short stop before entering Finland. October 201029 views
|
|
Thread upload5 viewsImage uploaded in thread 183786
|
|
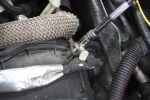
EGR Pipe Bracket 892 viewsRemoving EGR pipe bracket securing bolt
|
|

44 views
|
|

35 views
|
|

34 views
|
|

40 views
|
|

28 views
|
|

30 views
|
|

Brakes Description and Operation2231 viewsThis is a 17 page pdf that describes the operation of the various braking systems: the ABS, CBC, DSC, EBD, ETC, EBA, EDC, and HDC. Also discussed is the yaw rate and lateral acceleration sensor as well as the steering angle sensor.
|
|
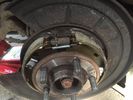
Thread upload8 viewsImage uploaded in thread 147264
|
|
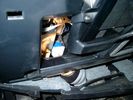
Brake Switch Visible thru Opening4975 viewsThe blue and white bit is the switch; the sort of gold appearing box,(it is really black), you will not see in your 3 as it is a Smooth Talker brand amplifier for my Blackberry phone antenna. This install is detailed in the SmoothTalker phone antenna section of my gallery.
One way to remove and install the switch is to lower the "horizontal" panel above the brake pedal as shown where the flashlight head is located. To actually remove the switch, you slide your hand thru the gap and rotate the switch clockwise 1/4 turn while watching thru the rectangular opening. Installation of the new switch is the reverse of above - 1/4 turn counterclockwise.
Before you remove the switch, note its orientation - horizontal with electrical wires to the left. That is the way it should look after replacement as well.
The second time I replaced the switch, I did it all thru the rectangular opening and did not remove the horizontal panel - that is experience helping out.
The knee kick you have to remove regardless. It is sort of hinged at the bottom so you just pull at the top and sort of rotate the knee panel and then pull upwards for two plastic "fingers" to clear the slots they reside in.
|
|
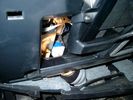
Smooth Talker Amplifier Box mounted below near steering column.179 viewsThe gold look box due to the lighting, (actually black), is the antenna amplifier located near the steering column. It can be put anyway but this seemed an OK location as I ran the antenna connector cable rearward from here to the back corner of the 3 and then up to the underside of the roof glass at the rear. The blue/white thing is the brake light switch that often must be replaced. See the Brake Light Switch file within this Gallery regarding the switch replacement.
|
|

6 views
|
|

Nice looking piece of engineering 55 views
|
|
snapped cap bottom right21 views
|
|

BROKEN DETENT11 views
|
|
Thread upload11 viewsImage uploaded in thread 150480
|
|

Bulb string37 views
|
|
Burnt Bit97 viewsThis bit of wiring going to the connector was so close to bulkhead it got a bit burnt, Its for the clutch switch on a manual used for EPB, It will be replaced connector to pin with the wiring shown.
|
|

camel stearing wheel104 views
|
|
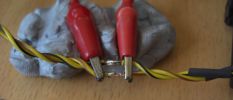
Can Pair Repair84 viewsThis is the high speed CAN bus Pair. By over twisting and keeping the repair short i will maintain the very important twist. Good soldering is a must it looks ropey in this shot but it is not, note the heat shrink pre placed on the wires to the right.
|
|

Thread upload10 viewsImage uploaded in thread 54001
|
|

Can Bus with splice locations2 views
|
|
10 views
|
|
2 views
|
|
3 views
|
|
6 views
|
|

74 viewsMS excel sheet for monthly mileage report will give average fuel consumption.(most cells have formulas to help fill in from previous line)
on first sheet add details you want on monthly sheets. during use the data needed to be added is ending reading on clock, places visited (if you want).
how much fuel when you purchased it also fuel in tank at start and end of month
|
|

6 views
|
|

506 views
|
|
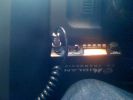
210 viewsCB location under steering wheel to left.
|
|

Thread upload5 viewsImage uploaded in thread 189445
|
|

Mvubu in Botswana 2014119 viewsMvubu 2014 Discovery 4 TDV6 XS, Corris Grey.Snorkel, OL Bull Bar, Winch,OME Heavy Duty Coil Springs,Light Guards,17" Black Wheels,Cooper ST max,Dual Battery+Inverter,Drawer Storage,FR Rear Ladder,Hannibal Roof Rack,80L Excel Long Range Fuel Tank,HiLift Jack Points,75L Water Tank.
|
|
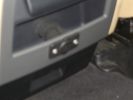
I placed the mic for the hand free at the steering colum - easy install and seems to work fine139 views
|
|
Auxiliary power sockets - TracTronics, Australia383 viewsA complete kit including two outlets, wiring etc connected to auxiliary Optima Blue top battery using their very effective SC40 split charge relay. One outlet between rear and front seats, and 2nd alongside loadspace 12v outlet, enables fridge to run when engine is not running, without affecting start capacity or vehicle functions.
|
|
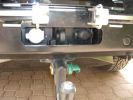
LR towing electrics pack 12N/12S313 viewsThe LR trailer electrics fitted before the Kaymar bumper and spare wheel carriers required no modifications are perfectly accessible. Good strong recovery point between the sockets too. The swing awau wheel carrier securing latches can be seen quite clearly here. Long Ranger tank (painted black) nestles where orignal spare was fitted.
|
|

nice quiet spot to sleep204 views3 week spring road trip from NC to Colorado.
|
|
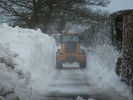
Clearing a path to the trapped tractor29 views
|
|

HVAC Climate Control Wiring Diagram 62 views
|
|
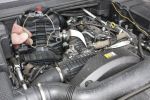
Remove Clip951 viewsRemoving the air box/EGR butterfly housing securing clip
|
|
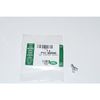
Clip Spring Metal FYC 500040 that holds LR together1748 viewsThe jpg is of the spring metal clip, Land Rover part number FYC 500040 that holds most of our 3 together - well at least most the interior trim parts.
If you are going to remove interior panels, you may as well stock up on a few for replacement as upon panel removal, the clips tend to spring away into deep never to be found voids within your 3.
|
|

Thread upload43 viewsImage uploaded in thread 164028
|
|
334 views
|
|
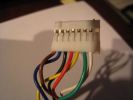
Clock Spring / Rotary Coupler Connector from horn controls209 views
|
|
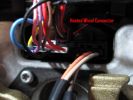
385 views
|
|

Thread upload2 viewsImage uploaded in thread 179494
|
|

Thread upload1 viewsImage uploaded in thread 209420
|
|
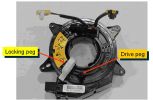
313 views
|
|

64 views
|
|

31 views
|
|
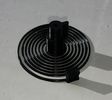
3D Printed Clock Spring27 views
|
|

7 views
|
|

35 views
|
|
32 views
|
|
30 views
|
|
42 views
|
|
Thread upload2 viewsImage uploaded in new thread
|
|

15 views
|
|

Thread upload6 viewsImage uploaded in thread 202536
|
|

Thread upload8 viewsImage uploaded in thread 202536
|
|

Thread upload4 viewsImage uploaded in thread 202536
|
|
Thread upload11 viewsImage uploaded in thread 202536
|
|
Thread upload6 viewsImage uploaded in thread 202536
|
|

Thread upload6 viewsImage uploaded in thread 202536
|
|

TDV8 to Date249 views2007 (57) TDV8 HSE
Mods:
BAS mapped.. oh yeah..
Colour coordinated lower sills,Java handles, supercharger vents and grill
Hawke smoked repeaters
Halo style HD LED rings in headlights
22" supercharger style diamond cut alloys
2011 LED rear lights
|
|
69 views
|
|
81 views
|
|
67 views
|
|
75 views
|
|

Thread upload39 viewsImage uploaded in new thread
|
|
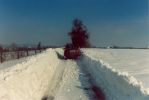
the road between home and work292 viewsthe day before returning from work, I got stuck here in the middle of the snow storm. The plow didn\'t pass yet and wind was blowing snow everywere. Since then I always carry during winter a survival pack consisting of warm coat,cap, warm, high boots and gloves.
It is no fun recovering a car stuck in the snow and sliding down from the road when moving in nothing more than a business outfit (no gloves, city shoes, no coat) with a snowy wind blowing 100km/h..... .
|
|
115 views
|
|
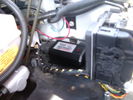
CounterAct Power Supply mounted 247 viewsPicture is blurred, however power supply is 3M two sided tape to the flat black plastic of the second battery compartment just under the antilock brake pipes to the fender side of the brake fluid reservoir. The white wire to the left rear coupler pad runs thru the firewall hole near the steering column. The blue wire to the right front coupler runs across and above the engine following the other wiring looms that cross the vehicle.
|
|
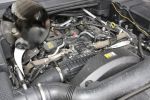
Engine Cover Removed901 viewsView of the engine before blanking off the EGRs. The inset sort of shows one of the EGR valve/pipe flange securing bolts. The EGR valves are not easy to get at!
|
|
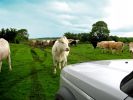
Cows553 viewsCALENDAR 2008 ENTRY
Taken during the navigation challenege at Rockingham 2007, when the crowd were lost in a farmers field!
By CY.
|
|
ruining someones day15 views
|
|

Thread upload9 viewsImage uploaded in thread 47890
|
|

Main Bearing Journal Clearance10 views
|
|
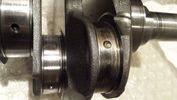
Thread upload9 viewsImage uploaded in new thread
|
|
Thread upload23 viewsImage uploaded in thread 104711
|
|

Thread upload15 viewsImage uploaded in new thread
|
|

Thread upload9 viewsImage uploaded in thread 141580
|
|
Thread upload12 viewsImage uploaded in thread 141580
|
|
Thread upload7 viewsImage uploaded in new thread
|
|
Thread upload16 viewsImage uploaded in thread 134286
|
|
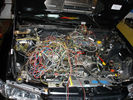
Thread upload21 viewsImage uploaded in thread 169498
|
|
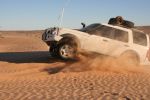
Powering over a dune on the Rig Road299 views
|
|
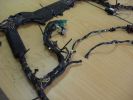
Drivers seat wiring Cut151 viewsSpare connector from my second hand seats shows where wiring to seat gets cut presumably by emergency services.
|
|
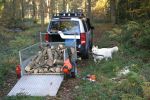
D3 at work, also showing my helper bringing me logs to cut420 views
|
|
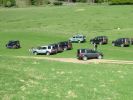
Is there a collective noun for a gathering of D3s295 views
|
|
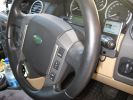
Steering wheel audio controls and iPod dock120 viewsFollowing the instructions I found on Disco3.com.uk it was a breeze the fit the steering wheel audio controls. The iPod dock was a bit more fiddly (took me several hours). Works a treat!
|
|

Steering wheel audio controls and iPod dock103 viewsFitted an iPod dock and steering wheel audio controls. Got then both from Nick at Yeoval Landrover in the UK at a fraction of the price that the Aussie dealer wanted.
|
|
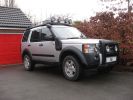
King Spring Lifted D3 Coiler397 views
|
|
200 views
|
|
179 views
|
|
clearout d3 wheel0 views
|
|
D3Matt scaring the sh*t out of himself131 views
|
|
Thread upload0 viewsImage uploaded in thread 201952
|
|
Thread upload1 viewsImage uploaded in thread 201952
|
|
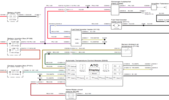
D3_FBH_Wiring24 views
|
|
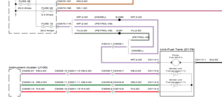
D3 Fuel Pump Wiring22 views
|
|
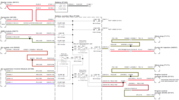
D3_Glow_Plug_Wiring_119 views
|
|
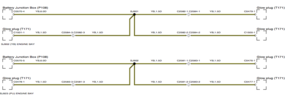
D3_Glow_Plug_Wiring_216 views
|
|
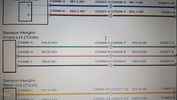
Thread upload19 viewsImage uploaded in thread 184914
|
|

D3 Kaymar Rear Bar Fitting Sharing20 views
|
|
Thread upload6 viewsImage uploaded in new thread
|
|
251 views
|
|
D3_Rear_Window_Wiring19 views
|
|
Thread upload23 viewsImage uploaded in thread 123695
|
|

Hog Rings and Hog Ring Pliers47 viewsHog Rings and Hog Ring Pliers showing an open and closed hog ring with 20p for scale
|
|

Seat Base cover partially removed - just hog rings to go45 views
|
|

Heated Seat Element Wiring - Seat Base48 views
|
|

Seat Base Cover - hog ring attachment points46 views
|
|

Hog ring pliers load with hog ring50 views
|
|

Attaching one of the hog rings43 views
|
|

Thread upload11 viewsImage uploaded in new thread
|
|

Thread upload12 viewsImage uploaded in new thread
|
|
Thread upload19 viewsImage uploaded in thread 162372
|
|
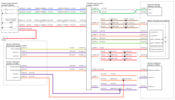
D3_TCCM_Wiring17 views
|
|

Thread upload10 viewsImage uploaded in thread 192004
|
|

Thread upload6 viewsImage uploaded in thread 206343
|
|

Thread upload5 viewsImage uploaded in thread 206743
|
|

Thread upload7 viewsImage uploaded in thread 206812
|
|

Thread upload3 viewsImage uploaded in thread 170152
|
|

Thread upload21 viewsImage uploaded in thread 142490
|
|

Thread upload19 viewsImage uploaded in thread 150396
|
|

216 views
|
|
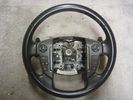
clearout D4 steering wheel1 views
|
|
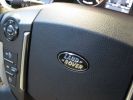
Steering wheel black badge148 views
|
|

d44 steering guard131 views
|
|

45 views
|
|
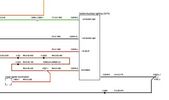
D4 Aux Lights Switch Wiring Diag80 views
|
|
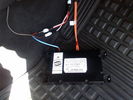
D4 Bluetooth AH42 10F845 AA module connected to 12VDC and MOST1210 viewsThis jpg shows the MOST bus connected to the AH42 10F845 AA module used in the D4 as well as +12VDC power from F58P connected. The power is split with a Y harness as the IHU (radio) for some reason required +12VDC power to the C2115-10 "mute" pin to keep the radio/CD audio from muting all the time.
With power on the pin, the radio audio does mute as it should when the cell phone rings and the hands free connects. The brown conductor feeds to C2115-10 and the blue to the module.
The module tucks up and hides behind the grey plastic section covering the forward portion of the passenger side tranny hump for left hand drive vehicles; for RHD, it would be located on the left side.
The pairing code is 2121 with this setup and not 1234 or 0000.
|
|
D4_clockspring_1.png23 views
|
|
D4_clockspring_2.png23 views
|
|

D4_FBH_Wiring19 views
|
|

D4 Fuel Temp Wiring17 views
|
|
D4_Glow_Plug_Wiring16 views
|
|

Thread upload62 viewsImage uploaded in thread 120453
|
|

8 views
|
|

Thread upload10 viewsImage uploaded in new thread
|
|
Thread upload2 viewsImage uploaded in new thread
|
|

71 views
|
|

51 views
|
|

30 views
|
|

Hardware location of wiring audio information and entertainment system2214 viewsHardware location of wiring audio information and entertainment system2
|
|

Air Distribution and Filtering6 views
|
|

419-08 Low and High line radio systems components and operation838 viewsThis 15 page pdf displays the radio components including pinouts for both the low and high line head units and the two Harman Kardon amplifiers including the Logic 7 amp. The steering wheel controls for both the radio and phone system are also outlined along with mention of the Sirius satellite radio feature.
|
|

Map-Liwa Tal Magreb, on the edge of the empty quarter, highest duune in the UAE. 27 viewsStaring point and bivouac for the Abu Dhabi Desert Race
|
|

DETENT SPRING AND HOUSING12 views
|
|

Dimensions - Coil spring suspension vehicles64 views
|
|
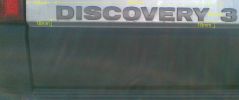
Spacing of Discovery 3 lettering99 views
|
|
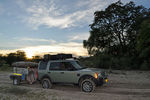
CALENDAR 201146 viewsThis photo was taken near Guma Lagoon camp in December 2009 while touring Botswana
|
|
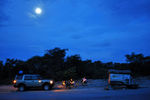
CALENDAR 2011402 viewsIn December 2009 we toured Botswana – first tour with the Disco, I had a yellow Defender previously. I rented a trailer, and the wheel bearing seized 1300km into the trip. This photo was taken while we waited for my friend to bring us a “fixed†hub. The elephant crossed the road less than 300 meters from us. Photo was taken 90Km from Nata
|
|
65 viewsoriginal lettering hidden behind the bar
|
|

Main secondary gear repair bush492 viewsPDF file of engineering drawing of bush turned up to repair the main secondary gear in the EPB gearbox.
Old gear has to be drilled out accurately to the external diameter of the bushing shaft.
|
|

Thread upload4 viewsImage uploaded in new thread
|
|

Perth to Shark Bay spearing trip. 9 viewsDisco 3 Tdv6 auto. Air suspension. Arb bullbar. BFG All Terrain KO 265/65r18. 6m Seafarer Honda 150hp
|
|

Thread upload1 viewsImage uploaded in thread 198362
|
|

D3 WIRING 08MY26 viewsImage uploaded in thread 185033
|
|

Thread upload9 viewsImage uploaded in thread 187892
|
|

Discovery 3 Exterior Light Wiring69 views
|
|

Thread upload12 viewsImage uploaded in thread 190934
|
|

Thread upload11 viewsImage uploaded in thread 193383
|
|

Thread upload13 viewsImage uploaded in thread 198096
|
|

Thread upload18 viewsImage uploaded in thread 147705
|
|
Thread upload28 viewsImage uploaded in thread 108293
|
|
Thread upload31 viewsImage uploaded in thread 108293
|
|
Thread upload12 viewsImage uploaded in thread 177861
|
|

Thread upload7 viewsImage uploaded in thread 206759
|
|

Thread upload6 viewsImage uploaded in thread 208122
|
|

Thread upload1 viewsImage uploaded in thread 209484
|
|

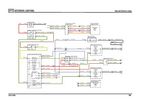
D4 Headlight Wiring Diagram 1 VIN 51332638 views
|
|

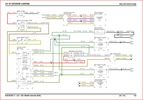
D4 Headlight Wiring Diagram 2 VIN 52454535 views
|
|

46 views
|
|
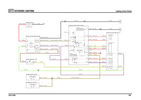
Lighting Wiring jpg58 views
|
|
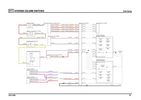
Steering Switches JPG53 views
|
|

Steering Switches51 views
|
|
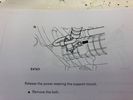
Thread upload10 viewsImage uploaded in new thread
|
|
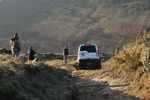
94 viewsWiggs's rear end disappearing over the edge.
|
|
old springs 21 views
|
|
Thread upload17 viewsImage uploaded in thread 151102
|
|
New Speaker Cables.111 viewsThis is the door connector, Main loom to Right, Door side to the left. to the top of the connectors you can see green and Green white wires which are the speaker ones. The door wiring is premium and has two pairs, the main loom was a 1 pair high line, so i am adding the pair you see (one already pinned up) to upgrade the loom to premium.
|
|

\'Our\' Zara with 60 Anniversary model490 viewsNot the most flattering photo of her.....
|
|
Thread upload23 viewsImage uploaded in thread 124908
|
|
Thread upload22 viewsImage uploaded in thread 116751
|
|
Thread upload15 viewsImage uploaded in new thread
|
|
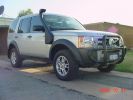
King Springs Lift331 viewsSpring Lift and Safari snorkel fitted
|
|
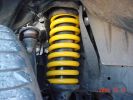
King Springs Lift240 viewsFront Spring
|
|
King Springs Lift217 viewsRear underbody Clearance
|
|
King Springs Lift205 viewsFront underbody clearance
|
|
215 views
|
|
Some of the new wiring514 views
|
|
Taken during the drive test of a TDV6 HSE with summer tyres!404 views
|
|

Lead Car Entering the Finish116 views7 May 2007 - My D3 on duty as lead car in shinfield 10K road race. what a nightmare driving at low speed in the rain. Clock was mounted on standard crossbars. connection to additional batteries in boot cable thru side window. There is a small offroad section (actually an un-made road) Oaklands Road, Shinfield, Reading (suggest anyone test driving in the Reading area take this road)
|
|
Picture of wire direct into headlight wiring181 views
|
|
Again just another pic of the wiring into the main175 views
|
|
Bush camp 70km South of Alice Springs114 views
|
|
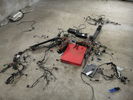
246 views2 wiring looms , looks like a mess but i know what i am doing ?
|
|
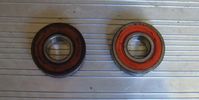
lower roller bearing RHS, upper on LHS49 views
|
|
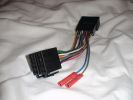
Wiring harness for Kenwood to Disco 360 views
|
|
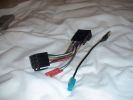
Aerial abd wiring adapter52 views
|
|
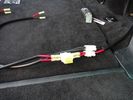
66 viewsI was quite proud of my wiring work - My Nursing Degree didn't cover too much content on auto electrics.
|
|
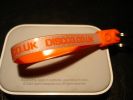
Keyring288 views
|
|
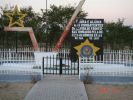
Memorial to those who died during the war147 views
|
|
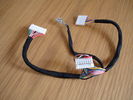
D3 Steering Wheel Wiring34 views
|
|
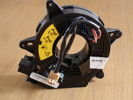
D3 Clockspring Unheated42 views
|
|
Springtime with the D4!178 views
|
|
| 1157 files on 3 page(s) |
 |
1 |  |
 |
|