| Search results - "V8" |

Extreme medics 110232 viewsFull Ambulance spec with extrem offroad cabability, 110 v8
|
|

V8 THIRST66 views
|
|

V8 VERSUS EXPLORER 4.0litre163 viewsA V8 HSE i had before i got the diesel
Thirsty but nice
|
|

Thread upload9 viewsImage uploaded in new thread
|
|

Thread upload9 viewsImage uploaded in thread 167536
|
|

LR3 V8 SE785 views
|
|

ford v884 views
|
|
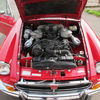
Thread upload26 viewsImage uploaded in new thread
|
|

Thread upload5 viewsImage uploaded in thread 181916
|
|

Thread upload19 viewsImage uploaded in new thread
|
|

Thread upload20 viewsImage uploaded in thread 147486
|
|

MGB GT V868 viewsNearside
|
|

Thread upload19 viewsImage uploaded in thread 137794
|
|
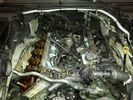
4.4 L Petrol Engine214 viewsIntake removed on V8 4.4L Petrol Engine to remove hose with T in it.
plse like my facebook page https://www.facebook.com/DifferentialPartsUS
|
|

RR Tdv8 Engine22 views
|
|

Beford CF V875 viewsa definate work in progress
|
|

Bedford CF V868 viewswith a very young me (19) in the bottom pic
|
|

RR Tdv8 Engine25 views
|
|

oh yea its a V8 ....159 views
|
|

Engine Accessory Drive Description and Operation884 viewsThis 2 page pdf shows both belts for the 4.4L petrol V8; the primary serpentine belt, (the long one), and the shorter secondary that drives only the radiator cooling fan.
The various accessory pulleys the two belts are each associated with are numbered and an included table describes each.
When replacing belts and pulleys, count the number of grooves on both your old items and your new replacement parts. It has been known for an pulley with the wrong number of grooves to come with a replacement part or the replacement belt has the incorrect number of grooves; hence make certain the groove count on the new parts are the same as the removed items.
|
|
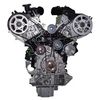
Thread upload3 viewsImage uploaded in thread 162309
|
|

Thread upload3 viewsImage uploaded in thread 162309
|
|

Air Conditioner Specifications 4.4L V81570 viewsThis 2 page pdf is just the specifications for the AC system. The refrigerant type is R134A.
Note that when topping the system up, it can be a good idea to include some of that ultra violet light dye that will glow to show leaks and loose fitting.
|
|

Alternator and Regulator Wiring Diagrams, TDV6 and petrol V8 and V61989 viewsThis is a three page pdf that shows the alternator and regulator wiring for the petrol V6, petrol V8 and TDV6. The pdf can be either printed or by right clicking on the displayed pdf, rotated as required for viewing.
Of interest is that the regulator gets its instructions primarily from the Engine Control Module (ECM) and only secondarily from the vehicles electrical buss. The conductor from the battery thru the 5 amp fuse F20E is to provide initial power to excite the alternator at startup and then secondarily, to instruct it if the PWM signals were not available. Primary instructions to and from the ECM are thru the two other conductors via a digital like Pulse Width Modulated (PWM) signal.
If F20E, the 5 amp engine compartment fuse box fuse is blown, the red alternator light on the dash will be illuminated. This means that the alternator could be OK, but if the F20E fuse is blown, no electricity will be generated. Hence check the F20E fuse if you get a red ALT light or some indication of the alternator not working.
Regarding operation of the red ALT light on the dash, it is not the regulator within the alternator that tells the red light to illuminate, or not, but instead the ECM. This is the reason the red light does not function in the same manner as with older vehicles. With the 3, sometimes you have illumination and sometimes not depending upon what the ECM is thinking. What this means is that you can have an alternator that is failing but the red light does not illuminate as the ECM is compensating for reduced alternator output - maybe by draining the battery and or cutting back on vehicle electrical loads such as shutting off or cycling the radio amplifier or heated seats.
|
|
Thread upload13 viewsImage uploaded in thread 158668
|
|

Thread upload1 viewsImage uploaded in new thread
|
|

CL 63 AMG V8 500BHP+87 views
|
|

CL63AMG V887 views
|
|

163 views
|
|

170 views
|
|

182 views
|
|

165 views
|
|

169 views
|
|

Gods Valley249 views
|
|

Gods Valley182 views
|
|

Thread upload17 viewsImage uploaded in new thread
|
|

Thread upload1 viewsImage uploaded in new thread
|
|

Thread upload1 viewsImage uploaded in new thread
|
|
Thread upload20 viewsImage uploaded in new thread
|
|

V8 defender air filter21 views
|
|

Thread upload16 viewsImage uploaded in thread 131081
|
|
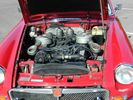
Thread upload16 viewsImage uploaded in thread 137794
|
|

Thread upload3 viewsImage uploaded in new thread
|
|

V8 Supercharged engine62 views
|
|

TDV8 to Date249 views2007 (57) TDV8 HSE
Mods:
BAS mapped.. oh yeah..
Colour coordinated lower sills,Java handles, supercharger vents and grill
Hawke smoked repeaters
Halo style HD LED rings in headlights
22" supercharger style diamond cut alloys
2011 LED rear lights
|
|

Cooling system hoses - 4.4L petrol V81110 viewsThese are the cooling system hoses on the 4.4L petrol V8. The little odd shaped bleeder hose, (LR006158), shown in the top right hand corner can give problems. There is a plastic tee with a threaded air bleeder outlet located in the middle of the hose. The plastic tee can or will fail due to I guess heat distress.
A BIC pen can serve as a field fix, however for your parts kit, a nominal 3/8" ID hose size brass hose barb inline connector plus a couple of hose clamps is suggested. Better yet is a threaded hose barb brass coupling or a tee and bleeder valve to allow bleeding of the line. Land Rover now makes the plastic bleeder valve that breaks available as a separate part, # LR027661, where 0 is a zero. As such, one can now purchase that part only for addition to your field fix parts kit.
|
|

Thread upload9 viewsImage uploaded in thread 187407
|
|

SI 1 D3 + RRV8215 views
|
|

V8 4.6 71 viewsD3 completed a down run & not to be out done 90 completed an up run in grand style
|
|

Thread upload11 viewsImage uploaded in new thread
|
|
Thread upload22 viewsImage uploaded in thread 167901
|
|

172 views
|
|

Discovery 3 TDV8101 viewsSaw this on the UK Land Rover site on 23 oct 2007.
|
|
68 views
|
|

Thread upload9 viewsImage uploaded in new thread
|
|

D4 5.0 V8 Air intake69 views
|
|

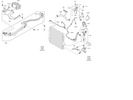
LR4 - Engine Cooling - V8 5.0L Petrol26 viewsEngine Cooling - V8 5.0L Petrol
|
|
55 views
|
|

Thread upload1 viewsImage uploaded in thread 201978
|
|
Thread upload1 viewsImage uploaded in thread 201978
|
|

Thread upload1 viewsImage uploaded in thread 201978
|
|
Thread upload1 viewsImage uploaded in thread 201978
|
|
Thread upload0 viewsImage uploaded in thread 201978
|
|
Thread upload0 viewsImage uploaded in thread 201978
|
|
Thread upload1 viewsImage uploaded in thread 201978
|
|

Thread upload0 viewsImage uploaded in thread 201978
|
|
Thread upload1 viewsImage uploaded in thread 201978
|
|
Thread upload2 viewsImage uploaded in thread 201978
|
|

72 views
|
|

74 views
|
|

80 views
|
|
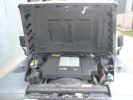
Defender V8132 views
|
|

38 views
|
|

222 views
|
|

Discovery 3 in Botswana45 views
|
|

CALENDAR 201146 viewsThis photo was taken near Guma Lagoon camp in December 2009 while touring Botswana
|
|

Discovery 3 in Botswana44 views
|
|

4.4 V8 Engine2573 views
|
|

Bing and his V8110 views
|
|
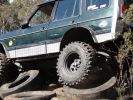
Tyre hill 3217 viewsC class V8 Disco made it through using the "grunt" approach
|
|

v8161 viewsclose call this weekend
|
|

v8133 viewsClose call this weekend
|
|

Our friend\'s V8 D361 views
|
|

LR3 4.4 V8128 viewsDSC02863.JPG
|
|

LR3 4.4 V8125 viewsDSC02865.JPG
|
|
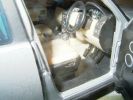
V8 HSE Auto Reg 734 EAB367 viewsThis is the model D3 that everyone's got.
Ever noticed that although its a V8 auto, it's got a clutch pedal??
|
|

HAmsters landrover151 viewsV8 4.2Ltr ..... what a noise!
|
|

calendar entry 2009543 viewsHigh on the Iceland Interior - On the Road to Askja - G4 D3 Discovery V8 HSE - Team vehicle from 2006 G4 Stage 3/4 Bolivia -
|
|

LRE V8 RRS304 views
|
|

EBC V8 Upgrade 181 views
|
|

EBC V8 Upgrade85 views
|
|

4.4 V8 Description103 views
|
|

First seven arrivals at South East Pub Meet in Cobham232 viewsOnly neo\'s D2 was out of place at this point - more than made up for my the lovely burble of his V8
|
|

212 views
|
|

My first and second Landies, 1985, SWB and 90 V8.85 views
|
|

Fluid, Filter/Pan Combo removal and install5980 viewsThese are the LR instructions re removal and install of the plastic pan/filter combo for the ZF 6HP26X transmission on the 4.4L petrol V8 LR3.
The instructions tend to ignore the reason you have to lift the right hand side of the engine about 40 mm. This is because of a frame cross member that interferes with dropping down of the plastic pan. The real problem is a vertical "oil filter spout" that rises out of the filter/pan combo up into the transmission. The spout is the suction pipe for filtered transmission oil back up into the tranny.
On the metal pan versions, the filter is separate from the pan, hence the filter remains with the tranny when the metal pan is dropped. The filter is then removed or installed independent of the metal pan, hence with the metal pan, there is no need to lift the engine.
If one is removing the plastic pan so as to install the metal pan, then some do not lift the engine but just drop the plastic pan enough to gain access to saw off the vertical plastic spout - it is a one time procedure.
Be aware however that the metal pan uses a flat gasket and the plastic pan uses a O ring like perimeter gasket that sits in a half round groove in the tranny casing. Also the metal pan uses 21 shorter torx M6x22.5 metric cap screws for the perimeter bolts. The plastic pan uses longer M6x28.5 torx metric cap screws.
|
|

Ford News Cover Story May 2006219 viewsFord News is a monthly publication (aka propaganda!) magazine, given to all Ford workers. This months issue has a lead article about the TDV8. Thought it might be of interest.
|
|
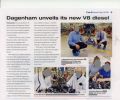
V8 Story254 viewsHere is the article about \'Job 1\' for the new TDV8, hopefully destined for the Discovery 3!!
|
|
![Filename=front-rear-disc-upgrade-kits-to-v8-size-12793-c[ekm]170x140[ekm].jpg
Filesize=6KB
Dimensions=170x140
Date added=17.Sep 2018 front-rear-disc-upgrade-kits-to-v8-size-12793-c[ekm]170x140[ekm].jpg](albums/userpics/33392/thumb_front-rear-disc-upgrade-kits-to-v8-size-12793-c%5Bekm%5D170x140%5Bekm%5D.jpg)
Thread upload9 viewsImage uploaded in thread 135978
|
|

My V8ES and Her TDiES (and the dog) in 1999262 views
|
|

MG ZT460 v835 views
|
|
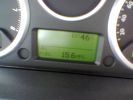
Thirsty V8 and very hot day127 views
|
|
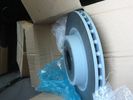
V8 LR OEM discs36 views
|
|
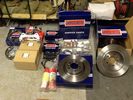
V8 Kit27 views
|
|

Dirty V887 views4.4 V8 and my very vaguely Christmassy cottage in background!
|
|

Dirty V879 views4.4 V8 and my very vaguely Christmassy cottage in background!
|
|

Dirty V882 views4.4 V8 and my very vaguely Christmassy cottage in background!
|
|

V8 and TDV6 disc's23 views
|
|

New V8 Disc15 viewsMmmmm,nice
|
|

33 views
|
|

V8 9014 views
|
|

V8 9015 views
|
|

V8 9018 views
|
|

V8 9017 views
|
|

Amari 4.4 V8 (Spain)123 viewsAt the villa in Spain
|
|

Jeep Commander, Rocky Mountain National Park, Colorado157 viewsA 5.7 litre V8 330bhp POS!
When you plant the throttle, engine noise just gets louder, nothing else happens!
|
|

Piped out after a two and a half year rebuild! A 90 V8.73 views
|
|

Heine\'s V8 Monster85 views
|
|
V8 monster95 views
|
|

838 views
|
|

769 views
|
|

Battery Maintainer pigtail sticking out of Grill729 viewsThis is all you see when everything is put back together - just the pigtail and Weather Pack blanking plug. Most often, I have it all tucked back behind the grill.
In winter, there may be a second cord hanging out as well - the 120 VAC power cord for the engine block heater, a tea kettle like element inserted in the engine block. NAS petrol V8's do not have the Fuel Burning Heater, (FBH), installed, but instead in cold area markets have the block heater element assembly available as a dealer installed option. There is an argument to say that the heating element is factory installed in all cold climate V8 gasoline engines, however the appropriate power cord is not. If true, this means that all one needs to purchase is the area specific power cord and plugging in / attachment to the engine block located block heater.
As such, you will often see a conventional 120VAC three prong power plug hanging loose out of the grill of most vehicles here in the wintertime. In summer, most drivers tuck the plug back behind the grill as it is no beauty mark.
|
|
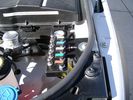
View from front left side looking towards rear aux battery compartment under cover 647 viewsAs there is no Fuel Burning Heater in the NAS V8 petrol vehicles, there is space available to install the FASKIT panel here. The piping is such that each air spring can be isolated from the air system and then filled one at a time manually via the Schrader valve. There are five Schrader valves and five shutoff valves. The fifth valve nearest the gauge controls air from the compressor, and can provide fill up air via a jumper fill line assuming the compressor is still operational.
|
|

LR3 TDV6 RRS TDV8 Engine Pre-heating Operating Instructions - Appendix343 viewsThis is the instructions you get with the LR original Webasto timer kit
|
|

LR3 AJV8 block heater location640 viewsThis 1 page pdf shows the screw in block heater location as related to the lower left side of the engine block.
|
|

LR3 Denso Alternator YLE500390 pulley view819 viewsNote the DENSO sticker on the side. Denso calls their nominal 150 amp 12 Volt alternator an SC2 design. SC means Segment Conductor which apparently increase the winding density of the stator coil, hence yielding a physically smaller lighter alternator for a given output. I presume the 2 means the second try at getting it right. A Denso part number is 4280003690 for the alternator, (there are others, as below).
Rotation is clockwise and the 54mm diameter pulley has 6 grooves (PV6x54). Count the pulley grooves on both the one you remove and your new one - some replacement alternators seem to ship with 5 or 7 grooves so you might be swapping pulleys.
A previous LR part number was YLE500190 for the older variation of the newer YLE500390 unit.
An additional part number for a factory rebuilt is Nippon Denso 210-0569 for the petrol V8 alternator. Other Nippon Denso numbers include 104210-3690 and 104210-3691. The Lester number is 11206 which relates to another Denso number of 290-5287. WAI uses 11206N.
From 2006 to 2009, the internal regulator is a Transpo IN6349 and of the B circuit type if it can be said that applies to PWM, (Pulse Width Modulated), regulators.
The "regulator" inside the alternator is therefore really not a regulator in the old sense of the term but instead an instruction receiver from the ECM that translates Pulse Width Modulated (PWM) signals into a form that the alternator understands – digital like signals from the Engine Control Module(ECM) into analogue like signals that the windings understand.
|
|

LR3 Denso Alternator YLE500390 rear view709 viewsThis picture shows the rear of the YLE500390, the Land Rover part number for a newer design alternator utilizing the Transpo IN6349 regulator with the "hidden" cooling fins. Note the visual difference in the rear view of the next file jpg.
If the alternator is a rebuilt, (service exchange unit), but Land Rover supplied, then the part number is LR008860 or similar. (Note that 0 in LR0 is zero.)
Two Denso part numbers exist for the alternator as well, 4280003690 and 4280003691. The rating of the petrol V8 alternator is nominal 12 VDC and 150 amps. In normal day to day operation, they seem to run about 14VDC - usually between 13.9 and 14.1 volts at the OBD port.
For the petrol V6, the LR service exchange number is LR008862, and the 2.7TDV6 is LR008861.
The bridge rectifier within the alternator is a 12 diode avalanche type, 117mm diameter, as used in Nippondenso 120 to 160 amp alternators with the Hair Pin stator. It is similar to a Transpo INR421 which is rated for 120 to 150 amp alternators. That is probably our primary problem - the rectifier is just too light. Alternate part numbers for the bridge rectifier are Cargo 237607, Mobiltron RM-29 and AS ARC6021.
Re the B+ stud, the INR421 calls it up as an M8 x 1.25 x 30 mm long course threaded stud; some say 34 mm but that may be longer than desirable.
|
|

Excel file for Rotors and Brake Pads part numbers for 4.4L V8 petrol LR3769 viewsComparing the cost of the various brands of brake parts is time consuming. Once you have your parts costs, this little spreadsheet will make collating the info easier.
I did not make any provision for labour costs, but the file can be downloaded and then modified. You can change Dollars to Euros or Pounds or whatever and insert lines for labour costs as desired.
Do not pay too much attention to the $ numbers as they are a mix of US and CDN, and from differing time frames, (prior to Spring 2011) . Also the brake part numbers are for my 2005 North America spec LR3 with the petrol 4.4L V8; diesel powered and supercharged 3's may have different part numbers
|
|

Discovery3 V831 viewsa friend\'s Disco3 tackles a deep patch of mud inside a National Park.
|
|
Thread upload1 viewsImage uploaded in new thread
|
|

LTB00125 - Technical Bulletin - 4.4L V8 Short Engine Availability61 views
|
|

Bonatti Grey V8 HSE4 views
|
|

Thread upload2 viewsImage uploaded in thread 205205
|
|

Thread upload22 viewsImage uploaded in thread 132691
|
|

81 views100" wheelbase,dana axles,big v8 :)
|
|
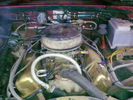
64 viewschevy v8,straight through pipes :)
|
|

06 V8 LR3 SE505 views
|
|
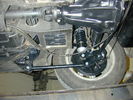
MGB GT V857 views5 Link rear suspension off-side.
|
|
Thread upload17 viewsImage uploaded in thread 166618
|
|

Discovery in Shinagawa240 viewsA Tokyo dealer's demonstrator - HSE Maya Gold V8
|
|

TDV8 HSE RRS147 viewsSporting her old 22" Overfinch Supersports
|
|

v8 oil80 views
|
|

V821 views
|
|

56 views
|
|

119 views
|
|

Thread upload10 viewsImage uploaded in thread 163427
|
|

Thread upload13 viewsImage uploaded in thread 111697
|
|

Thread upload8 viewsImage uploaded in thread 111697
|
|

Thread upload9 viewsImage uploaded in new thread
|
|

Thread upload10 viewsImage uploaded in thread 164759
|
|

Thread upload13 viewsImage uploaded in thread 164759
|
|

SSM47477 - 4.4 Naturally Aspirated AJV8 Petrol Oil Filter/Housing Leaks 89 views
|
|
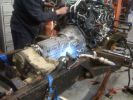
TDV8 engine+D3manual+LT230defender274 views
|
|

Thread upload9 viewsImage uploaded in new thread
|
|
Thread upload22 viewsImage uploaded in thread 169498
|
|
Thread upload22 viewsImage uploaded in thread 169498
|
|
Thread upload20 viewsImage uploaded in thread 169498
|
|
Thread upload4 viewsImage uploaded in new thread
|
|
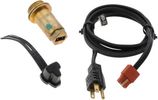
Block Heater and Cord for petrol V8 LR3 North America 120VAC529 viewsThe recommended 120VAC block heater cord is a Temro 3600003. This is a five foot long cord with what is called a Straight connector at the block heater end with holes for two pins; there is also a metal tab located between the two holes serving as the ground conductor. That cord, in addition to having the two pin holes plus ground tab end, is designed for both aluminum and brass heaters as that also matters.
The Land Rover part number for the Block Heater assembly is VUB504640 but is a Temro product not officially marketed by Temro as a Land Rover block heater. The Temro product number is 3100107 which shows as a brass body 30 mm threaded 700 watt 120VAC screw in block heater with a rectangular shaped depression and two pins suitable for the Temro 3600003 cord. Note the word BRASS as it mates with the aluminum OK.
|
|

718 views
|
|

122 views
|
|
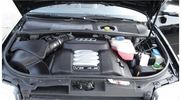
Audi 4.2 V8192 views
|
|

Thread upload6 viewsImage uploaded in thread 165149
|
|
40 views
|
|

Thread upload9 viewsImage uploaded in thread 184931
|
|
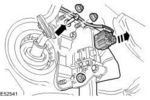
Thread upload13 viewsImage uploaded in thread 184931
|
|
Thread upload12 viewsImage uploaded in thread 169412
|
|

Thread upload4 viewsImage uploaded in new thread
|
|

Thread upload5 viewsImage uploaded in thread 165149
|
|
Thread upload14 viewsImage uploaded in new thread
|
|

Thread upload0 viewsImage uploaded in thread 199496
|
|

Thread upload3 viewsImage uploaded in new thread
|
|
Thread upload5 viewsImage uploaded in new thread
|
|
Thread upload6 viewsImage uploaded in new thread
|
|

Thread upload9 viewsImage uploaded in new thread
|
|
Thread upload8 viewsImage uploaded in new thread
|
|

DiscoDancers Desert crossing89 viewsThe team consisted of two LR3 V8s, a Disco II V8, and two Nissan Patrol Safaris. 168 km of dune crossings over 2 days with a camp overnight mid-way. Awesome!
|
|

Flat out!79 viewsThis ascent was really soft and required full out power of the V8 to get up. At one stage the car was sliding sideways towards the camera nose directly up the slope with 4 sizeable rooster tails of flying sand. Not what the books tell you, but momentum has to be gained and maintained from the bottom all the way up.
|
|
|
|
|
|