| Search results - "angle" |
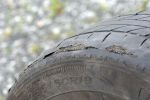
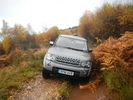
Goodyear Wrangler after 3 weeks in Iceland186 views
|
|
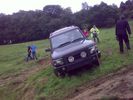
"Hold on lads..., I\'ve got an idea..."54 viewsThis angle tells you some of what could have been a bit of a tumble...
|
|
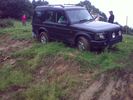
Almost a roll, but not quite...55 viewsI\'d \'launched\' myself at a 6ft hill and got to the top- but at an angle- the offside rear gripped and pulled us around to the right- perilously close to the edge... time for spare undies I think...
|
|

09 Starting to remove the seized brake assembly296 viewsBy this time we\'d poured about 8l of water on the dull-red glowing and burning wheel assembly (too close to 140l of 98 octane petrol). Sudden cooling cracked the disk brake which showed mangled park brake parts. How to remove a brake disk without the right star fitting? First remove the caliper then get a sledge hammer?!!
|
|

10 Cracked smoking parking brake drum338 viewsNote the crack in the face of the brake. This showed mangled parking brake springs and other bits. Also a bit of melted rubber was drooling out of the crack. Started to remove the brake caliper and enjoying the flies in 45 deg C heat. Ah, the wonderful Aussie climate in January.
|
|
Thread upload11 viewsImage uploaded in thread 13860
|
|
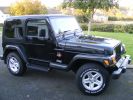
76 views
|
|

Bentley 98 views
|
|

Anti Lock and Traction Control description and operation.1987 viewsNote on page 6 of this 17 page pdf the significance of the Steering Angle sensor mounted on the steering wheel shaft. The paragraph regarding the plausibility check as related to the brake pedal being not depressed is why the clean operation of the second set of contacts on the brake switch matters so much.
|
|

Steering Column detailing Steering Angle Sensor1496 viewsItem 2 in the picture on page 1 of the 9 page pdf shows the location of the steering wheel sensor. Page 5 of the pdf has a paragraph describing the operation of the sensor. When the steering wheel does not point the same direction as the real wheels, then the computers can put the 3 into safe mode and down goes the suspension. See also the 17 page pdf on the Anti Lock and Traction Control pdf.
|
|

Goodyear wrangler (m&s)21 views
|
|
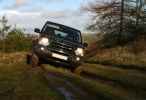
Traversing the angle53 views
|
|

Thread upload30 viewsImage uploaded in thread 108346
|
|
53 views
|
|
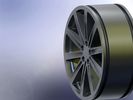
CAD render of a rim I created.71 viewsCAD render of a rim I created. Was supposed to look like the 18" style 2 rims.
|
|
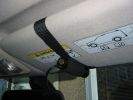
Cam mounted on sun-visor244 viewsI usually place something in between the sun-visor and the roof lining to give the cam a better angle. At Boughrood it was a roll of PVC tape. For Boughrood I also placed a small cardboard box between the cam and the sun-visor to bring the cam away from the dirty section of windscreen.
|
|
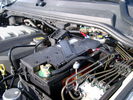
BCI Group 40R Deka 640RMF battery showing vent hose run forward to windshield washer reservoir area 1430 viewsRecessed post "Euro profile" battery to "match" OEM and stock Land Rover bracket; note that the Traxide SC80-LR module is mounted at an angle to allow for the main cable to sit under the cover so cover still closes.
The battery is a nominal 7", (180mm), high, but sits on a 1" battery spacer set under to raise the bottom front end of the battery such that the approx 11", (290 mm), length of the BCI 40R battery rises above the angled plastic nibs at the forward end bottom of the case front; hence sufficient space, (1/4", 5mm) remains at the brake reservoir end.
Also the 40R battery does not have hold down "flanges" on each end; on the sides yes, but not the ends so no additional length is required.
When I had to replace the 40R, this time I installed the shorter, (9.625"), taller, (7.5") Interstate BCI 47 / DIN H5 battery which eliminated the spacer on the bottom and better fit the stock LR tie down bolt lengths. Deka also has a BCI 47 / DIN H5 that would work fine as well.
|
|
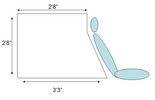
Dimensions67 viewsshown with 2nd row seat rake angle
|
|

Mr Bojangles at 3weeks122 views
|
|

4 week Old Mr BoJangles99 views
|
|

Bojangles - Black GSD124 views
|
|

Brakes Description and Operation2231 viewsThis is a 17 page pdf that describes the operation of the various braking systems: the ABS, CBC, DSC, EBD, ETC, EBA, EDC, and HDC. Also discussed is the yaw rate and lateral acceleration sensor as well as the steering angle sensor.
|
|
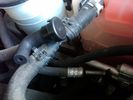
Breather line with factory cap cut off.2320 viewsIf you expand the jpg by clicking on it, in the bottom right corner if you look closely, one can see the black plastic factory vent tubing with the OEM cap cut off.
Note the tubing is cut at a 45 degree angle facing to the rear. Also shown in the top right is the cut off portion sitting on the coolant water hose and on the top left also sitting on the coolant hose, the new to be installed Gore manufactured replacement breather cap.
|
|
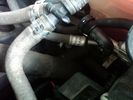
New Breather Cap installed.1710 viewsThis shows the new Gore brand angled breather cap installed. The cap points rearward to the firewall. Also shown is the cut off piece.
The new Gore breather cap is what one now sees on the LR4 and RR Sport.
|
|
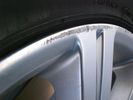
Wheel 2 Scuff different angle14 views
|
|
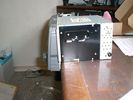
This shows the standard radio body angle161 views
|
|
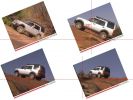
Climb angle?86 views
|
|

Controller 2132 viewsI find that the controller is easier to use when angled forward
|
|
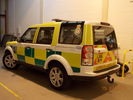
D4 Being Prepped for LAS26 viewsThis is a Disco 4 (unknown spec) being prepped up at my workplace for the LAS, having new comms kit put in and stuff. What you can't see from this angle is that the front grille and headlights have been taken out.
|
|

Deka Battery Dimension Data615 viewsThe battery size that I installed for my auxiliary was a BCI 40R battery as it was for me the easiest to fit and was also a cranking battery. The case profile was such that no tie down fins were located on either bottom end, (sides yes), and length wise, it was only about 11" (290 mm) long. As such, I did not have to grind the nibs at the front bottom of the plastic surround.
I did however raise the bottom of the battery above the angled nibs as I set the battery on a 1" (25mm) high plastic spacer. The total height, (battery plus spacer), was about 8" (200mm) so the battery top still fit under the Land Rover factory cover.
For the Aux battery, when I replaced the 40R, I installed an Interstate BCI 47 which is similar in size to a DIN H5. I was therefore able to eliminate the vertical spacer as the Group 47/H5 is the same height as the DIN H7/H8 stock LR spec starting battery. As such, the standard battery tie down bolts can be used without modification. The Group 47 battery is 9 11/16" long x 6 7/8" wide x 7 1/2" (190mm) high.
|
|

Cooling System - Description and Operation 4.0L and 4.4L petrol engines 5 pages1028 viewsThis is a 5 page pdf that provides some insight into how the coolant flows thru all the hoses. Of interest is the paragraph,(page 3/5), that attempts to explain how and why the thermostat is designed to open at different engine operating temperatures - in brief, the reason for the spaghetti tangle of small hoses on the top of the engine.
There is also reference to an engine oil cooler that I gather cools something I think related to a supercharger, if fitted.
|
|

30 views
|
|
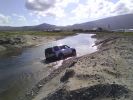
disco 3 on a scary side angle85 viewsdoes\'nt look to bad here, totally different story when your inside it. spare jocks anybody??
|
|
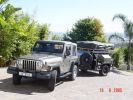
136 views2005 Jeep Wrangler (Still loved, wife's & Kids toy)
|
|
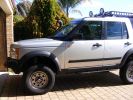
413 viewsLower front bib is removable via two bolts, for increased approach angle
|
|
45 ers 228 viewsagain, picture does not do the angle any justice. getting out of the car was pretty difficult. great pay and play site
|
|
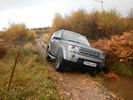
45ers - 31 viewslooks tame, but the car was at a pretty extreme angle. picture does not do it justice.
|
|

29 viewsUnused 255/60 x 18 112v Goodyear M+S wranglers
|
|

footwell - another angle170 views
|
|

Thread upload16 viewsImage uploaded in thread 101824
|
|

Thread upload13 viewsImage uploaded in thread 101824
|
|

Land Rover TSB LTB00245 install instructions1940 viewsThis is the Land Rover Technical Service Bulletin showing how to install the new breather cap. The instructions are a bit vague re cutting the existing air vent tubing on a 45 degree angle with the cut facing to the rear.
|
|

O.M.G!117 viewsThe vehicle sits at an alarming angle on the edge of the slope
|
|
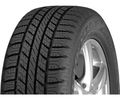
Thread upload5 viewsImage uploaded in thread 57247
|
|

18" WRANGLER30 views
|
|

18" wrangler AW31 views
|
|
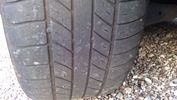
22 viewsWrangler on better wheel
|
|
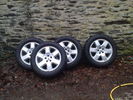
set of four land rover 19" 6 spoke alloys with wrangler MTR's as per G4 spec29 viewsFor sale the set of four tyres and wheels . tyres are new having only traveled 2000 miles
|
|

Switch is blue colour thing thru the rectangular opening.3177 viewsThe blue coloured plastic bit thru the rectangular opening is the brake light switch. The fist time, I found it easier remove the switch by dropping the horizontal plastic panel, (two screws), and then slipping my hand in and rotating the switch clockwise 1/4 turn. The second time, I was able to remove the switch thru the rectangular opening and did not need to remove the horizontal lower panel. Obviously, I had to remove the sloping knee pad panel, (note sort of hinged at the bottom so pull back from the top.)
Regardless, do not touch the brake pedal - just let it sit where it wants to. One has to first remove the angled knee pad panel that sits under the steering wheel. It can be pulled from the top corner at the door side. Pulling releases a pair of those U shaped metal clips that LR loves so dearly. You have to pull quite hard. The bottom is held by a couple of plastic fingers in a couple of slots so you pull at the top till the two clips release and then rotate the panel and pull upwards a bit.
To remove the switch, you rotate it clockwise and pull outwards. Rotating the switch clockwise automatically retracts the plunger back into the switch body away from the brake pedal arm.
Similarly when you install the new switch, the required 1/4 turn anti clockwise rotation action releases the plunger so it lays up against the brake pedal arm and at the same time, secures the switch in place.
To remove the electrical wires, the switch will drop below the horizontal pad and hang from the wires so unclipping the electrical connector plug is fairly easy to do.
|
|
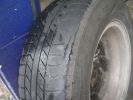
Worn Wrangler153 viewsOn trip to QLD both rear tyres went from slightly worn on inside edges to worn to carcass in just over 1000km. Wheel alignment(thanks to very helpful LR dealer in Maroochydore) and 4 new Continental tyres as no replacement wranglers in Aus.
|
|

top left hand side fitted66 viewsto show how its angled to fit in with the mouldings
|
|
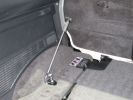
Paddock dog guard - secured289 viewsdifferent angle on the J-bolt
|
|
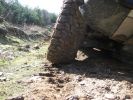
CALENDAR 2008 ENTRY \'testing\' the sideslope angle, Boughrood April 2007696 views
|
|

55deg365 views55degrees angle... Car would not move forward anymore.
|
|

Do I flip?349 views
|
|
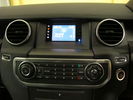
D4 Lowest Grade Radio - Wide Angle76 viewsThe CD player is at the bottom of the picture, the control buttons in the middle, and at the top is the screen with colour-lit icons on the left to indicate source, and bluetooth icon on the right to indicate connectivity. There are also two hardware buttons for hour/minute clock setting.
|
|
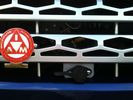
Cabled winch control connector114 viewsAdditional angle bracket made for connector in aluminium attached to red grill. Additional in-line connector between this and the solenoids to allow rad grill to be removed when required.
|
|
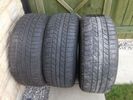
wranglers15 views
|
|
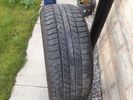
wrangler15 views
|
|
![Filename=IMG_1274[1].JPG
Filesize=405KB
Dimensions=1713x1279
Date added=12.Mar 2012 IMG_1274[1].JPG](albums/userpics/16344/thumb_IMG_1274%5B1%5D.JPG)
Goodyear Wrangler HP 255/55R19 with 4mm tread78 views
|
|
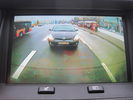
rear view camera hids4u sony ccd201 viewswide angle as can be seen - no blind spots
|
|
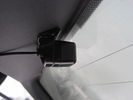
revesing camera hids4u sony ccd198 viewswide angle for blind spot
|
|
Angle Grinder0 views
|
|

Angle Grinder0 views
|
|

Thule 9705 plate40 viewsShows how the fixing plate reduces the departure angle
|
|
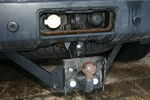
Modified Thule 9705 plate42 viewsShows the adapter plate after modification to improve departure angle
|
|
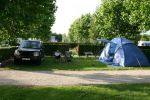
108 viewsSame campsite, different angle
|
|
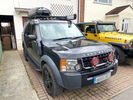
7 viewsMy Landy and the Missus Jeep Wrangler
|
|

Interstate Battery Dimension sheet641 viewsThis sheet is hard to find - the sheet is not on the Interstate corporate web site but some dealer web sites display it. The pdf shows most of their available batteries including the H7 and H8 sizes that are the LR North America replacement batteries for the main starting battery. These batteries are of the Land Rover desired "shallow" cycle high discharge current Maintenance Free, (Ca Ca), internal construction, (not AGM, but instead, Wet Flooded Lead Acid with battery "caps" and Ca grid separators).
For the AUX battery , the H6, (BCI Group 48), is probably similar in dimensions to the Varta E12V75N that is popular in Australia. For that battery to fit in the second battery compartment, you must grind out the angled nibs on the inside front bottom of the LR black plastic surround, something I did wish to do and hence installed a Group 40R on a spacer. Alternately, one can choose an Interstate BCI Group 47 which is similar to a DIN H5 for the AUX location. I did this when I had to replace my 40R. No vertical spacer is required and the stock battery tie down bolts and clamp work well.
|
|
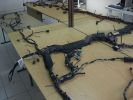
Wiring Laid out shown from other side121 viewsDamaged Disco 3 loom on bottom and new Sport one on top. This angle is as if you were looking at the drivers seat from the front (RHD). You can see the amp wiring centre shot and the rear door wiring to the left all duplicated.
|
|
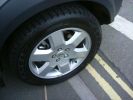
Goodyear Wranglers with the TPMS valves883 views
|
|

Wrangler DuraTrac51 views
|
|
17 views
|
|

Two Angels - clean for a change115 views
|
|

LR3 Air Conditioner Drain Tubes behind centre console2132 viewsThis shows the two air conditioner drain tubes located left and right under the radio stack.
The tube on the left side, (steering wheel side, LHD), disattached itself and the carpet on the floor under the gas pedal etc became soaked. I think rain water from outside that comes in the outside cowl vents also exits via the tubes as I first noticed the carpet was wet after parking outside during a big rain storm.
It was relatively easy to slide up and reattach the rubber hose that runs from the rectangular shaped plastic discharge hole(s) of the heater "pan" down along the transmission hump area and thru the floor pan. There is a hose on each side of the transmission hump, but only one hose had let go on my 3. The rubber hoses just slide over the rectangular plastic openings of the two heater housing drain outlets.
To get at each drain hose, remove the vertical sort of triangle carpeted piece below each side of the radio stack. The triangles of carpet will just pull away as each is held on with those metal U clips Land Rover so likes. Dislodge each triangle at least sufficiently to get ones hand in to slide the rubber hose back on.
You will rarely see AC water on the ground as the front drains pour onto a metal underside protection skid plate and the rear drain onto the top of the left rear muffler.
|
|
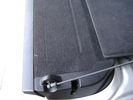
Flexible wire rope fishing leader 0.032" diameter exiting carpet 1948 viewsThis is all you see of the completed mod.
The short little angled "line" about an inch long that looks like a piece of debris and is located a few inches "above" the support cable is actually the wire rope release cable exiting from under the carpeted lift gate cover.
I drilled a very small hole in the carpet and pushed the 0.032" diameter release wire thru and then slipped the loose end under the black plastic.
To release with the lift gate etc closed, from the inside, just pull the loose end free from under the black plastic and gently pull wire about 5mm, (1/4"), and the upper door catch should release. You will have to manually push the upper door out wards to actually effect opening, but you will already be inside the rear cargo area so that part is easy to do.
The assumption is that the lower door latch still works electrically and hence, the lower lift gate half will open as normal by pressing the usual button on the top left of the lower door half.
|
|

Underhood Fuse and Relay Box drawing 3055 viewsShows the various fuse and relay locations. Fuse 3E, (5 amp), and Fuse 26E, (20 amp), as well as upgraded 70 amp Relay 7, part number YWB500220, locations are displayed. Relay 7 sends battery power to the compressor from the 60 amp fusible link called up as 10E. Fuse 26E is what provides full time always on battery power to the air suspension ECU and hence powers the auto level wakeup when the vehicle is shut down and say parked for the night. Removing F26E is the primary method to disable the air suspension system; Removing F35P is more if you want to experiment with it from inside.
I found it useful when I had a suspension problem, (actually a wheel alignment problem picked up by the steering wheel angle sensor), that only showed itself on the highway but allowed for no trouble light driving in the city. This was because in the city, the steering wheel was always in motion and rarely was the vehicle driven in a near straight line for very much distance.
|
|

55degiphone323 viewsHere is the proof... I had calibrated it before the event started...
|
|
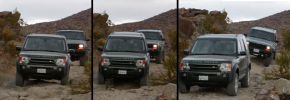
Smooth off road ride!399 viewsThis was the first time I took my LR3 off-road. I traded my Jeep Wrangler for this vehicle so I was used to heading into the rugged mountains. I was very amazed (as were my friends in their Jeeps) just how level the LR3 remained as I navigated over various dips and mounds. You can see the Cherokee behind me couldn't say the same.
|
|
Thread upload2 viewsImage uploaded in new thread
|
|
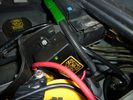
Traxide SC80-LR mounted598 viewsA close up showing the angle, mounting bolt. Only a single top bolt can be used, there are metal lines behind the lower bolt hole.
|
|
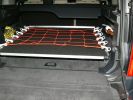
Sliding floor - closed position515 viewsMaterials: 17mm formply, ex 1000mm piano hinge, 2x Haefele 160 kg sliders, timber brackets for the floor to connect the sliders, aluminium angle for leading edge, 50x3mm aluminium flat drilled for the tie-down net connectors, 2x galv iron flat folded to form angle brackets (to secure sliding loadspace to floor), 1 square metre of black carpet to match the back of the seats.
|
|
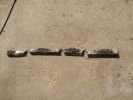
Reinforcement angle iron37 views
|
|
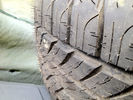
Goodyear wrangler73 views
|
|
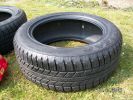
Goodyear Wrangler HP 255 R19/55 V x 2117 views
|
|
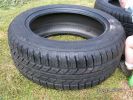
Goodyear Wrangler HP 255 R19/55 V x 2117 views
|
|
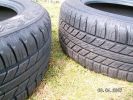
Goodyear Wrangler HP 255 R19/55 V x 2110 views
|
|
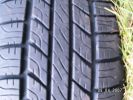
Goodyear Wrangler HP 255 R19/55 V x 2113 views
|
|

Goodyear Wrangler HP 255 R19/55 V x 2123 views
|
|
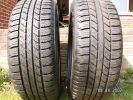
Goodyear Wrangler HP 255 R19/55 V x 2136 views
|
|

Goodyear Wrangler HP 255 R19/55 V x 2121 views
|
|
160 viewsAt Home - Jeep Wrangler & Trailer in background
|
|
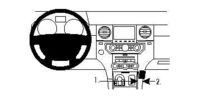
Thread upload8 viewsImage uploaded in thread 206013
|
|

Thread upload5 viewsImage uploaded in thread 134669
|
|
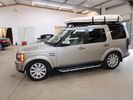
Rack with Maggiolina plus spangle SILVER tree sliders!185 views
|
|

5 views
|
|

Thread upload23 viewsImage uploaded in thread 137126
|
|
Thread upload11 viewsImage uploaded in new thread
|
|

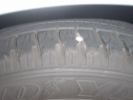
screw in Wrangler 262 views
|
|
Screw in Wrangler55 views
|
|
LR (STD extended mode) new normal road height.62 views
|
|
RR (STD extended mode) new normal road height.66 views
|
|
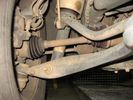
LF (STD extended mode) new normal road height.71 views
|
|
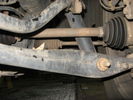
RF (STD extended mode) new normal road height.63 views
|
|
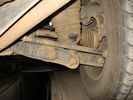
RR ( std super exteneded mode ) new off road height @ 100mm lift.101 views
|
|
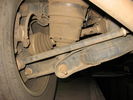
LR ( std super exteneded mode ) new off road height @ 100mm lift.91 views
|
|
LF ( std super exteneded mode ) new off road height @ 100mm lift.94 views
|
|
RF ( std super exteneded mode ) new off road height @ 100mm lift.86 views
|
|

8 views
|
|

6 views
|
|

7 views
|
|
Wrangler HP and russian spring holds the wheel136 views
|
|

steering_angle_sensor_removal98 viewssteering_angle_sensor_removal
|
|
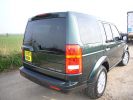
Sweet Behind105 viewsLooks good from every angle!
|
|
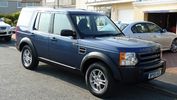
209 viewsAnglesey 2010
|
|

4 views
|
|
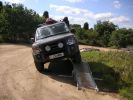
just checking some angles213 views
|
|

Varta Battery Dimension chart570 viewsThis pdf provides Varta dimensions for among others, the E12V75N, (old DIN H6 or 85605 or BCI Group 48 size). This appears to be a deep cycle battery and the choice for many re the Aux battery install as long as you are willing to grind away the angled nibs at the bottom front of the battery surround. My choice was a shallow cycle battery intended for cold weather related engine starting rather than winch use.
Note the pdf Varta batteries are all deep cycle batteries suitable for running fridges, winches etc, rather than for engine starting and hence a good Aux battery if those are the intended uses rather than engine starting.
Varta now makes a Varta G14 with AGM technology and known as a Stop Start Plus battery. It is 95Ah, CCA of 850A; length 353mm; Width 175mm; Height 790mm and is specific for these newer stop start vehicles such as some D4's. For the 3's, one is still probably better off with an H8 sized battery but of the older Wet Flooded Lead Acid type and battery caps rather than a sealed AGM.
The Land Rover part number for the recommended battery is LR033179.
|
|
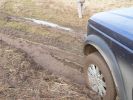
very greasy road for Wrangler HP122 views
|
|
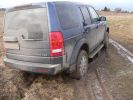
Wheelspining at left rear wheel stopped me 8-))159 views
|
|
Thread upload8 viewsImage uploaded in thread 137794
|
|

Goodyear MTR tread138 views
|
|

Thread upload2 viewsImage uploaded in thread 161239
|
|
|
|
|