| Search results - "app" |

Clearance to top arm - approx 10mm. Standard Links / Standard Height.200 views
|
|
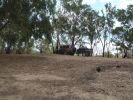
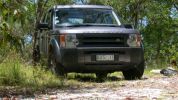
02 Last Photo before the little wheel problem saga222 viewsThis is my D3 with trailer on the banks of the Darling River, literally "back of Bourke" (the regional definition of the start of the Australian Outback). We were the first vehicle in a week to try and drive this route from Bourke to Wilcannia on the account of floods (first water in 7 years). Little did we know that 3 hours later there\'d be a bit of a wheel and tyre problem appearing...
|
|
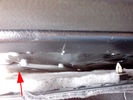
Riparazione attuatore sponda posteriore - Tailgate actuator repair38 viewsL'attuatore si trova dietro la pellicola nera incollata alla carrozzeria che va strappata.
The actuator is located behind the black film glued to the body must be torn.
|
|
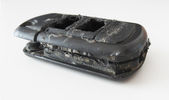
Tagliare lungo il perimetro della chiave - Cut along the key perimeter19 viewsI gusci sono saldati ad ultrasuoni. Con il disco tagliare lungo il perimetro della chiave in corrispondenza della giunta: lo spessore è di circa mm.3. Io non sono andato fino in fondo per evitare di danneggiare qualcosa, una volta inciso il solco per mm.2,7 ho fatto leva col cacciavite e ho strappato il materiale restante.
The body is ultrasonically welded. With the disc cut along the perimeter of the key in correspondence of the joint: the thickness is approximately 3mm. I have not gone all the way down
|
|
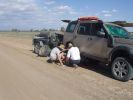
03 First bit of tyre/wheel trouble245 viewsIn the outback a tyre suddenly blew. "No worries" we thought, as we had 3 spares (+ two more if we abandoned the trailer), 150l of water, 3 days of food, and an EPIRB if things got really bad. At the time I didn\'t fully appreciate the fact that my index got a blister from the burning heat of one of the wheel nuts. It was 45 deg C at the time, so everything was hot.
|
|
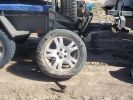
04 Damaged Tyre301 viewsYes, there\'s no doubt that this was a flat tyre. The ultra hot wheel nuts, look of the flat (note in a later photo that the back of the tyre appeared okay) and increased fuel consumption should have been a clue, but it was 45 deg C, and we had been doing about 105 km/hr on a dirt road for hours, so we just assumed it was a flat = WRONGO!
|
|
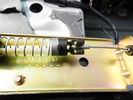
Lavoro finito - Finished work39 viewsEcco come appare a lavoro finito
Here is how it looks, finished the job
|
|
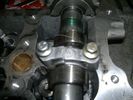
Snapped cap12 views
|
|
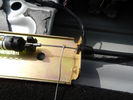
In caso di emergenza - For emergency48 viewsNel caso dovesse succedere nuovamente ho predisposto un cavetto da tirare.
If it were to happen again I have set up a cable to pull.
|
|
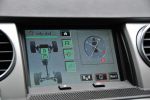
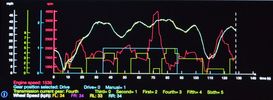
4x4 info when it happened.87 views
|
|

Thread upload7 viewsImage uploaded in thread 187861
|
|
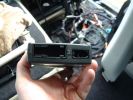
1 Nokia - Connections and loom appearing80 views
|
|
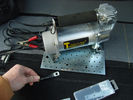
Compressore con base104 viewsIl materiale di partenza: compressore 12 volto senza base originale e con base fatta appositamente per il vano della 2° batteria del D3
|
|
First Thing this Morning :-)109 views
|
|
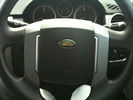
The Before - Standard Steering Wheel73 views
|
|

The Middle - Steering Wheel with Airbag Removed92 views
|
|
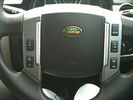
The After - Upgraded Steering Wheel91 views
|
|
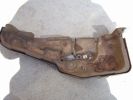
Compressor original cover657 viewsThe rock punctured straight through the plastic cover, snapped the soft compressor bracket and tore open one of the loom plugs.
|
|
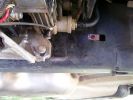
Repositioned compressor bracket738 viewsThe bracket was snapped in two, so I had it re-welded and slotted out the mounting holes so that it could be positioned 10mm higher (no longer protrudes under the chassis rail)
|
|
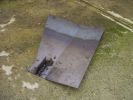
Steel compressor plate684 viewsIgnore my crappy welding attempts - I got a friend to finally weld the locator tab on the front!
|
|
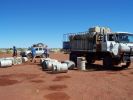
Fuel truck happened to be in the same day261 views
|
|
Thread upload322 viewsImage uploaded in thread 102519
|
|

Finito - At the end47 viewsEcco come appare la sponda a lavoro finito.
Here is how is the job ended.
|
|
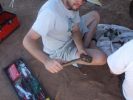
13 How to care for tools303 viewsWhat happened to the sledge hammer after 2 hours of beating my seized and cracked disk/park brake assembly to bits. Now down to 1 hammer remaining. At least by this time it was getting cooler (down to 40 deg C)
|
|

para polvere 113 viewsgomma parapolvere strappata solo esternamente
|
|
16 All the remains of a D3\'s parking brake373 viewsAfter 4 hours of hammering, finally removed the disk/park brake drum, and nearly all the parking brake bits fell to the ground. Cut rhe remaining brake cable loose as it was wrapped around the hub and a bit melted. Also having 2 jacks + 2 jack stands will support 4 hrs of hammering on the side of my D3.
|
|
![Filename=162-[Happy]-[SuperEmoticons_com].gif
Filesize=2KB
Dimensions=60x40
Date added=01.Jan 2010 162-[Happy]-[SuperEmoticons_com].gif](albums/userpics/14643/thumb_162-%5BHappy%5D-%5BSuperEmoticons_com%5D.gif)
45 views
|
|
Adam Happy @ Yarwell79 views
|
|
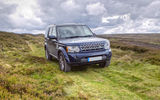
D4 HSE Baltic Blue365 views
|
|
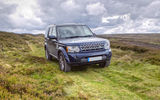
Discovery 4 HSE Baltic Blue334 views
|
|
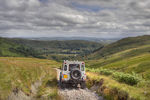
The view from the top of Breasthigh Road36 views
|
|
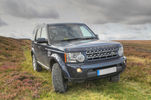
D4 HSE Baltic Blue with 255/55/19 General AT Tyres276 views
|
|
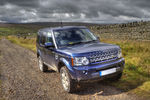
D4 HSE Baltic Blue with 255/55/19 General AT Tyres368 views
|
|
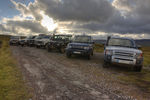
On Grasshill Causeway73 viewsA selection of D3's, a D4 and a couple of Defenders on Grasshill Causeway the highest greenlane in the UK
|
|
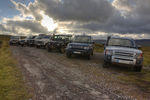
On Grasshill Causeway 320 viewsA selection of D3's, a D4 and a couple of Defenders on Grasshill Causeway the highest greenlane in the UK
|
|
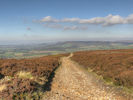
Rudland Rigg51 viewsThe view from the top of Rudland Rigg looking out towards Roseberry Topping and the coast.
|
|

This is a normal H7 HID bulb installed in a BMW headlight to show glare above cut off line99 viewsThis is what the light pattern is that causes glare in most retofit applications including some projector lights. this is in fact a projector headlight on a BMW but the old projectors were only actually half projectors and half reflective bowls. the beam pattern should be clean cut like this ___/
|
|

my MOG 404 APP110 views
|
|

2009 Ford ESP Extended Warranty Contract144 views
|
|

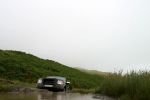
Nordkapp, Ghastly weather101 views
|
|

83 viewsReverse wire tapped into
|
|
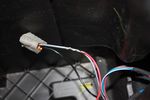
109 viewsThis is the plug for the accessory socket at the rear of the cubby box. On commercial D3 such as this one, there is no accessory socket so this plug is unused. I tapped into the 12V wire as an ignition feed. This will feed a relay coil which opens up power from the aux battery. Like this I can still retro fit and make use of the accessory socket later on.
|
|
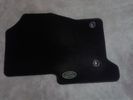
Set tappetini Land Rover per Discovery 3/4.19 viewsSet tappetini Land Rover per Discovery 3/4.
|
|

FBH_App-Default_Screen19 views
|
|

FBH_App-CheckSignal_Screen19 views
|
|

FBH_App-WebastoON_Screen19 views
|
|

FBH_App-Exit_Screen17 views
|
|

snapped cv joint n/s/f92 views
|
|
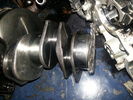
snapped crank (thread same name)25 views
|
|
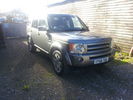
At work shining in the sunsheeeine181 viewsWashed it last night and applied Permanon Car Supershine Nano coating
|
|
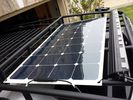
solar roof install444 viewsMore or less wrapped up my solar installation today. I added a Grape Solar Flex 100W panel, it's adequate to keep the vehicle topped off with the Fridge running, and Ham, but it could lose some ground if transmitting depending on how much, 2 would be awesome. One is enough, but barely. I am quite impressed with the Grape Solar flex panel version 2.0.
https://www.facebook.com/DifferentialPartsUS
|
|
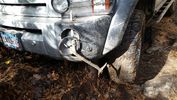
Thread upload26 viewsOne in a million shot. This happened while wheeling.
|
|

6 viewselaborazione scarichi aspirazione rifacimento frizione più robusta distribuzione egr killer centralina remapping
|
|

Thread upload23 viewsImage uploaded in thread 184721
|
|

Thread upload22 viewsImage uploaded in thread 184721
|
|

Thread upload23 viewsImage uploaded in thread 184721
|
|

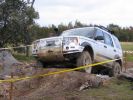
Mud/rock scrapes.177 viewsWhat happens when you lean the car on a mud wall.
|
|

Damage closeup 1150 viewsWhat happens when you lean the car on a mud wall.
|
|
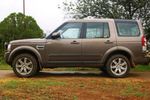
Normal height at off-road height (+50mm approx)202 views
|
|
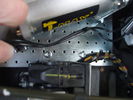
piastra compressore86 viewsParticolare dei bulloni di fissaggio della piastra al piano di appoggio del vano batteria
|
|

Shade is a rare commodity88 viewsRunning through the wadis approaching Jebel Achter, shade is a commodity scarce enough not to waste.
|
|
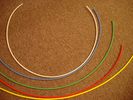
6mm Heat Shrink colours 362 viewsI decided to colour code the tubing so I used 6mm electrical heat shrink.
As there is no apparent colour coding re the 3, I tried to emulate the P38 coding; #1 LR red, #2 RR blue, #3 LF yellow, and #4 RF green. This was not doable as both left side air springs have green coloured tubing coming off the top of the front and rear air springs. I therefore arbitrarily chose the Left Rear to be red; Left Front green; Right Front yellow; Right Rear blue; and for the air compressor supply line, White coloured heat shrink. Since two new lines tie into each air spring line, I made the line between the air spring and the FASKIT, a single solid colour, and the line from the FASKIT to the valve block, White, plus the related appropriate solid colour.
|
|
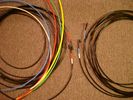
6mm PA12 grade nylon tubing with heat shrink applied 544 viewsShows some of the 6mm air line with heat shrink applied to one end of tubing. Shrink will be applied to the other end once field cut to length. These four tubes, each about 20 ft (6m) long, feed to the rear. Re the front air lines, (not shown), four additional lengths, each about 10 ft (3m) long, are required plus one more 3 metre length for compressor air. The 6mm tubing is a Nylon product specified as PA12. There is also a very similar Transport grade PA11 material, however it seems that PA12 is the more common Transport grade now in use. Also the applicable DIN standard seems to be both DIN 73378 and DIN 74324 for the nylon tubing. The working pressure of the 6mm tubing is about 27 Bar and bursting 82 Bar @ 20C. This is for the 1mm nominal wall thickness material, (4mm ID, 6mm OD).
|
|

Thread upload12 viewsImage uploaded in new thread
|
|

Next seasons haircut, apparently.156 views
|
|

Thread upload16 viewsImage uploaded in thread 167839
|
|

Add A Circuit Littelfuse Data sheet2279 viewsThe switch connects to what Littelfuse brand calls an Add-A-Circuit model FMH200BP which is an adapter that plugs in place of a Mini fuse and then has space for two Mini fuses, (original and a second one). In this install, only the original 5 amp fuse was used - adapter was so as to route power from fuse box thru fuse, then rocker switch, and then back to fuse box.
Before you install the Add A Circuit for this application, take an ohm meter and trace out the circuit path of the four slots that fuses could insert into. The path is more complicated than one might first think. As such, the orientation of the fuse holder in the socket matters for this application - that is for a circuit diverter, rather than accessory adder.
|
|
crappy soldering...98 views
|
|

happy camper19 views
|
|
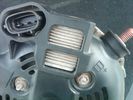
Alternator Plug and B+ terminal919 viewsPictured is the rear of the older Land Rover part # YLE500190 alternator showing the shiny cooling fin of the Regitar VRH2005-142 regulator under.
The first pin in the far left side of the connector is numbered #1 in the LR electrical wiring diagrams and is Battery Voltage Sensing (BVS); the middle pin, #2 receives a Pulse Width Modulated (PWM) signal from the Engine Control Module (ECM), and the right pin, #3 carries a PWM signal back to the ECM. Terminal Pin #2 on the LR wiring diagrams is called Alternator Control or ALT CON; Pin #3 per LR is called Alternator Monitoring or ALT MON.
Pin #1 is similar to what in older designs used to be called A or Batt, but is now called by Denso, S, AS, or Alternator Sensing for this design. Pin #1 also provides power to excite the alternator at startup until the PWM instructions over ride the battery voltage info. Land Rover calls the electronics under the pins a Smart Regulator, ironic, as it has to follow orders from the ECM rather than give the orders - new age thinking I guess. This is different from older design internal regulators that look at just the battery or the electrical buss voltage and then decides itself what to do.
It is almost like we are back to the external regulator designs of old, except that the ECM may decide that instead of telling the alternator to make more power, to load shed, and hence shut down the heated windscreen, seats, or whatever other electrical loads it decides are appropriate. My view is that the "smarts" are in the ECM and that the "regulator" should be regarded if not dumb, then as being a slave to the ECM.
|
|

Thread upload13 viewsImage uploaded in thread 144407
|
|

Thread upload11 viewsImage uploaded in thread 144407
|
|

Setup Web application for Altox WBUS-461 viewshow to setup the Web application for Altox WBUS-4
|
|

handrover app (android)29 viewslets offroad
|
|
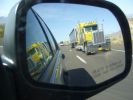
Objects in the rear view mirror are closer than they appear.251 views
|
|

Thread upload4 viewsImage uploaded in thread 203150
|
|

Thread upload13 viewsImage uploaded in thread 158023
|
|
Thread upload10 viewsImage uploaded in thread 202052
|
|

Apple-iPad-iPhone-iBoard-iMate-Evolution.jpg55 views
|
|

iPad Camera Kit19 views
|
|
Thread upload8 viewsImage uploaded in thread 164338
|
|

4 views
|
|

Thread upload7 viewsImage uploaded in new thread
|
|

8 views
|
|

Thread upload8 viewsImage uploaded in new thread
|
|

8 views
|
|

Thread upload8 viewsImage uploaded in new thread
|
|

8 views
|
|

Thread upload9 viewsImage uploaded in new thread
|
|

4 views
|
|

Thread upload8 viewsImage uploaded in new thread
|
|
Tong 200891 views
|
|
Tong 200889 views
|
|

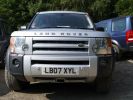
Tong 200889 views
|
|
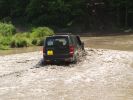
Tong 200888 views
|
|

145 viewsApplecross mountains
|
|
Thread upload1 viewsImage uploaded in thread 185838
|
|

Thread upload0 viewsImage uploaded in thread 185838
|
|

Thread upload1 viewsImage uploaded in thread 185838
|
|
Thread upload34 viewsImage uploaded in thread 109563
|
|

18 views
|
|

Thread upload18 viewsImage uploaded in new thread
|
|

Thread upload9 viewsImage uploaded in new thread
|
|
Thread upload7 viewsImage uploaded in new thread
|
|

Thread upload17 viewsImage uploaded in thread 172891
|
|

Thread upload11 viewsImage uploaded in thread 174831
|
|
25 views
|
|
23 views
|
|

21 views
|
|

19 views
|
|

IELTS test app32 viewsa little android app I wrote to help english learners planning to take the IELTS test
(some vocabulary in chinese)
|
|

30 views
|
|

Thread upload2 viewsImage uploaded in thread 139616
|
|

Thread upload4 viewsImage uploaded in thread 183644
|
|

Thread upload8 viewsImage uploaded in thread 190029
|
|
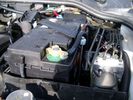
Aux Battery showing ground cable bolt "upside" down 1579 viewsIn order to obtain sufficient height clearance to get the plastic cover back on, I had to install the ground cable to the underside of the battery post connector.
Note the battery vent hose, (approx 5 ft required) is run down into where the windshield washer fluid container is located. There is not much electrical or metal in that area to be corroded by battery gas plus the open end of the vent hose tends to be protected from dirt and stays clean as well.
|
|
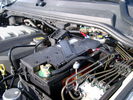
BCI Group 40R Deka 640RMF battery showing vent hose run forward to windshield washer reservoir area 1432 viewsRecessed post "Euro profile" battery to "match" OEM and stock Land Rover bracket; note that the Traxide SC80-LR module is mounted at an angle to allow for the main cable to sit under the cover so cover still closes.
The battery is a nominal 7", (180mm), high, but sits on a 1" battery spacer set under to raise the bottom front end of the battery such that the approx 11", (290 mm), length of the BCI 40R battery rises above the angled plastic nibs at the forward end bottom of the case front; hence sufficient space, (1/4", 5mm) remains at the brake reservoir end.
Also the 40R battery does not have hold down "flanges" on each end; on the sides yes, but not the ends so no additional length is required.
When I had to replace the 40R, this time I installed the shorter, (9.625"), taller, (7.5") Interstate BCI 47 / DIN H5 battery which eliminated the spacer on the bottom and better fit the stock LR tie down bolt lengths. Deka also has a BCI 47 / DIN H5 that would work fine as well.
|
|

BAS remap interface after dealer software update287 viewsBAS remap interface after dealer software update,This is what you will be presented with after the dealer updates your cars engine software.
This is no problem IF you have returned the car to standard before the dealer visit.
When faced with this screen it will show you tht the dealer has changed the software and NOT let you put the BAS mapping back on your car because of the differences.
|
|

Wrapped with foam51 views
|
|
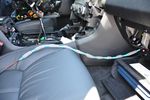
Wrapped cable82 views
|
|
Black Lane, Mellor Moor172 viewsLooking at tread marks, appears to be only tractors that come up here of recent - until me!
|
|

Black Deposits to interior of Brake Light Switch2863 viewsThere are two contacts, one on each side of the vertical plunger under the copper metal. The set of normally open contacts on the left side that carries the power for the brake light filaments, (15 amp fuse F15P), is apparently not heavy enough as the contacts deteriorate and generate the black residue.
The set of normally closed contacts on the other side appear to be sized OK. There is not as much current, (5 amp fuse F66P), flowing thru the contacts to the ABS module, however the contacts are likely adversely affected by the black residue produced by the other deteriorating set of contacts.
One presumes/hopes that the newer replacement switch now has contacts heavy enough to carry the brake light power. It would be ideal if the ABS set of contacts were sealed from the brake light contacts to prevent contamination of the normally closed set of contacts.
|
|
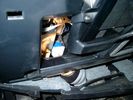
Brake Switch Visible thru Opening4977 viewsThe blue and white bit is the switch; the sort of gold appearing box,(it is really black), you will not see in your 3 as it is a Smooth Talker brand amplifier for my Blackberry phone antenna. This install is detailed in the SmoothTalker phone antenna section of my gallery.
One way to remove and install the switch is to lower the "horizontal" panel above the brake pedal as shown where the flashlight head is located. To actually remove the switch, you slide your hand thru the gap and rotate the switch clockwise 1/4 turn while watching thru the rectangular opening. Installation of the new switch is the reverse of above - 1/4 turn counterclockwise.
Before you remove the switch, note its orientation - horizontal with electrical wires to the left. That is the way it should look after replacement as well.
The second time I replaced the switch, I did it all thru the rectangular opening and did not remove the horizontal panel - that is experience helping out.
The knee kick you have to remove regardless. It is sort of hinged at the bottom so you just pull at the top and sort of rotate the knee panel and then pull upwards for two plastic "fingers" to clear the slots they reside in.
|
|
snapped cap bottom right21 views
|
|
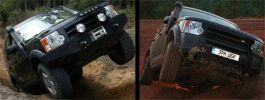
Comparison with OEM bumper, shows approach clearance gained306 views
|
|
Thread upload32 viewsImage uploaded in thread 172661
|
|

27 views
|
|

chrome wrapped FFRR32 viewschrome wrapped FFRR
|
|
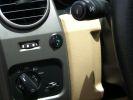
Long Ranger auxilairy fuel tank pump switch and tank gauge308 viewsFitted to the right of the air vent thumbwheel, the neat combination switch and gauge take sup no room at all. Switch locks on or off, but no pump running warning lamp! Contents of the tank are indicated by 5 LEDS, 4 green and 1 red for full, 3/4, 1/2, 1/4 and empty. Pump transfer rate of just 2 litres p/min is disappointing. I transfer on the move when main tank is at 1/4.
|
|
LongRanger auxiliary fuel tank358 viewsThe LR fuel tank imported from ARB in Australia with its 115 litre capacity has more than doubled the range of the car. This is important in the desert where fuel consumption increases at times to 10mpg or less. On a cruise on highways, the car now has a range approaching 850 miles. The tank fits neatly, has not affected handling in a detectable way apart from over speed humps, when a little more bounce from the rear suspension is detected! Suspension copes with the additonal loads without any problem.
|
|
Clearing a path to the trapped tractor29 views
|
|

TDV8 to Date249 views2007 (57) TDV8 HSE
Mods:
BAS mapped.. oh yeah..
Colour coordinated lower sills,Java handles, supercharger vents and grill
Hawke smoked repeaters
Halo style HD LED rings in headlights
22" supercharger style diamond cut alloys
2011 LED rear lights
|
|

This is what happens when you go too deep in a Discovery!578 viewsMy friend Dave was driving Strata Florida, after heavy rain. The Disco 200tdi was kitted for wading, with snorkel etc, but this demonstrates what happens when you submerge the bonnet.
|
|

Thread upload3 viewsImage uploaded in new thread
|
|

Thread upload9 viewsImage uploaded in thread 189928
|
|

55 views
|
|
Thread upload8 viewsImage uploaded in new thread
|
|
Thread upload7 viewsImage uploaded in thread 125156
|
|
Thread upload9 viewsImage uploaded in new thread
|
|
Thread upload6 viewsImage uploaded in thread 125156
|
|
Thread upload6 viewsImage uploaded in thread 125156
|
|
Thread upload6 viewsImage uploaded in thread 125156
|
|
Thread upload8 viewsImage uploaded in new thread
|
|
Thread upload7 viewsImage uploaded in thread 125156
|
|

Thread upload9 viewsImage uploaded in thread 125156
|
|

Thread upload6 viewsImage uploaded in thread 132535
|
|

doh believe it or not but i think i know what happend no special program selected51 views
|
|

Approved Vehicle Programme Multi-Point Inspection Check List Appendix26 viewsApproved Vehicle Programme Multi-Point Inspection Check List Appendix
|
|

Thread upload14 viewsImage uploaded in thread 163603
|
|
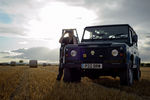
My Defender22 viewsDefender TD5 looking to keep it long term with a chassis replacement this year.but the quality / ride contrast between it and our Disco 3 is very apparent.
|
|
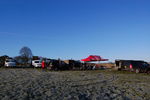
60 viewsA cold looking base camp, but a happy camp
|
|
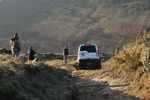
94 viewsWiggs's rear end disappearing over the edge.
|
|
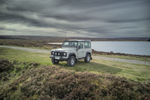
Thread upload22 viewsImage uploaded in thread 153623
|
|

18 views
|
|
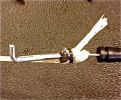
Pull cord as a backup63 viewsI added a pull cord so I would not kept caught with a broken release on the tailgate again. Think about a flat tyre if that happens to you.
|
|
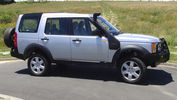
Disco3 with Llams set to +50mm and Offroad set149 viewsApprox 90mm lift
|
|
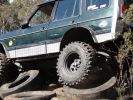
Tyre hill 3217 viewsC class V8 Disco made it through using the "grunt" approach
|
|
Simon disappears373 views
|
|
Gareth through Happy Valley544 views
|
|

A school on the road to Chitado145 viewsThe "school" is built of sticks, and the kids sit on wooden logs!
The kids were still very proud of their school and really appreciated the stationery
|
|
Along the beach on the way to Tombua. The wreck in the background is "Consortium Alpha"160 viewsApparently this boat was wrecked on it's maiden voyage cos the prop got caught in the nets
|
|
a Defender 150. Apparently 5 were made. We saw this one at Land Rover in Windhoek, Namibia178 views
|
|
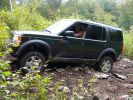
D3 happy in mud129 views
|
|
One slightly tired, but very happy D3133 views
|
|
Does Not Apply to D3s237 views
|
|
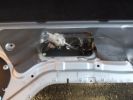
An alternative approach132 viewsDue to low temperature, and the size/mobility of my hands I decided that the easiest way to open the tail gate was to destroy the old Bowden cable and then pull centre core to release the tailgate - it worked, and doing this earlier would have saved a few cuts and grazes.
|
|
Jeff approaching the ford198 views
|
|
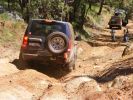
Arthur approaching ford217 views
|
|

29 viewsdischi maggiorati,forati e baffati,con pasticche apposite...
|
|
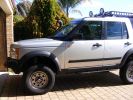
413 viewsLower front bib is removable via two bolts, for increased approach angle
|
|
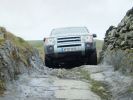
One of the wider bits of Happy Valley - Protrax Wild Wales322 views
|
|
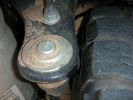
390 viewsTight clearance with Nitto TerraGrappler tires.
|
|
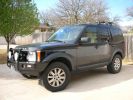
601 viewsMy truck; Nitto TerraGrapplers, ARB Winchbar, Warn 9.5 XP winch, Hella 4000\'s, Yakima bike rack
|
|
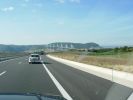
Millau bridge approach from north182 views
|
|
applying tape224 views
|
|

calendar entry 2009541 viewsCrossing a river in Iceland June 2008 - some of the rivers have deep sticky black basalt sand on their edges and some times needs a running approach! Car is G4 Challenge Event Car from 2006 - Team Germany / Spain - Stage 3/4 Bolivia
|
|
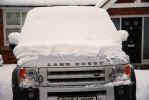
Happy Days!52 views
|
|

calendar entry 2009525 viewsCrossing a river in Iceland June 2008 - some of the rivers have deep sticky black basalt sand on their edges and some times needs a running approach! Car is G4 Challenge Event Car from 2006 - Team Germany / Spain - Stage 3/4 Bolivia
|
|

calendar entry 2009522 viewsCrossing a river in Iceland June 2008 - some of the rivers have deep sticky black basalt sand on their edges and some times needs a running approach! Car is G4 Challenge Event Car from 2006 - Team Germany / Spain - Stage 3/4 Bolivia
|
|
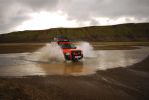
calendar entry 2009539 viewsCrossing a river in Iceland June 2008 - some of the rivers have deep sticky black basalt sand on their edges and some times needs a running approach! Car is G4 Challenge Event Car from 2006 - Team Germany / Spain - Stage 3/4 Bolivia
|
|
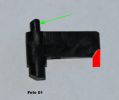
Foto 1 - particolare incriminato142 viewsIl problema del portello di rifornimento che non si chiude pi� � causato dalla rottura di un'appendice della linguetta che fa da guida al movimento (riprodotta in rosso). Un meccanismo simile al click delle penne biro. Un particolare del costo di qualche millesimo (valore della plastica) che in una macchina da �50.000,00 (per lo meno la mia) si sarebbe preferito in fusione di alluminio.
|
|
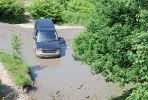
379 viewsCALENDAR ENTRY
Taken at Tong in June 2008
Approaching the \'big hill\'
|
|
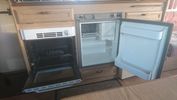
Clean and fully functional appliances34 views
|
|
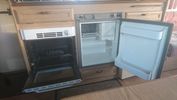
Clean and fully functional appliances103 views
|
|
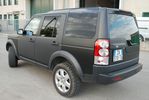
Car wrapping carbon black D4119 views
|
|
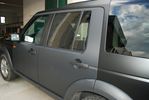
Car wrapping carbon black D4 2109 views
|
|
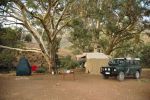
Defender 200 Tdi195 viewsCampsite in the Flinders Ranges, in the arid north of South Australia, as a dust storm blows up.
|
|

DVB-T Tuner Operations60 views
|
|

DVB-T Tuner aerial antenna positioning48 views
|
|
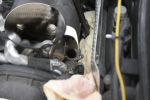
EGR Valve/Pipe Flange896 viewsThe bolts in the inset are the ones to be removed. Note the rag stuffed down beside the EGR to prevent dropped bolts or gaskets disappearing for ever. Don\'t forget to take the rag out if you don\'t want your D3 to go up in flames next time you use it!
|
|
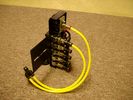
FASKIT on end view 864 viewsEnd and rear view of the FASKIT. Yellow lines are as shipped for hooking to the air supply; one line to valve/filler and other is to gauge. I will modify the arrangement to delete one of the yellow lines such that gauge line plugs into where the second yellow line is right now,(will be only one yellow tube), and then the air source line will plug into the port controlled by the valve, (hidden in this view but visible in other view). When white valve is in the ON position, gauge will read air source pressure, and be available to supply air to any of the selected four air springs. When valve is closed, the gauge will show individual air pressure in each of the air springs when a jumper is run between the gauge Schrader valve and the appropriate air spring Schrader valve.
|
|
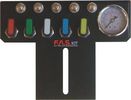
FASKIT air panel unmounted843 viewsThis is the manual air valve panel that is mounted in the "empty" space where the FBH normally resides. The gauge reads to a maximum of 25 Bar. The air tank relief valve is set just over 16.5 Bar (240 psig); the front air springs run maybe 9 Bar, (130 psig) and the rear, somewhat less, perhaps between 5 and 8 Bar. (70 to 115 psig). Max theoretical air spring pressure at full compression due to a big bump and full gross is approximately 27 Bar (390 psig).
|
|
Thread upload8 viewsImage uploaded in new thread
|
|
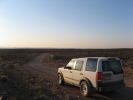
Approaching the Flinders from the East - from Erudina Woolshed153 views
|
|
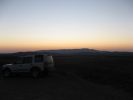
Approaching Wilpena Pound at Sunset - from Erudina Woolshed137 views
|
|

Front_clearance_offroad_mode754 views275/65/18 Cooper Discoverer STT mud tires - minimum clearance between front wheel and crappy plastic wheel arch. Although it lokos tight, there is actually more room between the tire and arch than the pictures shows.
|
|

Thread upload18 viewsImage uploaded in thread 117369
|
|
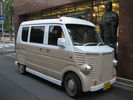
tokyo car140 views
|
|

best bar name in japan127 views
|
|
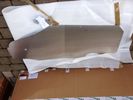
Unwrapped40 viewsD44 Tank Guard
|
|
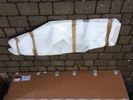
Wrapped38 viewsD44 tank guard
|
|

handrover app (android)25 views
|
|
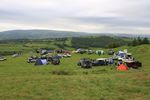
Happy Campers73 views
|
|
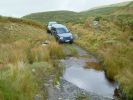
Happy Valley304 views
|
|
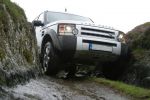
Happy Valley 161 views
|
|
Out of the Earth62 views
|
|

Thread upload5 viewsImage uploaded in thread 183683
|
|

Thread upload18 viewsImage uploaded in thread 124458
|
|
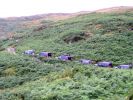
52 views
|
|

Thread upload1 viewsImage uploaded in thread 200758
|
|

Thread upload18 viewsImage uploaded in thread 120872
|
|

Thread upload16 viewsImage uploaded in thread 125610
|
|

40 views
|
|

Thread upload23 viewsImage uploaded in thread 192703
|
|

Thread upload8 viewsImage uploaded in new thread
|
|

Thread upload19 viewsImage uploaded in thread 101729
|
|
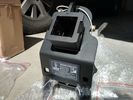
Rhino Tow Loop Hitch270 viewsThis is a receiver end view of the Rhino Hitch that ties to the factory tow loop. In addition to improved strength, it does not reduce ground clearance as does the factory style when installed.
Land Rover in early advertising videos when the 3 first came out showed the D3 hanging from a crane via the frame. The intent was to show how strong the frame is and by inference, the rear tow loop, specifically noted as being good for 6 tonne. The video ends before anything dropped or was lowered back to the ground, so one of course does not know for certain. The Rhino Hitch design however picks up on the apparent evidence of strength and certainly the additional clearance.
|
|
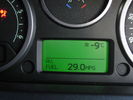
Northern Sweden October 201033 viewsHeading North to the Nordkapp.
|
|

IGN Live Spade - Approx 0.8mm x 6.3mm24 views
|
|

Underside of the ciruit board129 viewsThis looks more of a mess than needed to be. The Maplins guy tried to be helpful when I bought the relays, he wrote down the switching COM/NO/NC, it was actually NC/COM/NO. Some scratching of head when it didn't work then worked out what happened when I looked on the manufacturers website at the data sheet...lesson of the day check the data sheet!
|
|

Underside106 viewsStrapping threaded and rubber feet added, to the alloy frame made for it to sit in
|
|

One of the multimedia headrests14 viewsI used to have seperate touchscreens mounted on the headrests.
I now went to the xtrons 9" headrests which gives the children the possibility to
- view whatever movie they want to
- listen to whatever music they want to
- play whatever 32native game they want to (although I'm not quite happy with those)
and they can do this no matter what the other one is doing :)
|
|

just got it23 viewsthe girls like to dress up and think I am snapping them but look behind at the yaks head
|
|

happy little tractor23 views
|
|

The start of a 2 day adventure109 viewsOverall, car performed really well in all desert conditions, but doesn't do so well on side slopes or full on straight and soft dune climbs. Find an easier approach with plenty of power on and she'll climb the sandy equivalent of Everest!
|
|
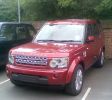
New Disco 4 3.0 HSE as it arrived at the dealers the day I just happend to be there190 views
|
|

Playing with laptop, GPS, Mobile Broadband and Mappoint/GoogleEarth82 views
|
|
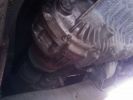
transfer box leak - apparently not529 viewsleak discovered today crap
|
|
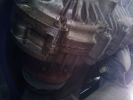
483 viewsappeared to be clogged up breather pipe uff
|
|
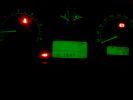
MY07 software applied to a MY06 instrument pack152 views
|
|

Apple 149 views
|
|

Apple 234 views
|
|

Apple 332 views
|
|

Apple 427 views
|
|

Apple 528 views
|
|

Apple 629 views
|
|

Apple 724 views
|
|

Apple 826 views
|
|

Apple 922 views
|
|

Apple 1025 views
|
|

Apple 1122 views
|
|

Headlight mod88 viewsAmber lens was quick to dissappear..
|
|
Evohome application8 views
|
|

LP scoped 222 viewsBy connecting a Low Amps probe to the fuel pump's voltage supply wire, you can view the pump's current waveform on a digital storage oscilloscope (DSO). The scope pattern will reveal internal wear in the brushes and commutator that may not show up in a traditional pressure or volume test.
Observing the waveform will show if the pump's amp draw is normal for the application or is high or low, and if the pump is operating at normal speed or is running slow. Problems such as a bad spot on a commutator or a short or open in the armature also will be obvious in the waveform.
A "good" electric fuel pump waveform will generally seesaw back and forth with relative consistency and minimal variation between the highs and lows. A "bad" waveform will show large or irregular drops in the pattern, with large differences between the highs and lows.
|
|

My Ball80 viewsLaser was happy
|
|
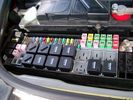
Picture of the engine compartment fuse panel5780 viewsEngine compartment fuse panel located near the battery. This is where F3E, (5 amp), F26E, (20 amp), Fuseable link 10E, (60 amp) and Relay 7E, the now upgraded 70 amp air compressor motor relay, part number YWB500220, (E is for Engine compartment fuse box), are all located. Fuse F35P, (5 amp), is inside the Passenger compartment behind the lower glove box door.
To keep the suspension from going down to the stops when driving, (or parked), it appears that it is only really necessary to remove F26E to depower the exhaust valve and generally keep all the valve block solenoid valves in a closed position trapping whatever air is within the air springs. F3E gets its power thru F26E, so when F26E is removed, the F3E circuit is automatically de-powered. F35P is more interesting in that battery power goes thru the ignition switch and F35P and then into the air suspension control unit. Apparently however, if F26E is removed, removing the F35P is not needed even when the engine is running.
With all fuses still in, if you have a problem, in practice, ideally, the compressor still works and will raise the 3 to an appropriate height. If so, one can then shut the engine off and allow the computers to go to sleep and then you remove the fuse(s). In actual practice, it seems that one need only pull the F26E fuse and can do so with the engine running. All the same, one might consider that the 3 is first a mobile computer, and secondly a 4x4. Computers prefer to go to sleep before the plug is pulled on them, however given that F26E circuit is always alive, then the computer never sleeps. With the fuse(s) pulled, and if you are still up, you can now be a 4x4 instead of a low rider. The whole purpose of the fuse pulling exercise is to depower the one and only system exhaust valve that is physically located within the compressor unit, (to keep it from opening), and secondarily to keep closed the four air spring solenoids within the block valves. This also shuts the air compressor down and stops the air compressor from making air even if the compressor is still good. That is why you initially need the fuse(s) in to allow the compressor to make air if it can.
|
|
After ditch crossing awaiting driving instructors184 viewsTR mode Rock Crawl - nearside front wheel apparently got to about 1 metre free of ground when we started on the climb to this section but no photos - sorry.
|
|
Start of easy hill climb172 viewsTR mode Rock Crawl - although I did turn off Hill Descent as the other side was not too steep and she wanted to keep slowing dramatically which I didn't appreciate in convoy. (Where is my old Pajero that had the inclinometer?)
|
|
Rest stop after our first hill descent - line of cars stretched way back up the hill that disappears up to right of photo.201 views
|
|
Start of approach to creek crossing174 views
|
|

Brand new blinking Discovery359 viewsDad is very happy with his new car, but mine daughter is more than proud and wil make a blinking picture. This is the first and only day to have a blinking Discoevery3.
Rene@LR3.nl
|
|
463 viewsFirst step in the journey, installed USB ports.
At the time I installed these, the goal was to use them in combination with the car-computer that resided in the back.
In the meanwhile, I dismantled the car-computer and nearly everything that was connected to it (touchscreen front, Wifi, DVB-T ...).
I kept the USB outlets in the front and turned them into charger for the appliances missus brings with her when we're on holiday. Mainly her iPod and smartphone ...
|
|
One happy customer - Artù322 viewsYes, whilst I was fitting everything, he was going mad as he loves to be in the car. He\'s actually had a failed entry into the Disco as it\'s too high for him!!
|
|

iPhone Gas Cubby19 viewsScreenshot showing the fuel economy of the LR4
|
|
231 viewsLED\'s instead of ordinary bulbs, brake applied
|
|

My d3146 views
|
|

Sunday, December 4th, 2011 at 7a.m. in Amboseli National Park, Kenya (East Africa)227 viewsThe top of Mt. Kilimanjaro showed it self for 15 minutes in the morning and my buddy snapped this picture of me and my Disco 3 from a Defender while on a morning game drive
|
|

Floating Caravan - Gunwharf Quays, Portsmouth 64 viewsHalf term happy families....
|
|

A nice piece of kit...351 viewsOne piece of kit I bought for myself. A backpack big enough for one of those 17" MacBook Pro from Apple which does also possess some solar panels to recharge the batteries in my Treo, my BT GPS or iPod. Convenient for when I am NOT in the car... Here the background is an armored Toyota... No Landies around ! :-(
|
|

269 viewsfinally a car the mutt is happy in...
|
|
tappetini118 views
|
|
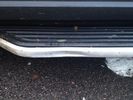
ooops - 21 viewsa great picture which describes why its not a good idea to have side steps fitted if you ever want to go off road. not sure where this happened, but the wife spotted it as soon as I went back to pick them up. Its her D4 and you can imagine she was not impressed. Still, a fun afternoon at a pay and play site whilst I was in inverness on holiday ;-)
|
|

I'm not sure if this is an approved method of tyre changing112 views
|
|
![Filename=IMG_1402 [1024x768].jpg
Filesize=110KB
Dimensions=1024x768
Date added=19.Apr 2009 IMG_1402 [1024x768].jpg](albums/userpics/12685/thumb_IMG_1402%20%5B1024x768%5D.jpg)
Discovery3 dappertutto74 views
|
|
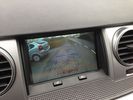
8 viewsNo buttons to press, simply stick it in reverse! This camera is also great @ night. More pictures to follow later this evening, so happy when I was done I just wanted to reverse in & out of car parks lol
|
|
magnet61 viewsmagnet trapping metal pieces
|
|
Plastic Promoter Applied77 views
|
|
Flappy bit of rubber139 views
|
|
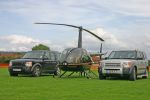
CALENDER ENTRY 2010269 viewsTaken at Nailsea flower show. I drove my disco there then Frapp took me to the airport to collect the helicopter. I flew the choper in and Frapp drove back there. Guess who arrived first!
|
|
Split intercooler hose100 viewsCaused black exhaust smoke when power was applied
|
|

DISCO 3 Porthallow Beach Cornwall 13 Aug 07 - CALENDAR 2008 ENTRY744 viewsCALENDAR 2008 ENTRY. Picture of my Disco 3 on the beach at Porthallow in Cornwall.
Picture taken in the height of the british summer on the 13th August 07 at approx 2:30 in the afternoon! (notice the hint of sarcasm there as even at that time of the day I had my lights on!).
Getting the car from where we were staying on to that beach was quite an entertaining drive, with the roads (more like lanes) only being just wide enough to fit the car through.
Hope you like it!
|
|

Disco 3 Porthallow Beach Cornwall140 viewsTaken 13th August 07 approx 14:30.
|
|
229 viewsApproaching the log sections
|
|

School - the kids are happy166 views
|
|

Using the stepladder method as approved by Oswiperus!16 views
|
|
Flamingo Camp, Angola www.aasafaris.com197 viewsThese guys entertained us for the night. What a great place. I am definitely going back for a longer visit. The fishing is apparently amazing
|
|

67 views
|
|

Thread upload10 viewsImage uploaded in thread 198490
|
|

Jeep Commander, Rocky Mountain National Park, Colorado157 viewsA 5.7 litre V8 330bhp POS!
When you plant the throttle, engine noise just gets louder, nothing else happens!
|
|

100 views
|
|

Happy Campers45 views
|
|

lappa1 viewsmud flaps
|
|
Thread upload21 viewsImage uploaded in thread 129540
|
|
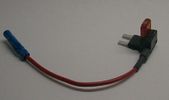
Littelfuse Mini Add-A-Circuit FMH200BP and OFH0200ZP1623 viewsFound this jpg somewhere on the forum - others are using them as it is a good way to tap the fuse box to add a fused circuit, or in this case, to modify a circuit to add a switch such that the fused circuit is switched. In my SmoothTalker gallery, there is a PDF from Littelfuse specifically related to this Add-A-Circuit device.
Before you install the Add A Circuit for any application, take an ohm meter and trace out the circuit path of the two pair of slots that fuses could insert into. The path is more complicated than one might first think. As such, the orientation of the fuse holder in the socket may matter depending upon the application. If the application is a circuit diverter, (as the F35 mode is), as opposed to a mere accessory adder, orientation matters.
|
|

LLumar "windscreen" clear Infra Red reduction side window film931 viewsThis is a data sheet on the LLumar brand of what they call Windscreen Film; It is almost clear, (has a bit of a blue tint), and reduces both the Ultra Violet fading and sun burn rays which most all films do as that is easy, plus more significantly, the Infra Red heat rays. That is rare as it is not so easy or cheap to do.
AIR80BLSRHPR (blue) is what the IR rejection film is listed as in the brochure that I used. http://www.llumar.com/en/AutoWindscreen.aspx
I had it applied to the front side windows as well as the front sun roof. One can feel the difference when the sun is low and streaming thru the side glass or high and coming thru the sun roof. Rolling a side window down is the simplest test of effectiveness re the rejection of the heat energy.
|
|

EPB Failure Analysis472 viewsDocumented dissection of failed screaming EPB showing fundamental design flaw and use of inappropriate materials.
|
|
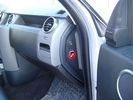
Air Suspension ECU Fuse 35P Shut Off Switch2636 viewsA more distant view of the shut off rocker switch in the ON position which is the normal position for when all is working as Land Rover intended.
Ideally, (but not totally necessary), the F35P circuit should be powered or de-energized after the various computers have gone to "sleep".
Similarly, removal of the F26E or F3E fuses is preferable after the computers have all gone to sleep but it appears that no real damage will be done if the fuses are removed while the system is energized. Pulling F26E is the main full time fuse that powers the air suspension computer. As such, once F26E is removed, pulling F3E is not really required.
Power for the compressor goes thru the 60 amp fusible link and relay, however control of the relay is via the air suspension computer so depowering the air suspension computer effectively depowers the air compressor and the internal exhaust valve relay/port.
|
|

Battery Maintainer pigtail sticking out of Grill729 viewsThis is all you see when everything is put back together - just the pigtail and Weather Pack blanking plug. Most often, I have it all tucked back behind the grill.
In winter, there may be a second cord hanging out as well - the 120 VAC power cord for the engine block heater, a tea kettle like element inserted in the engine block. NAS petrol V8's do not have the Fuel Burning Heater, (FBH), installed, but instead in cold area markets have the block heater element assembly available as a dealer installed option. There is an argument to say that the heating element is factory installed in all cold climate V8 gasoline engines, however the appropriate power cord is not. If true, this means that all one needs to purchase is the area specific power cord and plugging in / attachment to the engine block located block heater.
As such, you will often see a conventional 120VAC three prong power plug hanging loose out of the grill of most vehicles here in the wintertime. In summer, most drivers tuck the plug back behind the grill as it is no beauty mark.
|
|
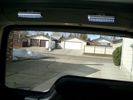
Boot lighting, looking to rear - hatch closed 543 viewsView shows the lights mounted in the rear on an early spring day.
In operation, the lights are tilted so that they shine downwards. The lights are mounted high enough up that one cannot see the LEDs from the front thru the rear view mirror; also the LEDs are so directional, that no light is thrown on the side glass.
Each assembly contains 15 LEDs, however the reflector is such that the LEDs appear to double.
|
|
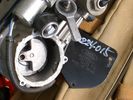
Compressor Con Rod Broken 1753 viewsThe model number of this compressor is RQG500060; the model number of my replacement compressor was LR015303, the unit that was apparently being installed on the D4 vehicles as of Spring 2010. As of Fall 2011, the new replacement part number is LR023964, the same as in the 4's.
Note the number hand written on the black plate. All the compressors seem to have some number hand written on them - hand built I presume, and every unit perhaps evolving a bit differently as LR struggles to build a compressor that will last. I guess Hitachi, (the manufacturer), should be given credit for that.
|
|
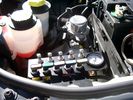
View of mounted panel from front left side878 viewsNote that all valve handles are shown in the OFF position, (the trouble position). In this case, the air that is in the air springs, (if any), is trapped in there - that is the valve blocks cannot vent whatever air is already in the air springs as the air lines between the springs and respective valve blocks are closed off by the FASKIT valves. In operation, there may be only trouble with one air spring, (perhaps a wheel height sensor), and as such, only one valve would need to be closed. If there was complete air compressor failure, then all valves would be closed and then as required, each spring could be manually filled from an outside clean dry oil free air source.
|
|
Empty space in NAS LR3 for location of FASKIT panel600 viewsThe empty space is available as the North America Spec gasoline engine LR3's do not have the Fuel Burning Heater installed. The air lines from the four air springs and the air tank will appear to rise up from under the headlight assembly. The lines to the front block valve assembly located behind the front right fog light will sort of run within the bumper across the front of the radiator down into behind the righthand fog light. The rear lines somewhat follow the path of the existing air feed line from the front valve assembly to compressor. Rather than be located between the left front fender liner and left metal wing however, the four lines will feed thru the empty wing space inside and above the wheel well arch and exit down by the left front mud flap. From there, the lines run along the left frame member above the air tank and then parallel the frame over top the compressor to the top of the rear left air spring where the rear air block valve assembly is located.
|
|

Blackberry Tour mounted on air vent showing default analogue clock 213 viewsA characteristic of the Blackberry is that when charging, the display can default to an analogue clock. Hence when the unit sits in the holder, the phone is being charged and the analogue clock displays. When the phone rings, the clock disappears and the call id displays.
|
|

Wheel cut thru definitions and specs898 viewsNote the location of REAR SPACING and also OFFSET; probably two of the most important dimensions and not always understood as related to wheel size and relationship to the brake components.
For the 3, Rear Spacing is approximately 6.5 inches or 165 mm for a nominal 8" rim. Offset is 53P or 53mm Positive, which means the distance from the machined hub flat mounting surface to the rim's true centreline is 53 mm in the outboard direction. (The rim illustrated has a negative offset.)
As Positive offset increases, this means the wheel wraps around the disc brake mechanism more deeply, and hence the more the wheel would cover the brake parts. This is why most 18" wheels will not fit with the larger Brembo "supercharged engine" brake calipers.
Pitch circle diameter is 120mm; Pattern is 5 lug, and the tyre load rating is 112 with a recommended tyre speed rating of H or higher along with the XL load rating. For the 3, the stock tyre diameter is about 30 inches. The 255/60/18 or 255/55/19 OEM tyre outside diameter is 30.04 inches; Wheel lug torque is from 130 to 150 Nm or 96 to 110 lbf-ft and the lug nut hex socket size is 22mm.
Max Load High Speed Driving Tyre pressures are Front, 33 psig, (230 Kpa) and Rear, 42 psig, (290 Kpa).
The OEM rims are rated at 940 kgs, the highest that LR makes, hence while rims from other Land Rover products may physically fit, the odds are they are under rated in a weight sense.
|
|
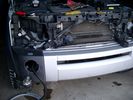
Wiring, (tubing), loom exiting temporarily from the front right fog light.569 viewsThe front axle air valve block is located just behind and below the fog light. Access to the valve block is by removing the right front fender liner, (or the bumper). The FASKIT lines are attached to the left and right front air spring lines at this location; also compressor air is taken from this location as well. Cutting the lines at as few different locations makes it easier to find leaks at a later date. As above, five 6mm air lines run from the FASKIT panel to the front axle air valve assembly and run within the loom. Two pair of the lines are for control of the air springs, and the fifth line taps the air supply at the valve block assembly off the compressor. This will be the air source line rather than tapping in directly to the high pressure air tank.
|
|
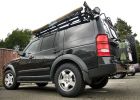
finally with more appropriate 18" BFG AT ko tires547 views
|
|

solo steep gravel stop = park brake plus reverse on shifter333 viewsso our disco II\'s locked all 4 wheels with brake but now the modern lr3 slides away with only the park brake!!!! 1. put auto shifter in reverse (low gear) with foot on brake, 2. apply park brake, 3. get out and snap photo incase something fails and it slides away ;)
I reversed up the hill from this position, system decided to engage extended heigh mode for some reason trying to gain traction on loose surface.
|
|

LR3 TDV6 RRS TDV8 Engine Pre-heating Operating Instructions - Appendix343 viewsThis is the instructions you get with the LR original Webasto timer kit
|
|

LR3 Denso Alternator YLE500390 pulley view819 viewsNote the DENSO sticker on the side. Denso calls their nominal 150 amp 12 Volt alternator an SC2 design. SC means Segment Conductor which apparently increase the winding density of the stator coil, hence yielding a physically smaller lighter alternator for a given output. I presume the 2 means the second try at getting it right. A Denso part number is 4280003690 for the alternator, (there are others, as below).
Rotation is clockwise and the 54mm diameter pulley has 6 grooves (PV6x54). Count the pulley grooves on both the one you remove and your new one - some replacement alternators seem to ship with 5 or 7 grooves so you might be swapping pulleys.
A previous LR part number was YLE500190 for the older variation of the newer YLE500390 unit.
An additional part number for a factory rebuilt is Nippon Denso 210-0569 for the petrol V8 alternator. Other Nippon Denso numbers include 104210-3690 and 104210-3691. The Lester number is 11206 which relates to another Denso number of 290-5287. WAI uses 11206N.
From 2006 to 2009, the internal regulator is a Transpo IN6349 and of the B circuit type if it can be said that applies to PWM, (Pulse Width Modulated), regulators.
The "regulator" inside the alternator is therefore really not a regulator in the old sense of the term but instead an instruction receiver from the ECM that translates Pulse Width Modulated (PWM) signals into a form that the alternator understands – digital like signals from the Engine Control Module(ECM) into analogue like signals that the windings understand.
|
|

LR3 and 4 NAS hitch receiver original and newer third generation.774 viewsThe picture shows the original 2005 model "plow" for the LR3 and the newer shorter hitch receiver introduced with the LR4. Either receiver can be used on the LR3/D3; they are interchangeable.
The part number of the newer third generation short style is LR019990 replacing previous long type part number KNB500080. There were two versions of the longer one, KNB500080 with the orange key, apparently a better locking setup. The first generation, KNB500023, with a black key was less than perfection.
The green lock assembly with orange key, part number KNW500010, shown on the shorter hitch, can be purchased separately should a key be lost.
Regardless of receiver model, the receiver will accept nominal NAS 2" tongue on which may be mounted the appropriate ball size.
|
|

Land Rover Brake Light switch XKB5001102700 viewsThis is what the switch looks like when removed from the parts box. Note that the plunger is recessed back into the body and when installing, the process of rotating the switch body 1/4 turn anticlockwise releases the plunger so it pops longer and engages the brake pedal. If you look down on the plunger you can see curved slots where the rotation takes place.
Do not try to rotate the new one - play with the one you remove. Also do not press on the brake pedal when removing or installing as you will damage the plunger - this is one of the reasons the plunger is retracted into the body for installation. It is also for this reason that if you try to confirm the operation of the switch contacts with an ohm meter by pressing the plunger, the switch will appear not to function as one might anticipate. Have faith, the switch will however, once installed and the plunger is in full motion.
|
|

Mirror shell replaced - notice self tapping screws52 viewsMirror shell replaced - notice self tapping screws to replace "plastic rivet heads" and also washers on inner screw to prevent screw piercing mirror housing due to short hole.
|
|

Thread upload0 viewsImage uploaded in new thread
|
|

Compare LR lettering102 viewsWhat happens when you let the dealer 'fix' the problem of deterioration of the bonnet badge lettering. Compare the left with the right side (LAND cf. ROVER). Only one side was 'fixed' under warranty.
|
|

LTB00062 - Technical Bulletin - IDS Vehicle Reset Application84 views
|
|

LTB00102 - Technical Bulletin - Driveline Clonk Noise after Throttle Release Reapply - Repair Procedure97 views
|
|

Excessive_Exhaust_Smoke_EN_-_Application_of_Bulletin19 viewsExcessive_Exhaust_Smoke_EN_-_Application_of_Bulletin
|
|

Lug Nut part number RRD500290 outline sketch541 viewsThis single sheet pdf provides dimensions of the LR part number RRD500290 lug nut on vehicles from MY 2005 to 2008, (up to VIN 8A450459). From VIN 8A450460, the part number is RRD500590.
Visually, there is no apparent difference between the two part numbers. The dimensions appear identical as well. The shape, size, and profile of the Stainless Steel "hat" appears identical.
There are I presume differences in metallurgy to reduce corrosion and swelling of the hat or perhaps better sealing between the inside surface of the hat and the steel of the lug nut body. The reality is the differences are not immediately obvious however.
A 22 mm six point half inch or larger socket drive fits over the lug nuts. I use a nominal 36" long breaker bar with the 22mm socket - any shorter bar, best you be in shape. Depending upon your source, for both alloy and steel wheels, the lug nut torque value appears to be 103 lbf ft, (140 Nm); others suggest first tighten to 96 and then finish at 110 lbf ft, (130 and 150 Nm).
|
|

I Approve!185 views
|
|

26 views
|
|
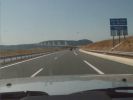
Northern approach to Millau Bridge84 views
|
|
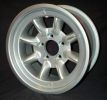
Minilites166 viewsNow if this wheel was available in 17-19" range wouldn't it complement the D3 especially if it had a nice Cooper STT tyre wrapped around it.
|
|

123 views
|
|
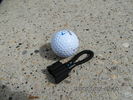
MOST fiber optic loop tool469 viewsThe looping tool in the jpg uses the Land Rover type plastic fiber optic cable with both ends feeding back into a female fiber optic connector that mates with the male fiber optic connectors on the Land Rover system.
The purpose of the loop is to allow one to disconnect MOST connected items such the BlueTooth module or the HK amplifier but allow the MOST system to still transmit signal from the head unit as the circuit would remain closed and hence complete. Of course with the Bluetooth module disconnected, there would be no Bluetooth available, however the radio and NAV would still function.
The looping tool allows one to troubleshoot the system by removing one component at at time from the MOST loop. In other words, what might appear to be a radio problem could be a Bluetooth problem - that sort of thing.
|
|

74 views
|
|

Mt Tamborine - panorama181 viewsPhotos taken on run into northern New South Wales - Hang gliders launch from here. Compiled from 5 images stitched with AutoStitch, a freeware application in development - superb application that requires little input other than reasonably good images.
|
|
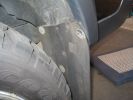
Used Original holes and 3 self tappers extra with penny washers 62 views
|
|

90 viewsI clipped a wallaby\'s tail -on dusk and in rain. There was no apparent damage upon initial inspection - however the flood light surround trim must have fell out on the return trip home.
|
|

Nitto Mud Grappler 33" x 12.50 clearance pencil575 views
|
|

Nitto Mud Grappler 33" x 12.50 clearance583 views
|
|

Nitto Mud Grappler 33" x 12.50 front549 views
|
|

Nitto Mud Grappler 33" x 12.50 side591 views
|
|
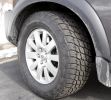
Right after install293 viewsHere is the left front Terra Grappler right after install. My they\'re big!
|
|

Head on Terra Grappler272 viewsLook at the nice tread on the Terra Grapplers. And they are quiet!
|
|
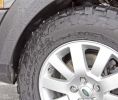
Front tire clearance288 viewsNote the close fit in normal height of the Nitto Terra Grappler 285/60 R18. I\'ve had no rubbing yet.
|
|
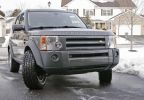
Nitto Terra Grapplers - front view270 views
|
|

Thread upload8 viewsImage uploaded in thread 139782
|
|

Thread upload0 viewsImage uploaded in new thread
|
|

Thread upload0 viewsImage uploaded in new thread
|
|
Thread upload5 viewsImage uploaded in thread 196051
|
|
209 viewsLead Jeep got stuck, I was behind him towing the D2 & the other Jeep behind us. The trail was narrow so to get him out we strapped the 4 trucks together & I & the back Jeep got r\' done!
|
|
197 viewsApproaching a mud pit with the peddle to the medal towing the D2
|
|

Happy campers at Boughrood65 views
|
|

New Boots - Nitto Terra Grapplers451 views
|
|
New Boots - Nitto Terra Grapplers366 views
|
|

Mitsubishi Pajero - Sapporo, Hokkaido193 viewsNice looking with custom painted bumper and special grille. Much better looking than the Aussie VRX version which uses the same grille but with standard bumper and bulbous lights.
|
|
Unknown Make197 viewsSnapped as it was leaving a small shopping centre but particularly interesting swage lines over the wheels which are featuring the typical Japanese feature of ultra low profile tyres. Ugly as a hatfull treatment of the front end though.
|
|
Negative Battery Cable209 viewsThis shows the corrosion from the negative terminal on the Negative to body ground. This is likely due to gas released through the negative post. It appears to be a common problem with the LR3. As a result of this corrosion left unchecked will damage the computer ecu and cables mounted near and below the battery.
|
|
Turn around area near Pyrocarpa Flora Reserve118 viewsApproximately 29ºS, 153.21ºE (did not observe the Eucalyptus pyrocarpa flowering though).
|
|

Minyon Falls - Nightcap NP111 viewsWest of Byron Bay (approx 28º27'S, 153º23'E) in the Nightcap National Park. Rocky Creek Dam is in the next valley west and supplies water to much of NE NSW.
|
|
High Centered & Happy(Before)203 viewsEntered extended mode when high centered
|
|

peralappa3 viewstail no wiper and mud flaps
|
|

What happened to the Permagrin?113 viewsNoticed that Permaglum had set in, in our group ...
|
|
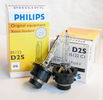
Philips D2S 85122 C1 Xenon 4300K projector HID bulb962 viewsThis is the 4300K OEM bulb in our HID Xenon projector headlights. People who design illumination systems regard the 4300K colour as a good compromise to provide what is called definition. This is effectively the ability to actually determine what an object being illuminated probably is. The more blue colour bulbs, say 5000K and greater, result in a reduction in the ability to distinguish detail, (regardless of brightness), of the object being illuminated. Effectively, you can see the object but you cannot quite figure out what it is. This is because the more blue frequencies means there are fewer other frequencies of light that allow our eyes to actually discern what an object really is.
The 4300K colour temperature applies to clear air conditions; for rain, dust, snow, fog, etc, then a yellow 2500K colour temperature is preferable. 2500K provides more contrast and there is less back splash of light off the air particles. In blowing snow, this means less sparkle back. Flat top cut off of the light beam, (which is the pattern our projector lights have), is important to reducing back splash - hence you do do not want roof mounted lighting for adverse conditions - as low down as possible is preferable, (which is why fog lights generally sit low.)
|
|
40 viewsSelf tapping screw in ashtray
|
|
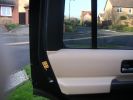
Panel gap421 viewsthis is the offending poorly fitted plastic capping
|
|
Astons disappearing into the night (should have taken the pix earlier)156 views
|
|
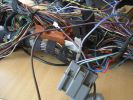
Pin swapping87 viewsExample of having routed the wires to their destination connectors to have the pins swapped out.
|
|

67 views
|
|
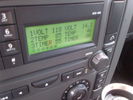
Voltage Display Page Radio Head Unit 118 14.2840 viewsThis shows the voltage/temperature/timer display page within the 6CD-465 radio head. There is a second file within this album, a doc file, that outlines the procedure to access the diagnostics.
The 14.1 volts number was the approximate vehicle system voltage with the engine running; the 118 number infers 11.8 volts which is the low power infotainment system shutdown cutoff voltage. The factory default setting is 135 or about 13.5 volts. By holding the keypad 1 button down, the 3 digit volts numbers will decrease 001 at a time until the keypad 1 button is released. Decreasing the number from 135 to some lower number should increase the time the system will remain on with the engine off.
The TEMP numbers refer to Fuel Burning Heater, (FBH), temperature values. 85 is apparently a high limit and 46 was the number when the jpg was taken. This number varies and given that there is no diesel fueled FBH in our NAS petrol engine vehicles, what the value refers to is unclear. The TIMER numbers also relate to the diesel fuel burning engine heater and perhaps make more sense being 00.
|
|
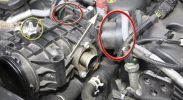
Lifting the EGR Butterfly Housing1021 viewsRemove the bolt circled in yellow. The housing can then be lifted carefully from the front. The \'Y\' shaped duct at the back will swivel at the points circled in red. Be careful of the connector at the back (arrowed) - I snapped the lugs that held it to something back there by pulling the housing up too far!
|
|
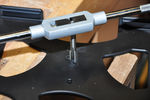
Drill & tapping Brodit iPad 2 mount with M10 thread to attach to Ram ball28 views
|
|

Gunbarrel Highway - Kata Tjuta (the Olgas)226 viewsAfter 300 kms of mud, the olgas appear
|
|

Transpo pdf explaining the operation of Ford PWM regulators625 viewsThe 4 page pdf produced by WAI-Transpo explains the operation of the Pulse Width Modulated regulators located within the alternators on our 3's. Of note, the pdf states that certain of the Ford PWM regulators do not meet Ford spec.
The pdf explains the function of all the terminals and the apparent advantages of the PWM style over previous designs. Note that Ford calls their "engine computer" a PCM, (Power Control Module), whereas Land Rover, an ECM, (Engine Control Module).
|
|
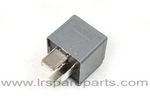
Air Compressor 70 amp replacement relay1394 viewsThere is a software update, 09 April 2010, LTB00270, for the compressor which reduces the shut down pressure to about 205 psig (14 bar). The update is usually done when changing to a new compressor and also includes replacing the R7 relay in the engine compartment fuse box, 07 DEC 2010 LTB00331.
The newer grey case coloured relay, part # YWB500220, shows to be rated at 70 amps, (the relay, not the compressor), however the previous black case coloured relay also indicates 70 amps.
Both the new and replaced relay show on their wiring diagrams to have a parallel voltage spike resistor, (probably 560 ohms), across the coil terminals, #1 and #2. This means one does not just replace the relay with any four prong 70 amp ISO sized relay that one happens upon.
One presumes the grey relay is either upgraded or just being installed for good measure. The relay is common on Ford Fiesta for the seat heater relay, Ford part number 5M5T 14B 192 EA; also Volvo, part number 30765034. The Tyco part number moulded on the grey body is V23136-J4-X62.
|
|

Thread upload8 viewsImage uploaded in thread 194057
|
|
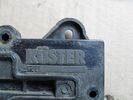
328 viewsThe name KUSTER (with umlaut over the U) appears on the lid - VERY British!!!
|
|
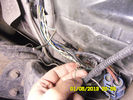
wiring snapped of66 views
|
|

D4 Mapped37 views
|
|

143 views
|
|

Thread upload13 viewsImage uploaded in thread 159039
|
|

Thread upload0 viewsImage uploaded in new thread
|
|

Thread upload0 viewsImage uploaded in new thread
|
|

Thread upload0 viewsImage uploaded in new thread
|
|

Thread upload0 viewsImage uploaded in new thread
|
|

Thread upload0 viewsImage uploaded in new thread
|
|

Thread upload0 viewsImage uploaded in new thread
|
|

Thread upload21 viewsImage uploaded in thread 174456
|
|
Thread upload10 viewsImage uploaded in thread 182161
|
|

Thread upload10 viewsImage uploaded in thread 155907
|
|

Thread upload12 viewsImage uploaded in new thread
|
|

Thread upload6 viewsImage uploaded in new thread
|
|

Thread upload1 viewsImage uploaded in thread 186253
|
|

Thread upload3 viewsImage uploaded in thread 187407
|
|

Thread upload2 viewsImage uploaded in thread 187407
|
|
Thread upload4 viewsImage uploaded in thread 126959
|
|

Thread upload1 viewsImage uploaded in thread 187407
|
|

Thread upload2 viewsImage uploaded in thread 187407
|
|

Thread upload3 viewsImage uploaded in thread 187407
|
|

Thread upload2 viewsImage uploaded in thread 159579
|
|

Thread upload2 viewsImage uploaded in thread 187407
|
|

4 views
|
|

Thread upload1 viewsImage uploaded in thread 188332
|
|

4 views
|
|

Thread upload2 viewsImage uploaded in thread 188332
|
|

Thread upload6 viewsImage uploaded in thread 187407
|
|

Thread upload6 viewsImage uploaded in thread 17923
|
|

Thread upload3 viewsImage uploaded in thread 187407
|
|

Thread upload6 viewsImage uploaded in thread 187407
|
|

Thread upload6 viewsImage uploaded in thread 159579
|
|

Thread upload2 viewsImage uploaded in thread 186251
|
|

Thread upload3 viewsImage uploaded in thread 159579
|
|

Thread upload11 viewsImage uploaded in thread 183933
|
|

Thread upload0 viewsImage uploaded in thread 194984
|
|

Thread upload23 viewsImage uploaded in thread 17923
|
|

Thread upload1 viewsImage uploaded in thread 194599
|
|

Thread upload3 viewsImage uploaded in thread 195939
|
|

Thread upload3 viewsImage uploaded in thread 195939
|
|

Thread upload1 viewsImage uploaded in thread 194599
|
|

Thread upload2 viewsImage uploaded in thread 194599
|
|
|
|