| Search results - "away" |
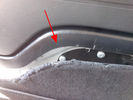
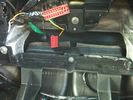
Rimozione pannello dalla sponda - Tailgate panel removing45 viewsPer togliere il pannello moquettato dalla sponda ho fatto leva con un cacciavite abbastanza grosso nel punto indicato, è stato veloce e non ho rovinato niente.
To remove the carpeted panel away from the tailgate I used a big enought screwdriver at the point indicated, it was fast and I have not ruined anything.
|
|
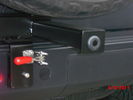
Sensor bar33 viewsSensor has been moved out to tire carrier where it should be. It does not pick up the tire anymore. "no faults".
|
|
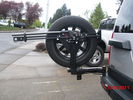
Highlift mount added27 viewsHighlift mounted in this position allows for any length with out overhead clearance issues if stood upright
|
|
highlift and new sensor wire loom30 viewsNew wire loom added to protect sensor wires and keep things sanitary looking
. Highlift jack mount arms added and gas strut
|
|
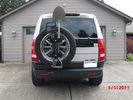
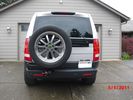
New mods for carrier. Backup sensor moved to the tire carrier. Toy rack and highlift mounts.38 viewsSon wanted all the toys on the carrier. I just wanted easy removal for a good clean look.
|
|
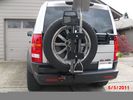
This is how to make it all work. Backup sensor on carrier43 viewsHighlift, ax and shovel. Yes they are matching colors. What else?
|
|
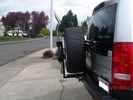
Receiver for toy rack39 viewsSensor bar was made of same heavy tube that the carrier was made from allowing a small 1 1/4" receiver to be placed on it for a multitude of toy racks of my choice. Rack adjust in and out of receiver.
|
|
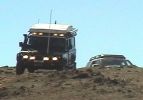
110 at Carinya Escapes ,Flinders ranges296 viewsDefender 110 Extreme,Long Range fuel tank,under floor water tanks, HF radio,GKN Overdrive,Swingaway Spare Carrier,70 litre Freezer,30 litre Fridge,Roof top Camper,Cruise Control,
|
|
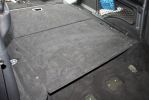
12220 viewsThe boot cover is back in place, hiding away all the controller components.
|
|

Lunar Ultima hitched to Disco 411 viewsPulling away for another caravan adventure
|
|
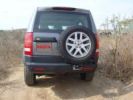
Rasta 4x4 Swing away spare wheel mount115 views
|
|
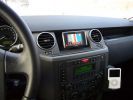
Navi Becker and iPod287 viewsThe Becker Highspeed II was installed in the bin with power connected. Works great, even TMC worked inside the garage right away!
|
|

View across the plain113 viewsThis was a shot across the plain taken with my KM Z5 at maximum 12x optical resolution - these vehicles were a long long long way away!
|
|

14 viewsOur treasure, passed away in june'12
He served for 14 years.
We miss him.
|
|
fitted ..tucked away 155 views
|
|

Thread upload5 viewsImage uploaded in thread 178588
|
|
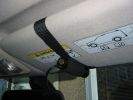
Cam mounted on sun-visor244 viewsI usually place something in between the sun-visor and the roof lining to give the cam a better angle. At Boughrood it was a roll of PVC tape. For Boughrood I also placed a small cardboard box between the cam and the sun-visor to bring the cam away from the dirty section of windscreen.
|
|
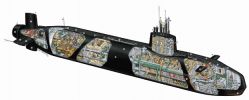
Astute Cutaway253 views
|
|

monitor above chubby box - fold away behind the box86 views
|
|
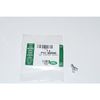
Clip Spring Metal FYC 500040 that holds LR together1750 viewsThe jpg is of the spring metal clip, Land Rover part number FYC 500040 that holds most of our 3 together - well at least most the interior trim parts.
If you are going to remove interior panels, you may as well stock up on a few for replacement as upon panel removal, the clips tend to spring away into deep never to be found voids within your 3.
|
|

Not much left of bonnet!281 viewsCrash in a Renault Scenic
Head on colition with a Nissan Terrano he lost control came over the central reservation & ended coming at us sideways!
We hit him in the back wheel arch & spun him around so he then hit my drivers side, I walked away having a air bag wife had broken solder coursed by the seat belt, but it did save her life!
Our car was trashed but it did its gob (was only 2 weeks old!) the bonnet tacking lots of energy out of the collision & the inertia staying relatively in tacked.
|
|

Disco3 on the move in Dangalli Conservation Park - at speed (south of Yunta)178 viewsMusic heard in video is from the stero blasting away inside the Disco - and yes...that was a cattle grid being crossed at the start :-)
|
|
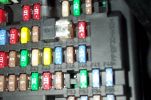
Tapa-Circuit Fuse Tap411 viewsTapa-circuit fuse tap fitted in existing fuseway provides extra fuseway which I have used to hard wire my Tomtom Sat Nav PDA. The fused output feeds into a female socket (Cigar lighter sized) into which the tomtom power adaptor is plugged. All hidden away behind the glove box.
|
|
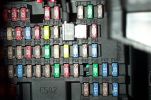
Tapa-circuit Fuse Tap435 viewsTapa-circuit fuse tap fitted in existing fuseway provides extra fuseway which I have used to hard wire my Tomtom Sat Nav PDA. The fused output feeds into a female socket (Cigar lighter sized) into which the tomtom power adaptor is plugged. All hidden away behind the glove box.
|
|
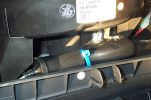
Hard wired tomtom498 viewsThe fused output from a tapa-circuit feeds into a female socket (Cigar lighter sized) into which the tomtom power adaptor is plugged. All hidden away behind the glove box.
|
|
My D3 - Stornaway Grey112 views
|
|
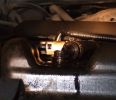
Damaged area66 viewsPic shows plastic breather fitting with the corner ground away. When tank reached full fuel is pushed out under forecourt pump pressure. The second occurrence shows similar damage.
|
|
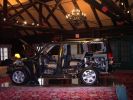
cutaway499 views
|
|
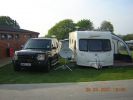
New van - set up at last146 viewsFirst trip away with new tin tent
|
|
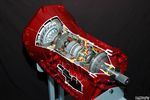
Ford 6R60 six speed cutaway showing torque converter.2201 viewsThis is a cutaway of the Ford 6R60 six speed which is a Ford license built version similar to our ZF 6HP26 six speed speced on early 3's.
The newer 3's and 4's have the ZF 6HP28. The Ford version is called the 6R80 and variations of it are used on the Raptor. As such, the Raptor metal pan can be installed on the 3's tranny but the deeper Ford Raptor pan does not have a drain plug.
|
|
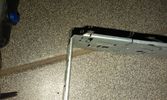
48 viewsI still needed to cut some small bits away from the DIN in order to have the facia cover fit nicely.
|
|
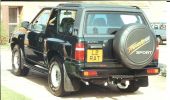
1994 Vauxhall Frontera, how they ever got away with calling it a \'Sport\'!119 views
|
|
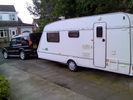
ES Premium with caravan hitched120 viewsES Premium with caravan hitched for weekend away
|
|

Switch is blue colour thing thru the rectangular opening.3180 viewsThe blue coloured plastic bit thru the rectangular opening is the brake light switch. The fist time, I found it easier remove the switch by dropping the horizontal plastic panel, (two screws), and then slipping my hand in and rotating the switch clockwise 1/4 turn. The second time, I was able to remove the switch thru the rectangular opening and did not need to remove the horizontal lower panel. Obviously, I had to remove the sloping knee pad panel, (note sort of hinged at the bottom so pull back from the top.)
Regardless, do not touch the brake pedal - just let it sit where it wants to. One has to first remove the angled knee pad panel that sits under the steering wheel. It can be pulled from the top corner at the door side. Pulling releases a pair of those U shaped metal clips that LR loves so dearly. You have to pull quite hard. The bottom is held by a couple of plastic fingers in a couple of slots so you pull at the top till the two clips release and then rotate the panel and pull upwards a bit.
To remove the switch, you rotate it clockwise and pull outwards. Rotating the switch clockwise automatically retracts the plunger back into the switch body away from the brake pedal arm.
Similarly when you install the new switch, the required 1/4 turn anti clockwise rotation action releases the plunger so it lays up against the brake pedal arm and at the same time, secures the switch in place.
To remove the electrical wires, the switch will drop below the horizontal pad and hang from the wires so unclipping the electrical connector plug is fairly easy to do.
|
|
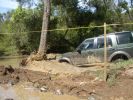
Last D3 through the deep crossing229 viewsThe water was stirred up by this time (didn't start off too clean due to heavy rains in the previous week) water was between 500 and 600mm deep depending on where the driver crossed. Away from the tree was slightly deeper but most drivers chose that line to be well clear of the tree.
|
|
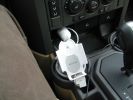
Set up in a cup holder...514 viewsRemember that my car is a LHD... There is a small suction cap to prevent the iPod from coming away to easily but it sildes "up" quite easily when you want to remove it... The Car charging adapter goes right behind in the provided outlet...
|
|
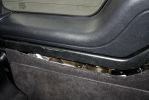
Cut away piece to fit DDin83 views
|
|
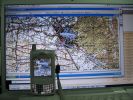
TTQV and PathAway on a Mac...384 viewsThat picture was taken as I was using TTQV from Touratech on a Mac running Windows XP SP2 under Parallels Software beta... The mobile is a Palm Treo 650 running PathAway...
|
|
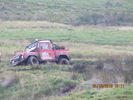
80 viewsGeorge (from 1/2 mile away)
|
|

It all packed away so quickly!52 views
|
|
106 viewsCarpet panel pried away from tailgate trim
|
|

Thread upload8 viewsImage uploaded in new thread
|
|
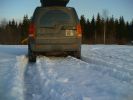
Snow is malting511 views Anything odd in the picture - except that snow is unfortunately melting away too early ?
|
|
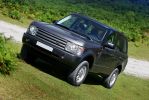
236 viewsShort outing outside the house and away.
|
|

My 2008 Discovery 3 TDV6 SE - Stornaway Grey36 viewsMy 2008 Discovery 3 TDV6 SE - Stornaway Grey
|
|

My 2008 Discovery 3 TDV6 SE - Stornaway Grey34 viewsMy 2008 Discovery 3 TDV6 SE - Stornaway Grey
|
|

My 2008 Discovery 3 TDV6 SE - Stornaway Grey33 viewsMy 2008 Discovery 3 TDV6 SE - Stornaway Grey
|
|

My 2008 Discovery 3 TDV6 SE - Stornaway Grey32 viewsMy 2008 Discovery 3 TDV6 SE - Stornaway Grey
|
|
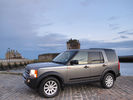
My 2008 Discovery 3 TDV6 SE - Stornaway Grey38 viewsMy 2008 Discovery 3 TDV6 SE - Stornaway Grey
|
|
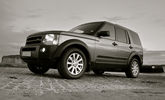
My 2008 Discovery 3 TDV6 SE - Stornaway Grey28 viewsMy 2008 Discovery 3 TDV6 SE - Stornaway Grey
|
|
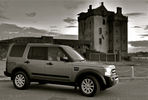
My 2008 Discovery 3 TDV6 SE - Stornaway Grey256 viewsMy 2008 Discovery 3 TDV6 SE - Stornaway Grey
|
|

My 2008 Discovery 3 TDV6 SE - Stornaway Grey46 viewsMy 2008 Discovery 3 TDV6 SE - Stornaway Grey
|
|
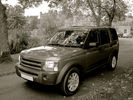
My 2008 Discovery 3 TDV6 SE - Stornaway Grey39 viewsMy 2008 Discovery 3 TDV6 SE - Stornaway Grey
|
|
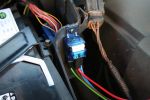
Wiring harness for Hella 4000 Compacts260 viewsWired directly to the battery, all tucked away neatly now but can\'t find the picie
|
|

LR3 Air Conditioner Drain Tubes behind centre console2137 viewsThis shows the two air conditioner drain tubes located left and right under the radio stack.
The tube on the left side, (steering wheel side, LHD), disattached itself and the carpet on the floor under the gas pedal etc became soaked. I think rain water from outside that comes in the outside cowl vents also exits via the tubes as I first noticed the carpet was wet after parking outside during a big rain storm.
It was relatively easy to slide up and reattach the rubber hose that runs from the rectangular shaped plastic discharge hole(s) of the heater "pan" down along the transmission hump area and thru the floor pan. There is a hose on each side of the transmission hump, but only one hose had let go on my 3. The rubber hoses just slide over the rectangular plastic openings of the two heater housing drain outlets.
To get at each drain hose, remove the vertical sort of triangle carpeted piece below each side of the radio stack. The triangles of carpet will just pull away as each is held on with those metal U clips Land Rover so likes. Dislodge each triangle at least sufficiently to get ones hand in to slide the rubber hose back on.
You will rarely see AC water on the ground as the front drains pour onto a metal underside protection skid plate and the rear drain onto the top of the left rear muffler.
|
|
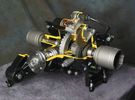
Rear Differential cutaway with E-Locker 1217 viewsThis jpg is from the link below.
There are another ten or so cutaways plus a whole file group showing a 2005 LR3 sectioned for the 2005 Chicago Auto show. Each jpg has an enlarge function to the bottom right of a main picture.
On one jpg you can see right into the stepper motor.
http://www.cutawaycreations.com/cutaways.php?project=land-rover-electronic-rear-differential#/IMAGES/car4/images/image1.jpg
Both the front and rear differentials are manufactured by Dana Spicer in the UK. Dana calls them a Clamshell design.
|
|

solo steep gravel stop = park brake plus reverse on shifter333 viewsso our disco II\'s locked all 4 wheels with brake but now the modern lr3 slides away with only the park brake!!!! 1. put auto shifter in reverse (low gear) with foot on brake, 2. apply park brake, 3. get out and snap photo incase something fails and it slides away ;)
I reversed up the hill from this position, system decided to engage extended heigh mode for some reason trying to gain traction on loose surface.
|
|
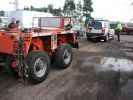
50t capacity trailer for D3 !!!80 viewsD3 comes in handy for splitting away 2 axles of a larger modular hydraulic heavy haulage trailer, just delivered an 80t transformer for me into Scotland, and we shortened the trailer for the journey back to Italy.
|
|

radar detector wires tucked up high414 viewsWires tied up neatly away from the electric motor, spool and gearbox.
|
|

Unknown bird at sand pumping station near mouth of the Tweed River124 viewsNoisy little bugger who remained under walkway but eventually came out and then flew away flying low over water towards Tweed Heads.
|
|
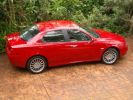
Alfa 156147 viewsOur 'other car' - not to be used on off road situations or 'She, who it is best to obey' gets mad at me. The evidence on the underbelly is a dead giveaway.
|
|

Killington VT 201330 viewsBottom of driveway before you get to the top, this was covered with about 6 inches of snow when we first got to VT but melted away 2 days later.
|
|
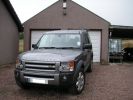
TDV6 HSE185 views
|
|
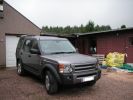
TDV6 HSE175 views
|
|
TDV6 HSE154 views
|
|
TDV6 HSE186 viewsbuilt 13 July 2007, picked up 16 July 2007)
|
|
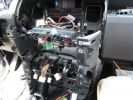
280 viewsHere is the center console with the support pulled away. You can see the wiring for the HD and XM radios working their way through the console and over to the lower glove box.
|
|

Regency Stages 2012101 viewsAll four wheel nuts sheared on a high speed corner & we had to retrieve the wheel from about 200yds away after it went on it's own little trip.
|
|
99 views
|
|
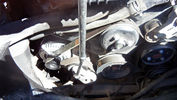
67 viewsThis is easy to remove. You will notice the tensioner at the bottom left near the alternator. There is a sqaure slot on the tensioner into which fits a 3/8" square drive. Just turn anti-clockwise and the tensioner is moved away to slacken the belt and off it comes.
|
|

ship sailing away8 views
|
|
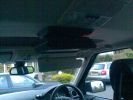
Stored away 132 views
|
|
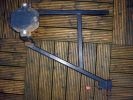
swing away carrier93 views
|
|
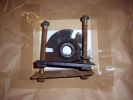
swing away chassis bracket102 views
|
|

Recommended temperature settings - Australian households167 viewsThis was from a give-away thermometer. It shows recommendations for various temperature settings for household appliances with a focus on the temperate part of Queensland.
|
|

Varta Battery Dimension chart573 viewsThis pdf provides Varta dimensions for among others, the E12V75N, (old DIN H6 or 85605 or BCI Group 48 size). This appears to be a deep cycle battery and the choice for many re the Aux battery install as long as you are willing to grind away the angled nibs at the bottom front of the battery surround. My choice was a shallow cycle battery intended for cold weather related engine starting rather than winch use.
Note the pdf Varta batteries are all deep cycle batteries suitable for running fridges, winches etc, rather than for engine starting and hence a good Aux battery if those are the intended uses rather than engine starting.
Varta now makes a Varta G14 with AGM technology and known as a Stop Start Plus battery. It is 95Ah, CCA of 850A; length 353mm; Width 175mm; Height 790mm and is specific for these newer stop start vehicles such as some D4's. For the 3's, one is still probably better off with an H8 sized battery but of the older Wet Flooded Lead Acid type and battery caps rather than a sealed AGM.
The Land Rover part number for the recommended battery is LR033179.
|
|
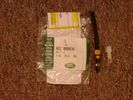
Voss System 203 connector 6 mm for valve blocks 907 viewsThis is Land Rover part number RQC000030, the Voss fitting for the axle valve blocks. I think it is a Voss System 203 6mm fitting, Voss part number 5 2 03 11 01 00.
The parts bag comes with the white plug inserted in the brass threaded bit with what is called the brass cutting ring placed on the tip of the white plastic plug. The idea is that one screws, (M10 x 1 thread), the brass insert into the appropriate hole with the white plug still in the brass insert. Once the brass is tight, (12 mm wrench), then the white plug is pulled from the assembly leaving the cutting ring down inside and under. One then pushes in the 6 mm tube end about 20 mm or so and the tube slides down thru the brass cutting ring, (2 internal sloped one way cutting ridges). When the tube is in far enough, one pulls upwards a bit and the ring cuts into the plastic such that the tube will not pull out. To remove tube, one unscrews the brass nut and all comes out, sort of like I have shown with the short piece of 6mm tubing. The white plug is a throwaway item upon install of the tubing.
|
|

Torque Converter cut away ZF 6HP26X tranny1551 viewsThis is a cut away of the model year 2005 ZF 6HP26X six speed automatic transmission. This is about as good a section of a torque converter, (the shudder maker), that I have yet seen.
|
|
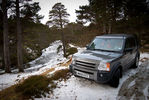
Linn of Dee - Cairngorms.44 views
|
|
|
|
|