| Search results - "back" |
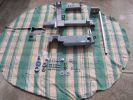
The full complement of bits and pieces, major parts back from the powder coaters, all bolts nuts washers replaced with stainless steel241 views
|
|
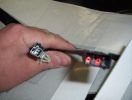
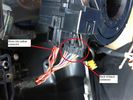
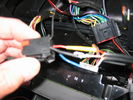
heated seat (base) wiring411 viewsThe Small connector takes the plug from the seat back pad, the larger connector (with red) is fitted into the multiplug casing uder the seat - the male side of this is already pre-wired.
|
|
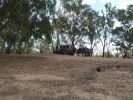
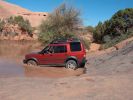
02 On banks of Darling River, Back of Bourke158 views"Back of Bourke" is the typical definition of the start of the Australian Outback. This was after crossing the Darling River "back of Bourke" on 8 Jan 08. We were the first vehicle to start driving after floods had closed (first time in 8 yrs there was any water in the river).
|
|
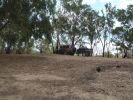
02 Last Photo before the little wheel problem saga222 viewsThis is my D3 with trailer on the banks of the Darling River, literally "back of Bourke" (the regional definition of the start of the Australian Outback). We were the first vehicle in a week to try and drive this route from Bourke to Wilcannia on the account of floods (first water in 7 years). Little did we know that 3 hours later there\'d be a bit of a wheel and tyre problem appearing...
|
|
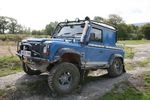
Truck Back 90 Challenge truck spec60 viewsSinusoidals at Ashford
|
|
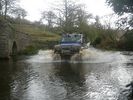
Truck Back 90 Challenge truck spec in the water53 views
|
|

194 viewsD3 with wind turbins in background, plus a Toyota
|
|
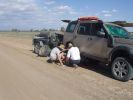
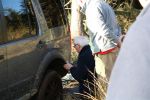
03 First bit of tyre/wheel trouble245 viewsIn the outback a tyre suddenly blew. "No worries" we thought, as we had 3 spares (+ two more if we abandoned the trailer), 150l of water, 3 days of food, and an EPIRB if things got really bad. At the time I didn\'t fully appreciate the fact that my index got a blister from the burning heat of one of the wheel nuts. It was 45 deg C at the time, so everything was hot.
|
|
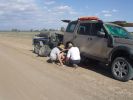
03 The first bit of tyre/wheel problem251 viewsSomewhere in the Australian outback on a 45 deg C day in Jan 08, a D3 had a bit of a flat tyre problem. "No worries, mate" st we had 3 spares (plus 2 more if we abandon the trailer), 150l of water, 4 days of food, and an EPIRB if things really go crook. The first clue that this was not a "normal" flat was when I handled a wheel nut and ended up with a blister from a burning hot nut (the ambient wasn\'t THAT hot).
|
|
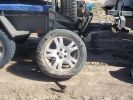
04 Damaged Tyre301 viewsYes, there\'s no doubt that this was a flat tyre. The ultra hot wheel nuts, look of the flat (note in a later photo that the back of the tyre appeared okay) and increased fuel consumption should have been a clue, but it was 45 deg C, and we had been doing about 105 km/hr on a dirt road for hours, so we just assumed it was a flat = WRONGO!
|
|
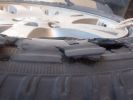
05 No doubt the tyre is flat276 viewsThis is the view of the flat tyre. Again, didn\'t think it anything more than a "normal" explosive blowout, as the tyre was about 90% worn, we were heavily loaded, it was 45 deg C, and driving 105 km/ho on a rough dirt road in the outback.
|
|
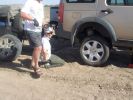
06 Spare tyre on and still suffering from hot wheel nuts296 viewsManaged to get ultra hot wheel nuts back on the spare (using the original 19" D3 wheel, vs the 19" RRS wider wheel which blew - shown in left of photo). Pity we didn\'t note that the disk brake was EXTREMELY hot at this time.
|
|

07 Back side of failed tyre340 viewsThis is the back of the blown tyre. It looks like any other worn tyre which has run a bit while flat. Note that we were running on wider 19" RRS wheels (have 4 19" MTRs + 1 old A/T on the original 5 wheels). Also have a rear-mount spare tyre holder which is really convenient with the wider rim and the fact that the tyre was still hot (it had some melted rubber on the other side!!)
|
|
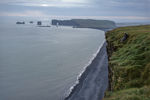
Watching puffins at VÃk21 viewsGreen cliffs with the black lava sand beach as backdrop.
|
|
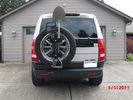
New mods for carrier. Backup sensor moved to the tire carrier. Toy rack and highlift mounts.38 viewsSon wanted all the toys on the carrier. I just wanted easy removal for a good clean look.
|
|
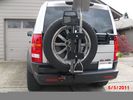
This is how to make it all work. Backup sensor on carrier43 viewsHighlift, ax and shovel. Yes they are matching colors. What else?
|
|
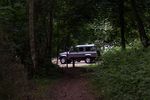
New Defender32 viewsNew Defender at National Trust park on route back home.
|
|
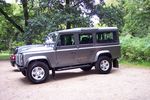
New Defender41 viewsNew Defender at National Trust park on route back home.
You can tell its new, its too shiny. Never looked like that again!
|
|
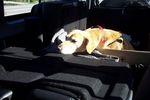
New Defender & Dog43 viewsOur dog relaxing in the back of the Defender.
|
|
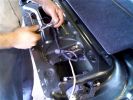
Putting all the bits back in52 viewsNotice the rope (Kevlar) coming out of the actuator box on the right side.
|
|
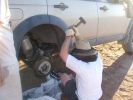
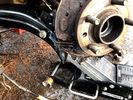
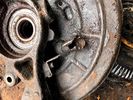
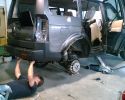
11 Lesson in removing a jammed brake assembly in the Outback379 viewsSpent the next 4 hours doing this to my D3. Gave the photos to Land Rover dealer and they did not think this constituted abuse of the vehicle. I thought that was charitable, but if we hadn\'t done this, the tow back to civilisation would have been even longer.
|
|
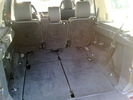
FSback198 views
|
|
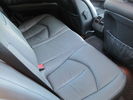
Mercedes E320 Back Seats22 views
|
|
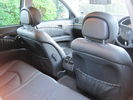
Mercedes E320 Back of Front Seats25 views
|
|
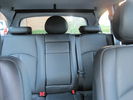
Mercedes E320 Back Seats20 views
|
|

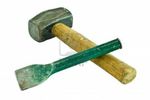
12 Half way through removing a jammed disk brake in the Outback297 viewsThis was just before breaking the sledge hammer. Note we luckily carried a spare hammer. Ended up using (or breaking) every tool we had on this little repair job. Bed sheets are a good way of gathering the bits to show for the inevitable warranty claim.
|
|
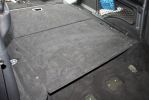
12220 viewsThe boot cover is back in place, hiding away all the controller components.
|
|
58 views
|
|
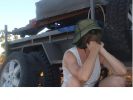
14 "Are we having fun yet?"349 viewsSWMBO is pondering why attempting to drive 3,900 kms across the outback on dirt roads is more fun than, say, spending New Years in Paris......
|
|

79 views
|
|

bent seat back118 views
|
|
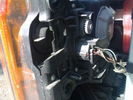
back of the light165 views
|
|

Ready to winch a friends disco 4 195 viewsback of the picture you can just see another freinds (luvbus) disco 3 acting as balast to stop the disco 4 pulling me down hill
|
|
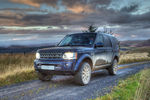
D4 HSE on top of Ogre Hill in Northumberland186 viewsD4 HSE on top of Ogre Hill in Northumberland with the Scottish hills in the background
|
|
10 viewsClone Back
|
|
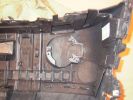
Back of bumper shows pre-fitted fog lamp brackets988 views
|
|
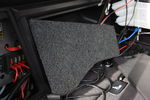
New cover for back panel66 views
|
|
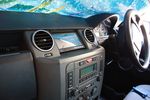
100 viewsScreen in place and console surround back on
|
|
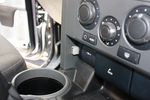
86 viewsAll back in place. Front USB socket final result.
|
|
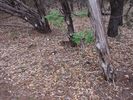
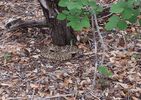
Western Diamondback Rattlesnake97 viewsAbout 4.5 Ft long
|
|
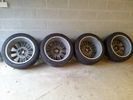
Wheels - Back28 views
|
|

Terratrip 202 V4 possible discrete location143 viewsAttached to ashtray - allowing removal / unplugging when not in use by pulling out the ashtray.
Terratrip is an odometer for use in rallies / raids - very popular with the French when used in conjunction with a roadbook. A mechanical backup in case GPS signal is lost on modern odometers like the Globe 800 I propose to use.
We'll see if there are reflection issues from the screen.
|
|
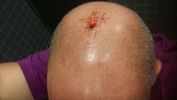
gauged head 15 viewsresult of bending down to pick up LTO tape for robot library and standing backup with door open (
|
|

offending part head caught 12 viewsoffending part head caught when standing back up from picking up dropped LTO tape
|
|

Back end13 views
|
|

Thread upload2 viewsImage uploaded in thread 201091
|
|
Thread upload3 viewsImage uploaded in thread 201091
|
|
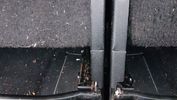
RAW jack4 viewsCasing just catches the inner legs of the seat backs.
|
|
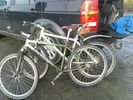
What 4x4's are for ...151 viewsThrowing a bunch of kit in back of an taking it places.
|
|
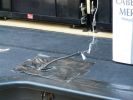
Temporary Tailgate Latch149 viewsTailgate jammed shut in Keep River NP (no access due to cargo barrier) 1000 km trip to Darwin dealer. After 3 days opened up and attached string. 2 weeks in Kakadu and Litchfield then back to Darwin when parts arrived
|
|

Thread upload10 viewsImage uploaded in new thread
|
|

Back seats.19 views
|
|
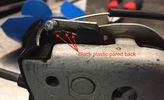
Close-up of lock showing emergency cable and pared back plastic tab144 views
|
|

Alternator and Regulator Wiring Diagrams, TDV6 and petrol V8 and V61991 viewsThis is a three page pdf that shows the alternator and regulator wiring for the petrol V6, petrol V8 and TDV6. The pdf can be either printed or by right clicking on the displayed pdf, rotated as required for viewing.
Of interest is that the regulator gets its instructions primarily from the Engine Control Module (ECM) and only secondarily from the vehicles electrical buss. The conductor from the battery thru the 5 amp fuse F20E is to provide initial power to excite the alternator at startup and then secondarily, to instruct it if the PWM signals were not available. Primary instructions to and from the ECM are thru the two other conductors via a digital like Pulse Width Modulated (PWM) signal.
If F20E, the 5 amp engine compartment fuse box fuse is blown, the red alternator light on the dash will be illuminated. This means that the alternator could be OK, but if the F20E fuse is blown, no electricity will be generated. Hence check the F20E fuse if you get a red ALT light or some indication of the alternator not working.
Regarding operation of the red ALT light on the dash, it is not the regulator within the alternator that tells the red light to illuminate, or not, but instead the ECM. This is the reason the red light does not function in the same manner as with older vehicles. With the 3, sometimes you have illumination and sometimes not depending upon what the ECM is thinking. What this means is that you can have an alternator that is failing but the red light does not illuminate as the ECM is compensating for reduced alternator output - maybe by draining the battery and or cutting back on vehicle electrical loads such as shutting off or cycling the radio amplifier or heated seats.
|
|
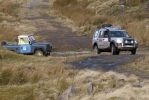
60 viewsColdweathers, classic 90 blew up its expansion bottle, he was glad of the ride to the top but funnily enuf didnt want a tow to the bottom, some say it may have been due to the fact that his 90 looked like it had been taken jet sking on the back of a D3
|
|
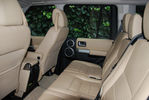
Back seats23 views
|
|
189 views
|
|

5D on body with d3 in the back!100 views
|
|
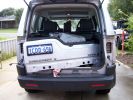
278 viewsRemove the back door
|
|
17 views
|
|

The Vale of Belvior and Nottingham in the background58 views
|
|
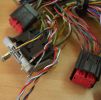
AirBag Pins79 viewsNew Wiring at AirBag ECU just need to back out the pins of the old and clip in the new.
|
|

Add A Circuit Littelfuse Data sheet2282 viewsThe switch connects to what Littelfuse brand calls an Add-A-Circuit model FMH200BP which is an adapter that plugs in place of a Mini fuse and then has space for two Mini fuses, (original and a second one). In this install, only the original 5 amp fuse was used - adapter was so as to route power from fuse box thru fuse, then rocker switch, and then back to fuse box.
Before you install the Add A Circuit for this application, take an ohm meter and trace out the circuit path of the four slots that fuses could insert into. The path is more complicated than one might first think. As such, the orientation of the fuse holder in the socket matters for this application - that is for a circuit diverter, rather than accessory adder.
|
|
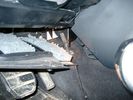
Air Conditioner Drain Hose on Drivers Side (LHD)2300 viewsThe corrugated rubber bit above and to the right of the gas pedal is the drain hose that goes down thru the carpet and floor sheet metal.
While it is bit hard to figure out from the jpg above, there is a rubber "strap" attached to the top of the corrugated hose that one uses to pull on to drag the hose up back around the black plastic heater "pan" drain. The same drain hose arrangement is on the other side as well.
One could I suppose run a plastic snap tie around the vertical pull strap if one was concerned about the hose slipping off again. See also the other jpg sketch which is from the Land Rover manual.
|
|
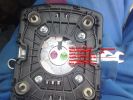
209 viewsBack view of airbag
|
|
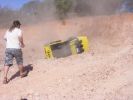
240 viewsOoops!! Tonka lost power and rolled back down onto his side
|
|
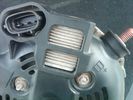
Alternator Plug and B+ terminal921 viewsPictured is the rear of the older Land Rover part # YLE500190 alternator showing the shiny cooling fin of the Regitar VRH2005-142 regulator under.
The first pin in the far left side of the connector is numbered #1 in the LR electrical wiring diagrams and is Battery Voltage Sensing (BVS); the middle pin, #2 receives a Pulse Width Modulated (PWM) signal from the Engine Control Module (ECM), and the right pin, #3 carries a PWM signal back to the ECM. Terminal Pin #2 on the LR wiring diagrams is called Alternator Control or ALT CON; Pin #3 per LR is called Alternator Monitoring or ALT MON.
Pin #1 is similar to what in older designs used to be called A or Batt, but is now called by Denso, S, AS, or Alternator Sensing for this design. Pin #1 also provides power to excite the alternator at startup until the PWM instructions over ride the battery voltage info. Land Rover calls the electronics under the pins a Smart Regulator, ironic, as it has to follow orders from the ECM rather than give the orders - new age thinking I guess. This is different from older design internal regulators that look at just the battery or the electrical buss voltage and then decides itself what to do.
It is almost like we are back to the external regulator designs of old, except that the ECM may decide that instead of telling the alternator to make more power, to load shed, and hence shut down the heated windscreen, seats, or whatever other electrical loads it decides are appropriate. My view is that the "smarts" are in the ECM and that the "regulator" should be regarded if not dumb, then as being a slave to the ECM.
|
|
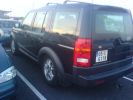
Got back to the airport after a few days in London to This!!!281 viewsThis is one of the many reasons we sold our first D3........
|
|
LR Aux Panel (rear)61 viewsBack of LR rear aux input panel
|
|
Aux Battery showing ground cable bolt "upside" down 1581 viewsIn order to obtain sufficient height clearance to get the plastic cover back on, I had to install the ground cable to the underside of the battery post connector.
Note the battery vent hose, (approx 5 ft required) is run down into where the windshield washer fluid container is located. There is not much electrical or metal in that area to be corroded by battery gas plus the open end of the vent hose tends to be protected from dirt and stays clean as well.
|
|
Spot the sport competition470 views
|
|
53 views
|
|
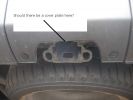
184 views
|
|

Back Flip not428 views
|
|
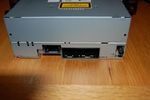
Back of DVD 175 views
|
|
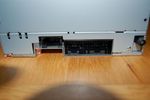
Back of DVD 276 views
|
|
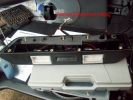
Didn\'t see reference to these anywhere - had to remove them143 views
|
|
back seat temp25 views
|
|
Back up Battrey on the DVD Player80 views
|
|
Back up battrey on Front of DVD Player79 views
|
|

Thread upload17 viewsImage uploaded in thread 136302
|
|

263 views
|
|
76 views
|
|

Thread upload8 viewsImage uploaded in thread 104059
|
|

Thread upload12 viewsImage uploaded in thread 22962
|
|

Thread upload3 viewsImage uploaded in thread 110148
|
|

11 views
|
|

Thread upload15 viewsImage uploaded in thread 172732
|
|
Thread upload3 viewsImage uploaded in thread 40682
|
|

244 views
|
|
Thread upload5 viewsImage uploaded in new thread
|
|
Thread upload4 viewsImage uploaded in new thread
|
|
79 views
|
|
86 views
|
|

BackGardenFoodSupply51 viewsmmmm...venison
|
|
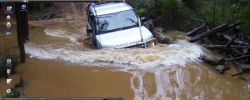
desktop pics181 views
|
|

Thread upload15 viewsImage uploaded in thread 191052
|
|

Thread upload17 viewsImage uploaded in thread 191052
|
|
10 views
|
|
98 views
|
|
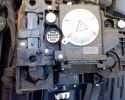
Back of Headlight121 views
|
|

199 views
|
|

Thread upload6 viewsImage uploaded in thread 161154
|
|
21 views
|
|
54 views
|
|

Thread upload0 viewsImage uploaded in thread 205170
|
|
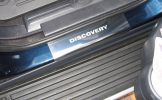
Stainless rear sill covers375 views
|
|

Thread upload6 viewsImage uploaded in thread 159579
|
|

Thread upload12 viewsImage uploaded in thread 22962
|
|
30 views
|
|

Thread upload5 viewsImage uploaded in thread 184740
|
|
Thread upload1 viewsImage uploaded in thread 198328
|
|
Thread upload14 viewsImage uploaded in thread 137627
|
|
Thread upload13 viewsImage uploaded in thread 137627
|
|
30 views
|
|

32 views
|
|
Thread upload21 viewsImage uploaded in thread 124051
|
|
27 views
|
|
Thread upload5 viewsImage uploaded in thread 120502
|
|

Thread upload12 viewsImage uploaded in thread 8370
|
|
Thread upload9 viewsImage uploaded in thread 200758
|
|
88 views
|
|
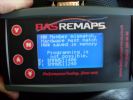
BAS remap interface after dealer software update287 viewsBAS remap interface after dealer software update,This is what you will be presented with after the dealer updates your cars engine software.
This is no problem IF you have returned the car to standard before the dealer visit.
When faced with this screen it will show you tht the dealer has changed the software and NOT let you put the BAS mapping back on your car because of the differences.
|
|
Black Supercharged Badge100 viewsGreat tip drilling from the back and you won\\\'t damage the lip that the badge is recessed in
|
|
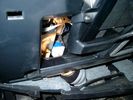
Smooth Talker Amplifier Box mounted below near steering column.180 viewsThe gold look box due to the lighting, (actually black), is the antenna amplifier located near the steering column. It can be put anyway but this seemed an OK location as I ran the antenna connector cable rearward from here to the back corner of the 3 and then up to the underside of the roof glass at the rear. The blue/white thing is the brake light switch that often must be replaced. See the Brake Light Switch file within this Gallery regarding the switch replacement.
|
|

bumper back138 views
|
|

Thread upload3 viewsImage uploaded in thread 186650
|
|

Thread upload3 viewsImage uploaded in thread 186650
|
|
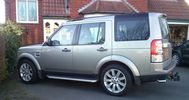
back on 20's81 viewswinter's over
|
|
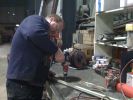
D3 Side Step Repairs187 viewsThere are about 10 rivets to drill out. I also increased the hole size to 5.5mm as I will be using larger rivets to hold the trim back in place. 5.5mm is the larger rivet size commonly available at motor factors etc.
|
|
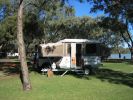
Jayco Dove Outback camper146 viewsPerfect setup for a young family
|
|

Thread upload2 viewsImage uploaded in thread 183462
|
|

www.cashbackcard.ie36 views
|
|

506 views
|
|

Thread upload0 viewsImage uploaded in thread 192069
|
|

Centre Console - back202 views
|
|

Central Door Locking Operation Description1458 viewsThis 17 page pdf explains how the door locks are supposed to operate. Note that on page 9/17, the explanation of the operation of the hood ajar switch is wrong. It operates similar to the door and tailgate ajar switches; that is when a "door" is closed, the switch is closed to maintain a ground back to the CJB. Opening the hood, door, or tailgate removes the ground breaking the circuit and hence allows for an alarm condition.
|
|
Thread upload13 viewsImage uploaded in thread 156375
|
|
Thread upload16 viewsImage uploaded in thread 160177
|
|
Thread upload13 viewsImage uploaded in thread 156375
|
|
Thread upload24 viewsImage uploaded in thread 160177
|
|
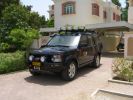
RHS view372 viewsSHows the Front Runner (SA) slimline windcheetah rack which is immensely strong. Takes my 110kg (oh gawd, I must get back on the diet and exercise regime) tramping over it when loading/unloading gear without a problem. Fittings are simply fixed or removed, and IMO very well designed and made. IPF 800 series driving and spots fitted to the front of the rack. IPF cam/reversing fitted each side and to rear of rack for negotiating rocky wadis at night. The G4 stickers were bought off E-bay as a set.
|
|
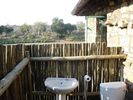
Bathroom No 237 viewsThe view from Bathroom No 2 is realy spectacular. The bathroom is in Botswana and the view is over the Limpopo River with South Africa in the back ground
|
|
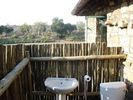
Outside bathroom56 viewsOver looking the Limpopo River with South Africa in the back ground
|
|
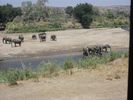
View from inside the house - South Africa in the back ground 34 views
|
|

36 views
|
|

TTB causes backlog44 viewsMy generally slow driving caused a few others to get held up - sorry
|
|
Looking back after a mile258 views
|
|
Calendar 2008 Entry531 viewsLooking back down Scotlands only \'greenlane\'
|
|
Backing out admting defeat321 views
|
|
Backflip (not)409 views
|
|
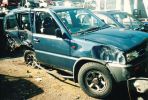
The car that we hit, pushed the back axle about 2\' through the car!288 views
|
|
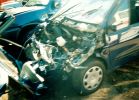
Not much left of bonnet!281 viewsCrash in a Renault Scenic
Head on colition with a Nissan Terrano he lost control came over the central reservation & ended coming at us sideways!
We hit him in the back wheel arch & spun him around so he then hit my drivers side, I walked away having a air bag wife had broken solder coursed by the seat belt, but it did save her life!
Our car was trashed but it did its gob (was only 2 weeks old!) the bonnet tacking lots of energy out of the collision & the inertia staying relatively in tacked.
|
|
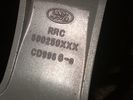
Part number moulded into spoke of 18" ten spoke. 323 viewsThis part number, RRC500250XXX is moulded into the backside of one of the spokes of the ten spoke 18" wheel. An alternate part number is ALY72190U or ALY72190U85 which relates to year and finish.
Another number is RRC500250MNH where MNH is also the finish, probably Sparkle Silver.
|
|
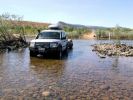
D3 in the Kimberley - on the Gibb River Road, crossing the Pentecost River49 viewsNot too far in on the Western end of the Gibb River Road is the Pentecost River, with the ranges in the back ground - an iconic shot of the Gibb River Road.
|
|
Thread upload4 viewsImage uploaded in thread 150447
|
|
Thread upload2 viewsImage uploaded in thread 150447
|
|

539 views
|
|
a marshal fixing some trim back on..!64 views
|
|
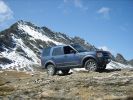
D3 High Alpine Pass450 viewsCALENDAR ENTRY
Sept.08 on the way back from Monaco towards Switzerland. The \'Col de L\'Iseran\' is the 3rd highest road in Europe and this shot is taken slightly higher than that!
|
|
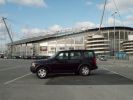
A bare looking Disco 3 at Eastlands back in February 2006167 views
|
|
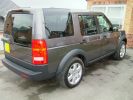
A little TLC and she\'s back to her former glory684 views
|
|
Thread upload6 viewsImage uploaded in thread 183959
|
|
Thread upload4 viewsImage uploaded in new thread
|
|
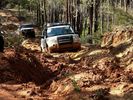
121 views
|
|
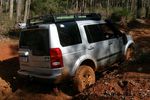
Stand off tubes218 viewsMy rock sliders and stand-off tubes in action
|
|

Finished - new seat base fitted back into D352 views
|
|
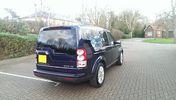
10 views
|
|

20 viewsCourtesy of: Interactive Land Rover MENA
24 April
Back in the city – after a wild set of adventures in destinations from mountains to deserts, cities to nomad camps, the Land Rover Journey of Discovery heads through urban Beijing at journey’s end.
|
|

Thread upload14 viewsImage uploaded in thread 107103
|
|

Thread upload2 viewsImage uploaded in new thread
|
|
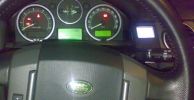
ipod detail159 viewsipod mounted without lr´s ipod kit. A cable cames from HK back aux input.
|
|
Waffel101 views
|
|
126 views
|
|
MY D3 at rest167 views
|
|
plenty of room once you pull the inner arch back out the way314 views
|
|
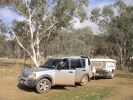
Disco3 and Jayco Dove Outback camper163 views
|
|
Wobbly Wheels now GONE282 viewsSent Back.
|
|

New D4 Rear Lights114 views
|
|
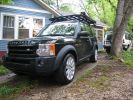
old and new. the old 96 disco in background, gave my mom the 2004 disco291 views
|
|
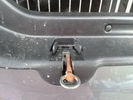
Thread upload4 viewsImage uploaded in thread 127619
|
|
Thread upload8 viewsImage uploaded in thread 127619
|
|
Thread upload5 viewsImage uploaded in thread 127619
|
|
Thread upload5 viewsImage uploaded in thread 127619
|
|
Thread upload4 viewsImage uploaded in thread 127619
|
|
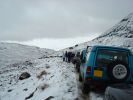
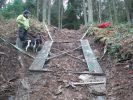
Coming back down122 viewsReturning after aborting the run.
|
|
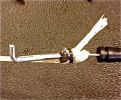
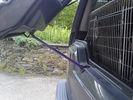
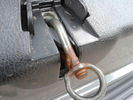
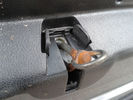
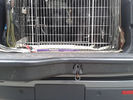
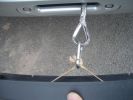
Pull cord as a backup63 viewsI added a pull cord so I would not kept caught with a broken release on the tailgate again. Think about a flat tyre if that happens to you.
|
|

BUCYRUS117 viewsActually been in one of these monsters at Allerton ByWater open cast before it shut
Stefan Frankowiak and Darren Axe and Martin Roberts
|
|
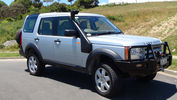
Disco 3 - 21 December 2012165 viewsJust back from having Front & Rear Bar, Compressor and Snorkel fitted.
|
|
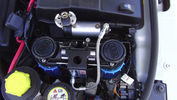
ARB CKMTA Twin Compressor180 viewsTwin Compressor with Manifold and Airtank. Tight fit but it fits. Also the ECU Chip is at the back and below up against the battery case.
I changed the hose quick release to a standard Air Hose Fitting eg like a workshop would use. My other truck has those also.
|
|
Looking back along the mountain track89 views
|
|

Rhodesian Ridgeback with a mucky nose299 views
|
|

That's why they're called Ridgebacks347 views
|
|

Camp over roast lamb with onions - perrrrfect111 viewsThis was the best camp oven roast ever, fed six hungry blokes in the Oz outback on a winters Sunday night
|
|

569 viewsMy father's last wish was to ride in my car one last time, and as such I believe him to be the first person to be carried to his funeral in a Disco 3.
My father's coffin was 6'5" and he was safely carried in the back of my Disco, and for once didn't complain about my driving. Air suspension helped enormously, being set to off-road height, to ease getting him in and out safely.
|
|
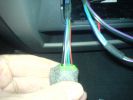
connectors - back side of the center arm rest123 views
|
|
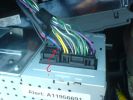
CD 400 back-side connectors147 views
|
|
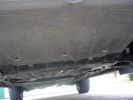
Sump guard, note drain holes to rear455 viewsThe sump guard runs back to the crossmember, it\'s a good idea to drill some large - ish drain hiles as there is no way water and mud can escape once it has entered round the revovery point
|
|
Leak at back of tank57 views
|
|
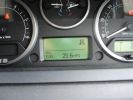
Ahem1063 viewsDid manage 42.1 mpg on the way back to dropping it off, down a hill!
|
|
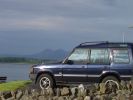
Our old TDi 300 on Islay with the Paps of Jura in the background300 views
|
|
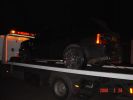
Bling Bling326 viewsOn the back of a lorry on the M6 services. Check out the 22" wheels!!
|
|
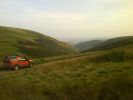
My backyard00294 views
|
|

My backyard00179 views
|
|
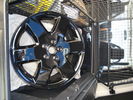
Back In Black52 views
|
|

The kids at Ruacana School, expedition vehicles in the background160 views
|
|

Kids from Ruacana school in Namibia151 viewsThe kids at some South African schools donated libraries and stationery which we were handing out. THe also filled a book with pictures of themselves and messages to the kids of the schools Kingsley\'s mission were to visit. In return the kids from the destination schools wrote messages back to the SA kids. Very Cool!
|
|
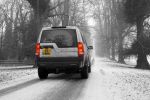
CALENDAR ENTRY - Christmas Eve at Calke Abbey497 viewsSlightly photoshopped to remove the colour in the background. Have the original if you prefer!
|
|
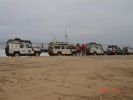
Along the beach on the way to Tombua. The wreck in the background is "Consortium Alpha"160 viewsApparently this boat was wrecked on it's maiden voyage cos the prop got caught in the nets
|
|
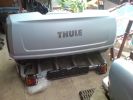
Thule backbox143 views
|
|
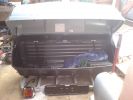
Thule back box140 views
|
|
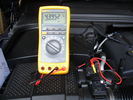
MAF Backprobe Results39 views
|
|
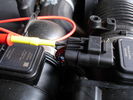
MAF Backprobe 134 views
|
|
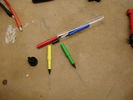
Backprobes28 views
|
|
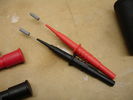
Black and Red Backprobes30 views
|
|

Hantek_backprobe 317 views
|
|

Hantek_backprobe19 views
|
|
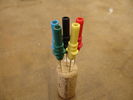
Hantek_backprobe 214 views
|
|
baby with tin pig in the background44 views
|
|
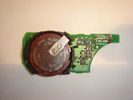
Backside board key fob153 views
|
|
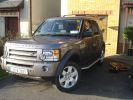
Side steps back on100 views
|
|
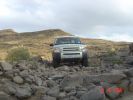
Coming back down from beggining of Baboons91 views
|
|
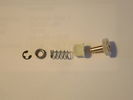
Assembly with new bush (exploded view)322 views(You have to put these back together, now...)
|
|
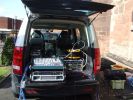
Expensive table?198 viewsOne of the better, if little, publicised advantages of the Disco3 is the split tailgate. Here its serving as the desk area at an outdoor event I was doing sound for. Rain was threatening so the amps got slung back inside rather than sat on the floor, other stuff was either in closed boxes or had to take its chances....
|
|
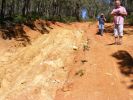
checking out the back fence line track200 views
|
|

The out-back is actualy out-front58 views
|
|
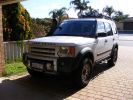
Back to normal after scrutineering134 viewsWe passed! Starting from position 28 (random draw)
|
|
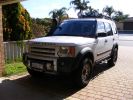
We passed! Back to \'normal\'221 viewsWe drew start position 28 (random draw). Event starts Sept 6th!
|
|
Pan back418 views(excuse the bugs)
|
|
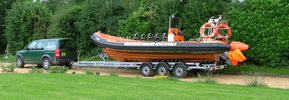
851 viewsD3 doing it's job rather well ! 17m from front to back! Belize green
|
|
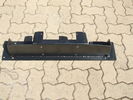
107 views"Uncle Ray" discrete winch tray, back and rear views. After painting.
|
|
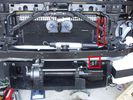
Installed winch with hydraulic hoses178 viewsThe hydraulic hoses are stiff, so I had to run them up the side of the radiator (can just see inside red boxes) to near the top of the radiator, then back down inside the engine compartment, then underneath the engine (behind the radiator) to the D4's power steering rack, where the hoses become metal. This hose routing may not be possible if the fuel-burning heater is in place (we don't have those in Aust and the space allowed room for my hands to bend and run the hoses without kinking).
|
|
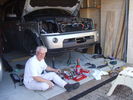
Installed winch, with bumper partially re-installed205 viewsPutting the D4 back together. Shows the tools and owner lying about.
|
|
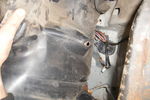
51 viewsLooking up under the wheel arch with the cover held back
|
|
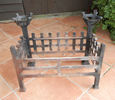
Back view49 views
|
|
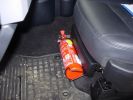
Mounting a non-LR fire extinguisher410 viewsSimply fixed it to the plastic cover for now, but will remove cover and mount further back later - just need to make up a metal plate first.
|
|
Back 21st June 2011178 views
|
|
Adesivi forum35 viewsDiscreto...ma visibile back
|
|
199 viewsback of the driver side back seat back rest, sweet
|
|
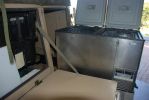
121 viewsthis shows the fridge on the 2 x 180kg sliders. i had to slightly modify the door opening to fir the fridge hinges thru. I just gently bent it, and fitted additional seals, hence it can easily be returned to standard. having the fridge in the kitchen is a major bonus, plus the back door of the trailer is now used for easy access to the cavernous interior, whereas prior to this youhad only access thru the front doors, which are only 500mm wide
|
|
Discovery 3 SE98 viewsJust arrived back from Bradford
|
|
DiscoDunc after landing back on terra firma....339 views
|
|
28 views
|
|
The swinging lump of iron that sit under the back,871 viewsLook how close it is to the wiring!
|
|
88 viewsdvd plug inthe back of the radio
|
|

tent closed from the backside415 views
|
|
Eastnor a few years back18 views
|
|

Having fun at Elvington153 views
|
|
Thread upload6 viewsImage uploaded in thread 186251
|
|

eye test 126 viewsLook at the picture below very carefully
Have you noticed the girl in the background?
Can you see her bum?
If your answer is YES then go and see an Optician!
What you see is the armpit of the girl taking the picture.
|
|

Thread upload26 viewsImage uploaded in new thread
|
|
Thread upload5 viewsImage uploaded in new thread
|
|

Fiche_LandRover_Disco3-4 Outback Import74 views
|
|
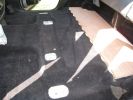
Back section with size 20 biscuits ready to received front section of floor140 views
|
|

Fluid, Filter/Pan Combo removal and install5987 viewsThese are the LR instructions re removal and install of the plastic pan/filter combo for the ZF 6HP26X transmission on the 4.4L petrol V8 LR3.
The instructions tend to ignore the reason you have to lift the right hand side of the engine about 40 mm. This is because of a frame cross member that interferes with dropping down of the plastic pan. The real problem is a vertical "oil filter spout" that rises out of the filter/pan combo up into the transmission. The spout is the suction pipe for filtered transmission oil back up into the tranny.
On the metal pan versions, the filter is separate from the pan, hence the filter remains with the tranny when the metal pan is dropped. The filter is then removed or installed independent of the metal pan, hence with the metal pan, there is no need to lift the engine.
If one is removing the plastic pan so as to install the metal pan, then some do not lift the engine but just drop the plastic pan enough to gain access to saw off the vertical plastic spout - it is a one time procedure.
Be aware however that the metal pan uses a flat gasket and the plastic pan uses a O ring like perimeter gasket that sits in a half round groove in the tranny casing. Also the metal pan uses 21 shorter torx M6x22.5 metric cap screws for the perimeter bolts. The plastic pan uses longer M6x28.5 torx metric cap screws.
|
|
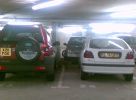
Back at the pad - a Fox in the garage90 views
|
|

428 views
|
|
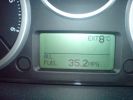
35.2MPG - after a 10 mile drive on back and main roads211 views
|
|

346 views
|
|
30 views
|
|

Thread upload18 viewsImage uploaded in thread 109662
|
|

242 viewsDid they have D3\'s way back when?
|
|
136 views
|
|

Gore Tex data sheet on Breather Cap.786 viewsThis is a Gore data sheet on the air vent material that is within the breather cap. The filter material has both hydrophobic and oleophobic properties. That means it keeps water out and the differential oil in.
Also the membrane material is air permeable; that means air pressure is equalized between the interior of the differential and outside air. This is important when the 3 is flying at altitude in the back of a Hercules with the rear door open - that is the rear hatch of the Herc.
|
|

Gore Tex Oleophobic Membrane Vents85 viewsThese is a link to a Gore website that explains how the Gore Tex material within the breather cap allow pressure to escape (but retains the oil) and allows moisture free air to come back in but excludes free water.
|
|
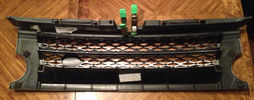
narpy's grill42 views
|
|
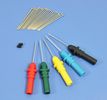
Hantek_backprobe26 views
|
|
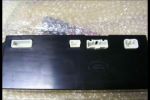
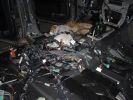
Heater Control Unit Back222 views
|
|
Rhino Tow Loop Hitch271 viewsThis is a receiver end view of the Rhino Hitch that ties to the factory tow loop. In addition to improved strength, it does not reduce ground clearance as does the factory style when installed.
Land Rover in early advertising videos when the 3 first came out showed the D3 hanging from a crane via the frame. The intent was to show how strong the frame is and by inference, the rear tow loop, specifically noted as being good for 6 tonne. The video ends before anything dropped or was lowered back to the ground, so one of course does not know for certain. The Rhino Hitch design however picks up on the apparent evidence of strength and certainly the additional clearance.
|
|

Driving back home, we stayed in a nice little castel before going to Solihull. D3 fits the place, doesn\'t it ?498 views
|
|

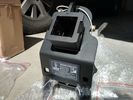
Back of unit shows choice of port for best fit94 views
|
|
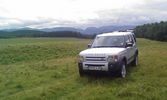
Cairngorms Backdrop55 views
|
|

Back of dip17 views
|
|

Back of main beam25 views
|
|
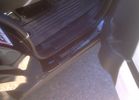
Black Chrome on Santorini black - os rear39 viewsSet slightly back off centre
|
|
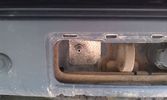
Outside connection to the compressor14 viewsFrom the compressor which is in the booth, the air hose runs to the back of the car.
I was able to install the connector in the space of the second trailer plug (which wasn't installed anyway).
|
|

Cyc.202 viewsOne of My dogs. Cyclops. Yes he has two eyes. He is called Cyclops because He used to walk backwards, sometimes, when he was a pup & He is a monster.
|
|
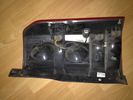
back of NSR light unit21 views
|
|
put bumper back on298 views
|
|
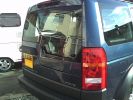
disco3.co.uk badge in back window252 views
|
|
Impact Skid after hitting wayward Hilux208 viewsDisco3 was stopped when a skidding Hilux collided with it. Collision caused Disco3 to slide backwards
|
|

Putting the rear window back in271 views
|
|

The Test Drive70 viewsThe new D3 with the traded D1 in the background.
|
|
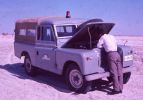
End of the line at Ras Al Khaimar72 viewsI am led to believe that this example was left overnight on the beach broken down - by morning the natives had stripped every last piece of usefull equipment out of it, engine and all and dragged it across the creek back to their village
|
|
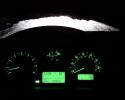
Cold43 viewsBack home on the driveway
|
|
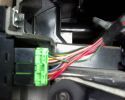
Connector81 viewsOn the back of part YUL501330
|
|
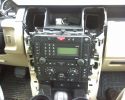
After removal of H-panel96 viewsCrikey, you have to pull HARD to remove this trim!!! Broke one clip and only lost half of it. Fit back with 3 clips ok. Yet to drive it to see if it rattles.
|
|

Headlight mod77 viewsNo turning back now..
|
|
White Background Fault Codes17 views
|
|
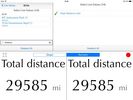
Searchable Live Date White Background13 views
|
|

Ipad back 213 views
|
|

LP scoped 222 viewsBy connecting a Low Amps probe to the fuel pump's voltage supply wire, you can view the pump's current waveform on a digital storage oscilloscope (DSO). The scope pattern will reveal internal wear in the brushes and commutator that may not show up in a traditional pressure or volume test.
Observing the waveform will show if the pump's amp draw is normal for the application or is high or low, and if the pump is operating at normal speed or is running slow. Problems such as a bad spot on a commutator or a short or open in the armature also will be obvious in the waveform.
A "good" electric fuel pump waveform will generally seesaw back and forth with relative consistency and minimal variation between the highs and lows. A "bad" waveform will show large or irregular drops in the pattern, with large differences between the highs and lows.
|
|
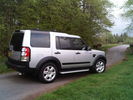
19's are back on96 views
|
|
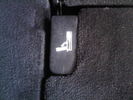
Existing 3rd row backseat lever (left side from back of car)29 views
|
|

Missing 3rd row backseat lever (right side from back of car)29 views
|
|
3rd row seat cushion slider (glued but broken) - right side as from back of car35 views
|
|
Armrest vent (back of console)39 views
|
|

785 viewsStarting to put it all back togther
|
|

2272 viewsAll back together again, note the connector panel below the heater controls, it has USB and LAN connections for the Onboard PC
|
|
1492 viewsComputer and sub bass mounting board pusshed back into place
|
|
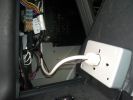
220v Socket894 viewsPicture showing the back of the Inverters 220v socket
|
|
1736 viewsIndustrial elastic a stanless clip and a winch mount the number plate back in place
|
|

1828 viewsHere it is all back together with the winch looking well and truly hidden !
|
|
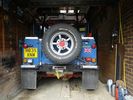
Truck Back 90 Challenge truck spec52 views
|
|

Switch is blue colour thing thru the rectangular opening.3180 viewsThe blue coloured plastic bit thru the rectangular opening is the brake light switch. The fist time, I found it easier remove the switch by dropping the horizontal plastic panel, (two screws), and then slipping my hand in and rotating the switch clockwise 1/4 turn. The second time, I was able to remove the switch thru the rectangular opening and did not need to remove the horizontal lower panel. Obviously, I had to remove the sloping knee pad panel, (note sort of hinged at the bottom so pull back from the top.)
Regardless, do not touch the brake pedal - just let it sit where it wants to. One has to first remove the angled knee pad panel that sits under the steering wheel. It can be pulled from the top corner at the door side. Pulling releases a pair of those U shaped metal clips that LR loves so dearly. You have to pull quite hard. The bottom is held by a couple of plastic fingers in a couple of slots so you pull at the top till the two clips release and then rotate the panel and pull upwards a bit.
To remove the switch, you rotate it clockwise and pull outwards. Rotating the switch clockwise automatically retracts the plunger back into the switch body away from the brake pedal arm.
Similarly when you install the new switch, the required 1/4 turn anti clockwise rotation action releases the plunger so it lays up against the brake pedal arm and at the same time, secures the switch in place.
To remove the electrical wires, the switch will drop below the horizontal pad and hang from the wires so unclipping the electrical connector plug is fairly easy to do.
|
|
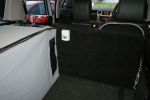
View from back of car69 views
|
|

Broken Rear Wheel Carrier166 viewsOpposite Lock rear wheel carrier 7 months old, one outback trip. Weld has broken. OL replaced with new improved unit free of charge (has just covered 20000 klm of outback roads without problem)
|
|
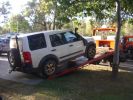
Dead Starter Motor105 viewsLuckily we were back in civilisation
|
|
Rest stop after our first hill descent - line of cars stretched way back up the hill that disappears up to right of photo.201 views
|
|

Back Seats19 views
|
|

Back Seats24 views
|
|

ditch it77 viewsjust another view of the ditch. i had a worry on as i came skating down the hill backwards with no means to do anything
|
|

In the ditch80 viewsCar slid back down the hill on snow 35ft before i managed to bury it in the ditch
|
|
Dirty V890 views4.4 V8 and my very vaguely Christmassy cottage in background!
|
|
Dirty V881 views4.4 V8 and my very vaguely Christmassy cottage in background!
|
|
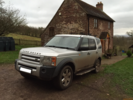
Dirty V884 views4.4 V8 and my very vaguely Christmassy cottage in background!
|
|

195 viewsour mad dog back home
|
|
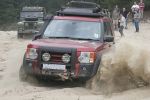
The Red Pearl at Marcanterra, Betsy in the background799 views
|
|

463 viewsPrevious installation.
Only my GPS, Mobile and MP3 changer in the back (controller seen on later pictures)
|
|
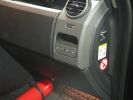
463 viewsFirst step in the journey, installed USB ports.
At the time I installed these, the goal was to use them in combination with the car-computer that resided in the back.
In the meanwhile, I dismantled the car-computer and nearly everything that was connected to it (touchscreen front, Wifi, DVB-T ...).
I kept the USB outlets in the front and turned them into charger for the appliances missus brings with her when we're on holiday. Mainly her iPod and smartphone ...
|
|
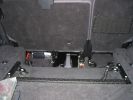
510 viewsMP3-changer and PC beneath the back seats (5 seater). Left and right, 2 USB hubs
|
|
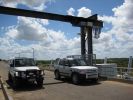
107 viewsMassingir dam wall, with winches for manual opening of locks in back ground.
|
|
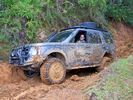
reartire379 viewsRear left tire off the rim! Took 4 guys to get it back in (prefered no to use spare if possible)
|
|

Backing trailer onto low loader60 views
|
|
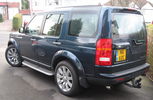
stomers back on136 views
|
|

Thread upload5 viewsJust back from picking up from dealer
|
|

Over the wall and back upto the track24 views
|
|

A nice piece of kit...351 viewsOne piece of kit I bought for myself. A backpack big enough for one of those 17" MacBook Pro from Apple which does also possess some solar panels to recharge the batteries in my Treo, my BT GPS or iPod. Convenient for when I am NOT in the car... Here the background is an armored Toyota... No Landies around ! :-(
|
|

On way back from Mexico27 viewsThis is the border on the Princes Hwy, on way from Lakes Entrance to home.
|
|
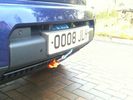
Redg plate mounting127 viewsThe original redg plate mounting was modified. An L-shaped piece of plastic now sticks out rearward from the top of the mounting and this hooks over the back of the top edge of the bumper cover. Then 2 spring clips hold the bottom edge of the mounting in place. Proximity sensor and surround camera seen unaffected.
|
|
![Filename=IMG_1068[1].JPG
Filesize=195KB
Dimensions=1280x1280
Date added=11.Jul 2013 IMG_1068[1].JPG](albums/userpics/36668/thumb_IMG_1068%5B1%5D.JPG)
Me and my girl having a fish and chip picnic in the back of my D35 viewsMe and my girl having a fish and chip picnic in the back of my D3
|
|
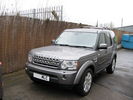
My New Disco4 Parked at the back of the dealers.182 views
|
|
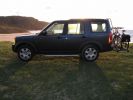
Sunset in the Western Isles 3653 viewsCalender 2008 Entry
Taken on the beach at Kneep on the west coast of Lewis, Outer Hebrides - May 2007. Backlit Disco with low shadows. Foreground flash fill defines the iconic shape!
|
|
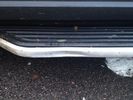
ooops - 21 viewsa great picture which describes why its not a good idea to have side steps fitted if you ever want to go off road. not sure where this happened, but the wife spotted it as soon as I went back to pick them up. Its her D4 and you can imagine she was not impressed. Still, a fun afternoon at a pay and play site whilst I was in inverness on holiday ;-)
|
|

Footwell connector 1 back28 views
|
|

Footwell connector 2 back24 views
|
|
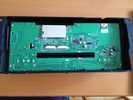
Back view of front panel removed from head unit with facia still attached15 views
|
|

D3 Rear Tailgate switch headliner connector8 viewsThe black connector in the headliner of a D3, showing the brown wire being pushed back and not making contact, and stopping the rear button from working
|
|
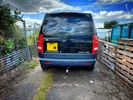
4 viewsBack end of our Disco
|
|

Back in Saffron Yellow Mat and Black Mat53 views
|
|
![Filename=IMG_2190 [1024x768].JPG
Filesize=148KB
Dimensions=1024x768
Date added=27.Nov 2007 IMG_2190 [1024x768].JPG](albums/userpics/12685/thumb_IMG_2190%20%5B1024x768%5D.JPG)
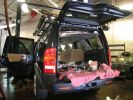
D3 Cargo 8187 viewsBack door open
|
|
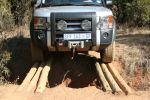
Comming back 2 weeks later with new wheels this bridge was... Uhhhmmm let\'s say... broken..145 views
|
|
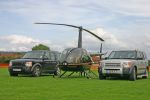
CALENDER ENTRY 2010269 viewsTaken at Nailsea flower show. I drove my disco there then Frapp took me to the airport to collect the helicopter. I flew the choper in and Frapp drove back there. Guess who arrived first!
|
|
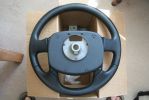
steering wheel back62 views
|
|
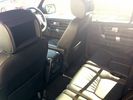
Back of front seats48 views
|
|
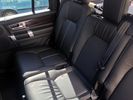
Back seats40 views
|
|

Front drivers side interior facing back40 views
|
|
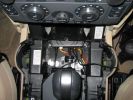
Here\'s a view of the Drive+Play "brain" which I mounted in the empty space in front of the gear selector.650 viewsI ran the power and audio cables to the rear of the center console in order to tap into the 12 volt power and "Aux" adapter. When you're sitting in the back seat, you don't see any cables whatsoever. My entire goal was to make it look as factory original as possible.
|
|
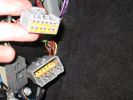
33 viewsConnector in LHS footwell, which connects (amongst other things) to the AUX input on the back of the stereo.
|
|
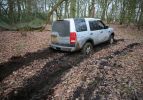
Stuck in Ray Mear's woods with his discarded survival tent in the background - litter bug.90 views
|
|
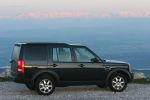
CALENDAR 2008 ENTRY - Sunset over the Alps770 viewsCALENDAR 2008 ENTRY
Drove to the top of my local mountain so "the airliner" could pose for a couple of pics with the sunset drenched Swiss Alps in the background, 80km to the south.
|
|

Black-backed Jackal - Etosha160 viewsNamutoni camp seems to be overrun with Jackals and Honey Badgers. This guy had no fear of humans, and tried to take food off our table
|
|
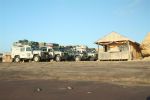
Flamingo Camp, Angola www.aasafaris.com198 viewsThese guys entertained us for the night. What a great place. I am definitely going back for a longer visit. The fishing is apparently amazing
|
|

folding back the Caranex under a HEAVY rain, funny indeed463 views
|
|
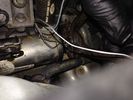
EGR replacement16 viewsBack of left EGR cooler was a swine to replace the clip. Bound it with wire before using pincers to clip together.
|
|
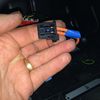
MOST Connector16 viewsThis connector plugs into the back of the Screen (TSD)
|
|
back view arone47 views
|
|

Sard back38 views
|
|

Koffiebaai from the hill. Hotel in background42 views
|
|
RRS console top back36 views
|
|
back and side292 views
|
|

Thread upload13 viewsImage uploaded in thread 146850
|
|

Thread upload2 viewsImage uploaded in thread 183929
|
|
Subwoofer Install275 viewsThe stock sub has 2 sets of wires running to it. Both of these wires lead back to the stock amp.
The new sub only needs two wires - a positive and a ground. So, we just cut the stock wiring harness off the wires in the tail gate and wired them together. On the other end of these wires, we did the same thing.
|
|
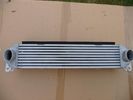
IntercoolerBack48 views
|
|

Thread upload20 viewsImage uploaded in thread 170511
|
|

Thread upload25 viewsImage uploaded in thread 174503
|
|

Thread upload7 viewsImage uploaded in thread 94828
|
|
Thread upload3 viewsImage uploaded in new thread
|
|

Thread upload5 viewsImage uploaded in new thread
|
|
Thread upload5 viewsImage uploaded in new thread
|
|
Thread upload6 viewsImage uploaded in thread 114908
|
|
Thread upload10 viewsImage uploaded in thread 120501
|
|
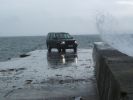
Stormy day in Islay505 viewsCALANDER ENTRY - Summer (?) holiday on Isle of Islay, Scotland. Good weather generally, but a storm came through mid-week. Car is parked at the end of the pier at Port Charlotte, looking towards Bowmore (!).
Sorry not much of a background or good light - but it was a storm. Oh and this is the highest res image I have, 5mp.
|
|

CALENDAR ENTRY - Islay 2008505 viewsSame as description for previous photo, with a bit more of a background. Looking towards Port Charlotte lighthouse. Sorry, number plate not visible, so probably inadmissible.
|
|
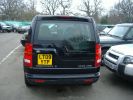
From back166 views
|
|

KA back11 views
|
|
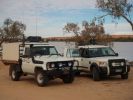
Lake Coongey. The project vechle and Micheals mighty D3150 viewsStoped for lunch and to do some boating with the inflateable boat, kids paddled to the other side and after trying to call them back D2 was dispatched to the other side to bring them bach but by thr time D2 got to the other side they had paddled back, we thought if was funney but the D2 driver definitly did not, ha ha ha!
|
|

new back lights239 views
|
|

led light24 views
|
|

LED trailer lights adapter for LR3844 viewsThis doc includes a partial list of materials and the instructions/links required to construct an adapter to prevent LED trailer lights from pulsing due to the 3's diagnostic circuits interrogating the signal light circuit.
Using the adapter also facilitates the green flashing of the dash located trailer indicator when the signal lights operate plus inhibits operation of various systems such as the backup sensors, etc.
|
|
Thread upload2 viewsImage uploaded in thread 189967
|
|

LR3 Air Conditioner Drain Tubes behind centre console2137 viewsThis shows the two air conditioner drain tubes located left and right under the radio stack.
The tube on the left side, (steering wheel side, LHD), disattached itself and the carpet on the floor under the gas pedal etc became soaked. I think rain water from outside that comes in the outside cowl vents also exits via the tubes as I first noticed the carpet was wet after parking outside during a big rain storm.
It was relatively easy to slide up and reattach the rubber hose that runs from the rectangular shaped plastic discharge hole(s) of the heater "pan" down along the transmission hump area and thru the floor pan. There is a hose on each side of the transmission hump, but only one hose had let go on my 3. The rubber hoses just slide over the rectangular plastic openings of the two heater housing drain outlets.
To get at each drain hose, remove the vertical sort of triangle carpeted piece below each side of the radio stack. The triangles of carpet will just pull away as each is held on with those metal U clips Land Rover so likes. Dislodge each triangle at least sufficiently to get ones hand in to slide the rubber hose back on.
You will rarely see AC water on the ground as the front drains pour onto a metal underside protection skid plate and the rear drain onto the top of the left rear muffler.
|
|
Air Suspension ECU Fuse 35P cut off switch.3825 viewsThis shows the SPST rocker switch mounted in the blank plate installed in lieu of a manual passenger side air bag shut down switch - now automatic via passenger seat pressure switch. Fuse 35P (5 amps) is located in the interior fuse box behind the lower glove box and protects the ignition power supply to the Air Suspension ECU. When the SPST switch is moved to the OFF position, the RAISE /LOWER switch on the centre console is not powered, and hence does not function. As such, some signals from the wheel height sensors and CPU are ignored. By itself however, removing F35P will probably not stop the 3 from self dropping, particularly after the engine is turned off.
Fuse F3E, (5 amps), located in the engine bay fuse box by the starting battery protects the circuit that provides feedback to the Air System ECU indicating that the Compressor Relay has successfully operated and that the Air Compressor is or should be operational, can also be removed, (but is probably not totally necessary), as it gets its power thru F26E. Hence Fuse F26E, (20 amp), also located in the engine compartment fuse box is the fuse that must be removed. This fuse protects the circuit that provides full time battery power to the Air System ECU. When in place, current thru the fuse powers the periodic re-levelling action, (usually lowering a bit with that brief air release noise), that often occurs when the vehicle is parked and the engine is off.
Removing F26E fuse will stop the auto levelling action and also inhibit any other down to the stops signals, (engine running or not). When F26E is removed, no power can flow thru to F3E, hence removing F3E is more for insurance than an absolute requirement. The same with F35P, removing F26E removes primary full time power from the Air Suspension ECU, and hence removing the F35P fuse should not really be required either as long as F26E has been removed.
|
|
Battery Maintainer pigtail sticking out of Grill729 viewsThis is all you see when everything is put back together - just the pigtail and Weather Pack blanking plug. Most often, I have it all tucked back behind the grill.
In winter, there may be a second cord hanging out as well - the 120 VAC power cord for the engine block heater, a tea kettle like element inserted in the engine block. NAS petrol V8's do not have the Fuel Burning Heater, (FBH), installed, but instead in cold area markets have the block heater element assembly available as a dealer installed option. There is an argument to say that the heating element is factory installed in all cold climate V8 gasoline engines, however the appropriate power cord is not. If true, this means that all one needs to purchase is the area specific power cord and plugging in / attachment to the engine block located block heater.
As such, you will often see a conventional 120VAC three prong power plug hanging loose out of the grill of most vehicles here in the wintertime. In summer, most drivers tuck the plug back behind the grill as it is no beauty mark.
|
|
Boot lighting panel, wiring side up 285 viewsThis shows the back side of the plastic cover panel on which the two LED lights are mounted.
Also of note is the SPST rocker switch to switch the new lights off independent of the the Land Rover W5W light.
The new light pair will only power up if the Land Rover light is powered and hence dims and automatically goes off along with the Land Rover light.
The Black wire is ground, the Purple wire is +12VDC.
|
|
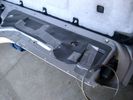
Dust Seal duct taped back together 2282 viewsThis shows the dust seal duct taped back together; also the surplus wire rope exiting from the actuator area prior to being cut to length.
I do not think the sticky plastic membrane is a dust seal, but more of a cable protector to cover up the wiring bundle that is effectively sticking to the underside of the flexible membrane.
|
|
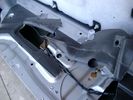
Dust seal rolled back showing electrical conductors 1661 viewsNote power conductors just under the dust seal which makes cutting the seal more interesting.
Also shown are the two 8mm nuts located in slots. One must loosen each nut to effect removal of the actuator. This will then reveal two T15 Torx screws that one must completely un-thread to remove the top gold plate from the actuator assembly.
|
|

NAS 7 Blade Round plus NAS 4 Pin Flat Vehicle end Socket529 viewsThis shows the function of each blade when looking into the connector at the vehicle end for the 7 pin NAS plug. The layout is the pin order for most new North American pickup trucks and the LR3/4.
The colour and gauge of the wires feeding into the back of the plug varies even within manufacturer model lines.
Also detailed is the flat 4 pin layout common on smaller trailers not having electric brakes. This includes most U-Haul rental trailers.
|
|

NAS 7 Pin Round Socket + 4 Pin Flat Socket oriented as installed.753 viewsThis is the layout you see when you look into the NAS Land Rover sockets as installed at the rear of the LR3/4. The flat 4 pin socket is located under the round socket.
Wiring order is relative to the slot on the round socket, and hence the same as the other jpg where the slot is shown at the top.
The CJB monitors the front and rear turn signal lamps and can detect if more than four lamps are fitted, (the side turn signal lamps are not monitored). This is another reason for using genuine LR bulbs as off shore bulbs can have varied and out of spec resistance values.
When a trailer is detected, the trailer warning indicator in the instrument cluster is supposed to flash green in synchronization with the turn signal indicators.
If one or more of the turn signal lamps on the vehicle or the trailer are defective, the trailer warning indicator will cease to flash any longer. This is to alert the driver to probably bulb failure.
If the trailer has LED lamps installed, and no LED adapter circuitry is used, most likely the trailer will not be sensed and systems such as the backup sensors will not be disabled.
|
|
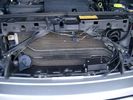
Plastic cover and Box back on in Front of Radiator 640 viewsThe wiring loom is below the cover - nothing is crushed or distorted and all fits back together OK. The black plastic box with the DPDT, (centre OFF), toggle switch is to tie the battery maintainer to each of the two batteries per the Traxide Dual battery install. I can also get power to the power door locks if all fails.
|
|
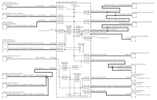
Power Window Circuit centered on Central Junction Box (behind glove box fuse panel)738 viewsRelay 143, the power window relay, and most other relays and FET's as well are built into the back of the passenger side behind the lower glove box fuse panel.
As such, the relays etc are not removable, jump-able, or serviceable.
|
|
In the water on Baby Lions Back302 views
|
|
Wiring (tubing) loom at left headlight showing FASKIT panel 586 viewsThis shows the wiring (tubing) loom and FASKIT panel mounted to left wing. The loom moves a a couple of inches (50mm) towards the bottle once the headlight is put back in as there is not enough free space for the loom as located. The FASKIT panel is just visible at the top left corner of the picture.
|
|
wiring progress424 viewslots torn out that somehow goes back together
|
|
LAKs LR3528 views
|
|

Thread upload5 viewsImage uploaded in new thread
|
|

Land Rover Brake Light switch XKB5001102704 viewsThis is what the switch looks like when removed from the parts box. Note that the plunger is recessed back into the body and when installing, the process of rotating the switch body 1/4 turn anticlockwise releases the plunger so it pops longer and engages the brake pedal. If you look down on the plunger you can see curved slots where the rotation takes place.
Do not try to rotate the new one - play with the one you remove. Also do not press on the brake pedal when removing or installing as you will damage the plunger - this is one of the reasons the plunger is retracted into the body for installation. It is also for this reason that if you try to confirm the operation of the switch contacts with an ohm meter by pressing the plunger, the switch will appear not to function as one might anticipate. Have faith, the switch will however, once installed and the plunger is in full motion.
|
|

Horn Wiring Circuit LR3580 viewsThe is the wiring diagram for the dual horn circuit.
The Horn Relay, (R133), is not a big black thing hidden somewhere but instead what is called a FET, (and it is hidden)!
This is a Field Effect Transistor that is built into the circuit board that is mounted to the back of the fuse box that is located behind the lower glove box door on the passenger side of the 3. The related 15 amp fuse, 12P, is mounted in this fuse box and is often called F12P, where F is for fuse, and P is for Passenger compartment.
This is to help differentiate from another fuse and relay box, (the usual kind), that is located beside the starting battery in the Engine compartment. FxxE is often used in the naming of those fuses.
|
|
![Filename=LR3_Radio_Removal[1].pdf
Filesize=190KB
Dimensions=320x240
Date added=04.Feb 2014 LR3_Radio_Removal[1].pdf](images/thumb_pdf.jpg)
Radio Removal from Radio Stack572 viewsThis shows how to remove the radio from the stack. Basically you remove the H surround first and then at least loosen all the Torx 20 screws left and right sides from the top down starting at the narrow unit that the four way flasher/locking buttons are mounted on.
The units kind of interlock, hence some movement of each is required to remove the radio by itself. I find it best to take out the four way flasher/locking buttons assembly first as that allows access to the fibre optic cable connector into the back of the radio head without too much tugging.
|
|
| 542 files on 2 page(s) |
 |
1 |  |
|