| Search results - "blanking" |
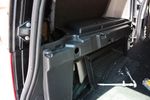
79 viewsHole for 12V accessory socket. This hole has a blanking plate on it on Commercial D3s. It just needed to be filed down in some areas to fit the socket I bought.
|
|
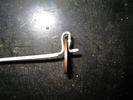
EGR Blanking Tool - coat-hanger76 views
|
|
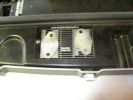
EGR Blanking215 viewsBlanking plates cut from stainless steel plate.
|
|

Land Rover Aerial Fin images for both Glass and Metal Roof Disco3 / LR3864 viewsAs well as the two different fins, this pdf also shows the plastic blanking plate for glass roof vehicles where no fin is installed.
The glass roof fin is secured by two security screws from the top into a plastic frangible glue on gasket. The hope is that when struck, the fin will shear off and not crack the glass roof. Re the metal roof design, the fin is secured from underneath via two nuts.
The pdf also shows the various electrical bits related to the antennas. In the UK, the fin would house not only a cell phone antenna but the TV and satellite radio antenna electronics as well; in the States, the Sirius sat radio antenna and a G type cell phone antenna if the phone kit was installed would reside within the fin. The SAT NAV GPS antenna is located within the High Mount Brake Light plastic mounted to the upper rear hatch.
|
|

Fin cell phone aerial drawing190 viewsThe factory aerial for the factory NAV / GPS on my 2005 HSE is within the high mounted stop light lens at the top of the upper hatch door. I do not have the factory installed phone kit, and as such, do not have the fin installed; instead there is just a plastic blanking insert to fill the cell phone aerial wiring hole in the metal portion of the roof; hence this requirement for an "external" cell antenna. For those that do have the fin on their glass roof, the fin is screwed on to a glued on plastic gasket, (sort of), and not bolted thru as per the metal roof 3's.
|
|

Blanking Kit Fitting Procedure2451 viewsHow I fitted the kit to my D3.
|
|
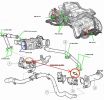
Pipinig lay out EGR220 views
|
|

blanking plates64 views
|
|
Thread upload7 viewsImage uploaded in new thread
|
|
Thread upload8 viewsImage uploaded in new thread
|
|
Thread upload4 viewsImage uploaded in new thread
|
|
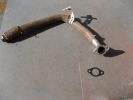
EGR Blanking206 viewsBlanking plates cut from stainless steel plate.
|
|
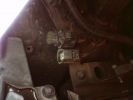
Connector without blanking plug282 views
|
|
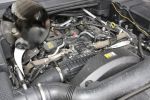
Engine Cover Removed902 viewsView of the engine before blanking off the EGRs. The inset sort of shows one of the EGR valve/pipe flange securing bolts. The EGR valves are not easy to get at!
|
|

Blanking Plug side shot399 views
|
|

Glass Roof Blanking plug365 views
|
|
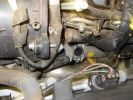
EGR Blanking267 viewsPipe removed for blank plate.
|
|
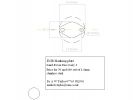
Drawing of Euro III engine EGR blanking plate215 views
|
|

EGR Blanking129 views
|
|
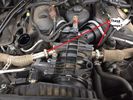
Thread upload5 viewsImage uploaded in thread 177730
|
|
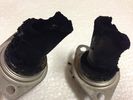
EGR Stub Pipes13 viewsThis what they looked like after 15K Km
Glad I fitted the Blanking kit
|
|
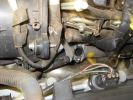
EGR Blanking269 viewsL.H.S.
|
|

Blanking plate removed290 views
|
|
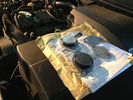
BAS Reemap UK EGR Valve blanking kit 18 views
|
|
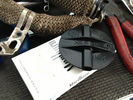
Butterfly valve15 views
|
|

what you should be left with after the blanking procedure8 viewsApart from this, you'll also have to remove the pipes that connect the valves to the airbox. Not mandatory, but a proper job well done
|
|

Butterfly valve and varous leftovers from the EGR valve blanking and pipe removing17 views
|
|

airbox with EGR blanking kit installed 16 views
|
|
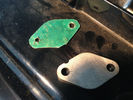
BAS Remap UK blanks for the EGR's 18 viewsnotice i also added a garage made seal, just to make sure there are no problems
|
|
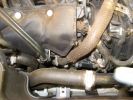
EGR Blanking220 viewsL.H.S pipe.
|
|
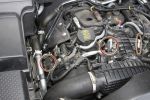
EGR Blanking Kit Fitted.946 viewsLook, no EGR pipes. The circled bits are the new blanks.
|
|
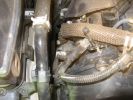
EGR Blanking214 viewsR.H.S PIPE, note the tight space to get your hands in. Loosen pipe clamp below air cleaner for better access.
|
|

Battery Maintainer pigtail sticking out of Grill729 viewsThis is all you see when everything is put back together - just the pigtail and Weather Pack blanking plug. Most often, I have it all tucked back behind the grill.
In winter, there may be a second cord hanging out as well - the 120 VAC power cord for the engine block heater, a tea kettle like element inserted in the engine block. NAS petrol V8's do not have the Fuel Burning Heater, (FBH), installed, but instead in cold area markets have the block heater element assembly available as a dealer installed option. There is an argument to say that the heating element is factory installed in all cold climate V8 gasoline engines, however the appropriate power cord is not. If true, this means that all one needs to purchase is the area specific power cord and plugging in / attachment to the engine block located block heater.
As such, you will often see a conventional 120VAC three prong power plug hanging loose out of the grill of most vehicles here in the wintertime. In summer, most drivers tuck the plug back behind the grill as it is no beauty mark.
|
|
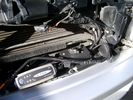
Battery Maintainer switching box plug and CTEK Multi US 3300 charger. 709 viewsThe CTEK Multi US 3300 maintainer is just sitting there for the picture. In addition to topping up both batteries, the CTEK can provide power such that if the batteries were completely dead, there would be power to the door locks and hence, one could most likely still gain access via the remote once the starting battery charged up a bit.
The Land Rover recommended method is via the hidden key hole which is mechanical, however that presumes the mechanism is not frozen from lack of use. As such, the manual lock should be exercised at least once a year to ensure that it still functions.
The blanking plug sitting on top of the plastic box is of the GM Weather Pack series. That is what I like to use for vehicle wiring that is subject to moisture, (or not).
|
|
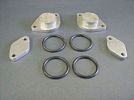
Contents of the BAS EGR Blanking Kit855 viewsThe O-ring seals are fitted to the 2 larger blanks at the top of the picture. You need to fit 2 O-rings to each blank.
|
|

Redundant Parts977 viewsThese are what you are left with once the EGR blanking kit is installed. Best to hang onto them in case you need them again!
|
|
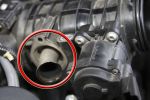
Stub Pipe839 viewsRemove these and fit the blanking plates. Make sure the seal comes out too!
|
|
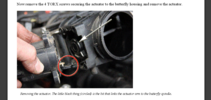
Thread upload23 viewsImage uploaded in thread 131881
|
|
Thread upload0 viewsImage uploaded in thread 186484
|
|
|
|
|