| Search results - "charge" |
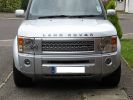
Supercharged Silver134 views
|
|
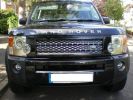
Supercharged Black125 views
|
|
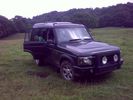
After a \'charge\' up the hill from the river- VICTORIOUS!46 views
|
|
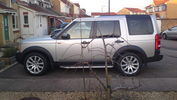
New 295/45R20 114V XL Hankook Ventus ST tyres fitted on 20" RRS Supercharged 20" Alloys123 views
|
|

Optima Yellow - with split charge72 views
|
|
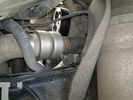
Charge Air Inlet hose - front mounting bkt86 views
|
|
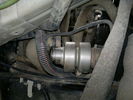
Charge Air Inlet hose67 views
|
|
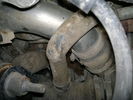
Charge Air Pipe - turbo end.101 viewsThe maint manual identifies releasing the pipe hose clip in the center of the photo. Pity who ever built this engine Put the hose in such a position that access to it was near impossible. I released the other clip at the turbo end of the flexi hose. Easy to get to but a right git to release the hose of the turbo.
|
|

Air con pipe65 viewsIts the brown pipe in the center of the photo. To remove this first you need to remove the "charge air cooler inlet hose" to allow access to the air con pipe securing fixings. But with the "charge air cooler inlet hose" disconnected it can\'t be removed from the veh because the air con pipe is in the way???
|
|
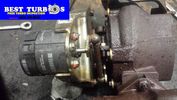
Thread upload176 viewsImage uploaded in new thread
|
|
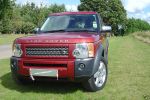
Supercharged Red166 views
|
|

5.0L Supercharged RRS - 0-100-0 mph 107 views
|
|
5.0L Supercharged RRS 0-100-0 mph99 views
|
|

amps-acid-car-battery-soc-charge-voltage-3d26 views
|
|

Thread upload8 viewsImage uploaded in thread 152796
|
|

68 views
|
|
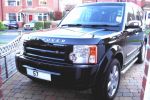
Black Supercharged Badge100 viewsGreat tip drilling from the back and you won\\\'t damage the lip that the badge is recessed in
|
|
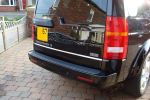
TDV6 lettering removed, LR Supercharged Badge fitted135 views
|
|
Thread upload6 viewsImage uploaded in new thread
|
|

2 views
|
|
66 views
|
|
65 views
|
|

Thread upload7 viewsImage uploaded in thread 176808
|
|

Thread upload8 viewsImage uploaded in thread 176808
|
|

Thread upload7 viewsImage uploaded in thread 176808
|
|

Thread upload8 viewsImage uploaded in thread 176808
|
|

Thread upload4 viewsImage uploaded in thread 176808
|
|
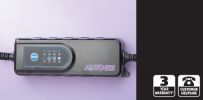
Aldi Charger 3 year guarantee107 views
|
|

14 views
|
|

Thread upload16 viewsImage uploaded in thread 174216
|
|

Thread upload3 viewsImage uploaded in thread 80646
|
|
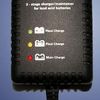
9 views
|
|

Thread upload6 viewsImage uploaded in thread 80646
|
|

V8 Supercharged engine62 views
|
|

Supercharged Stats58 views
|
|
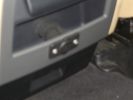
Auxiliary power sockets - TracTronics, Australia383 viewsA complete kit including two outlets, wiring etc connected to auxiliary Optima Blue top battery using their very effective SC40 split charge relay. One outlet between rear and front seats, and 2nd alongside loadspace 12v outlet, enables fridge to run when engine is not running, without affecting start capacity or vehicle functions.
|
|

TDV8 to Date249 views2007 (57) TDV8 HSE
Mods:
BAS mapped.. oh yeah..
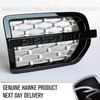
Colour coordinated lower sills,Java handles, supercharger vents and grill
Hawke smoked repeaters
Halo style HD LED rings in headlights
22" supercharger style diamond cut alloys
2011 LED rear lights
|
|
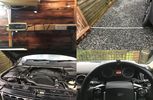
ctek charge system23 views
|
|

Thread upload29 viewsImage uploaded in thread 167874
|
|
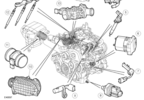
D3_Engine_Control_Sensors_Air_Charge_Temp_Sensor27 views
|
|
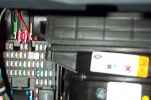
Tapa-circuit388 viewsTapa-circuit fitted to fuse box behind glove box. Red cable to top is the fused output cable leading to the PDA charger
|
|

Cooling System - Description and Operation 4.0L and 4.4L petrol engines 5 pages1028 viewsThis is a 5 page pdf that provides some insight into how the coolant flows thru all the hoses. Of interest is the paragraph,(page 3/5), that attempts to explain how and why the thermostat is designed to open at different engine operating temperatures - in brief, the reason for the spaghetti tangle of small hoses on the top of the engine.
There is also reference to an engine oil cooler that I gather cools something I think related to a supercharger, if fitted.
|
|
Thread upload20 viewsImage uploaded in thread 128730
|
|

Supercharged?16 views
|
|
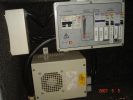
Detail of 20A ac charger/adaptor & breakers for 2 x 10⁵AH batteries, lights, pump etc218 views
|
|
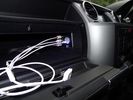
iPod connectors17 viewsAux video and Audio inputs (for nav screen) and usb charge point in upper glovebox
|
|
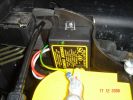
SC40 Smart Charger158 views
|
|
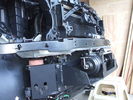
Front-right view (looking forward) of partially installed winch and mount124 viewsThe closest bracket, with three rubber grommets, is the air bag sensor. Before beginning any of this work, be sure to disconnect battery and discharge any remaining electrical power. I didn't want to accidently drop this assembly and cause the airbags to deploy.
|
|
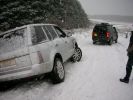
FFRR Supercharged being towed out of ditch by D3295 views
|
|

240V / 12V Power Board and Battery Charger102 views
|
|

Thread upload3 viewsImage uploaded in new thread
|
|

6 views
|
|

4 views
|
|
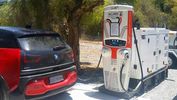
Thread upload6 viewsImage uploaded in thread 186220
|
|
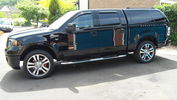
52 viewsEXTREME ROAR AND POWER.
|
|

189 viewsCars belonging to the team of guns where I was picking up the other day..... A D3 was in there!!! plus 2 Supercharged RRs with MTRs and a RR Vogue
|
|

The new Aux Battery charger for the D3 !196 views
|
|

An extra 12V outlet17 viewsOn the passenger side, I added a 12V outlet which is fed through the fuse box in the rear and adds as such an outlet for whatever charger we don't want to have lingering around around the central console.
The USB charging outlets are visible as well :)
|
|

12V to dual USB11 viewsAs the USB cables were running to the booth, I added a 12V to dual USB charger in the booth and connected the USB cables.
|
|

Supercharged RRS Black on Disco 416 views
|
|
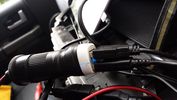
Charger5 views
|
|

BMS on a charger 118 views
|
|

BMS on a charger 216 views
|
|
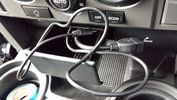
Nexus 7 usb and phone charger7 views
|
|

New 20" Supercharged alloys on General UHP 275/45/20 110 Load ratting201 views
|
|
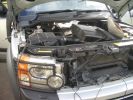
940 viewsFitting Second Battery and split Charge System
|
|

Aux Battery918 viewsShopwing the addition of the 35mm2 cable going to the split charge relay
|
|

Broken Rear Wheel Carrier166 viewsOpposite Lock rear wheel carrier 7 months old, one outback trip. Weld has broken. OL replaced with new improved unit free of charge (has just covered 20000 klm of outback roads without problem)
|
|

These supercharger wheels don\'t work on D3246 views
|
|
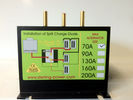
Split Charge diode Ratings88 views
|
|
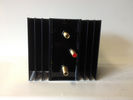
Split Charge diode64 views
|
|

Split Charge diode mounted on a D4.90 views
|
|
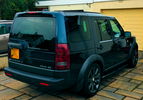
Almost there62 viewsA couple of other tweaks to add to the D Wagon and she will be as I want her. Still to match the side vent and Supercharger grill paint and considering a rear bumper valance and twin exhaust kit conversion. That should do the "Anti-Bling" nicely.
|
|
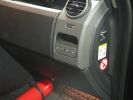
463 viewsFirst step in the journey, installed USB ports.
At the time I installed these, the goal was to use them in combination with the car-computer that resided in the back.
In the meanwhile, I dismantled the car-computer and nearly everything that was connected to it (touchscreen front, Wifi, DVB-T ...).
I kept the USB outlets in the front and turned them into charger for the appliances missus brings with her when we're on holiday. Mainly her iPod and smartphone ...
|
|
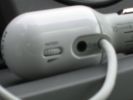
Close up...406 viewsSorry, this is blurry ! Oops...
This is a close up of the adapter itself... There is a 3,5mm input for the connection to the iPod. There is also a volume button. I don\'t use this because of interference between my quite old iPod and that system. But it does charge the iPod through the dock adapter.
|
|

PP002 12V135 views Brad Harris Socket
Hella Socket Cigarette
Lighter Socket
Battery Level Meter
External Terminals for Battery Charger or Solar Panel
ON/OFF isolator tie down strap excludes Battery
Built in fuses
https://www.facebook.com/snomasterusa
|
|

A nice piece of kit...351 viewsOne piece of kit I bought for myself. A backpack big enough for one of those 17" MacBook Pro from Apple which does also possess some solar panels to recharge the batteries in my Treo, my BT GPS or iPod. Convenient for when I am NOT in the car... Here the background is an armored Toyota... No Landies around ! :-(
|
|

T-Max split charge system41 views
|
|
split charge30 views
|
|
60 viewsCharger for tom tom, cable running behind H trim
|
|
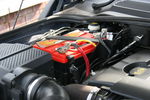
Split charge164 views
|
|

Interstate Battery Dimension sheet643 viewsThis sheet is hard to find - the sheet is not on the Interstate corporate web site but some dealer web sites display it. The pdf shows most of their available batteries including the H7 and H8 sizes that are the LR North America replacement batteries for the main starting battery. These batteries are of the Land Rover desired "shallow" cycle high discharge current Maintenance Free, (Ca Ca), internal construction, (not AGM, but instead, Wet Flooded Lead Acid with battery "caps" and Ca grid separators).
For the AUX battery , the H6, (BCI Group 48), is probably similar in dimensions to the Varta E12V75N that is popular in Australia. For that battery to fit in the second battery compartment, you must grind out the angled nibs on the inside front bottom of the LR black plastic surround, something I did wish to do and hence installed a Group 40R on a spacer. Alternately, one can choose an Interstate BCI Group 47 which is similar to a DIN H5 for the AUX location. I did this when I had to replace my 40R. No vertical spacer is required and the stock battery tie down bolts and clamp work well.
|
|
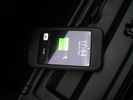
iPod Charging113 viewsHK Drive & Play (1) does charge 1st generation iPod Touch
|
|

LA303-001 - Technical Bulletin - Cylinder Head Built to Supercharged Specification67 views
|
|

Thread upload18 viewsImage uploaded in new thread
|
|

LR3 Air Conditioner Drain Tubes behind centre console2132 viewsThis shows the two air conditioner drain tubes located left and right under the radio stack.
The tube on the left side, (steering wheel side, LHD), disattached itself and the carpet on the floor under the gas pedal etc became soaked. I think rain water from outside that comes in the outside cowl vents also exits via the tubes as I first noticed the carpet was wet after parking outside during a big rain storm.
It was relatively easy to slide up and reattach the rubber hose that runs from the rectangular shaped plastic discharge hole(s) of the heater "pan" down along the transmission hump area and thru the floor pan. There is a hose on each side of the transmission hump, but only one hose had let go on my 3. The rubber hoses just slide over the rectangular plastic openings of the two heater housing drain outlets.
To get at each drain hose, remove the vertical sort of triangle carpeted piece below each side of the radio stack. The triangles of carpet will just pull away as each is held on with those metal U clips Land Rover so likes. Dislodge each triangle at least sufficiently to get ones hand in to slide the rubber hose back on.
You will rarely see AC water on the ground as the front drains pour onto a metal underside protection skid plate and the rear drain onto the top of the left rear muffler.
|
|

Battery Maintainer pigtail sticking out of Grill729 viewsThis is all you see when everything is put back together - just the pigtail and Weather Pack blanking plug. Most often, I have it all tucked back behind the grill.
In winter, there may be a second cord hanging out as well - the 120 VAC power cord for the engine block heater, a tea kettle like element inserted in the engine block. NAS petrol V8's do not have the Fuel Burning Heater, (FBH), installed, but instead in cold area markets have the block heater element assembly available as a dealer installed option. There is an argument to say that the heating element is factory installed in all cold climate V8 gasoline engines, however the appropriate power cord is not. If true, this means that all one needs to purchase is the area specific power cord and plugging in / attachment to the engine block located block heater.
As such, you will often see a conventional 120VAC three prong power plug hanging loose out of the grill of most vehicles here in the wintertime. In summer, most drivers tuck the plug back behind the grill as it is no beauty mark.
|
|
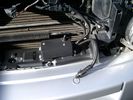
Battery Maintainer switch box and connector 724 viewsThe Hammond box contains a DPDT toggle switch with centre off. The Positive and Negative from each battery feeds to the switch. Depending on the setting of the toggle, (full left, full right,or centre off),the respective batteries connect into the pigtail that can stick out thru the grill when one wishes to connect the charger.
This allows one to charge each battery independently via a suitable battery maintainer. I use a CTEK unit that feeds a maximum of 3.3 amps at 14.4 or 14.7 VDC, depending upon setting. The wiring therefore allows for a slow recharge of either of the batteries separately if either one requires such.
|
|
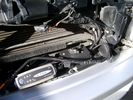
Battery Maintainer switching box plug and CTEK Multi US 3300 charger. 708 viewsThe CTEK Multi US 3300 maintainer is just sitting there for the picture. In addition to topping up both batteries, the CTEK can provide power such that if the batteries were completely dead, there would be power to the door locks and hence, one could most likely still gain access via the remote once the starting battery charged up a bit.
The Land Rover recommended method is via the hidden key hole which is mechanical, however that presumes the mechanism is not frozen from lack of use. As such, the manual lock should be exercised at least once a year to ensure that it still functions.
The blanking plug sitting on top of the plastic box is of the GM Weather Pack series. That is what I like to use for vehicle wiring that is subject to moisture, (or not).
|
|
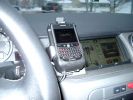
Blackberry Tour mounted on air vent showing default analogue clock 213 viewsA characteristic of the Blackberry is that when charging, the display can default to an analogue clock. Hence when the unit sits in the holder, the phone is being charged and the analogue clock displays. When the phone rings, the clock disappears and the call id displays.
|
|

Wheel cut thru definitions and specs898 viewsNote the location of REAR SPACING and also OFFSET; probably two of the most important dimensions and not always understood as related to wheel size and relationship to the brake components.
For the 3, Rear Spacing is approximately 6.5 inches or 165 mm for a nominal 8" rim. Offset is 53P or 53mm Positive, which means the distance from the machined hub flat mounting surface to the rim's true centreline is 53 mm in the outboard direction. (The rim illustrated has a negative offset.)
As Positive offset increases, this means the wheel wraps around the disc brake mechanism more deeply, and hence the more the wheel would cover the brake parts. This is why most 18" wheels will not fit with the larger Brembo "supercharged engine" brake calipers.
Pitch circle diameter is 120mm; Pattern is 5 lug, and the tyre load rating is 112 with a recommended tyre speed rating of H or higher along with the XL load rating. For the 3, the stock tyre diameter is about 30 inches. The 255/60/18 or 255/55/19 OEM tyre outside diameter is 30.04 inches; Wheel lug torque is from 130 to 150 Nm or 96 to 110 lbf-ft and the lug nut hex socket size is 22mm.
Max Load High Speed Driving Tyre pressures are Front, 33 psig, (230 Kpa) and Rear, 42 psig, (290 Kpa).
The OEM rims are rated at 940 kgs, the highest that LR makes, hence while rims from other Land Rover products may physically fit, the odds are they are under rated in a weight sense.
|
|
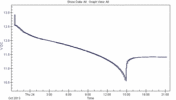
34 viewsLand Rover branded D3 battery of unknown age, discharged at 4.5A (= 90Ah at 20hr rate)
|
|

Excel file for Rotors and Brake Pads part numbers for 4.4L V8 petrol LR3769 viewsComparing the cost of the various brands of brake parts is time consuming. Once you have your parts costs, this little spreadsheet will make collating the info easier.
I did not make any provision for labour costs, but the file can be downloaded and then modified. You can change Dollars to Euros or Pounds or whatever and insert lines for labour costs as desired.
Do not pay too much attention to the $ numbers as they are a mix of US and CDN, and from differing time frames, (prior to Spring 2011) . Also the brake part numbers are for my 2005 North America spec LR3 with the petrol 4.4L V8; diesel powered and supercharged 3's may have different part numbers
|
|

LTB00180 - Technical Bulletin - Supplemental Restraint System Power Circuit Discharge59 views
|
|
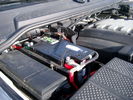
Main starting battery showing 1/2" hole drilled for power cable egress910 viewsView of OEM battery in Left Hand Drive LR3. This is supposed to be a Battery Group BCI 49 or H8 sized battery but in reality is the slightly shorter BCI 94R or H7 battery that fits easier lengthwise, (12 3/8" vs 14").
Note the 10mm hole drilled in plastic of surround to allow for entry of main power cable that runs between batteries. The cable bolts to a spare 6mm threaded hole in the OEM battery cable end; the light gauge wire runs to the front of vehicle to a connector for the CTEK MULTI US 3300 charger. Coloured felts, (red and green), are a material treated to reduce battery post corrosion. The OEM battery ground cable is only about a foot long and runs to an 8mm stud located on the inner fender just to the rear of the fuse case.
|
|
109 views
|
|
127 views
|
|
118 views
|
|
103 views
|
|
105 views
|
|
109 views
|
|
105 views
|
|
113 views
|
|
116 views
|
|
118 views
|
|
108 views
|
|
132 views
|
|
149 views
|
|
151 views
|
|
116 views
|
|
127 views
|
|
151 views
|
|
144 views
|
|
147 views
|
|
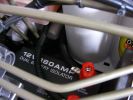
12v Isolator876 viewsEnsures that aux ery won\'t charge until the main batt is topped up and won\'t drain the main batt. I used the biggest I could find to take the load with no stress - especially the higher voltage on the landy. Came as a compete kit and works well.
|
|

Optima Battery91 views
|
|
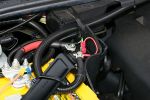
IBS split charge relay102 views
|
|
IBS Split Charge controller133 views
|
|
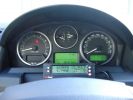
ScanGauge II on steering column of LR3801 viewsMAP is Manifold Absolute Pressure, what I call Vacuum.
The volts is I think the battery charging voltage as it moves around from about 12.4 when shut down to 13.5 when the batteries seems charged; 14.9 is about as high as I have seen it display.
You also have RPM, speed in MPH or KPH, coolant temperature and a bunch of other readings including sort of instantaneous fuel in a variety of units.
Also under some conditions, the ScanGauge will reset the MIL light as well. The background colour of the display can be changed to many different colours. I have it set to match the LR green.
|
|

My old Seadoo RXT 291 viewsOn holiday with the ski's, St Tropez France.
My RXT on the left, supercharged & intercooled 1500cc rotax engine...aftermarket freeflow intake system by RIVA, SOLAS blueprinted prop, race sponsons, RIVA intake grate & opas system removed for less drag...estimated 230hp.
Proven 70mph (with GPS & Radar gun)
On the right is my best man's GTX Ltd. with 185hp and good for 60mph with a tail wind...
|
|
Thread upload10 viewsImage uploaded in thread 109979
|
|
Thread upload4 viewsImage uploaded in new thread
|
|

Thread upload27 viewsImage uploaded in thread 126959
|
|

5.0L Supercharged RRS skid pan - Picture Nick Dimbleby113 views
|
|
478 views
|
|

Thread upload12 viewsImage uploaded in thread 124933
|
|

Thread upload15 viewsImage uploaded in thread 135276
|
|

41 views
|
|

209 views
|
|

Thread upload16 viewsImage uploaded in new thread
|
|

i have a set of 4 of these alloys with tyres in very good condition for sale43 views4 for sale and i will deliver free of charge around the glasgow area.
|
|

Thread upload3 viewsImage uploaded in thread 194623
|
|
WPC256 views
|
|
WPC154 views
|
|
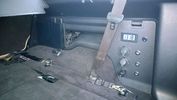
PS2 + Split charge system 10 viewsPS2 - Wireless controllers and headphones.
Split charge system with auxiliary sockets with digital voltage display
|
|
|
|
|