| Search results - "complete" |
420 views
|
|
352 views
|
|

complete remote access in position before closing the rear saets129 views
|
|
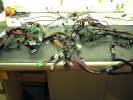
1 Dash Loom61 views
|
|
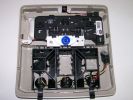
222 viewsThe complete roof panel reassembled
|
|
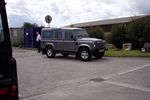
New Defender35 viewsTrade in of old Defender 90 and New Defender 110
Stratstone Pickering - Very friendly, good deal, but....
Same old Stratstone - not complete when collected.
|
|
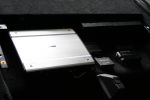
11207 viewsThe controller components are complete and fit neatly within the boot space.
|
|

15 First sign of bits of parking brake failure336 viewsNote the complete lack of pad from the parking brake. Not only was there no composite brake material left, but the drum was somewhat twisted and connecting bits all smashed. Also a small drip of melted rubber from wheel bearing parts....
|
|
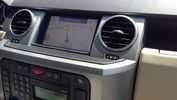
ta-dah! the final result36 viewscomplete GPS satNav system, with iGO software and ALL maps from europe 2012, including POIs speedcams, and personalized land rover skins
|
|
![Filename=20140816_223610[1].jpg
Filesize=406KB
Dimensions=2275x1280
Date added=17.Aug 2014 20140816_223610[1].jpg](albums/userpics/25538/thumb_20140816_223610%5B1%5D.jpg)
Rear floor Completed144 views
|
|

Thread upload57 viewsImage uploaded in new thread
|
|

Thread upload53 viewsImage uploaded in thread 102519
|
|
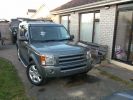
New front bumper with headlamp washers, fogs and PDC complete110 views
|
|

Rear Panel Complete97 views
|
|

5 views
|
|

Thread upload9 viewsImage uploaded in thread 195195
|
|
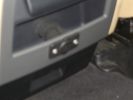
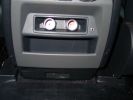
Auxiliary power sockets - TracTronics, Australia382 viewsA complete kit including two outlets, wiring etc connected to auxiliary Optima Blue top battery using their very effective SC40 split charge relay. One outlet between rear and front seats, and 2nd alongside loadspace 12v outlet, enables fridge to run when engine is not running, without affecting start capacity or vehicle functions.
|
|
386 views
|
|

D3 and D4 Underbody Protection inc. bracketry 115 views
|
|
Thread upload37 viewsImage uploaded in thread 77665
|
|
Thread upload4 viewsImage uploaded in thread 204346
|
|

Thread upload7 viewsImage uploaded in thread 199265
|
|

Installation completed67 views
|
|

V8 4.6 71 viewsD3 completed a down run & not to be out done 90 completed an up run in grand style
|
|
Thread upload10 viewsImage uploaded in thread 126243
|
|
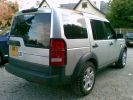
Completely debadged92 views
|
|

Discovery 4 Owners Handbook 2012121 viewsThe complete handbook for MY12 Discovery 4
|
|
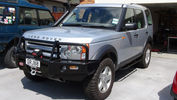
Ready to Roll114 viewsCompleted putting on sliders, mud tyres etc ready for Kauri Coast 2013.
youtube.com search snafu4wd
|
|
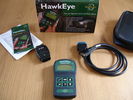
D3 Hawkeye Kit Complete47 views
|
|
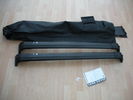
roof bars complete94 viewsset for sale
|
|

Jaguar E Type S1 4.2 Coupe6 viewsFactory restoration to near concourse condition almost complete. Disco 3 purchased as towing vehicle for shows.
|
|
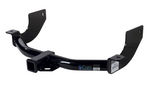
Curt Manufacturing brand hitch, assembled but not installed.290 viewsThe Curt Manufacturing hitch is an alternate to the Land Rover removable "plow" hitch. Once bolted in place, the Curt hitch is always there.
The Curt part number is 13456. It is a Class III hitch with a 2" square receiver and designed for a maximum 600 pound tongue weight.
The hitch hangs below the rear bumper but does not stick out past the bumper; also the "donut" spare tyre can still be installed / removed; am not so certain about a full sized fully inflated spare.
|
|

How To - AMK Suspension Compressor Replacement by Disco_Mikey20 viewsA copy of Disco_Mikey's guide on how to replace AMK Compressor, complete with photos.
|
|

iMac completed listings24 views
|
|
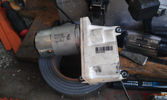
complete motor assembly epb96 views
|
|

Completed unit127 viewsReady for frame
|
|

Completed and fitted272 views
|
|

Completed headlamp mod90 views
|
|

4 x Genuine Complete Lashing Eyes For Expo Rack46 views
|
|

FBH Complete17 views
|
|
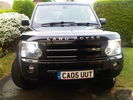
NEW LED SIDE LIGHTS AND INDICATORS (headlight MOD complete baby)88 views
|
|
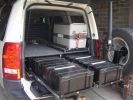
Complete system201 views
|
|
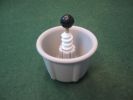
Complete Modified Tunedok144 views
|
|
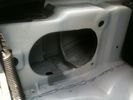
Cut out of inner guard completed - to allow 83mm flexible hose through, as the smaller hole in channel was too small.164 views
|
|

The clips (one completely broken, one partially, and one ok) that hold the plastic locking mechanism to the camera.31 views
|
|
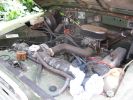
Series III complete with vines...64 views
|
|
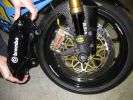
Smaller ones cost more118 viewsIt\'s hard to think that one of the small gold Brembos costs more than the complete set on my D3!!!
Stopping power of both is awesome!!
|
|

complete set5 views
|
|
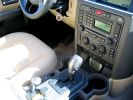
I have the screen lightly wedged between the rubber mat and the bottom of the ashtray567 viewsI plan to create a wooden block to attach the screen to and use foam tape (sticky on both sides) to hold it in. However, so far it hasn\'t moved and the ashtray is completely useable (for my parking meter quarters).
|
|

This is a night photo of the completed installation. The controller and screen brightness can be adjusted.499 views
|
|

Complete kit16 views
|
|
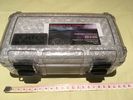
Otterbox complete11 views
|
|

Loom Layout108 views
|
|

Thread upload3 viewsImage uploaded in thread 206152
|
|
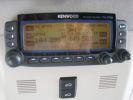
461 viewsCompleted install of control panel.
|
|
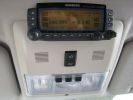
388 viewsCompleted Install of Control Panel. Wiring goes up into headliner, over curtain airbag on left hand side, and down the B pillar.
|
|
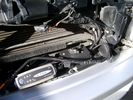
Battery Maintainer switching box plug and CTEK Multi US 3300 charger. 706 viewsThe CTEK Multi US 3300 maintainer is just sitting there for the picture. In addition to topping up both batteries, the CTEK can provide power such that if the batteries were completely dead, there would be power to the door locks and hence, one could most likely still gain access via the remote once the starting battery charged up a bit.
The Land Rover recommended method is via the hidden key hole which is mechanical, however that presumes the mechanism is not frozen from lack of use. As such, the manual lock should be exercised at least once a year to ensure that it still functions.
The blanking plug sitting on top of the plastic box is of the GM Weather Pack series. That is what I like to use for vehicle wiring that is subject to moisture, (or not).
|
|
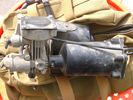
Compressor Air Drier 2044 viewsA view of the air drier - the black round thing to the right of the actual compressor cylinder head.
The general feeling is that the air dryer is responsible for most of the compressor problems now and that replacement of either the assembly or just the beads inside will probably revive one's compressor. In reality, the beads may have for the most part broken down and turned to dust plugging the internal filters. Hence replacement of the complete dryer unit has some merit.
The part number for the dryer assemble complete with the desiccant is VUB504700.
|
|
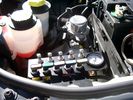
View of mounted panel from front left side878 viewsNote that all valve handles are shown in the OFF position, (the trouble position). In this case, the air that is in the air springs, (if any), is trapped in there - that is the valve blocks cannot vent whatever air is already in the air springs as the air lines between the springs and respective valve blocks are closed off by the FASKIT valves. In operation, there may be only trouble with one air spring, (perhaps a wheel height sensor), and as such, only one valve would need to be closed. If there was complete air compressor failure, then all valves would be closed and then as required, each spring could be manually filled from an outside clean dry oil free air source.
|
|
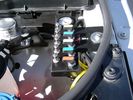
View of mounted panel from front left corner737 viewsI drilled a hole for the supplied 6 mm tie down toggle bolt in a flat portion of the wing on which the panel sits. I inserted a 50 mm flat rubber washer between the wing metal surface and the underside of the black painted panel plate; also a 40 mm flat rubber washer between the supplied fender washer and the metal plate - just seemed like a good idea so surfaces mate well even if wing metal not completely flat.
|
|
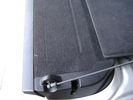
Flexible wire rope fishing leader 0.032" diameter exiting carpet 1948 viewsThis is all you see of the completed mod.
The short little angled "line" about an inch long that looks like a piece of debris and is located a few inches "above" the support cable is actually the wire rope release cable exiting from under the carpeted lift gate cover.
I drilled a very small hole in the carpet and pushed the 0.032" diameter release wire thru and then slipped the loose end under the black plastic.
To release with the lift gate etc closed, from the inside, just pull the loose end free from under the black plastic and gently pull wire about 5mm, (1/4"), and the upper door catch should release. You will have to manually push the upper door out wards to actually effect opening, but you will already be inside the rear cargo area so that part is easy to do.
The assumption is that the lower door latch still works electrically and hence, the lower lift gate half will open as normal by pressing the usual button on the top left of the lower door half.
|
|
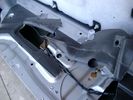
Dust seal rolled back showing electrical conductors 1658 viewsNote power conductors just under the dust seal which makes cutting the seal more interesting.
Also shown are the two 8mm nuts located in slots. One must loosen each nut to effect removal of the actuator. This will then reveal two T15 Torx screws that one must completely un-thread to remove the top gold plate from the actuator assembly.
|
|
Thread upload1 viewsImage uploaded in new thread
|
|

DISCOVERY 5 2017 IRELAND COMPLETE PRICE LIST10 views
|
|
Completely normal behaviour in a pub car park 50 views
|
|
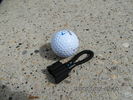
MOST fiber optic loop tool469 viewsThe looping tool in the jpg uses the Land Rover type plastic fiber optic cable with both ends feeding back into a female fiber optic connector that mates with the male fiber optic connectors on the Land Rover system.
The purpose of the loop is to allow one to disconnect MOST connected items such the BlueTooth module or the HK amplifier but allow the MOST system to still transmit signal from the head unit as the circuit would remain closed and hence complete. Of course with the Bluetooth module disconnected, there would be no Bluetooth available, however the radio and NAV would still function.
The looping tool allows one to troubleshoot the system by removing one component at at time from the MOST loop. In other words, what might appear to be a radio problem could be a Bluetooth problem - that sort of thing.
|
|
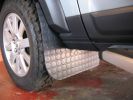
Completed and fitted new front N/S.234 views
|
|
rear socket installation complete643 viewsThis demonstrates the rear sockets installed, shows how the sockets in use are tucked up nicely and out of the way.
|
|
rear socket installation complete680 viewsdemonstrate a neat and roomy install
|
|
D44 Winch stainless fairlead660 viewsThe completed D44 winch installation, including the stainless fairlead. A stainless trim plate, and NA license plate holder is on the way.
|
|
Phase 2 complete81 views
|
|
Phase 2 complete73 views
|
|

Nicks rear view mirror - complete with embedded video screen232 views
|
|
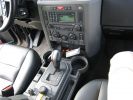
255 viewsAlmost completed install. Just the controllers need mounting.
|
|
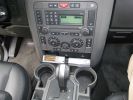
259 viewsCompleted install with both receivers working.
|
|
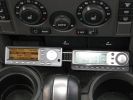
355 viewsCompleted install, again with aluminum bar and 3M velcro.
|
|
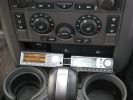
307 viewsCompleted install. I used a bar of aluminum bar with 3M industrial velcro to hold the controllers.
|
|

Complete underbody protection system photo render172 views
|
|

Complete underbody protection system117 views
|
|
Stephen completes the manouver by parking neatly in a hole86 views
|
|
Stephen completes the manouver by neatly parking in a handy hole88 views
|
|

2004 Citroen C8191 viewsMy second 7 seat motor - another big french tank with plastic bodywork in silver, complete with shopping trolley handle on the roof. A 2 ton motore with a 2.0l petrol engine mated to a 4 speed auto box - not good for performance!
|
|

My D3 safely at the top of Roych Steps226 viewsWhistled up with little drama - lost a bit of momentum coming up to the last couple and needed a couple of goes to get up them.
For those there in July - this is a completely different kettle of fish when going up it!
|
|
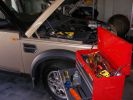
The worksite714 viewsIt looked a simple job, but it was very fiddly and was completed over several weekends
|
|
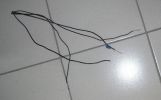
Discarded cut wires80 viewsThese are Earth wires that have been completely replaced.
|
|

Two complete sets of Rear Tail Lights13 views2 X Left Hand Rear Lights and 2 X Right Rear Lights
|
|
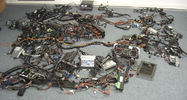
Late model complete test Rig69 views
|
|

Complete set of wheel arch trims - sample picture 112 views
|
|

Complete set of wheel arch trims - sample picture 211 views
|
|

Complete set of wheel arch trims - sample picture 311 views
|
|

Thread upload6 viewsImage uploaded in new thread
|
|

Modified Wiring diagram for the added electrical bits29 viewsI made this wiring diagram during the cleanup I did lately.
I completely removed some 'old' electrical bits I had installed and used the occasion to document every left and new part.
|
|

Mechatronic Sleeve Removal and Install Instructions1058 viewsThis 3 page pdf with pictures shows how to remove and install the Mechatronic sleeve that tends to leak tranny oil after about ten years. Even if not leaking, replacement when doing a pan/filter change at the ten year mark is suggested.
Note the 3mm or less requirement when sleeve installation is completed; also that rotation of the sleeve during the install procedure can do damage to some internal pins - hence do not rotate the sleeve when trying to insert it or in getting it to lock in place - not so easy it seems.
|
|
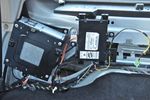
Completed installation33 views
|
|
|
|
|
|