| Search results - "diff" |
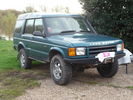
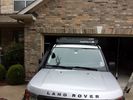
51 viewsD44 front winch bumper. Ali washer bottle. D44 rear h/d bumper. centre diff lock. 235x85x16 pirelli muds. OME +2" springs & shocks. front diff guard. side tree bars. wired for roof CB. Aux fuse block. safari snorkel. extended wading tubes. the list goes on...
|
|

different camera in gps version131 views
|
|

Offroad Training in Linthe, Germany.208 views9 Cars: Suzuki Jimny; Touareg V10 Diesel no difflock; Touareg V6 Diesel rear difflock; Disco 1; Disco 2; Disco 3; RR ´05; RR ´06; Q7.
|
|
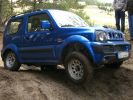
200 viewsSuzuki Jimny. Some holes were deep enough to swallow the little fella, but it got out as long as all wheels were on the ground. No difflocks or electronics in this one.
|
|
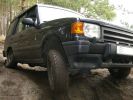
199 viewsSuspension working nicely. Thia model has no difflocks - not to mention electronics - to control wheel spin, so it needed speed to get through some points.
|
|
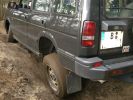
209 viewsDiscovery 1. Is stuck in this picture. No difflock.
|
|
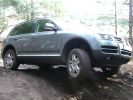
223 viewsThis is the Touareg with the 6cyl engine and rear difflock. did well, useless air-suspension though.
|
|
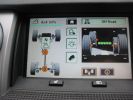
both diff locks active 252 views
|
|
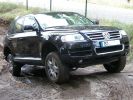
241 viewsThis Toureg is stuck - doesn´t look like it. After 8 hours of driving everyone agreed that with the big 10cyl. diesel engine you should probably oder the rear difflock as well... In this picture the rear left anf front right wheels have no grip, esp or whatever just doesn´t do it.
|
|

153 viewsBought Landmark alloys for Discovery 4 ,look great but makes calipers and discs look rubbish.Had centres of discs painted black and got calipers professionally painted ,what a difference.
|
|
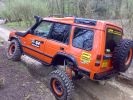
COVER SHOT FOR TOTAL OFF ROAD114 viewsG WAGEN AXELS FITTED WITH HYDRAULIC FRONT + REAR DIFF LOCKS + EXTREAM SUSPENSION SYSTEM FRONT + REAR WARN WINCHES.
|
|

Diff Guard609 views
|
|
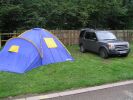
169 viewsCAmping in CArdiff for the Mad Charity Challenge event at the Cardiff Half Marathon
|
|

Thread upload3 viewsImage uploaded in thread 183644
|
|
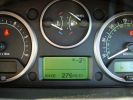
fuel range????????296 viewsfilled tank up and climbed the 21 hairpins into Alpe d\'Huez 1860m - as you can see the projected fuel range (due to the climb) suffered. The reality was different as it used virtually no fuel on the descent.
|
|

18 Brake "repairs" finished at sunset296 viewsWe just finished the repair at sunset and were driving slowly with 3 brakes. Oddly the D3 didn\'t behave any differently at 50 km/hr than it did normally. We had 4 instances of hitting the (3) skids for kangaroos before arriving in Wilcannia 3 hrs later. The brake light warning was making very distinctive noises and flashing randomly, though.
|
|
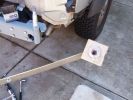
Nut holder for the difficult ones258 views
|
|

Steyr Puch Pinzgauer 6x615 viewsSomething different on the Kielder Safari
|
|
stand hid different distance - glare glare88 views
|
|
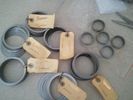
Custom Shim Assortment673 viewsMfd from https://www.facebook.com/DifferentialPartsUS
|
|
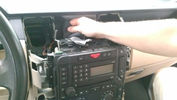
difficult to remove this pocket using normal tools...18 views
|
|
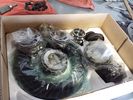
Locking Kit637 viewsready to install
Mfd from https://www.facebook.com/DifferentialPartsUS
|
|
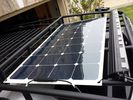
solar roof install444 viewsMore or less wrapped up my solar installation today. I added a Grape Solar Flex 100W panel, it's adequate to keep the vehicle topped off with the Fridge running, and Ham, but it could lose some ground if transmitting depending on how much, 2 would be awesome. One is enough, but barely. I am quite impressed with the Grape Solar flex panel version 2.0.
https://www.facebook.com/DifferentialPartsUS
|
|
low profile solar panel211 viewsThe low profile solar panel, can be seen here, as the fine white line under the light bar. The way it's laid out, the panel should generate decent power between 10am and 4pm depending on the time of year, from the sides or front, with no shadows. Grape Solar 100W flex panel.
https://www.facebook.com/DifferentialPartsUS
|
|
Traxide USI-160 Install515 viewsOverview picture of Traxide USI-160 upgrade install. This was an upgrade from the SC80 which performed flawlessly. The USI-160 had two relays and can deliver more amperage. As a result, the wiring was upgraded to 4/0 Welding Cable (warn) and heat shielding was added. The unit performs flawlessly to support 2 HAM Radios, Fridge, etc. Like me https://www.facebook.com/DifferentialPartsUS
|
|
Winch Power upgrade319 viewsUsing 2 warn kits, and removing one of the wires to use on another project. The purpose was to replace the power and ground wire. I used Warn kits, which are 4/0 Welding cable. The original red #4 warped from getting a little too worn. The 2nd
Battery #1 Deka 9A94 AGM Intimidator, Battery #2 Deka 9A47 AGM Intimidator WARN 36080 28" Quick Connect Cable X 2, WARN 26405 Quick Connect Cable 7' X 2, WARN 15901 Black Cable X 1 -- winch control 72" X 1 https://www.facebook.com/DifferentialPartsUS
|
|
Rigid SR2 40" combo133 viewshttps://www.facebook.com/DifferentialPartsUS
|
|

discrete winch mount415 viewsThe D44 winch mount on the trails. Like it on Facebook https://www.facebook.com/DifferentialPartsUS
|
|
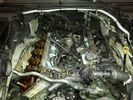
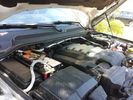
4.4 L Petrol Engine214 viewsIntake removed on V8 4.4L Petrol Engine to remove hose with T in it.
plse like my facebook page https://www.facebook.com/DifferentialPartsUS
|
|
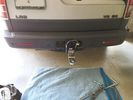
Rhino Hitch206 viewsRhino hitch https://www.facebook.com/DifferentialPartsUS
|
|
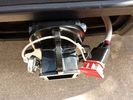
Rhino Hitch229 viewsRhino Hitch https://www.facebook.com/DifferentialPartsUS
|
|
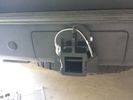
Rhino Hitch429 viewsCover fitted over the 75A Anderson plug with Rhino Hitch fitted which is a Class IV hitch. https://www.facebook.com/DifferentialPartsUS
Fits the Disco 3, Disco 4 and Range Rover Sport
|
|
Rhino Hitch309 viewshttps://www.facebook.com/DifferentialPartsUS
|
|
Rhino Hitch395 viewsMore info from https://www.facebook.com/DifferentialPartsUS
|
|

Victory Cup Polo Match141 viewsVictory Cup Bi Plane Polo Match2 viewsLand Rover event at Victory Cup Polo match 10/17/15. http://victorycup.org/bootsandpearls/
VIP Section by Texas Rovers and Land Rover Austin http://texasrovers.org and http://landroveraustin.com/ https://www.facebook.com/DifferentialPartsUS https://www.facebook.com/snomasterusa
https://www.facebook.com/DifferentialPartsUS
|
|

Victory Cup Bi Plane Polo Match121 viewsLand Rover event at Victory Cup Polo match 10/17/15. http://victorycup.org/bootsandpearls/
VIP Section by Texas Rovers and Land Rover Austin http://texasrovers.org and http://landroveraustin.com/ https://www.facebook.com/DifferentialPartsUS
https://www.facebook.com/DifferentialPartsUS
|
|

Rear Diff drain/fill27 views
|
|

81 views
|
|

Front Differential Description and Operation1544 viewsThe 4 page pdf describes of the operation of the front differential plus displays an exploded view of the front differential.
The fill plug is item 36 and the drain plug, item 8.
It is suggested one first unscrew the fill plug before unscrewing the drain plug - and it might take two different wrench sizes, hence get this detail sorted out before any oil drains out.
|
|
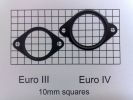
Photo of Euro III and Euro IV plates to show difference127 views
|
|
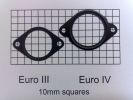
Photo of Euro III and Euro IV plates to show difference145 views
|
|
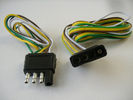
4 pin NAS flat connector from NAS small trailer382 viewsThe connector with the three exposed pins is the end that would commonly be located at the trailer hitch end, (front), of a small NAS lightweight trailer that has no electric brakes. This plug would connect into the flat 4 pin connector at the rear of the 3.
Note the order of the pin functions and wire colours: White is ground; the next pin is for tail/marker lights using the Brown wire; the Yellow conductor is for the left turn signal, and the far pin uses the Green conductor for the right turn signal.
There is no separate brake light conductor as NAS spec vehicles most often combine the brake and signal light functions to the same bulb filament rather separate filaments in different bulbs. The LR factory harness resolves that design difference.
Fortunately, the Land Rover NAS assembly pin order for the 4 pin flat plug maintains the above described conventions.
|
|
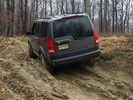
63 viewsDiffs getting a little workout
|
|

Diff and Exaust Protection656 views
|
|

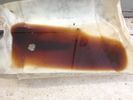
Diff oil45 views
|
|

Land Rover Aerial Fin images for both Glass and Metal Roof Disco3 / LR3864 viewsAs well as the two different fins, this pdf also shows the plastic blanking plate for glass roof vehicles where no fin is installed.
The glass roof fin is secured by two security screws from the top into a plastic frangible glue on gasket. The hope is that when struck, the fin will shear off and not crack the glass roof. Re the metal roof design, the fin is secured from underneath via two nuts.
The pdf also shows the various electrical bits related to the antennas. In the UK, the fin would house not only a cell phone antenna but the TV and satellite radio antenna electronics as well; in the States, the Sirius sat radio antenna and a G type cell phone antenna if the phone kit was installed would reside within the fin. The SAT NAV GPS antenna is located within the High Mount Brake Light plastic mounted to the upper rear hatch.
|
|
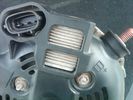
Alternator Plug and B+ terminal919 viewsPictured is the rear of the older Land Rover part # YLE500190 alternator showing the shiny cooling fin of the Regitar VRH2005-142 regulator under.
The first pin in the far left side of the connector is numbered #1 in the LR electrical wiring diagrams and is Battery Voltage Sensing (BVS); the middle pin, #2 receives a Pulse Width Modulated (PWM) signal from the Engine Control Module (ECM), and the right pin, #3 carries a PWM signal back to the ECM. Terminal Pin #2 on the LR wiring diagrams is called Alternator Control or ALT CON; Pin #3 per LR is called Alternator Monitoring or ALT MON.
Pin #1 is similar to what in older designs used to be called A or Batt, but is now called by Denso, S, AS, or Alternator Sensing for this design. Pin #1 also provides power to excite the alternator at startup until the PWM instructions over ride the battery voltage info. Land Rover calls the electronics under the pins a Smart Regulator, ironic, as it has to follow orders from the ECM rather than give the orders - new age thinking I guess. This is different from older design internal regulators that look at just the battery or the electrical buss voltage and then decides itself what to do.
It is almost like we are back to the external regulator designs of old, except that the ECM may decide that instead of telling the alternator to make more power, to load shed, and hence shut down the heated windscreen, seats, or whatever other electrical loads it decides are appropriate. My view is that the "smarts" are in the ECM and that the "regulator" should be regarded if not dumb, then as being a slave to the ECM.
|
|
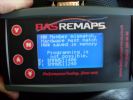
BAS remap interface after dealer software update287 viewsBAS remap interface after dealer software update,This is what you will be presented with after the dealer updates your cars engine software.
This is no problem IF you have returned the car to standard before the dealer visit.
When faced with this screen it will show you tht the dealer has changed the software and NOT let you put the BAS mapping back on your car because of the differences.
|
|
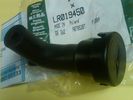
Breather Cap part # LR0194501543 viewsThis is the replacement breather cap as manufactured by the Gore Tex people, (Gore), for the engine compartment end of the front differential breather line.
You can with some difficulty, both blow and suck thru the breather filter material. The Gore Tex filter material has what are called hydrophobic and oleophobic properties. This means the filter material keeps oil in and water out, while at the same time, allowing air pressure to slowly equalize, (air permeable). Additionally, the transfer of dust, salt, and road debris is inhibited.
|
|
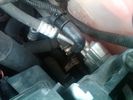
Breather Cap Installed2010 viewsThe black L shaped tube is is the Gore manufactured, (the Gore-Tex people), LR4 Breather Valve installed in an LR3. Naturally the installation looks similar to what one sees on an LR4 or RRS as the Gore breather valve is now OEM for new production.
The part number of this upgraded front differential breather valve is LR019450 and costs about thirty dollars.
|
|

Diff Torque settings49 views
|
|
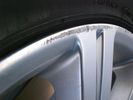
Wheel 2 Scuff different angle14 views
|
|
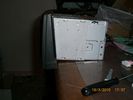
This show that the angel of the radio body is diffrent from the original, hence shall some plasic be removed - I used a dremmel and removed 7 mm of the horizontal bar inside 160 views
|
|
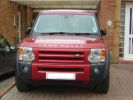
Rimini Red - Decision made438 viewsSo excited, hence camera wobble!!, having a differnt colour at last after only 7 Silver Discos
|
|

River Crossing on Strata Florida428 viewsAfter a night of torrential rain, we drove Strate Florida. The many river crossings were difficult - but we made it!
|
|

Thread upload14 viewsImage uploaded in thread 195443
|
|
Thread upload11 viewsImage uploaded in thread 159659
|
|
Thread upload16 viewsImage uploaded in thread 185241
|
|

Thread upload26 viewsImage uploaded in thread 184914
|
|

Thread upload31 viewsImage uploaded in thread 184914
|
|
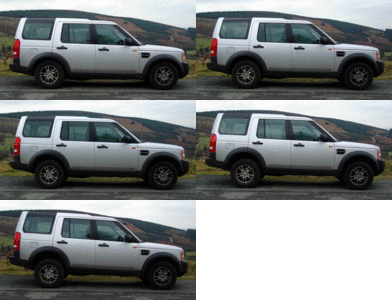
Animation of suspension in different positions65 viewsAccess, Normal, Off-road, Extended Mode and (partial) Super-Extended Mode
|
|
Thread upload23 viewsImage uploaded in thread 123573
|
|

Thread upload8 viewsImage uploaded in thread 189350
|
|

Cooling System - Description and Operation 4.0L and 4.4L petrol engines 5 pages1028 viewsThis is a 5 page pdf that provides some insight into how the coolant flows thru all the hoses. Of interest is the paragraph,(page 3/5), that attempts to explain how and why the thermostat is designed to open at different engine operating temperatures - in brief, the reason for the spaghetti tangle of small hoses on the top of the engine.
There is also reference to an engine oil cooler that I gather cools something I think related to a supercharger, if fitted.
|
|

167 views
|
|

Rear diff draining and filling620 views
|
|
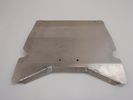
D3 and D4 rear diff guard119 views
|
|
Thread upload5 viewsImage uploaded in thread 80785
|
|
Thread upload18 viewsImage uploaded in thread 142315
|
|
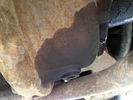
Thread upload9 viewsImage uploaded in new thread
|
|
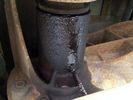
Thread upload12 viewsImage uploaded in new thread
|
|

Essential info for visiting Maroc and/or France113 views
|
|

27 views
|
|

30 views
|
|
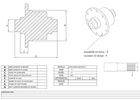
Differential size123 views
|
|
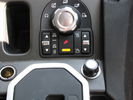
Different Llams knob c/w large washer102 views
|
|

D3 reqar diff lock186 viewsView from right rear tyre well, left rear tire/rim visible on other side. Actuator motor visible
|
|

Difflock225 viewsDifflock with annotations
|
|

Thread upload19 viewsImage uploaded in new thread
|
|

Diff Kit78 viewsAll you need to change the oil in your front diff.....
|
|
Thread upload4 viewsImage uploaded in new thread
|
|

Thread upload18 viewsImage uploaded in new thread
|
|
Thread upload16 viewsImage uploaded in new thread
|
|
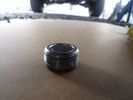
Front Diff Oil Plug 70k After76 views
|
|
Thread upload13 viewsImage uploaded in thread 123506
|
|
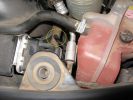
174 viewsFront diff breather
|
|
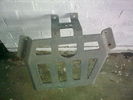
92 viewsASFIR rear diff guard
|
|
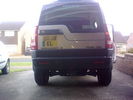
126 viewsasfir rear diff guard and disco3.co.uk sticker ;)
|
|
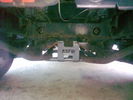
116 viewsasfir rear diff guard
|
|

Thread upload2 viewsImage uploaded in new thread
|
|
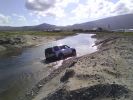
disco 3 on a scary side angle85 viewsdoes\'nt look to bad here, totally different story when your inside it. spare jocks anybody??
|
|
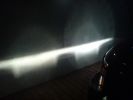
Right fog uses H9 bulb, note the difference between the H11 and H9 bulb253 views
|
|
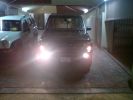
Right fog uses H9 bulb, note the difference between the H11 and H9 bulb243 views
|
|
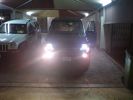
Right fog uses H9 bulb, note the difference between the H11 and H9 bulb227 views
|
|
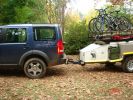
Towing conqueror trailer with standard towbar. D3 at offroad height (looks different now with new tent & wheels)340 views
|
|
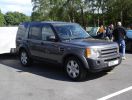
Disco 3 at Oulton Park 28th May 2005918 viewsDifferent Disco 3 at the VSCC Oulton Park meeting
|
|
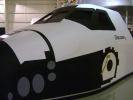
A different kind of Discovery67 views
|
|
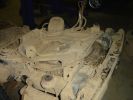
90 viewsRear of car, note control? box just behind and above rear diff
|
|
85 viewsFuel filler, showing rear diff breather pipe
|
|
103 viewsRear shot, showing diff and fuel tank breather pipes running up to filler neck at top LHS
|
|
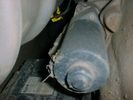
rear diff lock motor 1128 views
|
|
rear diff lock motor123 views
|
|
attuatore bloccaggio diff post156 views
|
|
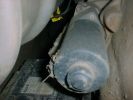
rear diff lock motor 2130 views
|
|
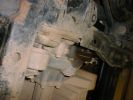
leaking front diff126 views
|
|
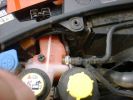
Front diff breather136 views
|
|

45 ers 228 viewsagain, picture does not do the angle any justice. getting out of the car was pretty difficult. great pay and play site
|
|
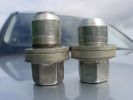
Different wheel bolts on my D3240 views
|
|
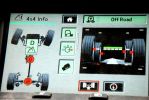
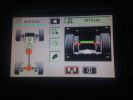
4x4 info screen showing both diffs hard at work146 views
|
|
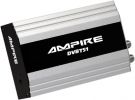
Multimedia in my D387 viewsSome pictures on how 12h of work made a difference to my D3
|
|
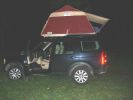
First Night709 viewsfor more than 10 years I'm using my roof tent on a lot of different cars (Mitsubishi L300, Mitsibishi L200, LR 110 Td5, Disco 2 Td5).
Now, on last friday I finished to fitt the tent of the original LR Expedition roof rack.
It was a hard job because I wont neither to change the possition of the GPS antenna nor I was interessted to fitt a second one.
|
|
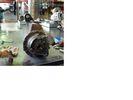
removing e-diff actuator915 views
|
|
looking at gear through actuator hole832 views
|
|
Thread upload174 viewsImage uploaded in thread 32281
|
|

Thread upload20 viewsImage uploaded in thread 176633
|
|
57 views
|
|

Ford Sounder 4L1Z-15K864 A that I installed.12 viewsThis is the Ford sounder, part number 4L1Z-15K864 that I purchased and installed in lieu of the official Land Rover sounder. Note the part number is what is printed on the box (and also my invoice) but the part number on the sounder body is a bit different. I think a new box/invoice related part number is created each time the price of a part is changed. Regardless the Ford sounder was about half the cost of the Land Rover part and sounds the same as the removed factory buzzer.
|
|

front diff draining and filling539 views
|
|

Front Diff - drain and fill99 views
|
|
34 viewsfront diff oil
|
|
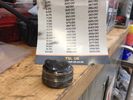
38 viewsfront diff plug doing its job
|
|
Thread upload6 viewsImage uploaded in new thread
|
|

Thread upload8 viewsImage uploaded in new thread
|
|

13 views
|
|

Breather Hose exploded view.1232 viewsThis pdf shows the exploded view of the breather hose from the front differential to the engine compartment. The breather hose part number is TAP500081 and is identified as 4A058 in the drawing.
|
|

Thread upload4 viewsImage uploaded in new thread
|
|

55 views
|
|

Thread upload46 viewsImage uploaded in thread 134360
|
|

30 views
|
|

Gore Tex data sheet on Breather Cap.784 viewsThis is a Gore data sheet on the air vent material that is within the breather cap. The filter material has both hydrophobic and oleophobic properties. That means it keeps water out and the differential oil in.
Also the membrane material is air permeable; that means air pressure is equalized between the interior of the differential and outside air. This is important when the 3 is flying at altitude in the back of a Hercules with the rear door open - that is the rear hatch of the Herc.
|
|
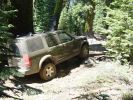
Heading up to Snake Lake150 viewsDidn't know we were actually going up to the lake. We were planning doing a loop without taking the spur to the lake. Turned around early due to time concerns. Difficulty (as rated by trail book): 8/10.
|
|

91 viewsme and my two friend on the way to Cardiff
|
|

Spesial message, diff noise170 views
|
|
Diff Oil28 views
|
|
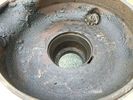
Rusty diff internal25 views
|
|

LP scoped 222 viewsBy connecting a Low Amps probe to the fuel pump's voltage supply wire, you can view the pump's current waveform on a digital storage oscilloscope (DSO). The scope pattern will reveal internal wear in the brushes and commutator that may not show up in a traditional pressure or volume test.
Observing the waveform will show if the pump's amp draw is normal for the application or is high or low, and if the pump is operating at normal speed or is running slow. Problems such as a bad spot on a commutator or a short or open in the armature also will be obvious in the waveform.
A "good" electric fuel pump waveform will generally seesaw back and forth with relative consistency and minimal variation between the highs and lows. A "bad" waveform will show large or irregular drops in the pattern, with large differences between the highs and lows.
|
|
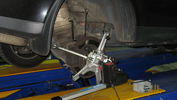
Bruce Davis Specialised Wheel Alignment Photo 280 viewsBruce claims that it is trial and error with standard wheel alignment equipment as you have to remove the wheel to make an adjustment and then recheck, a difficult task.
|
|
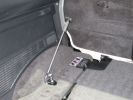
Paddock dog guard - secured289 viewsdifferent angle on the J-bolt
|
|
diff lock142 views
|
|

Fridge Controls208 viewsSnomaster 72 Fridge controls. https://www.facebook.com/DifferentialPartsUS
|
|

72 Liter Fridge211 viewsSnomaster 72L Fridge / Freezer. https://www.facebook.com/DifferentialPartsUS
|
|

D2 Rear Diff 242 views
|
|

D2 Rear Diff 138 views
|
|
ASFIR Rear Diff Guard48 views
|
|

67 viewsfill and drain plugs (rear diff)
|
|
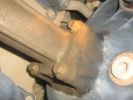
Oil leak Front Diff 110 views
|
|
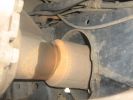
Oil leak Rear Diff? 75 views
|
|
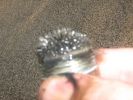
Rear diff Plug79 views
|
|

Diff Recon 128 views
|
|

Diff Recon kit24 views
|
|

Diff Recon29 views
|
|

Diff Recon23 views
|
|
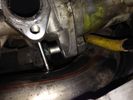
EGR replacement21 viewsThe left EGR valve is tight up against the turbo boost pipe. This make insertion of the long bolts difficult!
|
|

108 viewsSame campsite, different angle
|
|

Replacement switch from RRS installed on LR3864 viewsThe switch shown is LR part number YUZ500020, the upper rear hatch release switch that is found on the Range Rover Sport.
The switch body is the same switch as on the LR3 except that there is no wiring disconnect on the LR3. Hence when the switch corrodes and requires replacement, the LR solution is to purchase a new handle and license plate light assembly. I instead cut off the old switch and installed a JAE mating connector to the existing wiring and hence just plugged the RRS switch in.
The replacement RRS switch snaps into the same rectangular space in the same manner as the removed LR3 switch, the difference is the JAE male wiring connector.
|
|

Front Diff Patch Sample71 views
|
|

Rear diff Patch sample66 views
|
|
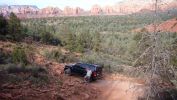
Just finished the difficult stairway decent...106 views
|
|

L319_Front_Diff_Repair.31 views L319_Front_Diff_Repair.
|
|
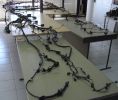
Looms laid out122 viewsview of both a d3 and sport loom from rear left quarter, the single tailgate sport is slightly to the left of the split D3. This was the only real area of difference.
|
|

Thermostat Housing LR005631538 viewsWhen the time comes to install a new thermostat, consider installing the whole housing instead.
Advantages are the thermostat is correctly installed, (not as simple as it should be); you get all new plastic and that is important, plus a new coolant temperature sensor and also a new heater coolant bypass valve, the secret part no one realizes is also within.
The cost of the whole assembly is not much more than the cost of a factory thermostat and the effort to replace all is not as difficult as it might seem.
|
|

LLumar "windscreen" clear Infra Red reduction side window film930 viewsThis is a data sheet on the LLumar brand of what they call Windscreen Film; It is almost clear, (has a bit of a blue tint), and reduces both the Ultra Violet fading and sun burn rays which most all films do as that is easy, plus more significantly, the Infra Red heat rays. That is rare as it is not so easy or cheap to do.
AIR80BLSRHPR (blue) is what the IR rejection film is listed as in the brochure that I used. http://www.llumar.com/en/AutoWindscreen.aspx
I had it applied to the front side windows as well as the front sun roof. One can feel the difference when the sun is low and streaming thru the side glass or high and coming thru the sun roof. Rolling a side window down is the simplest test of effectiveness re the rejection of the heat energy.
|
|
Thread upload4 viewsImage uploaded in new thread
|
|
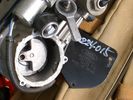
Compressor Con Rod Broken 1753 viewsThe model number of this compressor is RQG500060; the model number of my replacement compressor was LR015303, the unit that was apparently being installed on the D4 vehicles as of Spring 2010. As of Fall 2011, the new replacement part number is LR023964, the same as in the 4's.
Note the number hand written on the black plate. All the compressors seem to have some number hand written on them - hand built I presume, and every unit perhaps evolving a bit differently as LR struggles to build a compressor that will last. I guess Hitachi, (the manufacturer), should be given credit for that.
|
|
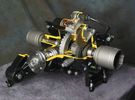
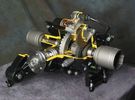
Rear Differential cutaway with E-Locker 1210 viewsThis jpg is from the link below.
There are another ten or so cutaways plus a whole file group showing a 2005 LR3 sectioned for the 2005 Chicago Auto show. Each jpg has an enlarge function to the bottom right of a main picture.
On one jpg you can see right into the stepper motor.
http://www.cutawaycreations.com/cutaways.php?project=land-rover-electronic-rear-differential#/IMAGES/car4/images/image1.jpg
Both the front and rear differentials are manufactured by Dana Spicer in the UK. Dana calls them a Clamshell design.
|
|
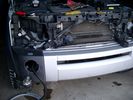
Wiring, (tubing), loom exiting temporarily from the front right fog light.569 viewsThe front axle air valve block is located just behind and below the fog light. Access to the valve block is by removing the right front fender liner, (or the bumper). The FASKIT lines are attached to the left and right front air spring lines at this location; also compressor air is taken from this location as well. Cutting the lines at as few different locations makes it easier to find leaks at a later date. As above, five 6mm air lines run from the FASKIT panel to the front axle air valve assembly and run within the loom. Two pair of the lines are for control of the air springs, and the fifth line taps the air supply at the valve block assembly off the compressor. This will be the air source line rather than tapping in directly to the high pressure air tank.
|
|

Thread upload2 viewsImage uploaded in thread 127470
|
|

Thread upload3 viewsImage uploaded in thread 127470
|
|

Thread upload2 viewsImage uploaded in thread 127470
|
|

Thread upload4 viewsImage uploaded in thread 127470
|
|

LR3 Denso Alternator YLE500390 rear view709 viewsThis picture shows the rear of the YLE500390, the Land Rover part number for a newer design alternator utilizing the Transpo IN6349 regulator with the "hidden" cooling fins. Note the visual difference in the rear view of the next file jpg.
If the alternator is a rebuilt, (service exchange unit), but Land Rover supplied, then the part number is LR008860 or similar. (Note that 0 in LR0 is zero.)
Two Denso part numbers exist for the alternator as well, 4280003690 and 4280003691. The rating of the petrol V8 alternator is nominal 12 VDC and 150 amps. In normal day to day operation, they seem to run about 14VDC - usually between 13.9 and 14.1 volts at the OBD port.
For the petrol V6, the LR service exchange number is LR008862, and the 2.7TDV6 is LR008861.
The bridge rectifier within the alternator is a 12 diode avalanche type, 117mm diameter, as used in Nippondenso 120 to 160 amp alternators with the Hair Pin stator. It is similar to a Transpo INR421 which is rated for 120 to 150 amp alternators. That is probably our primary problem - the rectifier is just too light. Alternate part numbers for the bridge rectifier are Cargo 237607, Mobiltron RM-29 and AS ARC6021.
Re the B+ stud, the INR421 calls it up as an M8 x 1.25 x 30 mm long course threaded stud; some say 34 mm but that may be longer than desirable.
|
|

Excel file for Rotors and Brake Pads part numbers for 4.4L V8 petrol LR3769 viewsComparing the cost of the various brands of brake parts is time consuming. Once you have your parts costs, this little spreadsheet will make collating the info easier.
I did not make any provision for labour costs, but the file can be downloaded and then modified. You can change Dollars to Euros or Pounds or whatever and insert lines for labour costs as desired.
Do not pay too much attention to the $ numbers as they are a mix of US and CDN, and from differing time frames, (prior to Spring 2011) . Also the brake part numbers are for my 2005 North America spec LR3 with the petrol 4.4L V8; diesel powered and supercharged 3's may have different part numbers
|
|
26 views
|
|

Horn Wiring Circuit LR3578 viewsThe is the wiring diagram for the dual horn circuit.
The Horn Relay, (R133), is not a big black thing hidden somewhere but instead what is called a FET, (and it is hidden)!
This is a Field Effect Transistor that is built into the circuit board that is mounted to the back of the fuse box that is located behind the lower glove box door on the passenger side of the 3. The related 15 amp fuse, 12P, is mounted in this fuse box and is often called F12P, where F is for fuse, and P is for Passenger compartment.
This is to help differentiate from another fuse and relay box, (the usual kind), that is located beside the starting battery in the Engine compartment. FxxE is often used in the naming of those fuses.
|
|
Thread upload7 viewsImage uploaded in new thread
|
|

Thread upload7 viewsImage uploaded in new thread
|
|

ZF 6HP26 Land Rover Transmission specs1677 viewsThis is just two sheets of paper with various numbers related to the 6HP26 such as oil capacity, gear ratios, and torque wrench settings for the fill and drain plugs.
You may note that LR calls this ZF transmission the 6HP26 whereas ZF calls out the LR3 transmission as the 6HP26X. Just what the differences are, I am not certain however the X refers to 4WD or AWD use as opposed to solely 2WD.
Zahnradfabrik is what ZF is short for and translated from German, roughly means Gear Factory.
|
|

LTB00084 - Technical Bulletin - Glass Roof Panel Blind Difficult to Latch - Repair Procedure137 views
|
|

LTB00178 - Technical Bulletin - Rear Differential Pinion Oil Seal Availability132 views
|
|

LTB00245 - Technical Bulletin - Revised Front Differential Breather Cap Availability86 views
|
|

Lug Nut part number RRD500290 outline sketch541 viewsThis single sheet pdf provides dimensions of the LR part number RRD500290 lug nut on vehicles from MY 2005 to 2008, (up to VIN 8A450459). From VIN 8A450460, the part number is RRD500590.
Visually, there is no apparent difference between the two part numbers. The dimensions appear identical as well. The shape, size, and profile of the Stainless Steel "hat" appears identical.
There are I presume differences in metallurgy to reduce corrosion and swelling of the hat or perhaps better sealing between the inside surface of the hat and the steel of the lug nut body. The reality is the differences are not immediately obvious however.
A 22 mm six point half inch or larger socket drive fits over the lug nuts. I use a nominal 36" long breaker bar with the 22mm socket - any shorter bar, best you be in shape. Depending upon your source, for both alloy and steel wheels, the lug nut torque value appears to be 103 lbf ft, (140 Nm); others suggest first tighten to 96 and then finish at 110 lbf ft, (130 and 150 Nm).
|
|
Thread upload6 viewsImage uploaded in thread 205885
|
|
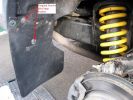
Fitting Land Rover Series 3 Rear Mud Flaps to a Disco 3/4 - A956 viewsUsed Original Screws plus two extras, Had to cut around exhaust. Once first done, laid them back to back and used first as a template to drill and cut second. Used a 5.5mm drill for the holes in the flap for the original screws and a 7mm drill to make the new holes in the plastic wheel-arch trim and lining to take the two-part trim clip (see my gallery for a picture of this style clip) - this photo of the new flap shows two screws but I modified that design to avoid using screws which corrode with time. Ignore the fact the pics are taken on a D3 Coiler, it makes no difference.
|
|

Differences between entry and enhanced sat nav396 views
|
|

N - S Differences37 views
|
|

N - S Differences40 views
|
|
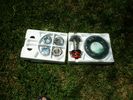
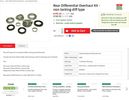
Rebuild Kit1032 viewsReplacement custom Crown Wheel & Pinion, upgraded seals, OE bearings, replacement needle bearings.https://www.facebook.com/DifferentialPartsUS
|
|
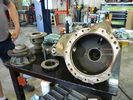
Housing and Bits1283 viewsHousing of DIII/LR3 locking differential
|
|
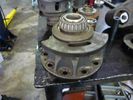
Locker and Bearing1382 viewsRusty shot bearing and locker mechanism https://www.facebook.com/DifferentialPartsUS
|
|
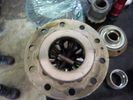
gears1218 viewsNice Gear set, most diffs only have 2
|
|
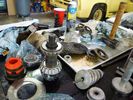
clutch in bits1257 viewssome clutch bits, pinion, etc.
|
|
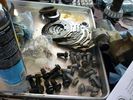
more clutch bits1188 viewsmore bits, bolts and pieces
|
|
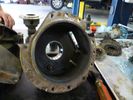
Housing and Bits1178 viewshalf of the housing
|
|
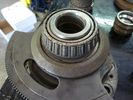
shot bearing1436 viewsshot rusty bearings https://www.facebook.com/DifferentialPartsUS
|
|
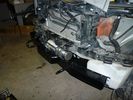
new inner bumper fitted with winch756 viewsD44 Discrete winch mount inner bumper fitted with Warn XD9000 winch. https://www.facebook.com/DifferentialPartsUS
|
|
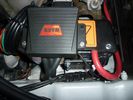
warn winch controller installation568 viewsLeft Hand Drive, fitted in engine bay near washer fluid fill for reference point.Remote control unit fitted on the box. Remotely installed due to space limitations, and to keep the unit dry.
https://www.facebook.com/DifferentialPartsUS
|
|
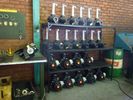
DIII Diffs stacked1217 viewsMfd from https://www.facebook.com/DifferentialPartsUS
|
|
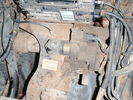
Locking Rear Diff30 views
|
|
Locking Rear Diff26 views
|
|
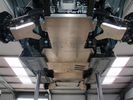
D3 and D4 Underbody Protection178 viewsIncludes:
Sump guard
Centre guard (transfer box, exhaust, fuel tank)
Rear diff guard
A-arm guards
|
|
234 viewsDifference required = 200mm
|
|
294 viewsStandard holes seem to differ on models, I moved mine 45 degrees & it works fine
|
|

Wheel DiametervDifference between 19" Sport Zero and 17" ST66 views
|
|
Rear Diff Oil Leak 185 views
|
|
Rear Diff Oil Leak 285 views
|
|
Rear Diff Oil Leak 391 views
|
|

Rear Diff Oil Leak 487 views
|
|

Rear diff - drain and fill96 views
|
|

46 views
|
|
31 viewsrear diff oil
|
|
31 views
|
|
29 viewsrear diff plug
|
|
Rear Locking Diff618 views
|
|

39 views
|
|

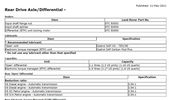
rear drive axle and differential87 views
|
|
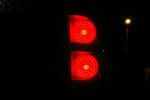
Rear LEDs184 viewsNot much different to the glow-worms that were there, but they should last a lot longer.
|
|
Thread upload6 viewsImage uploaded in new thread
|
|

Thread upload8 viewsImage uploaded in new thread
|
|
2 views
|
|

27 views
|
|
Thread upload21 viewsImage uploaded in thread 188542
|
|

9 views
|
|

7 views
|
|
Thread upload34 viewsImage uploaded in thread 124447
|
|

1 views
|
|

Transpo Regulator IN6349 Pin Assignment716 viewsThis pdf shows the Land Rover and Ford pin naming for the 3 pins in the receptacle of the Transpo IN6349 regulator that accepts PWM signals. This jpg is as if you are looking into the receptacle located on the alternator.
Also provided are the Transpo pin names that are in common use and that some may be more familiar with plus some comments re testing.
The IN6349 regulator is used in the newer LR part # YLE500390 alternator. For the older YLE500190 alternator, the regulator is a Regitar VRH2005-142 unit that is shaped a bit different than the newer IN6349 regulator. Externally, the main difference is that no shiny fins are visible on the rear of the newer YLE500390 alternator. The pin naming and numbering is the same for both and both alternators are interchangeable.
|
|
91 views
|
|

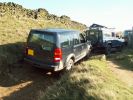
Damaged after recent rain82 viewsJonesy bent a steel rim on one of the deep ruts. It was late afternoon and the shadows made it difficult to pick out the ruts
|
|
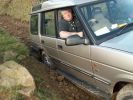
Roych Victim Number 2250 viewsA bust diff lock combined with side steps and road tyres makes for a stationary Disco 1 - took us an hour to get this over the big steps - and only then with a tow!
|
|
My D3 safely at the top of Roych Steps226 viewsWhistled up with little drama - lost a bit of momentum coming up to the last couple and needed a couple of goes to get up them.
For those there in July - this is a completely different kettle of fish when going up it!
|
|
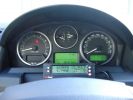
ScanGauge II on steering column of LR3800 viewsMAP is Manifold Absolute Pressure, what I call Vacuum.
The volts is I think the battery charging voltage as it moves around from about 12.4 when shut down to 13.5 when the batteries seems charged; 14.9 is about as high as I have seen it display.
You also have RPM, speed in MPH or KPH, coolant temperature and a bunch of other readings including sort of instantaneous fuel in a variety of units.
Also under some conditions, the ScanGauge will reset the MIL light as well. The background colour of the display can be changed to many different colours. I have it set to match the LR green.
|
|
Thread upload3 viewsImage uploaded in thread 165158
|
|
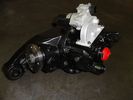
reman unit1129 viewshttps://www.facebook.com/DifferentialPartsUS
|
|

Thread upload12 viewsImage uploaded in thread 139974
|
|
Thread upload17 viewsImage uploaded in new thread
|
|

Skid plate diff256 views
|
|

Front Diff specs33 views
|
|

Thread upload2 viewsImage uploaded in thread 208925
|
|

Thread upload24 viewsImage uploaded in new thread
|
|
New Rack and Wheels :)90 views
|
|
Sump plug - Rear diff81 viewsSump plug - Rear diff. Check all the iron filings
|
|

The Disco 3 the day I bought it74 viewsSince then here's what's been done
1) New slotted and dimpled EBC rotors and Pads
2) Rover Specialties rock sliders
3) Clear color side markers
4) Front & Rear LR lamp guards
5) Rebuilt both of my Non working Key FOBS by replacing batteries. - I can't believe I didn't even check these when I bought the vehicle.
6) Changed the LR3 emblem to Discovery 3
7) Terrafirma Front Skid Plate
8) Tactical 4x4 Gas Tank Guard
9) ASFIR Rear Diff Guard
10) Here are the things now mounted on Roof Rack
- Full size 18" MTR/Kevlar
- (2) 5 Gallon Jerry Cans mounted in Front Runner holder
- 60" Hi-Lift X-treme Jack
- Shovel
- Magnetic CB Antennae
|
|

transmission, transfer and differential oils specs, quantities and info122 viewstransmission, transfer and differential oils specs, quantities and info
|
|
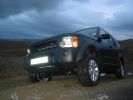
Only 10 miles on the clock - Walna Scar in the Lake District489 viewsIt was getting dark and there was only me and the wife so nothing too difficult here. At least I know where to find the place now.
|
|

Almost there121 viewsAlmost at the top and still scrambling to keep momentum to reach the top of this awkward dune. The tussock grass mounds can be seen in the foreground and on the plain below and almost always made it difficult to maintain all 4 wheels in contact with the ground at the same time as keeping sufficient momentum to reach the top. Challenging all the way!
|
|
214 views
|
|
210 views
|
|
214 views
|
|
245 views
|
|

ZF 6HP26X-28X Plastic and Metal Pan part numbers and list583 viewsThis 3 page pdf lists the ZF part numbers for the factory metal and plastic pans. Note that the plastic pan is listed as the General pan, and the two metal pans as the BMW and Ford pans. The differences are subtle - drain related it appears.
Torx cap screw descriptions are provided as well as data on the differing gaskets and oil filters.
|
|

Electrical Connector Sleeve Replacement ZF 6HP26974 viewsThis 3 page pdf with pictures shows how to replace the sleeve that holds the multipin electrical connector that passes thru the transmission body to the Mechatronic unit.
The install of the sleeve is more difficult than the removal in that one must not rotate the sleeve as damage to the internal pins can result. The pan must be first removed to both remove and install the sleeve.
|
|
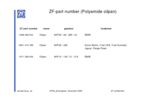
ZF Plastic Pan / Filter part numbers852 viewsZF, not Land Rover, part numbers for the various types of plastic pan depending upon vehicle manufacturer. The BMW pan is apparently different from the Land Rover pan even though the transmissions are 6HP26 units. No wonder each manufacturer has his own oil - maybe it is different as well. What I find interesting is the mention of Ford Australia and Ford USA separately rather than just Ford.
|
|

Underside of ZF 6HP19 and 26 transmissions pans1429 viewsThis is a view of the underside of two different plastic transmission pans, one for the ZF 6HP19, and the other, the 6HP26.
The 24 Torx screw pan is for the 6HP19; the 21 Torx screw pan is for the 6HP26/28/32 transmissions. The screws are numbered in the order that they are to be tightened re the O ring seal. Our 3 has the 21 screw transmission, the ZF 6HP26X six speed.
|
|
|
|
|
|
|