| Search results - "fix" |
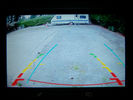
Red and yellow lines on fixed on the camera, blue lines gvif and adjustable78 views
|
|
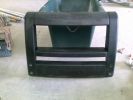
ABar for sale , no fixings115 views
|
|
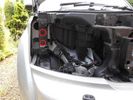
Remove Headlights and Grille using bulb replacement instructions in Manual - Push the fixings supplied into these holes circled in red152 views
|
|
Fixing a webcam on a tree54 views
|
|
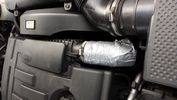
Thread upload148 viewsTemporary short term fix - duck tape to get you home!!
|
|
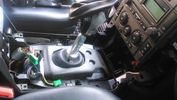
Thread upload13 viewsImage uploaded in thread 142948
|
|
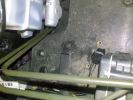
Area where Alarm Sounder was originally fixed99 views
|
|

Air con pipe65 viewsIts the brown pipe in the center of the photo. To remove this first you need to remove the "charge air cooler inlet hose" to allow access to the air con pipe securing fixings. But with the "charge air cooler inlet hose" disconnected it can\'t be removed from the veh because the air con pipe is in the way???
|
|
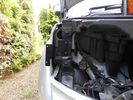
Fix bracket using the existing holes and fixings supplied90 views
|
|
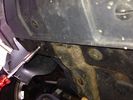
Thread upload46 viewsImage uploaded in thread 102519
|
|

Thread upload0 viewsImage uploaded in thread 208658
|
|
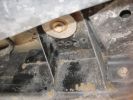
drill 2 holes for fixing front of airtank153 views
|
|
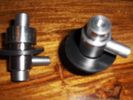
138 viewsarm rest fixing points
|
|
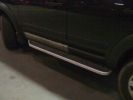
D3 Side Step Repairs165 viewsFinished job all I need to do now is wash it all off. I had already replaced the front door trim using new trim fixers and as you can see it was still dirty.
|
|
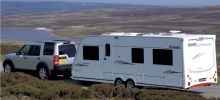
Elddis Crusader Storm257 viewsNot our actual caravan (or car) but very similar! We have a Superstorm which doesn\'t have a fixed bed at the rear like this one does.
|
|
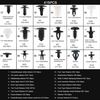
Thread upload4 viewsImage uploaded in new thread
|
|

Thread upload3 viewsImage uploaded in new thread
|
|
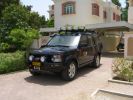
RHS view372 viewsSHows the Front Runner (SA) slimline windcheetah rack which is immensely strong. Takes my 110kg (oh gawd, I must get back on the diet and exercise regime) tramping over it when loading/unloading gear without a problem. Fittings are simply fixed or removed, and IMO very well designed and made. IPF 800 series driving and spots fitted to the front of the rack. IPF cam/reversing fitted each side and to rear of rack for negotiating rocky wadis at night. The G4 stickers were bought off E-bay as a set.
|
|
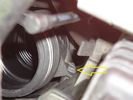
Thread upload18 viewsImage uploaded in thread 108943
|
|

Cooling system hoses - 4.4L petrol V81110 viewsThese are the cooling system hoses on the 4.4L petrol V8. The little odd shaped bleeder hose, (LR006158), shown in the top right hand corner can give problems. There is a plastic tee with a threaded air bleeder outlet located in the middle of the hose. The plastic tee can or will fail due to I guess heat distress.
A BIC pen can serve as a field fix, however for your parts kit, a nominal 3/8" ID hose size brass hose barb inline connector plus a couple of hose clamps is suggested. Better yet is a threaded hose barb brass coupling or a tee and bleeder valve to allow bleeding of the line. Land Rover now makes the plastic bleeder valve that breaks available as a separate part, # LR027661, where 0 is a zero. As such, one can now purchase that part only for addition to your field fix parts kit.
|
|
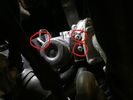
15 views
|
|

fixed penalty is in the post67 views
|
|
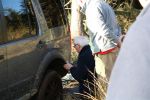
a marshal fixing some trim back on..!64 views
|
|

22 views
|
|
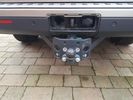
Thread upload21 viewsImage uploaded in thread 175954
|
|
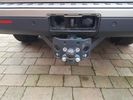
Thread upload18 viewsImage uploaded in thread 187274
|
|
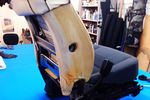
arm rest fit262 viewsas you can see there is a hole where the arm rest fixing point gose... gives you a good guide.
|
|

176 viewssealant used for sticking resistor to rear light and spot fixing the D4 front grill this stuff is superb but needs 24 hrs to cure
|
|

CALENDAR 2011402 viewsIn December 2009 we toured Botswana – first tour with the Disco, I had a yellow Defender previously. I rented a trailer, and the wheel bearing seized 1300km into the trip. This photo was taken while we waited for my friend to bring us a “fixed†hub. The elephant crossed the road less than 300 meters from us. Photo was taken 90Km from Nata
|
|
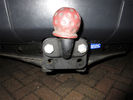
Tow Trust Fixed18 views
|
|
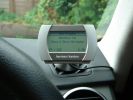
HARMAN KARDON DRIVE+PLAY219 viewsFOUND THIS A GOOD PLACE TO FIX THE SCREEN
|
|
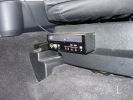
Base unit458 viewsFixed to seat base so it moves with the seat, two power supplies are needed to start up and shut down with the vehicle
|
|
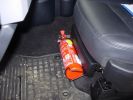
Mounting a non-LR fire extinguisher410 viewsSimply fixed it to the plastic cover for now, but will remove cover and mount further back later - just need to make up a metal plate first.
|
|
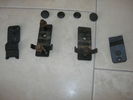
A Bar fixing Kit169 views
|
|
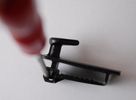
Mat Clips Discovery 4 201318 views
|
|

Earth Strap Fix8 viewsHow to fix the corroded engine to chassis earth strap
|
|
Thread upload2 viewsImage uploaded in thread 192192
|
|
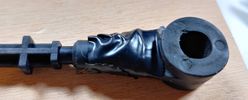
Thread upload2 viewsImage uploaded in thread 192192
|
|
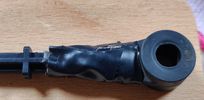
Thread upload0 viewsImage uploaded in thread 192192
|
|
134 views
|
|

70 views
|
|
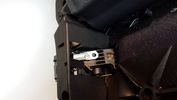
Fixed shelve release 26 views
|
|

fixed tow bar44 views
|
|
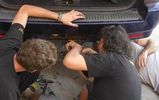
tow bar removal34 views
|
|

Thread upload9 viewsImage uploaded in new thread
|
|
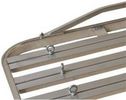
T fixing rails36 views
|
|

8 views
|
|

Flydrive in Lugano34 views
|
|

Fix stiff gear selector or jumping out of drive into neutral32 viewsThis is a document culled from a topic about a simple fix to teh gearbox selector lever that fixes a problem with jumping out of drive into neutral.
I made the document to give to my local independent and thought it might be useful for others.
Thanks to disco_mikey, EdF and Robbie from the original post whose information and photos made this possible (I take no credit for anything here apart from errors).
|
|

Fix stiff gear selector or jumping out of drive into neutral17 viewsUpdated 19 Dec 2012
This is a document culled from a topic about a simple fix to the gearbox selector lever that fixes a problem with jumping out of drive into neutral.
I made the document to give to my local independent and thought it might be useful for others.
Thanks to disco_mikey, EdF and Robbie from the original post whose information and photos made this possible (I take no credit for anything here apart from errors).
Updated after I did this fix on my own car.
|
|

Headlamp condensation fix99 views
|
|
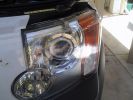
Headlight Protector Top Fixing381 views
|
|

Bit foggy outside, so got out the Laptop to get a place fix139 views
|
|

Tailage cable fix22 viewsThe broken cable elbow is fixed to the motor with two pieces of steel wire. I've also tied a string so I can open if the motor dies.
|
|
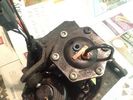
Old Compressor - temporary fix26 views
|
|
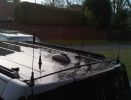
Aerials 0298 viewsRoof mounted fixed and temporary aerials
|
|

Aerials 01101 viewsRoof mounted fixed and temporary aerials
|
|

Dash View 0194 viewsShows remote radio head (FT-8900), fist microphone and sat nav. Mic is fixed using Velcro...
|
|
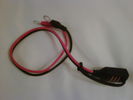
Permanent fixing63 viewsPermanent fixing with eyelet connectors and dust/moisture cap
|
|
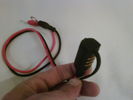
Permanent fixing71 viewsDust/moisture cap on permanent fixing
|
|

964 viewsRipping off the cheap carpet reveales the galvanised steel box with sharp edges that has been fixed in with 4 ton of silicon.
|
|
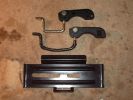
Roof box fixings379 viewsTop original with new one in middle!
Had to make the hole to the left of the plate longer to fit new brackets, it was the same size!
|
|

Roof box fixing new ones!316 viewsnow wide enough for LR roof bars!
|
|
Roof box fixing original313 views
|
|
Waffell boards fixed in place560 views
|
|
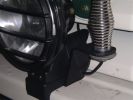
UHF antenna mounted to bracket fixed to driving light mount176 views
|
|
115 viewsHeat shrink tubing "fixed" in place
|
|
115 viewsHeat shrink tubing "fixed" in place
|
|
3M "Thingies" x 2187 viewsI\'ve since stuck two together in-line but the method behind the madness is the same. The blinds now don\'t randomly BANG open.
|
|
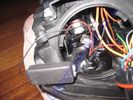
LED resistor fix68 views
|
|
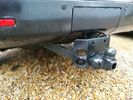
Fixed towbar41 views
|
|

Rear home made mud flap fixing254 views
|
|
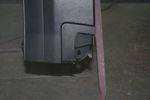
Hidden Fixing Behind Wheel Arch78 views
|
|
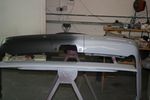
Rear Bumper Showing Lower Fixing Points84 views
|
|
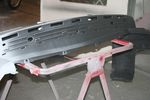
Rear Bumper High Build Primer & Showing Tread Plate Removed & Fixing Points Top86 views
|
|

Thule 9705 plate40 viewsShows how the fixing plate reduces the departure angle
|
|

Modified Thule 9705 bike carrier50 viewsBar has been moved up above the tow ball and the lower fixing replaced by nuts and bolts.
|
|
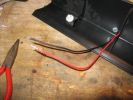
LED light - fixing bolt and cable size82 views
|
|

183 viewsShackle shoes anyone? Passing the time while men fix truck hehe.
|
|
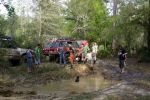
191 viewsWaiting for guys to fix another truck.
|
|

Missing Lampguard Fixings79 viewsI\'m missing these bits from my used lamp guards!
|
|

Fixing method14 viewsStainless Jubilee clip to mount electrics box to winch post
|
|

LR3 Brake Wear Sensor Wiring1517 viewsThis 1 page wiring diagram pdf shows that both the front and rear brake pad wear sensors are part of a closed series circuit to ground.
In operation, when all is good, the series circuit is grounded and the amber brake wear warning indicator on the instrument panel is not illuminated.
When the pads on one wheel, either the left front, or right rear, become too worn, the respective sensor is "cut" which results in an open circuit condition. This causes the dash brake wear indicator to illuminate.
The circuit is like the old style Christmas light strings where one burned out bulb caused the whole string to go out.
A quick field fix to get the dash light to extinguish in lieu of replacing the sensor and pads etc is to disconnect the brake pad wear sensor and short across the two open conductors of the vehicle side connector plug. This of course means you now have a normal vehicle, one of the thousands that do not feature brake pad wear information systems.
|
|

Compare LR lettering102 viewsWhat happens when you let the dealer 'fix' the problem of deterioration of the bonnet badge lettering. Compare the left with the right side (LAND cf. ROVER). Only one side was 'fixed' under warranty.
|
|

Thread upload6 viewsImage uploaded in thread 200758
|
|

104 views
|
|

Fixed Mud Flap 2262 views
|
|

Fixed Mud Flap 1244 views
|
|
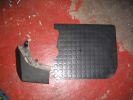
using old as templatefor fixings209 views
|
|

New Rear Fixings207 views
|
|

Rear extra fixing231 views
|
|

you cant fix stupid58 views
|
|

Thread upload2 viewsImage uploaded in thread 64970
|
|
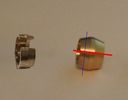
4 viewsI modified a compression fitting collet (right) to match a Landrover voss fitting collet (left) by cutting at the lines as shown. Intended as a temporary fix for a leaking voss fitting, but has worked great for several years.
|
|
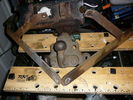
fixed towbar26 views
|
|
sucker fixing85 views
|
|
fix sucker thru blind108 views
|
|
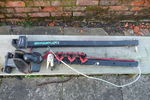
Maxxraxx38 viewsMaxxraxx fixed towball mounted bike rack. Top: upright with pivot and locking pin. Bottom left: towball mount with spacer and 50mm towball. Bottom right: horizontal member with three bike carriers, securing strap and security cable.
|
|
Sprinter Jack Mod60 viewsWasher fixing mod
|
|
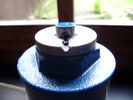
Sprinter Jack mOD48 viewsWasher fixing mod
|
|
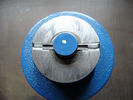
Sprinter Jack Mod46 viewsWasher fixing mod
|
|

My Ship258 views
|
|

My Ship260 viewsMotor Vessel Solent Scene
|
|
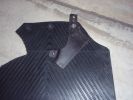
Brace, for additional support, from OEM's fixed to replacement mud flaps53 views
|
|

22 views
|
|

Rack Fixings29 views
|
|
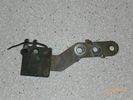
Radio Noise Suppression Capacitor NNW502820699 viewsThis is the radio noise suppression capacitor, part number LR020488 (previous NNW502820), that is mounted underneath and near the transmission. It is powered by fuse 10 amp F30E in the engine compartment. If F30E blows, (the fuse that also powers the transmission ECU), the problem is probably caused by the failed capacitor, not the ECU. A quick fix is just to disconnect the capacitor and replace the fuse as nothing bad seems to immediately result.
The above radio noise capacitor is not to be confused with LR004160, the ignition noise capacitor which is located under the black plastic engine cover on the right hand side above the air intake towards the rear of the engine.
The ignition capacitor is held on with a single 8mm bolt and a three wire electrical connector. Replacing the ignition capacitor as a routine maintenance prevention action at 100,000 miles, 160,000 km), has merit. It is a do it yourself kind of thing and easier to get at than the radio capacitor underneath.
|
|
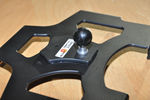
Brodit iPad 2 mount with 1" Ram ball fixed27 views
|
|

225 views
|
|
Thread upload16 viewsImage uploaded in thread 189049
|
|

30 views
|
|
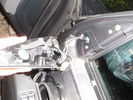
Tweeter removed and wing mirror fixing bolts visible24 views
|
|

Drivers Door wing mirror fixing bolts21 views
|
|
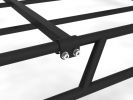
Close up of cross bar fixings263 viewsClose up showing how our crossbars fit our rack
|
|

Trim in Middle of Row 3 Seats 44 viewsThis trim has become loose and needs the right fixing
|
|
Thread upload10 viewsImage uploaded in new thread
|
|
Thread upload12 viewsImage uploaded in new thread
|
|
Thread upload9 viewsImage uploaded in new thread
|
|
broken&fixed ps2163 views
|
|

Thread upload6 viewsImage uploaded in thread 200758
|
|

Seat Movement Fix?238 views
|
|

25 viewsshowing the fixed tensioner on the upper right of the engine
|
|

Thread upload16 viewsImage uploaded in thread 126267
|
|
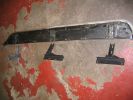
N/S and brackets showing 6 x 10mm bolt fixings163 views
|
|
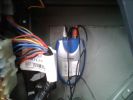
Sounder Module fixed to body panel within LHS cubby hole199 views
|
|
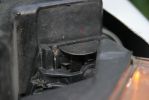
Headlamp fixed361 views
|
|

81 viewsYep, the suspension failed! A sensor was to blame - dumped the air out ... nice! Easily fixed by the prompt arrival of LR Assist - thanks!
|
|
![Filename=Technical Service Bulletin SB034 SB036 Vehicle Enhancement Program[1].pdf
Filesize=959KB
Dimensions=0x0
Date added=17.Jun 2010 Technical Service Bulletin SB034 SB036 Vehicle Enhancement Program[1].pdf](images/thumb_pdf.jpg)
Technical Service Bulletin SB034 SB036 Vehicle Enhancement Program2390 viewsOn page 6 and following are the Land Rover service bulletin instructions as to how to install delivery valve and exhaust valve repair kit JPO500010; also a list of previous compressor model numbers as related to the 3. The new delivery valve is easy to install, the exhaust, not so easy. Note that this in not the more recent TSB that reduced the operating pressure of the compressor via a software fix and also recommended replacement of the air compressor 70 amp relay. See the F35 album near the bottom for the relay material.
|
|
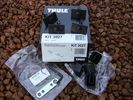
11 views
|
|
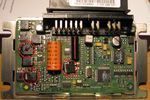
transfer case control module71 viewsPicture shows blown components of the Transfer Case control module after water ingress over time - with a healthy top up from over-enthusiastic lad with a high pressure water hose in the car wash!!!
|
|
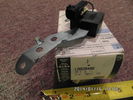
Radio Noise Filter Transmission Electronic Control Unit915 viewsThe jpg shows part number LR020488, a noise suppression capacitor located underneath on a bracket on the right side of the transmission forward of the selector shaft lever. The suppressor is connected to the transmission wiring harness and prevents solenoid operating noise affecting the audio system.
Failure of the capacitor is most often discovered as a result of either black smoke from below and or the blowing of 10 amp fuse F30E located in the engine compartment fuse box. This fuse protects the power circuit to the Transmission Engine Control Unit. When the fuse blows, the engine will still run however you have no gears, hence movement of the 3 is inhibited.
Anything over eight years in service is considered good capacitor life. If the capacitor does fail and fuse 30 blows, a quick fix is just to disconnect the capacitor and replace the fuse.
The capacitor might be missed by the DOT/FCC but the 3 does not seem to mind. With the filter disconnected, solenoid noise might be heard on some radio stations but at least the 3 would be in motion.
|
|
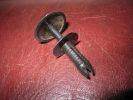
Two-part trim clip464 viewsThis is what I used to fix the Large Rear Mud flaps instead of my first attempt with screws - these actually cameof the vehicle when I fitted RLD's rock sliders
|
|

Thread upload3 viewsImage uploaded in thread 64970
|
|

Vehicle Maintenance Log for LR3/4 D3/4 or other1136 viewsThis is a Excel file that you can download and then modify to suit. It is very simple, but allows me to keep track of most maintenance and fixes etc on my LR3. All columns and rows and boxes can be edited.
I did not erase any data in the various boxes so you could see how I am using it - again not very fancy but it works for me. Under the brakes column, one will see f6 r5 which is how I keep track of the condition of the brake pads. The dealer records the pad thickness at each oil change so that is where the numbers come from.
f is for Front Pads, 6 is for 6mm; r is for Rear pads, 5 is for 5 mm. New pads are about 10 mm; replacement is at 3 mm or less. The amber coloured brake wear dash warning light should come on at about 2 mm.
|
|
23 views
|
|
31 views
|
|
22 views
|
|
32 views
|
|
|
|
|
|