| Search results - "frame" |

Part of the Metal framework.142 views
|
|
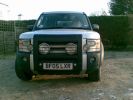
A frame with driving lamps133 views
|
|

HSE seat frame177 views
|
|
![Filename=20140816_205723[2].jpg
Filesize=286KB
Dimensions=2275x1280
Date added=17.Aug 2014 20140816_205723[2].jpg](albums/userpics/25538/thumb_20140816_205723%5B2%5D.jpg)
Floor Frame160 views
|
|
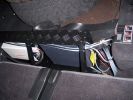
HF radio on RH side Inverter on LH. Frame is fitted behind second row of seats. (I have removed 3rd row as they will never be used)310 views
|
|
Thread upload19 viewsImage uploaded in thread 185475
|
|
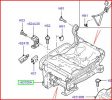
HTG500042 RH Out 2nd Row Seat Frame Assy203 views
|
|

Thread upload9 viewsImage uploaded in new thread
|
|
Thread upload7 viewsImage uploaded in new thread
|
|

Thread upload17 viewsImage uploaded in thread 172891
|
|

Thread upload11 viewsImage uploaded in thread 174831
|
|

Frame Jacking Points showing where holes are located.1088 viewsThe four points marked with the arrows show where the holes in the underside of the frame are located such than one could insert a trolley jack pin type lifting adapter, (or as designed), the official LR scissors jack.
|
|
Thread upload15 viewsImage uploaded in thread 102923
|
|
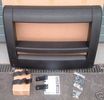
A frame31 views
|
|

Buckingham Blue D3 Screen Saver206 views49 frame (8 base frame) animated 100x46 pixel image in size cut from the Discovery 3 Accessory Builder screen - modelled after my D3 - running on my phone!
|
|

A Frame Bracket356 views
|
|
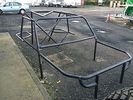
Thread upload16 viewsImage uploaded in new thread
|
|
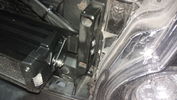
Lamp mounting details138 viewsTwo holes have to be drilled into the frame to fasten the brackets
|
|
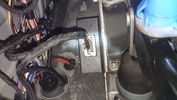
Electronic Relay157 viewsRelay mounted to mounting frame of the brake pedal
|
|

A fresh start4 viewsMy frame after it had a ‘treatment’
|
|
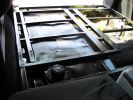
water tank282 viewsTank in position under subframe.
|
|
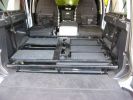
water tank357 viewsFlip up doors for extra storage under sub frame.
L.H.S covered with carpeting.
|
|
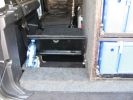
Rear lid322 viewsRear storage compartment, under sub frame.
|
|
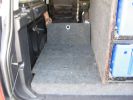
Inner lid261 viewsStorage compartment, front, under subframe.
|
|
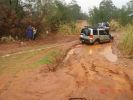
mud recovery222 viewsI think this is atacama in the poo. Heine is out of the picture to the extreme left. Note the white recovery rope stretching out of the frame
|
|
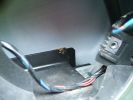
Overview423 viewsSharp edge of frame is dead centre of image.
Eroded "switched live" feed is blue wire high on the right
|
|
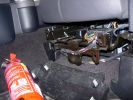
Mounting a non-LR fire extinguisher535 viewsShowing the plastic cover removed. I will make up a metal plate or bar so that the extinguisher frame can be mounted directly to this framework under the seat.
|
|
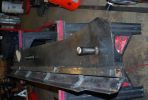
182 viewsAnother shot of the right slider. The center support channel has drainage channels welded in that match the locations of the drain holes on the sill frame.
|
|
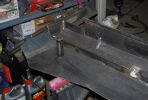
190 viewsGetting closer to the finished product. The steel tube in the middle reaches up to the body mounts on the frame.
|
|

BT Infinity FTTC best-effort with QoS on upload and jumbo frames26 views
|
|

Fluid, Filter/Pan Combo removal and install5980 viewsThese are the LR instructions re removal and install of the plastic pan/filter combo for the ZF 6HP26X transmission on the 4.4L petrol V8 LR3.
The instructions tend to ignore the reason you have to lift the right hand side of the engine about 40 mm. This is because of a frame cross member that interferes with dropping down of the plastic pan. The real problem is a vertical "oil filter spout" that rises out of the filter/pan combo up into the transmission. The spout is the suction pipe for filtered transmission oil back up into the tranny.
On the metal pan versions, the filter is separate from the pan, hence the filter remains with the tranny when the metal pan is dropped. The filter is then removed or installed independent of the metal pan, hence with the metal pan, there is no need to lift the engine.
If one is removing the plastic pan so as to install the metal pan, then some do not lift the engine but just drop the plastic pan enough to gain access to saw off the vertical plastic spout - it is a one time procedure.
Be aware however that the metal pan uses a flat gasket and the plastic pan uses a O ring like perimeter gasket that sits in a half round groove in the tranny casing. Also the metal pan uses 21 shorter torx M6x22.5 metric cap screws for the perimeter bolts. The plastic pan uses longer M6x28.5 torx metric cap screws.
|
|
Thread upload14 viewsImage uploaded in thread 1546
|
|

Thread upload16 viewsImage uploaded in thread 151386
|
|

Water crossing near Elliot Falls17 views
|
|

Thread upload18 viewsImage uploaded in thread 169932
|
|
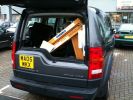
84 views
|
|

glass frames and consoles37 views
|
|
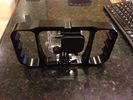
28 views
|
|
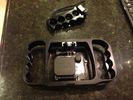
24 views
|
|
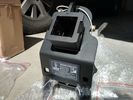
Rhino Tow Loop Hitch270 viewsThis is a receiver end view of the Rhino Hitch that ties to the factory tow loop. In addition to improved strength, it does not reduce ground clearance as does the factory style when installed.
Land Rover in early advertising videos when the 3 first came out showed the D3 hanging from a crane via the frame. The intent was to show how strong the frame is and by inference, the rear tow loop, specifically noted as being good for 6 tonne. The video ends before anything dropped or was lowered back to the ground, so one of course does not know for certain. The Rhino Hitch design however picks up on the apparent evidence of strength and certainly the additional clearance.
|
|

Completed unit127 viewsReady for frame
|
|

Underside106 viewsStrapping threaded and rubber feet added, to the alloy frame made for it to sit in
|
|

Collision with Hilux 2208 viewsHilux\'s roo bar is tougher than LR\'s A Frame
|
|
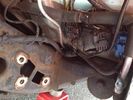
NSF left bolt on subframe member31 views
|
|
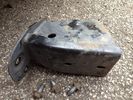
NSF left subframe part26 views
|
|
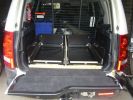
Frame for OL drawer system200 views
|
|

Drawer frame tied down to 4 OE points188 views
|
|
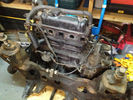
engine and sub frame out13 views
|
|

Dribbles along bottom of door frame/door card27 views
|
|

FFRR SC Grill into D3 Frame180 views
|
|
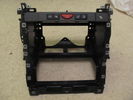
RRS stereo frame37 views
|
|

Thread upload8 viewsImage uploaded in thread 159579
|
|

Thread upload6 viewsImage uploaded in thread 159579
|
|

179 views
|
|

147 views
|
|
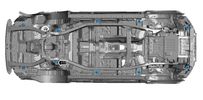
Thread upload16 viewsImage uploaded in new thread
|
|
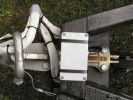
Here it is attached to the caravan "A" frame.634 viewsThe cable ties are temporary until I can drill and tap a couple of holes for screws.
|
|
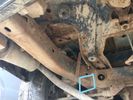
Thread upload4 viewsImage uploaded in new thread
|
|
Thread upload3 viewsImage uploaded in new thread
|
|
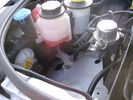
Empty space in NAS LR3 for location of FASKIT panel600 viewsThe empty space is available as the North America Spec gasoline engine LR3's do not have the Fuel Burning Heater installed. The air lines from the four air springs and the air tank will appear to rise up from under the headlight assembly. The lines to the front block valve assembly located behind the front right fog light will sort of run within the bumper across the front of the radiator down into behind the righthand fog light. The rear lines somewhat follow the path of the existing air feed line from the front valve assembly to compressor. Rather than be located between the left front fender liner and left metal wing however, the four lines will feed thru the empty wing space inside and above the wheel well arch and exit down by the left front mud flap. From there, the lines run along the left frame member above the air tank and then parallel the frame over top the compressor to the top of the rear left air spring where the rear air block valve assembly is located.
|
|

Excel file for Rotors and Brake Pads part numbers for 4.4L V8 petrol LR3769 viewsComparing the cost of the various brands of brake parts is time consuming. Once you have your parts costs, this little spreadsheet will make collating the info easier.
I did not make any provision for labour costs, but the file can be downloaded and then modified. You can change Dollars to Euros or Pounds or whatever and insert lines for labour costs as desired.
Do not pay too much attention to the $ numbers as they are a mix of US and CDN, and from differing time frames, (prior to Spring 2011) . Also the brake part numbers are for my 2005 North America spec LR3 with the petrol 4.4L V8; diesel powered and supercharged 3's may have different part numbers
|
|

VUB501210 lower bumper brackets95 viewsVUB501210
|
|
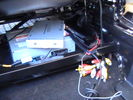
interface unit sat on dvd - cables pulled under seat frame410 views
|
|
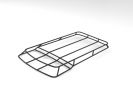
Tubular frame236 viewsView of just the tubular frame of the expedition roof rack
|
|

rib_on framed...108 views
|
|
Thread upload4 viewsImage uploaded in new thread
|
|
Thread upload2 viewsImage uploaded in new thread
|
|
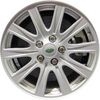
LR3 Silver 10 spoke grooved wheel Cromodora of Italy 18 inch x 8 ALY72201U85387 viewsThis is Land Rover part number RRC505360MNH or RRC505360XXX, a grooved ten spoke 18" wheel rated at 940 kg and found on circa 2006 RR Sports and some 2007 LR3's. An alternative part number is ALY72201U85.
This is an example of a wheel factory spec on the full frame older RRS that is also factory spec on the 3 or 4 and hence can be moved from the RRS to the 3 or 4. This is rare however. A factory spec wheel for a 3/4 can always go onto an older full frame RRS but not necessarily vice versa.
Just because a wheel is a 5 lug, 120mm bolt circle, +53 mm offset and made by Cromodora does not mean it has the required 940 km load rating. That also has to be confirmed by looking on the backside of one of the spokes for the moulded in load number in kg.
|
|
Thread upload5 viewsImage uploaded in thread 80785
|
|
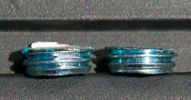
Mitchell Bros Hitch 7148 viewsThis much had to be cut from the bolts to stop them contacting the frame.
|
|
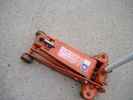
Trolley Jack Adapter824 viewsThis shows my 2.5 long ton, (2,540 kg, 5,600 pounds), trolley jack with the pin adapter that slots up into the round holes on the underside of the frame.
Use of the adapter when lifting by the left rear wheel ensures that I will not be jacking on the air compressor support; on the other three corners, it is much safer than merely jacking directly on the nearly flat narrow underside of the frame rail.
|
|

24 viewsTo be Auctioned.
Framed 'Iron" Mike Tyson Autographed Help for Heroes T-shirt From the October 2012 UK tour, Two only like this ever to be done.
All money raised goes to Help for Heroes.
|
|
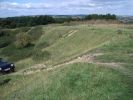
10forcash should have been in the frame! But got stuck!!343 views
|
|

Thread upload1 viewsImage uploaded in new thread
|
|

Thread upload4 viewsImage uploaded in new thread
|
|

VUB501210 lower bumper brackets113 viewsVUB501210, brackets, bumper
|
|
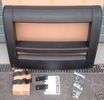
55 views
|
|

Thread upload9 viewsImage uploaded in new thread
|
|
|
|
|
|