| Search results - "lhd" |
Vacuum pipe + valve LHD 12 views
|
|
brake master cylinder + servo LHD10 views
|
|
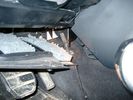
Air Conditioner Drain Hose on Drivers Side (LHD)2256 viewsThe corrugated rubber bit above and to the right of the gas pedal is the drain hose that goes down thru the carpet and floor sheet metal.
While it is bit hard to figure out from the jpg above, there is a rubber "strap" attached to the top of the corrugated hose that one uses to pull on to drag the hose up back around the black plastic heater "pan" drain. The same drain hose arrangement is on the other side as well.
One could I suppose run a plastic snap tie around the vertical pull strap if one was concerned about the hose slipping off again. See also the other jpg sketch which is from the Land Rover manual.
|
|

40 views
|
|

Thread upload22 viewsImage uploaded in thread 167901
|
|

D4 LHD 13 Pin Euro29 views
|
|
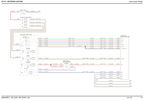
D4 LHD 13 Pin Euro29 views
|
|
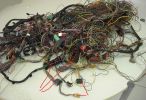
Donar Loom98 viewsThis ball of wires is from a LHD which has been opened and had all audio wires removed, however it is a gold mine for the bits i need. I have pointed out the connectors i know i need for starters near the bottom.
|
|
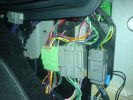
connectors - LHD - passenger footwell159 views
|
|

elbow-in place20 viewsDriver's side (LHD) sunroof elbow in place
|
|
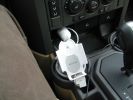
Set up in a cup holder...511 viewsRemember that my car is a LHD... There is a small suction cap to prevent the iPod from coming away to easily but it sildes "up" quite easily when you want to remove it... The Car charging adapter goes right behind in the provided outlet...
|
|

Prevoiuse driver seat in LHD now passenger seat base removed, memory module missing224 views
|
|

Thread upload6 viewsImage uploaded in new thread
|
|
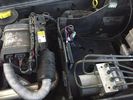
Thread upload7 viewsImage uploaded in new thread
|
|
LHD grommet86 views
|
|
LHD grommet90 views
|
|
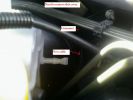
LHD grommet w/comments96 views
|
|
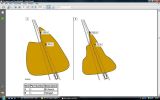
LHD light pattern97 views
|
|

Thread upload11 viewsImage uploaded in thread 109034
|
|

9 views
|
|

LR3 Air Conditioner Drain Tubes behind centre console2091 viewsThis shows the two air conditioner drain tubes located left and right under the radio stack.
The tube on the left side, (steering wheel side, LHD), disattached itself and the carpet on the floor under the gas pedal etc became soaked. I think rain water from outside that comes in the outside cowl vents also exits via the tubes as I first noticed the carpet was wet after parking outside during a big rain storm.
It was relatively easy to slide up and reattach the rubber hose that runs from the rectangular shaped plastic discharge hole(s) of the heater "pan" down along the transmission hump area and thru the floor pan. There is a hose on each side of the transmission hump, but only one hose had let go on my 3. The rubber hoses just slide over the rectangular plastic openings of the two heater housing drain outlets.
To get at each drain hose, remove the vertical sort of triangle carpeted piece below each side of the radio stack. The triangles of carpet will just pull away as each is held on with those metal U clips Land Rover so likes. Dislodge each triangle at least sufficiently to get ones hand in to slide the rubber hose back on.
You will rarely see AC water on the ground as the front drains pour onto a metal underside protection skid plate and the rear drain onto the top of the left rear muffler.
|
|

Thread upload30 viewsImage uploaded in thread 118475
|
|
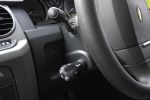
Goldcruise control showing presets, fitted to LHD key blank478 views
|
|
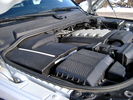
Overview of engine compartment from Main Battery side, (Passenger, LHD), looking across to Aux Battery749 viewsNote labels on main battery cover. The one you cannot read says that an auxiliary battery is installed on the other side. This is to warn service people should they wish to shut off all battery power.
The main starting battery is supposed to be of CaCa separator construction and DIN H8 or BCI Group 49 size. This means Calcium separators Wet Flooded Lead Acid, 13.9" long, 7.5" high and 6.9" wide.
On the Aux battery cover is a label saying to disconnect the blue Anderson single pole connector located under the cover by the brake reservoir. BCI Group 40R battery is small enough that the cover goes back on.
|
|

Replacing the blower motor572 viewsThis is a 6 page pdf with regards to replacing the HVAC blower fan and the associated fan speed module in a LHD North America spec LR3. The fan can be replaced from below and it is not necessary to pull the dash apart.
|
|

Thread upload8 viewsImage uploaded in thread 156918
|
|
Thread upload41 viewsImage uploaded in thread 69791
|
|
Thread upload38 viewsImage uploaded in thread 69791
|
|
|
|