| Search results - "light" |

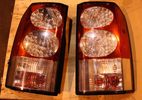
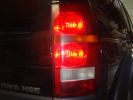
Rear Lights D478 viewsD4 Rear Lights
|
|

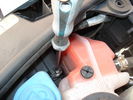
Fog Light & Washer Jet Install93 views
|
|
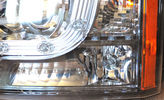
D4 Adaptive Xenon with cornering light89 views
|
|
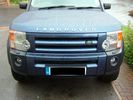
Fog Light & Washer Jet Install94 views
|
|
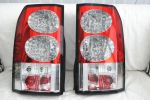
D4 LED Lights91 views
|
|

D4 LED Lights78 views
|
|
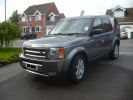
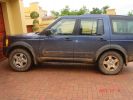
Disco 3 TDV6 GSLE75 viewsLimited Edition. Parking sensors front & rear, Full body skirts with chrome trim fog lights, Twin chrome tail pipes,
|
|
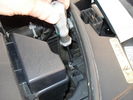
Removing the work light255 views
|
|

Mitsubishi Montero Headlight Washer43 views
|
|
White side light bulbs and 3w 501\'s in the side marker58 views
|
|
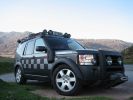
CALENDAR ENTRY 20091191 viewsBonatti grey TDV6 S, ambulance conversion, MTR's, winch, RAI, safety devices roof rack, rear ladder, bash plate, warn lighting, LED lighting throughout.
Owned by me, Rich Bell, Director of Extreme Medical Ltd, providers of medical support to Land Rover events.
|
|
new lights mod144 views
|
|

Estrarre il circuito stampato con la batteria - Exctact the printed board with the battery18 viewsRimossa la parte superiore del contenitore, estrarre il circuito stampato sollevandolo leggermente dalla parte della batteria.
Removed the top of the box, pull out the printed circuit board slightly lifting from the battery side.
|
|
Misty fog Light9 views
|
|
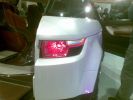
LRX Rear Light Cluster49 views
|
|
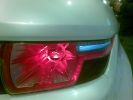
LRX Rear Light Close Up52 views
|
|
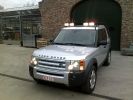
Spot lights 183 viewsFinally there was light
|
|
12 lights125 views
|
|
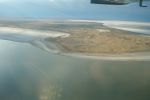
Lake Eyre with water in 2000 79 viewsTook a flight from William Creek to view the lake with water in it.
|
|
LED light56 views
|
|
LED light64 views
|
|
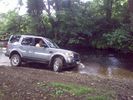
Si taking a slightly wetter route...54 views
|
|

A few mods later27 viewsPro-Speed rock/tree sliders
LED side lights
LED interior lights
|
|
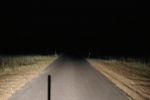
Standard Vehicle Low Beam Lights Only (Bi-Xeons)32 views
|
|
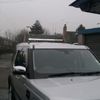
SR switched off88 viewsSR40 lightbar
|
|
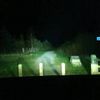
full beam and HID spotlights70 views
|
|
all on 72 viewsfull lights on
|
|
all lights switched on 79 viewsthis is the Bixenon with LR HID converted spotlights and the rigid SR40 lightbar switched on
|
|
SR 30 inch led lightbar58 views
|
|
SR lightbar illuminated 75 viewsSR 40 lightbar illuminated
|
|
SR lightbar illuminated at night 74 viewsSR40 iluminated
|
|
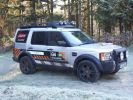
Rally Wales 2008 200 views2009 G4 now with black RRS wheels lightforce lights and strobe lights in bumper and rear lights
|
|

238 viewsThe cable loom for the lights (installed by 10forcash)
|
|

214 views4x LightForce 140
|
|

258 viewsFull lights
|
|
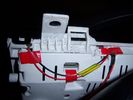
Insrument panel rear 34 viewsShowing wiring for heater and lights on indicator
|
|
Insrument panel 36 viewsShowing heater and lights on indicator
|
|
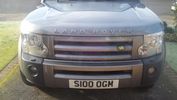
Lights38 views
|
|
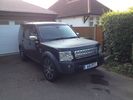
D3 July 2014189 viewsD4 Grille, wheels and de-tangoed lights
|
|
Thread upload27 viewsImage uploaded in thread 104904
|
|

Thread upload37 viewsImage uploaded in thread 120468
|
|
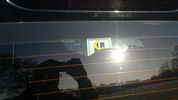
57 viewsSlight damage to rear window tint, the garage I bought it from "removed" the landrover garage sticker and damaged the tint!
|
|
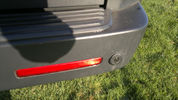
54 viewsSlight dink in parking sensor, caused by under sied trailor. Stops parking sensors from working and didnt see it. Bloody thing!! Parking snsor still working perfectly normal.
|
|
ledlights157 views
|
|

Chassis harness to main harness116 viewsDescription: Chassis harness to main harness
Location: Below LH rear wheelarch
Part No.: YPC909640 Colour: LIGHT GREY Cavities: 18WY
Harness: CHASSIS HARNESS
|
|
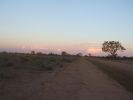
18 Brake "repairs" finished at sunset296 viewsWe just finished the repair at sunset and were driving slowly with 3 brakes. Oddly the D3 didn\'t behave any differently at 50 km/hr than it did normally. We had 4 instances of hitting the (3) skids for kangaroos before arriving in Wilcannia 3 hrs later. The brake light warning was making very distinctive noises and flashing randomly, though.
|
|
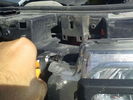
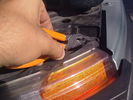
light stops X 2150 views
|
|
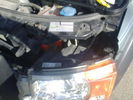
light stops X 2154 views
|
|
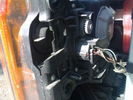
light undo169 views
|
|
back of the light165 views
|
|
Amber lightbar405 views
|
|
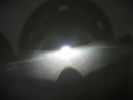
This is a H7R bulb fitted into the same headlight - look at cut off and no glare116 viewsPerfect like OEM what more can i say
|
|
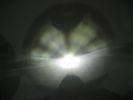
This is a normal H7 HID bulb installed in a BMW headlight to show glare above cut off line99 viewsThis is what the light pattern is that causes glare in most retofit applications including some projector lights. this is in fact a projector headlight on a BMW but the old projectors were only actually half projectors and half reflective bowls. the beam pattern should be clean cut like this ___/
|
|
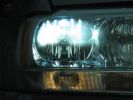
H7R Headlight retrofit H7R HIDS4U notice no light in bottome half of the bowl98 viewsThis is how a retofit HID should look in a reflector headlight
|
|
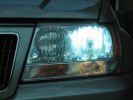
Standard hid bulb - light everywhere and glare caused by light in bottom of bowl95 viewsWhilst the beam pattern is ok the problm is that with 300% more light the spillage into the bottom of the reflector bowl is seen as glare by other motorists. it also is the reason the overhead motorway signs are lit up so well be bad retrofit xenons
|
|
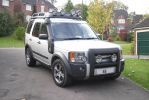
D3 with latest additions - Snorkel & Rack Lights609 views
|
|
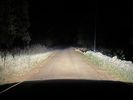
Thread upload3 viewsImage uploaded in thread 200614
|
|
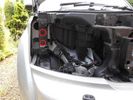
Remove Headlights and Grille using bulb replacement instructions in Manual - Push the fixings supplied into these holes circled in red152 views
|
|
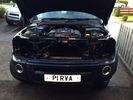
Thread upload46 viewsImage uploaded in thread 102519
|
|
Haunted Headlights34 views
|
|
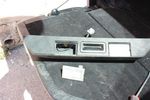
34 viewsRemoved one light from tailgate handle
|
|

121 viewsTraxide brain mounted. It's mounted slightly tilted towards the front of the engine bay so as to give as much space as possible to the brake vacuum pipe behind it.
|
|
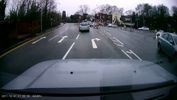
Blackvue - First Red Light Victim - 161 views
|
|
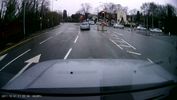
Blackvue - First Red Light Victim - 270 views
|
|

Gear Stick Selector Light32 views
|
|
148 viewsDetail of d3wing cut to fit d4 lights and bumper
|
|
excelse minilight32 views
|
|

257 viewsHeadlight mod
|
|

LED Reverse light54 views
|
|

Original Reverse light55 views
|
|
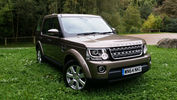
slightlyoffroad16 viewsNear Malvern
|
|
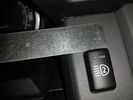
Light Kit switch2069 views
|
|
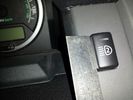
Light Kit switch1140 views
|
|
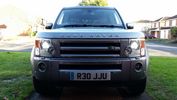
32 viewsLed sidelight and 6000k xenon
|
|
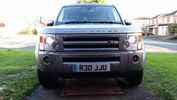
39 viewsLed sidelight and 6000k xenon
|
|
Thread upload0 viewsImage uploaded in new thread
|
|
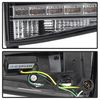
Thread upload5 viewsImage uploaded in new thread
|
|
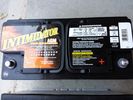
Deka 9A49 AGM Intimidator327 viewsThe Deka 9A49 AGM Intimidator makes an excellent primary battery alternative to the factory or Interstate. Made in US of premium quality. This is an excellent match with the Traxide system w/another Deka or Yellow Top optima.
This will behave properly in your D3/4 LR3 with slightly less wear and tear on your alternator.
|
|
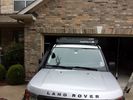
low profile solar panel211 viewsThe low profile solar panel, can be seen here, as the fine white line under the light bar. The way it's laid out, the panel should generate decent power between 10am and 4pm depending on the time of year, from the sides or front, with no shadows. Grape Solar 100W flex panel.
https://www.facebook.com/DifferentialPartsUS
|
|
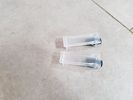
Puddle Lights12 views
|
|

Thread upload3 viewsImage uploaded in thread 184085
|
|
![Filename=20200422_141029[6519].jpg
Filesize=130KB
Dimensions=960x1280
Date added=22.Apr 2020 20200422_141029[6519].jpg](albums/userpics/58755/thumb_20200422_141029%5B6519%5D.jpg)
Cornering Light lit up5 viewsAdded H9 65w cornering lights on 4-18-2020
|
|
![Filename=20200422_141048[6517].jpg
Filesize=150KB
Dimensions=960x1280
Date added=22.Apr 2020 20200422_141048[6517].jpg](albums/userpics/58755/thumb_20200422_141048%5B6517%5D.jpg)
Cornering Lights3 viewsAdded H9 cornering lights on 4-4-18-2020
|
|
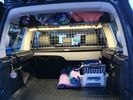
Tray light20 views
|
|

LightBar10 views
|
|

LightBar12 views
|
|
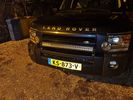
LightBar9 views
|
|

Chrome fog light covers16 views
|
|
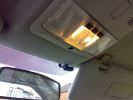
Interior Lighting189 views
|
|
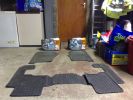
Lights and mats286 viewsD3 headlights and a set of mats
|
|
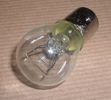
Land Rover Stop Tail Light dual filament bulb nominal 12 volt 21 / 5 watt filaments1427 viewsThis is the Land Rover part number 264590 dual filament bulb, (P21/5), that inserts into the upper two tail lamp receptacles. In the upper one, both filaments function, in the lower one, only the 5 watt tail light filament functions.
I regard it as not a good practice to routinely switch bulbs when the tail light filament, (5 watt), burns out on the lower bulb. The broken filament can jiggle over onto the brake light filament, (21 watt), and short the circuit to ground or something else not predicable.
There are also arguments to say that quality control is better on the Land Rover marketed bulbs than say far east sourced bulbs. Filament construction, and hence resistance can vary and mislead the current sensing circuits monitoring the signal light systems. Also when the bulbs are properly installed, all filaments should be standing vertically and not at any slope.
These are the sort of obscure circumstances that can lead to false trouble messages on the display, dropping to the stops, and subsequent concerns - all over a tail/signal light bulb.
For example, the filament life of both the tail light and the brake light filaments in the P21/5 bulb is significantly less than the USA common 1157 dual filament bulb, (1000/250 vs 5000/1200 hours); brightness in the P21/5 is a bit more, (3cp/35cp vs 3cp/32cp where cp is candle power), but current consumption is oddly less, (0.44a/1.86a vs 0.59a/2.10a where a is amps). It is the quest for efficiency vs maintenance trade off.
|
|
Thread upload4 viewsImage uploaded in thread 200614
|
|
Off with the taillights240 views
|
|

Headlight washer plugs83 views
|
|

Headlight washer hose85 views
|
|

Thread upload3 viewsImage uploaded in new thread
|
|
Thread upload2 viewsImage uploaded in thread 200614
|
|
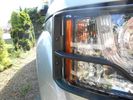
Replace the headlight and then fasten the light guard using the two allen bolts322 views
|
|
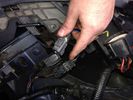
Thread upload47 viewsImage uploaded in thread 102519
|
|
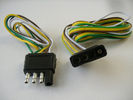
4 pin NAS flat connector from NAS small trailer382 viewsThe connector with the three exposed pins is the end that would commonly be located at the trailer hitch end, (front), of a small NAS lightweight trailer that has no electric brakes. This plug would connect into the flat 4 pin connector at the rear of the 3.
Note the order of the pin functions and wire colours: White is ground; the next pin is for tail/marker lights using the Brown wire; the Yellow conductor is for the left turn signal, and the far pin uses the Green conductor for the right turn signal.
There is no separate brake light conductor as NAS spec vehicles most often combine the brake and signal light functions to the same bulb filament rather separate filaments in different bulbs. The LR factory harness resolves that design difference.
Fortunately, the Land Rover NAS assembly pin order for the 4 pin flat plug maintains the above described conventions.
|
|

Air Conditioner Specifications 4.4L V81570 viewsThis 2 page pdf is just the specifications for the AC system. The refrigerant type is R134A.
Note that when topping the system up, it can be a good idea to include some of that ultra violet light dye that will glow to show leaks and loose fitting.
|
|

Alternator and Regulator Wiring Diagrams, TDV6 and petrol V8 and V61989 viewsThis is a three page pdf that shows the alternator and regulator wiring for the petrol V6, petrol V8 and TDV6. The pdf can be either printed or by right clicking on the displayed pdf, rotated as required for viewing.
Of interest is that the regulator gets its instructions primarily from the Engine Control Module (ECM) and only secondarily from the vehicles electrical buss. The conductor from the battery thru the 5 amp fuse F20E is to provide initial power to excite the alternator at startup and then secondarily, to instruct it if the PWM signals were not available. Primary instructions to and from the ECM are thru the two other conductors via a digital like Pulse Width Modulated (PWM) signal.
If F20E, the 5 amp engine compartment fuse box fuse is blown, the red alternator light on the dash will be illuminated. This means that the alternator could be OK, but if the F20E fuse is blown, no electricity will be generated. Hence check the F20E fuse if you get a red ALT light or some indication of the alternator not working.
Regarding operation of the red ALT light on the dash, it is not the regulator within the alternator that tells the red light to illuminate, or not, but instead the ECM. This is the reason the red light does not function in the same manner as with older vehicles. With the 3, sometimes you have illumination and sometimes not depending upon what the ECM is thinking. What this means is that you can have an alternator that is failing but the red light does not illuminate as the ECM is compensating for reduced alternator output - maybe by draining the battery and or cutting back on vehicle electrical loads such as shutting off or cycling the radio amplifier or heated seats.
|
|

52 views
|
|

Exterior Lighting (Fog Lamps - Non NAS)13 viewsWiring diagram for non-NAS fog lamps
|
|

Thread upload27 viewsImage uploaded in thread 106673
|
|
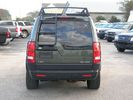
Rear ladder with expedition roof and taillight guards58 views
|
|
Fit the 2nd lightguard and then replace the centre grille330 views
|
|

Thread upload8 viewsImage uploaded in thread 195195
|
|

Rear light guards fitting instructions56 views
|
|
Thread upload5 viewsImage uploaded in thread 175209
|
|

Thread upload11 viewsImage uploaded in thread 188531
|
|

25 viewsFunky map reading light
|
|
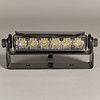
ghost lighting 106 viewsGhost marker lighting available in amber blue green white
|
|
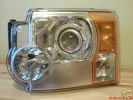
adaptive light144 views
|
|
UHF CB439 viewsThe remote head of the GME TX3400 was mounted on the front of the ashtray after unclipping the ashtray facia. The head is very light, double sided tape was used plus 1 screw to hold it.
|
|

Antenna Mount447 viewsA light dual band VHF/UHF antenna mounted on an 3mm x 25 alloy bracket
|
|
light mod93 views
|
|

headlights52 views
|
|
Thread upload0 viewsImage uploaded in new thread
|
|

Land Rover Aerial Fin images for both Glass and Metal Roof Disco3 / LR3863 viewsAs well as the two different fins, this pdf also shows the plastic blanking plate for glass roof vehicles where no fin is installed.
The glass roof fin is secured by two security screws from the top into a plastic frangible glue on gasket. The hope is that when struck, the fin will shear off and not crack the glass roof. Re the metal roof design, the fin is secured from underneath via two nuts.
The pdf also shows the various electrical bits related to the antennas. In the UK, the fin would house not only a cell phone antenna but the TV and satellite radio antenna electronics as well; in the States, the Sirius sat radio antenna and a G type cell phone antenna if the phone kit was installed would reside within the fin. The SAT NAV GPS antenna is located within the High Mount Brake Light plastic mounted to the upper rear hatch.
|
|

Fin cell phone aerial drawing190 viewsThe factory aerial for the factory NAV / GPS on my 2005 HSE is within the high mounted stop light lens at the top of the upper hatch door. I do not have the factory installed phone kit, and as such, do not have the fin installed; instead there is just a plastic blanking insert to fill the cell phone aerial wiring hole in the metal portion of the roof; hence this requirement for an "external" cell antenna. For those that do have the fin on their glass roof, the fin is screwed on to a glued on plastic gasket, (sort of), and not bolted thru as per the metal roof 3's.
|
|
christmas lights102 views
|
|

Thread upload3 viewsImage uploaded in thread 126959
|
|
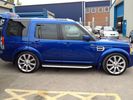
FOR SALE - ONE OFF Land Rover Disco 3 37 viewsOne of a kind Landrover Discovery TDV6 HSE LUX Model 5 door automatic 4x4 diesel evo blue. Upgrades: sidesteps, roof rails, privacy glass, front and rear heated seats/elec seats, landrover tv and headphones, 7 seater black leather, piano black dash/steering wheel, built in fridge, 6 disc changer, sat nav and bluetooth, harman kardon premium entertainment pack, by-xenon adaptive headlights , cruise control and front and rear park distance control, panoramic electric glass roof, 22inch alloy wheels, body kit
|
|

Amp Drawing53 viewsThis is how many amps my vehicle was using when the ign in possision II. Lights where off, radio off,hvac off Crazy?
|
|

Thread upload10 viewsImage uploaded in thread 136352
|
|

Thread upload8 viewsImage uploaded in thread 140561
|
|
Thread upload2 viewsImage uploaded in thread 200614
|
|

Riparazione attuatore rotante volante - Steering rotary coupling repairing22 viewsCome riparare l'attuatore rotante del volante quando si accende la spia dell'airbag.
How to repair the steering rotary coupling when airbag warning light turns on.
|
|

Thread upload13 viewsImage uploaded in thread 138228
|
|

Aux85 views
|
|
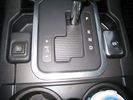
D4 Auxiliary Light Switch351 views
|
|

26 views
|
|
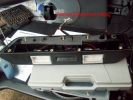
Didn\'t see reference to these anywhere - had to remove them143 views
|
|
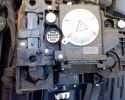
Back of Headlight120 views
|
|
Thread upload6 viewsImage uploaded in thread 162372
|
|
27 views
|
|

Thread upload17 viewsImage uploaded in new thread
|
|

BCM_Power_Interior_Lights29 views
|
|

Rear Light416 views
|
|

Thread upload3 viewsImage uploaded in thread 126959
|
|

Turn light off71 views
|
|

Turn light on82 views
|
|
153 views
|
|
155 views
|
|
147 views
|
|
Thread upload10 viewsImage uploaded in thread 139920
|
|

Thread upload10 viewsImage uploaded in new thread
|
|

Thread upload7 viewsImage uploaded in new thread
|
|
Thread upload0 viewsImage uploaded in thread 177818
|
|
LED light ON - looking out from boot84 views
|
|
LED light OFF - looking out from boot71 views
|
|

LED light ON - looking into boot88 views
|
|

LED light OFF - looking into boot76 views
|
|
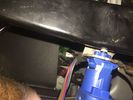
Thread upload0 viewsImage uploaded in thread 195722
|
|
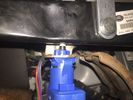
Thread upload0 viewsImage uploaded in thread 195722
|
|

Black Deposits to interior of Brake Light Switch2860 viewsThere are two contacts, one on each side of the vertical plunger under the copper metal. The set of normally open contacts on the left side that carries the power for the brake light filaments, (15 amp fuse F15P), is apparently not heavy enough as the contacts deteriorate and generate the black residue.
The set of normally closed contacts on the other side appear to be sized OK. There is not as much current, (5 amp fuse F66P), flowing thru the contacts to the ABS module, however the contacts are likely adversely affected by the black residue produced by the other deteriorating set of contacts.
One presumes/hopes that the newer replacement switch now has contacts heavy enough to carry the brake light power. It would be ideal if the ABS set of contacts were sealed from the brake light contacts to prevent contamination of the normally closed set of contacts.
|
|

Brake Light Switch, Find, Remove, and Install Instructions 7852 viewsThis is a two page doc outlining where to find the brake light switch, how to remove it, and then install the new one.
Note, do not move the brake pedal when removing or installing the switch. Let the brake pedal hang where it wants to. The switch design is actually cunning, and as such is supposed to make the removal and install fool proof. Hence if you think too much about it, you can wreck the new switch.
If you want to inspect the interior of the switch, wait until you have removed the old switch. You can then just unsnap the blue from the white to get it apart. Inside, the switch is quite simple, (no circuit boards), but it will probably show black dust from failing contacts.
I think the reason the switch fails is that the Normally Open, (NO), contacts of the brake light contacts were made too light to carry the current load for make and break of the tail light filaments. I also think the black dust created then fouls the Normally Closed, (NC), second set of contacts for the ABS circuit. As such, the Normally Closed contacts become intermittent in operation and display as a fluctuating open and closed circuit condition to the ABS system when the ABS should be seeing a steady closed circuit. Hopefully the replacement switch contacts are more robust and may be as I recently replaced my switch again just as a matter of maintenance. While in a redesign, ideally the NC contacts should be sealed or at least separated from the NO contacts, when I inspected the removed switch, this time there was no black dust present.
Probably the removed switch will have a Land Rover oval logo moulded into it, the new one, FOMOCO.
|
|
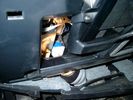
Brake Switch Visible thru Opening4973 viewsThe blue and white bit is the switch; the sort of gold appearing box,(it is really black), you will not see in your 3 as it is a Smooth Talker brand amplifier for my Blackberry phone antenna. This install is detailed in the SmoothTalker phone antenna section of my gallery.
One way to remove and install the switch is to lower the "horizontal" panel above the brake pedal as shown where the flashlight head is located. To actually remove the switch, you slide your hand thru the gap and rotate the switch clockwise 1/4 turn while watching thru the rectangular opening. Installation of the new switch is the reverse of above - 1/4 turn counterclockwise.
Before you remove the switch, note its orientation - horizontal with electrical wires to the left. That is the way it should look after replacement as well.
The second time I replaced the switch, I did it all thru the rectangular opening and did not remove the horizontal panel - that is experience helping out.
The knee kick you have to remove regardless. It is sort of hinged at the bottom so you just pull at the top and sort of rotate the knee panel and then pull upwards for two plastic "fingers" to clear the slots they reside in.
|
|
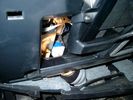
Smooth Talker Amplifier Box mounted below near steering column.179 viewsThe gold look box due to the lighting, (actually black), is the antenna amplifier located near the steering column. It can be put anyway but this seemed an OK location as I ran the antenna connector cable rearward from here to the back corner of the 3 and then up to the underside of the roof glass at the rear. The blue/white thing is the brake light switch that often must be replaced. See the Brake Light Switch file within this Gallery regarding the switch replacement.
|
|

Black Deposits on Brake Light Switch Plunger2757 viewsThis jpg I got off another forum and is typical of what one will see when one opens up the removed brake light switch. The black powder is residue from arcing of one of the pair of contacts within.
Hopefully the newer switches with the FOMOCO logo moulded into the plastic are improved from the Land Rover logo marked early units, however I doubt it.
The Ford part number is SW-6572 and/or 7E5Z-13480-A as used on the 2006 to 2009 Ford Fusion's and Mercury Milan's; the Land Rover part number is XKB500110. Cost of switch could be about twenty five dollars. A previous LR part number for the switch was XKB500030, so hopefully the newer LR part number, XKB500110, reflects some improvement in reliability.
It is possible that the new switches are better as I installed a replacement 72,000 km, (45,000 miles) later, at 195,000 km (121,000 miles). When I took the removed switch apart to inspect, it was clean inside. There was no black dust - the switch looked like new, hence they must be improved now.
|
|
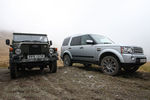
CALENDAR 2011429 viewsD4 and an ex-military Lightweight
|
|

88 views
|
|

475 viewsSide steps, light guards, rubbing strips, roof bars, privacy front and rear
|
|
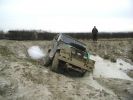
Lightweight At Tixover31 views
|
|
Thread upload37 viewsImage uploaded in new thread
|
|
Thread upload19 viewsImage uploaded in thread 152682
|
|

Mvubu in Botswana 2014119 viewsMvubu 2014 Discovery 4 TDV6 XS, Corris Grey.Snorkel, OL Bull Bar, Winch,OME Heavy Duty Coil Springs,Light Guards,17" Black Wheels,Cooper ST max,Dual Battery+Inverter,Drawer Storage,FR Rear Ladder,Hannibal Roof Rack,80L Excel Long Range Fuel Tank,HiLift Jack Points,75L Water Tank.
|
|
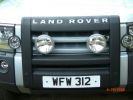
Spotlights fitted 1239 views
|
|
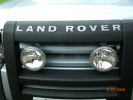
Spotlights Fitted 2193 views
|
|
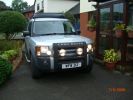
Hella Spotlight Fitting 2306 views
|
|
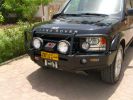
Front end327 viewsARB deluxe winch bar is very well made. Still allows Mantec sump guard to be used. Warn M8000 winch fitted - (wish I could\'ve found an M15000!) and IPF 900XS Extreme Series mounted with light stays to grille. Fog lights work fine with the replacement bumper, and indicators in bumpoer are effective too.
|
|
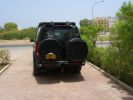
Rear end294 viewsLocally made wheel covers. LH is zipped from bottom to top to fit over registration plate with zip fasteners top and bottom. Rear IPF Reversing /camp lights on rack linked to reverse light circuit.
|
|
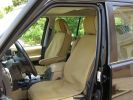
\'Escape\' canvas seat covers269 viewsFull set of these well made SA seat covers fitted to protect the Alpaca leather from constant exposure to Middle EAst sunlight and sand. They fit well, and to date have proved very durable. They include headrest and arm rest covers too.
|
|

smoked rear light clusters75 views
|
|

64 views
|
|

TDV8 to Date249 views2007 (57) TDV8 HSE
Mods:
BAS mapped.. oh yeah..
Colour coordinated lower sills,Java handles, supercharger vents and grill
Hawke smoked repeaters
Halo style HD LED rings in headlights
22" supercharger style diamond cut alloys
2011 LED rear lights
|
|
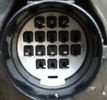
LHS Headlight Plug Socket24 views
|
|
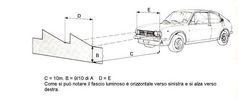
headlight level83 views
|
|
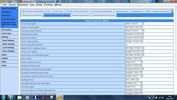
Thread upload39 viewsImage uploaded in thread 102519
|
|
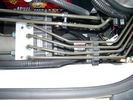
CounterAct Power supply mounted under brake lines.194 viewsThis top view shows where I located the power supply. It is attached with 3M sticky to the black plastic surface that is located under the brake lines.
When the system is operating properly, the red LED pulses about twice per second.
Some users claim they can hear a very slight hum or whine coming from the unit. My unit seems silent.
|
|
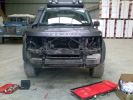
Mantec Plate , Bumper , Lights & Grille removed161 views
|
|
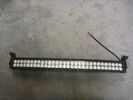
clearout curved lightbar1 views
|
|
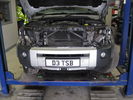
232 views
|
|
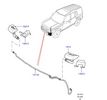
56 views
|
|

Adaptive headlights44 views
|
|
184 views
|
|
179 views
|
|
146 views
|
|
140 views
|
|
162 views
|
|
185 views
|
|
182 views
|
|
157 views
|
|
152 views
|
|
177 views
|
|
211 views
|
|
144 views
|
|
148 views
|
|
151 views
|
|
231 views
|
|
167 views
|
|
261 views
|
|
247 views
|
|
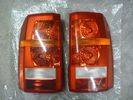
d3 rear lights1 views
|
|
178 views
|
|
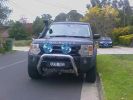
Lightforce 240 XGTs on ECB nudge bar165 views
|
|

57 views
|
|
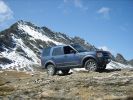
D3 High Alpine Pass450 viewsCALENDAR ENTRY
Sept.08 on the way back from Monaco towards Switzerland. The \'Col de L\'Iseran\' is the 3rd highest road in Europe and this shot is taken slightly higher than that!
|
|
Thread upload37 viewsImage uploaded in thread 136565
|
|
Thread upload38 viewsImage uploaded in thread 136565
|
|
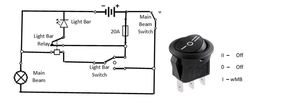
Thread upload41 viewsImage uploaded in thread 137224
|
|

37 views
|
|
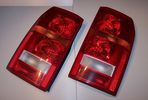
D3 Rear Lights13 views
|
|
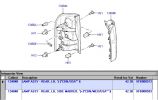
503 views
|
|

Thread upload6 viewsImage uploaded in new thread
|
|
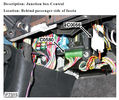
D3_CJB_lower_connections_inc_for_LR_spotlights_C058029 views
|
|
Thread upload12 viewsImage uploaded in new thread
|
|
Thread upload7 viewsImage uploaded in new thread
|
|

Thread upload6 viewsImage uploaded in thread 149950
|
|
Thread upload6 viewsImage uploaded in thread 150275
|
|
Thread upload9 viewsImage uploaded in thread 150275
|
|
251 views
|
|
Thread upload9 viewsImage uploaded in new thread
|
|
Thread upload4 viewsImage uploaded in new thread
|
|
Thread upload6 viewsImage uploaded in new thread
|
|
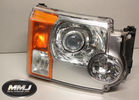
Thread upload4 viewsImage uploaded in new thread
|
|

Thread upload6 viewsImage uploaded in new thread
|
|
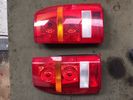
43 views
|
|
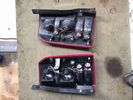
39 views
|
|
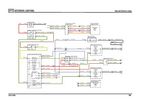
Thread upload23 viewsImage uploaded in thread 123695
|
|

Thread upload21 viewsImage uploaded in thread 142490
|
|

Thread upload19 viewsImage uploaded in thread 150396
|
|

D4 Adapter brackets for spots144 views
|
|
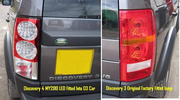
234 views
|
|
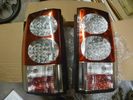
clearout D4 rear lights1 views
|
|

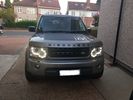
D4 Headlight (Xenon) LEDS (Angel Lights)98 viewsD4 Headlight (Xenon) LEDS (Angel Lights)
|
|

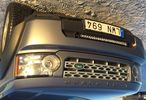
D4 Headlight (Halogen) no LEDS (Angel Lights)76 viewsD4 Headlight (Halogen) no LEDS (Angel Lights)
|
|
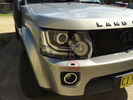
Thread upload1 viewsImage uploaded in thread 149337
|
|
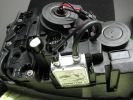
D4 hid installed in light ready to go217 views
|
|
D4 hid kit fitted NO FAULTS213 views
|
|
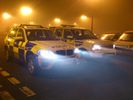
whos got the brightest lights then39 views
|
|

Thread upload5 viewsImage uploaded in new thread
|
|

Thread upload14 viewsImage uploaded in new thread
|
|

Thread upload10 viewsImage uploaded in new thread
|
|

Thread upload10 viewsImage uploaded in new thread
|
|
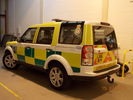
D4 Being Prepped for LAS26 viewsThis is a Disco 4 (unknown spec) being prepped up at my workplace for the LAS, having new comms kit put in and stuff. What you can't see from this angle is that the front grille and headlights have been taken out.
|
|
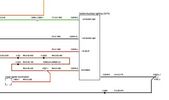
D4 Aux Lights Switch Wiring Diag80 views
|
|
Thread upload6 viewsImage uploaded in new thread
|
|
Thread upload12 viewsImage uploaded in thread 138426
|
|
Thread upload13 viewsImage uploaded in thread 138655
|
|

Frontale D4 201422 views
|
|
Thread upload1 viewsImage uploaded in new thread
|
|
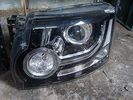
Thread upload3 viewsImage uploaded in new thread
|
|
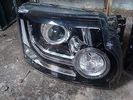
Thread upload1 viewsImage uploaded in new thread
|
|

D4_LH_Rear_Light21 views
|
|
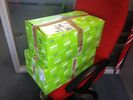
D4 lights in box23 views
|
|
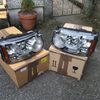
Thread upload9 viewsImage uploaded in new thread
|
|

Thread upload10 viewsImage uploaded in new thread
|
|

Thread upload2 viewsImage uploaded in new thread
|
|

Thread upload0 viewsImage uploaded in thread 197145
|
|

New D4 lights147 views
|
|
Thread upload1 viewsImage uploaded in thread 197145
|
|
Thread upload14 viewsImage uploaded in thread 156159
|
|
Thread upload15 viewsImage uploaded in thread 156159
|
|
Thread upload11 viewsImage uploaded in new thread
|
|
Thread upload1 viewsImage uploaded in new thread
|
|

Thread upload10 viewsImage uploaded in new thread
|
|
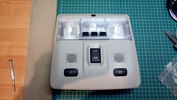
Roof console with mounted switches148 viewsOne switch is for switching the R-750 spot lamps, the other is for additional external lighting using a second Relay kit provided by OEM Plus.
|
|

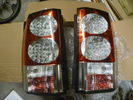
307 viewsTail light assembly
|
|
51 views
|
|
Thread upload30 viewsImage uploaded in thread 165982
|
|
Thread upload8 viewsImage uploaded in thread 91
|
|
39 views
|
|

30 views
|
|
25 views
|
|
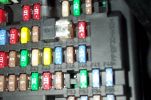
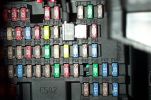
Tapa-Circuit Fuse Tap411 viewsTapa-circuit fuse tap fitted in existing fuseway provides extra fuseway which I have used to hard wire my Tomtom Sat Nav PDA. The fused output feeds into a female socket (Cigar lighter sized) into which the tomtom power adaptor is plugged. All hidden away behind the glove box.
|
|
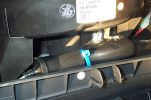
Tapa-circuit Fuse Tap435 viewsTapa-circuit fuse tap fitted in existing fuseway provides extra fuseway which I have used to hard wire my Tomtom Sat Nav PDA. The fused output feeds into a female socket (Cigar lighter sized) into which the tomtom power adaptor is plugged. All hidden away behind the glove box.
|
|
Hard wired tomtom498 viewsThe fused output from a tapa-circuit feeds into a female socket (Cigar lighter sized) into which the tomtom power adaptor is plugged. All hidden away behind the glove box.
|
|

DDin Xtron kit first fit - slight adjustments needed top and bottom.103 views
|
|
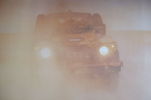
Defender in the Fog, another day on the job.459 viewsThis is another normal work day for a Defender - actually the jpg is from a Land Rover advertising shot, but it may just not be a set up one. I think it is an actual working Defender. Note the visible front tow hook and how the hi lift is just rope tied on; also the normal stock headlights and I guess dual spare tyres - just another day on the job.
|
|
Thread upload26 viewsImage uploaded in new thread
|
|
Thread upload20 viewsImage uploaded in new thread
|
|

external lighting 346 views
|
|

Exterior lighting - Description and Operation312 views
|
|

Description and Operation - daytime running lights127 views
|
|
D3 - A few mods, A-bar & Lights, Expo Rack, 18" Wheels with AT2s630 views
|
|
78 views
|
|
77 views
|
|
80 views
|
|
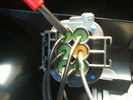
190 viewssignal wire pin 3 on rear of D4 rear light plug fit 6 ohm 50 watt resistor across here and common ground Pin 5 yellow terminal shown in next pic
|
|
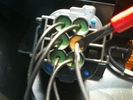
170 viewscommon groung wire pin 5 yellow on rear of d4 light plug
|
|
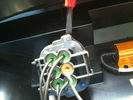
172 viewsorientation peg on rear of D4 light plug
|
|
199 viewslocating of resistor to rear of D4 led lights and scotch blocks but theres loads of room so the choice is yours
|
|

176 viewssealant used for sticking resistor to rear light and spot fixing the D4 front grill this stuff is superb but needs 24 hrs to cure
|
|

256 viewspulled off the factory plastic and found 2 6inch cracks in the drivers side top in front of head light
|
|

Headlight mod and D4 grill mod64 viewsFirst tackle of mods to my D3, First attempt was the D4 grill, then the de-orange of the headlands, Also installed LED sidelights and indicators
|
|

Lights6 viewsChrome surround
|
|
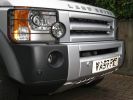
added light guards & bashplate57 views
|
|

Exterior Lighting - D3159 viewsSource is undetermined
|
|
added light guards & bashplate58 views
|
|
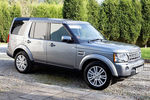
Orkney Grey in the sun37 viewsOrkney Grey XS in the sunlight
|
|
2012 XS34 viewsOrkney Grey in the sunlight
|
|
2012 XS32 viewsOrkney Grey in the sunlight
|
|

New D4 Rear Lights114 views
|
|

85 views
|
|

New D4 Rear Lights107 views
|
|

Discovery 3 Exterior Light Wiring69 views
|
|

Thread upload10 viewsImage uploaded in new thread
|
|
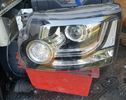
Thread upload12 viewsImage uploaded in new thread
|
|
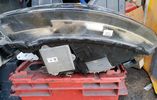
Thread upload9 viewsImage uploaded in new thread
|
|

D4 Headlight Wiring Diagram 1 VIN 51332638 views
|
|

D4 Headlight Wiring Diagram 2 VIN 52454535 views
|
|
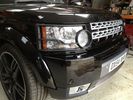
104 views
|
|
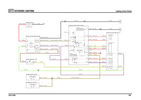
Lighting Wiring jpg58 views
|
|
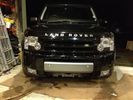
New front end98 views
|
|

Thread upload9 viewsImage uploaded in new thread
|
|
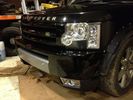
Corner87 views
|
|

Thread upload8 viewsImage uploaded in new thread
|
|

Thread upload5 viewsImage uploaded in new thread
|
|
Close up90 views
|
|

Thread upload7 viewsImage uploaded in new thread
|
|
Thread upload12 viewsImage uploaded in thread 115982
|
|
Thread upload6 viewsImage uploaded in new thread
|
|
Thread upload15 viewsImage uploaded in thread 1546
|
|
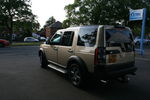
Thread upload12 viewsImage uploaded in thread 1546
|
|
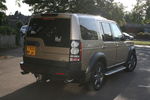
Thread upload13 viewsImage uploaded in thread 136043
|
|
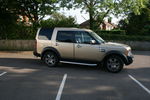
Thread upload12 viewsImage uploaded in thread 1546
|
|
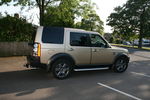
Thread upload11 viewsImage uploaded in thread 1546
|
|

Thread upload60 viewsImage uploaded in thread 123909
|
|
Thread upload4 viewsImage uploaded in new thread
|
|
Thread upload4 viewsImage uploaded in thread 153444
|
|

7 views
|
|
Thread upload14 viewsImage uploaded in new thread
|
|
Thread upload33 viewsImage uploaded in thread 102519
|
|
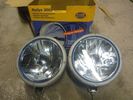
clearout driving lights1 views
|
|
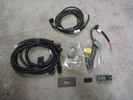
clearout driving light fitting kit6 views
|
|
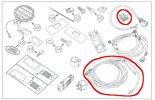
Driving Light Parts Picture48 views
|
|

Thread upload8 viewsImage uploaded in thread 188443
|
|

Thread upload7 viewsImage uploaded in thread 204949
|
|

6 views
|
|
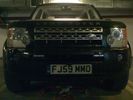
philips drl day light running lights84 views
|
|
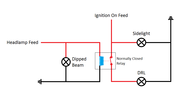
Thread upload22 viewsImage uploaded in thread 116751
|
|

Old Yellow Sidelight91 views
|
|
New Blue Sidelight104 views
|
|

Stop light90 views
|
|

white kite in flight36 views
|
|
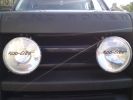
RooLights207 views
|
|
Picture of wire direct into headlight wiring181 views
|
|
another picture of the direct feed from the headlight163 views
|
|
spot light mounting bracket150 views
|
|

Pooch in full flight252 views
|
|
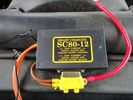
63 viewsI have no idea what's in there, or what it does, but with just one green light to tell me everything is OK it's speaking my language.
|
|
sidelight access aperture255 views
|
|
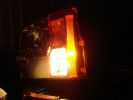
Sidelight & amber strip illuminated268 views
|
|
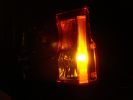
Amber strip light, note hotspot289 viewsShould be better with a 3W lamp
|
|
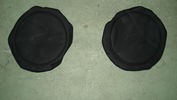
Cover for front lights68 views
|
|
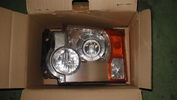
xenon light 67 views
|
|
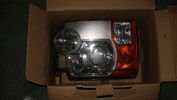
Xenon light 69 views
|
|
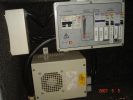
Detail of 20A ac charger/adaptor & breakers for 2 x 10⁵AH batteries, lights, pump etc218 views
|
|
Exodus Roof Rack18 viewsMade by Derek Chase of Urban Offroad in the USA - nice and strong (and quite light for steel) rack.
|
|
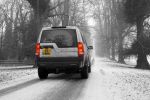
CALENDAR ENTRY - Christmas Eve at Calke Abbey497 viewsSlightly photoshopped to remove the colour in the background. Have the original if you prefer!
|
|
Headlight adjuster O/S80 views
|
|
Headlight adjuster N/S78 views
|
|
Voltage on cheap cigar lighter meter56 views
|
|
One slightly tired, but very happy D3133 views
|
|
Smoked taillight181 views
|
|
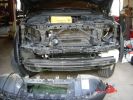
Must remove the lights and front bumber first361 views
|
|
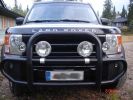
Driving lights installed435 viewsinstalled with Defender styled alu parts
|
|
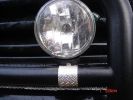
Aluminium holder for the driving lights407 views Hella FF 1000 model with 100 W halogen means ENOUGH light to drive here in dark north
|
|
Headlight Mod 1193 views
|
|
Headlight Mod 2207 views
|
|
Headlight Mod 3209 views
|
|
Headlight Mod 4230 views
|
|
Headlight Mod 5183 views
|
|
Headlight Mod 6211 views
|
|
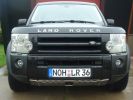
Headlight Mod 7229 views
|
|
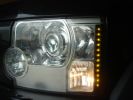
Headlight Mod 8260 views
|
|
wire from reversing light131 views
|
|
Switch lights428 views
|
|
LED sidelights60 views
|
|
LED sidelights65 views
|
|
LED sidelights61 views
|
|

61 viewsD4 LEd lights
|
|
G4 inside rear light178 views
|
|
Day running lights & led side light upgrade287 views
|
|
433 viewsWasher bottle guard, I covered the exposed headlight waser hose with protective tubing.
|
|
273 views
|
|

balloon flight86 views
|
|
342 viewsSide steps, rubbing strips, lamp guards & roof bars.
Rear windows tinted with darkest \'limo\' tint, side windows with one shade lighter (but still slightly darker than factory option).
|
|
291 viewsSide steps, rubbing strips, lamp guards & roof bars.
Rear windows tinted with darkest limo tint, side windows with one shade lighter (but still slightly darker than factory option).
|
|
39 viewsMy trusty Defender 90. Only gets used for 6 months of the year, little light green laning.
|
|
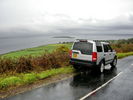
View across to Pladda Lighthouse (Arran)52 views
|
|
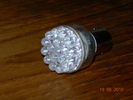
Rear LED lights (2)40 views
|
|
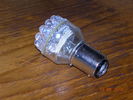
Rear LED lights38 views
|
|
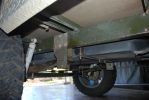
143 viewsraised susspension - this i bought from the factory, so I assume you could order a trailer with this fitted. only necessary if you are fitting big tyres like I have. the axle is a standard alco axle which I ordered from alco with blank hubs. hubs were machined to accept LR studs. Wheel centres had to be slightly machined to fit over bearing caps
|
|
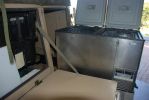
121 viewsthis shows the fridge on the 2 x 180kg sliders. i had to slightly modify the door opening to fir the fridge hinges thru. I just gently bent it, and fitted additional seals, hence it can easily be returned to standard. having the fridge in the kitchen is a major bonus, plus the back door of the trailer is now used for easy access to the cavernous interior, whereas prior to this youhad only access thru the front doors, which are only 500mm wide
|
|

Very Light Bowler10 views
|
|
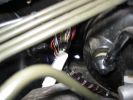
264 viewslook for the light shining through ...thats were the gromet is
|
|
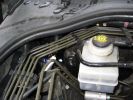
260 viewslook for the light shining through ...thats were the gromet is
|
|
| 1120 files on 3 page(s) |
 |
1 |  |
 |
|