| Search results - "loose" |
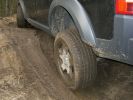
202 viewsDidn´t loose contact, but grip was zero.
|
|
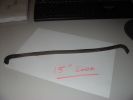
183 viewscame loose when washing car with power washer - its 15" long and hollow
|
|
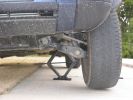
Jacked-up, loosened bolts, ready to replace.444 views
|
|
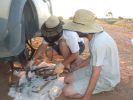
16 All the remains of a D3\'s parking brake373 viewsAfter 4 hours of hammering, finally removed the disk/park brake drum, and nearly all the parking brake bits fell to the ground. Cut rhe remaining brake cable loose as it was wrapped around the hub and a bit melted. Also having 2 jacks + 2 jack stands will support 4 hrs of hammering on the side of my D3.
|
|
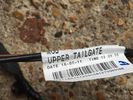
Upper Tailgate Loom (no Camera) BH22-14A583-AA7 viewsOne Pin loose on grey plug
|
|
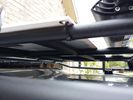
solar panel install356 viewsAt least at this point, I mounted it by using Clear Silicone RTV. This stuff is kind of like glue, but can be removed. If it doesn't hold up after curing and driving, I'll remove it and come up with another plan. I used heavy cable ties on the 4 grommets, in case it lets loose, it won't take out my wiring and the car behind me. 2 Panels are dandy like this, but I don't want to permanently block the roof space. Grape Solar to power my snomaster fridge
|
|

Air Conditioner Specifications 4.4L V81570 viewsThis 2 page pdf is just the specifications for the AC system. The refrigerant type is R134A.
Note that when topping the system up, it can be a good idea to include some of that ultra violet light dye that will glow to show leaks and loose fitting.
|
|

anti loose180 views
|
|
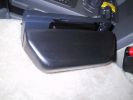
Ham Radio448 viewsThe remote head of an Icom IC706 was mounted on a piece of wood shaped to fit into the coin holder. This is quite a tight fit and does not shake loose. The radio is mounted under the driver seat.
|
|
Loose Part 230 views
|
|
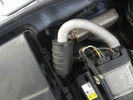
Loose Part 136 views
|
|

OSR_Brake47 viewsFriction material loose and broken off.
|
|

Disco4 TDV6 Pulley loose38 viewsLoose pulley
|
|

Over the top performance350 viewsDropping down over a 50ft loose gravel drop, aprox 80 degree slope, in Quarry day, ireland event#8
|
|
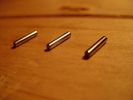
Loose needle roller bearing17 views
|
|
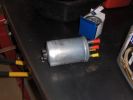
fuel filter 3133 viewsBlack knob loosens on bottom of filter to release water.
|
|

Tow hitch receiver before repair20 views
|
|

Loose bolt 89 viewsThis is how my car was returned from the garage
|
|

sump guard bolts loose 2nd time41 viewsmore bolts left loose by the garage
|
|

Loose tube... ?!?!57 views
|
|
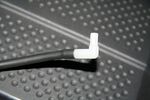
Loose tube...!?!?!48 views
|
|
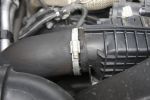
Air Box Jubilee Clip735 viewsLoosen to allow air inlet pipe to be removed from the air box
|
|
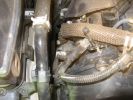
EGR Blanking214 viewsR.H.S PIPE, note the tight space to get your hands in. Loosen pipe clamp below air cleaner for better access.
|
|
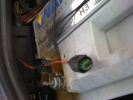
Connector170 views
|
|

Thread upload4 viewsImage uploaded in thread 200758
|
|

Loose cable17 views
|
|
53 views
|
|
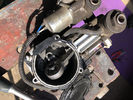
Thread upload4 viewsImage uploaded in thread 199871
|
|

13 views
|
|

Battery Maintainer pigtail sticking out of Grill729 viewsThis is all you see when everything is put back together - just the pigtail and Weather Pack blanking plug. Most often, I have it all tucked back behind the grill.
In winter, there may be a second cord hanging out as well - the 120 VAC power cord for the engine block heater, a tea kettle like element inserted in the engine block. NAS petrol V8's do not have the Fuel Burning Heater, (FBH), installed, but instead in cold area markets have the block heater element assembly available as a dealer installed option. There is an argument to say that the heating element is factory installed in all cold climate V8 gasoline engines, however the appropriate power cord is not. If true, this means that all one needs to purchase is the area specific power cord and plugging in / attachment to the engine block located block heater.
As such, you will often see a conventional 120VAC three prong power plug hanging loose out of the grill of most vehicles here in the wintertime. In summer, most drivers tuck the plug back behind the grill as it is no beauty mark.
|
|
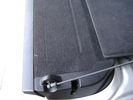
Flexible wire rope fishing leader 0.032" diameter exiting carpet 1949 viewsThis is all you see of the completed mod.
The short little angled "line" about an inch long that looks like a piece of debris and is located a few inches "above" the support cable is actually the wire rope release cable exiting from under the carpeted lift gate cover.
I drilled a very small hole in the carpet and pushed the 0.032" diameter release wire thru and then slipped the loose end under the black plastic.
To release with the lift gate etc closed, from the inside, just pull the loose end free from under the black plastic and gently pull wire about 5mm, (1/4"), and the upper door catch should release. You will have to manually push the upper door out wards to actually effect opening, but you will already be inside the rear cargo area so that part is easy to do.
The assumption is that the lower door latch still works electrically and hence, the lower lift gate half will open as normal by pressing the usual button on the top left of the lower door half.
|
|
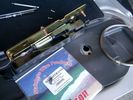
0.032" OD metal fishing leader and lead fishing weight clamped to existing wire rope 2121 viewsI used a size #0 lead fishing weight as a clamp to attach the 0.032" diameter flexible wire rope fishing leader to the release cable.
The pictured weight is the smaller #00 weight, however it did not work very well so reinstalled with the larger #0 size. I clamped to the cable as what breaks is the L retainer that is hidden in the actuator and holds the cable. When the L breaks, it lets go of the cable so you hear the clicking but there is no opening action.
Clamping on to the cable is an attempt to resolve that reality; also if the actuator electrically fails, the release mod should still do the task. Note in the picture the two Torx T15 screws that hold the gold plate to the plastic case and also the two 8mm cap screws that have to be loosened to remove the actuator from inside the door.
|
|
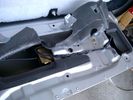
Dust seal cut; note electrical conductors right under dust seal 1627 viewsShows what is underneath when the dust seal is cut. Note the electrical conductors.
I used a box knife to cut the plastic and it was at first easy; then I seemed to hit something and fortunately I stopped - it was the wires - lots of them stuck right to underside of the sticky seal material.
Also shown are the two 8mm nuts in slots that you only have to loosen to release the gold actuator assembly.
|
|
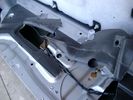
Dust seal rolled back showing electrical conductors 1658 viewsNote power conductors just under the dust seal which makes cutting the seal more interesting.
Also shown are the two 8mm nuts located in slots. One must loosen each nut to effect removal of the actuator. This will then reveal two T15 Torx screws that one must completely un-thread to remove the top gold plate from the actuator assembly.
|
|

solo steep gravel stop = park brake plus reverse on shifter333 viewsso our disco II\'s locked all 4 wheels with brake but now the modern lr3 slides away with only the park brake!!!! 1. put auto shifter in reverse (low gear) with foot on brake, 2. apply park brake, 3. get out and snap photo incase something fails and it slides away ;)
I reversed up the hill from this position, system decided to engage extended heigh mode for some reason trying to gain traction on loose surface.
|
|
![Filename=LR3_Radio_Removal[1].pdf
Filesize=190KB
Dimensions=320x240
Date added=04.Feb 2014 LR3_Radio_Removal[1].pdf](images/thumb_pdf.jpg)
Radio Removal from Radio Stack572 viewsThis shows how to remove the radio from the stack. Basically you remove the H surround first and then at least loosen all the Torx 20 screws left and right sides from the top down starting at the narrow unit that the four way flasher/locking buttons are mounted on.
The units kind of interlock, hence some movement of each is required to remove the radio by itself. I find it best to take out the four way flasher/locking buttons assembly first as that allows access to the fibre optic cable connector into the back of the radio head without too much tugging.
|
|

LTB00319 - Technical Bulletin - Exterior A-Pillar Moulding Loose98 views
|
|
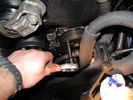
loosening screws via holes in pulley60 views
|
|

good on the loose stuff27 views
|
|

Thread upload3 viewsImage uploaded in thread 163024
|
|
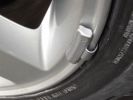
Tyre 3 - not cracked but pretty loose fit51 views
|
|

tensioner pulley loosening to remove belt80 views
|
|

Trim in Middle of Row 3 Seats 44 viewsThis trim has become loose and needs the right fixing
|
|

Thread upload1 viewsImage uploaded in thread 198799
|
|

Wadi Bani Auf, Oman160 viewsLoose river-borne gravel as the main surface routes from Al Rustaq into the Grand Canyon separating Jebal Achter and Jebel Shams
|
|
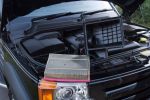
Removing air box is very easy, some screws and just loosen the jubilee clip around the air pipe149 views
|
|
|
|
|
|