| Search results - "rim" |
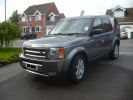
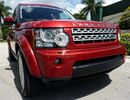
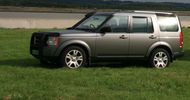
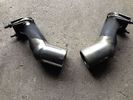
Disco 3 TDV6 GSLE75 viewsLimited Edition. Parking sensors front & rear, Full body skirts with chrome trim fog lights, Twin chrome tail pipes,
|
|
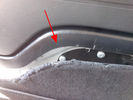
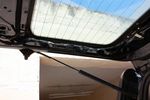
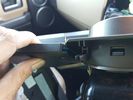
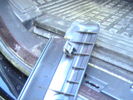
Rimozione pannello dalla sponda - Tailgate panel removing45 viewsPer togliere il pannello moquettato dalla sponda ho fatto leva con un cacciavite abbastanza grosso nel punto indicato, è stato veloce e non ho rovinato niente.
To remove the carpeted panel away from the tailgate I used a big enought screwdriver at the point indicated, it was fast and I have not ruined anything.
|
|
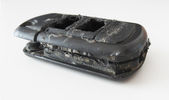
Tagliare lungo il perimetro della chiave - Cut along the key perimeter17 viewsI gusci sono saldati ad ultrasuoni. Con il disco tagliare lungo il perimetro della chiave in corrispondenza della giunta: lo spessore è di circa mm.3. Io non sono andato fino in fondo per evitare di danneggiare qualcosa, una volta inciso il solco per mm.2,7 ho fatto leva col cacciavite e ho strappato il materiale restante.
The body is ultrasonically welded. With the disc cut along the perimeter of the key in correspondence of the joint: the thickness is approximately 3mm. I have not gone all the way down
|
|

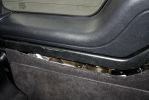
Removal of the trim around the pedals285 views
|
|

Tagliare per eliminare parte del coperchio - Cut to remove part of the cover14 viewsE' meglio prima levare il circuito stampato e poi la lama della chiave, per evitare di danneggiarlo. Tagliare sopra il tasto superiore per rimuovere solo la parte con i tasti.
Is better to remove the printed board first then the key, to prevent damage. Cut over the top button to remove only the part with the buttons.
|
|

Estrarre il circuito stampato con la batteria - Exctact the printed board with the battery18 viewsRimossa la parte superiore del contenitore, estrarre il circuito stampato sollevandolo leggermente dalla parte della batteria.
Removed the top of the box, pull out the printed circuit board slightly lifting from the battery side.
|
|

Thread upload3 viewsImage uploaded in new thread
|
|
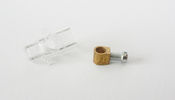
Morsetto - Clamp33 viewsHo smontato il morsetto, il diametro del foro è esattamente quello di quello che rimane del particolare che si è rotto.
I removed the clamp, the hole diameter it's the same of the detail that is broken.
|
|

Chiave aperta12 viewsUna volta estratto il circuito stampato, facendo leva col cacciavite sulla parte rimasta attaccata ho prelevato la lama della chiave da inserire nel box nuovo.
Once you remove the printed circuit board, leveraging with the screwdriver on the part remained attached, I picked up the blade of the key to be inserted in the new box.
|
|

07 Back side of failed tyre340 viewsThis is the back of the blown tyre. It looks like any other worn tyre which has run a bit while flat. Note that we were running on wider 19" RRS wheels (have 4 19" MTRs + 1 old A/T on the original 5 wheels). Also have a rear-mount spare tyre holder which is really convenient with the wider rim and the fact that the tyre was still hot (it had some melted rubber on the other side!!)
|
|

Crimps18 views
|
|

1 ICE Loom - Behind boot trim drivers side. TMC and Nokia modules92 views
|
|

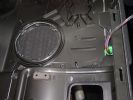
Trim removed from tailgate138 views
|
|

Attuatore rimontato - Actuator reassembled40 viewsAttuatore rimontato col cavo di emergenza.
Actuator riassemble with emergency cable.
|
|

Installazione Ganasce Freno di Stazionamento30 viewsRimozione ed Installazione Ganasce Freno di Stazionamento
|
|
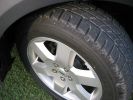
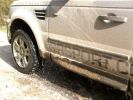
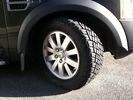
Wheel351 viewsDetail of the Pirelli Scorpion zero on 19" rim.
|
|
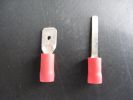
use right hand crimp301 views
|
|
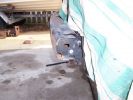
Trimmed RH end of inner bar269 views
|
|
Thread upload123 viewsImage uploaded in new thread
|
|
Rea inner bar with end trimmed258 views
|
|
Thread upload4 viewsImage uploaded in new thread
|
|
Thread upload2 viewsImage uploaded in thread 195195
|
|
2 Nokia - Location of Nokia Module on trim71 views
|
|
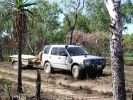
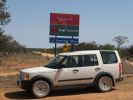
D3 in Kakadu National Park, on the track into the Alligator Billabong47 viewsThis whle area is down on the flood-plain, so in the Wet it is all under a few inches of water. In the dry it has a hard but brittle surface, which is then chewed up in many places by the feral animals with hard hoofs such as buffalo, pigs and horses. This then turns the track into a big dust bowl which is primarily bull-dust - a soft fine powder like talcum powder, which can be many feet deep, and gets into everything. The cover on the trailer is actually black.
|
|
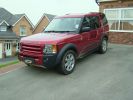
Rimini Red266 views
|
|
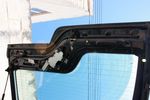
30 viewsBottom trim removed
|
|
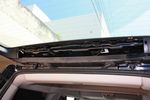
30 viewsTop trim removed
|
|
30 viewsTrim removed
|
|

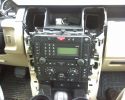
75 viewsRemoved console surround trim
|
|
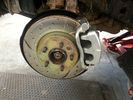
Front caliper on D4 to fit 17" rims135 views
|
|
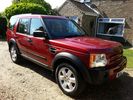
My D3201 viewsJust washed and polished.
|
|

Headrest trimmed23 views
|
|
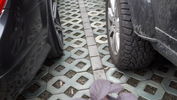
odd trend22 viewsfitting tyre to a rim which is too wide
|
|
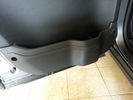
Door trim plastic scrath9 views
|
|
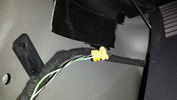
Plug behind rear quarter panel trim12 views
|
|
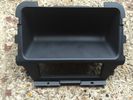
Rear Console trim which i replaced with one with heated rear seats.11 views
|
|
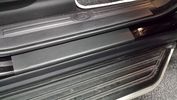
VW Sill trim9 viewsVW Sill trim
|
|
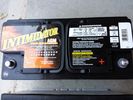
Deka 9A49 AGM Intimidator327 viewsThe Deka 9A49 AGM Intimidator makes an excellent primary battery alternative to the factory or Interstate. Made in US of premium quality. This is an excellent match with the Traxide system w/another Deka or Yellow Top optima.
This will behave properly in your D3/4 LR3 with slightly less wear and tear on your alternator.
|
|

window switch trim47 views
|
|
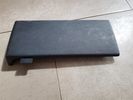
Rear Seat Trim4 views
|
|
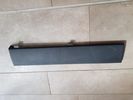
Rear Seat Trim4 views
|
|

Front Seat Trim8 views
|
|

Thread upload4 viewsImage uploaded in new thread
|
|
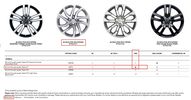
Thread upload6 viewsImage uploaded in thread 175426
|
|

scenic rim 129 views
|
|

Engine Accessory Drive Description and Operation882 viewsThis 2 page pdf shows both belts for the 4.4L petrol V8; the primary serpentine belt, (the long one), and the shorter secondary that drives only the radiator cooling fan.
The various accessory pulleys the two belts are each associated with are numbered and an included table describes each.
When replacing belts and pulleys, count the number of grooves on both your old items and your new replacement parts. It has been known for an pulley with the wrong number of grooves to come with a replacement part or the replacement belt has the incorrect number of grooves; hence make certain the groove count on the new parts are the same as the removed items.
|
|
Thread upload23 viewsImage uploaded in thread 132827
|
|

Oli pump priming19 views
|
|

Alternator and Regulator Wiring Diagrams, TDV6 and petrol V8 and V61989 viewsThis is a three page pdf that shows the alternator and regulator wiring for the petrol V6, petrol V8 and TDV6. The pdf can be either printed or by right clicking on the displayed pdf, rotated as required for viewing.
Of interest is that the regulator gets its instructions primarily from the Engine Control Module (ECM) and only secondarily from the vehicles electrical buss. The conductor from the battery thru the 5 amp fuse F20E is to provide initial power to excite the alternator at startup and then secondarily, to instruct it if the PWM signals were not available. Primary instructions to and from the ECM are thru the two other conductors via a digital like Pulse Width Modulated (PWM) signal.
If F20E, the 5 amp engine compartment fuse box fuse is blown, the red alternator light on the dash will be illuminated. This means that the alternator could be OK, but if the F20E fuse is blown, no electricity will be generated. Hence check the F20E fuse if you get a red ALT light or some indication of the alternator not working.
Regarding operation of the red ALT light on the dash, it is not the regulator within the alternator that tells the red light to illuminate, or not, but instead the ECM. This is the reason the red light does not function in the same manner as with older vehicles. With the 3, sometimes you have illumination and sometimes not depending upon what the ECM is thinking. What this means is that you can have an alternator that is failing but the red light does not illuminate as the ECM is compensating for reduced alternator output - maybe by draining the battery and or cutting back on vehicle electrical loads such as shutting off or cycling the radio amplifier or heated seats.
|
|

154 viewsAlmond/Arabica trim
|
|

133 viewsAlmond/Arabica trim
|
|
19 views
|
|

Front Door Trim Panel168 views
|
|

Front Door Card24 views
|
|

Thread upload5 viewsImage uploaded in new thread
|
|
Thread upload2 viewsImage uploaded in thread 180038
|
|
Both L Brackets attached and bottom tabs slotted in H Trim5 views
|
|
358 views
|
|

Moi - as seen on Crimewatch399 views
|
|
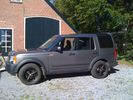
49 views18' ZU rims
|
|
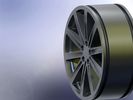
CAD render of a rim I created.71 viewsCAD render of a rim I created. Was supposed to look like the 18" style 2 rims.
|
|
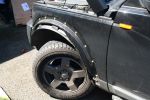
Wheel Arch Trim Removed150 viewsLuckily I didn\'t break any clips
|
|

Thread upload14 viewsImage uploaded in thread 162127
|
|

Thread upload11 viewsImage uploaded in thread 181159
|
|

Thread upload15 viewsImage uploaded in new thread
|
|

Battery Primer120 views
|
|
Thread upload12 viewsImage uploaded in thread 159295
|
|
Thread upload6 viewsImage uploaded in new thread
|
|

Chrome1445 viewsCerberus 20" Chrome rims with Pirelli Scorpio Zero Asymetrico 295/40/20
|
|
116 views
|
|
109 views
|
|
110 views
|
|
110 views
|
|
111 views
|
|
Thread upload5 viewsImage uploaded in new thread
|
|
8 views
|
|
22 views
|
|
21 views
|
|
Thread upload0 viewsImage uploaded in thread 114491
|
|

C Pillar Lower Trim Removal411 views
|
|
Edge of H Trim filed to allow screen to rest flush on front5 views
|
|
Thread upload6 viewsImage uploaded in new thread
|
|
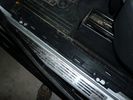
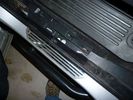
D3 Side Step Repairs156 viewsAluminium trim has been straightend out but need to remove all the old rivets from the rear of the trim.
|
|
D3 Side Step Repairs186 viewsThere are about 10 rivets to drill out. I also increased the hole size to 5.5mm as I will be using larger rivets to hold the trim back in place. 5.5mm is the larger rivet size commonly available at motor factors etc.
|
|
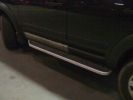
D3 Side Step Repairs165 viewsFinished job all I need to do now is wash it all off. I had already replaced the front door trim using new trim fixers and as you can see it was still dirty.
|
|
D3 Side Step Repairs147 viewsThe old rivet ends which I removed from the trim. I took one rubber end off the trim and let them all out by shaking it to save them rattling around inside the trim for years to come.
|
|
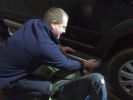
D3 Side Step Repairs167 viewsWhilst I held the trim in place a second person inserted the rivets from behind the step edge. We started in the middle and worked out either way to ensure a snug fit of the aluminium trim.
|
|

Trim12 views
|
|

Interior Trim268 views
|
|

Interior Trim367 views
|
|
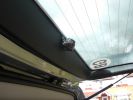
High level camera mounting on inside of tailgate trim53 views
|
|

Thread upload0 viewsImage uploaded in thread 181600
|
|
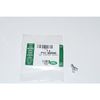
Clip Spring Metal FYC 500040 that holds LR together1747 viewsThe jpg is of the spring metal clip, Land Rover part number FYC 500040 that holds most of our 3 together - well at least most the interior trim parts.
If you are going to remove interior panels, you may as well stock up on a few for replacement as upon panel removal, the clips tend to spring away into deep never to be found voids within your 3.
|
|

Thread upload37 viewsImage uploaded in thread 132594
|
|
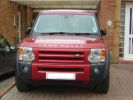
Rimini Red - Decision made437 viewsSo excited, hence camera wobble!!, having a differnt colour at last after only 7 Silver Discos
|
|

Front Footwell Panel98 views
|
|

42 views
|
|

Thread upload2 viewsImage uploaded in thread 200758
|
|

Thread upload4 viewsImage uploaded in thread 200758
|
|

The Joy Of Crimps61 views
|
|
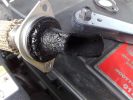
Grim EGR Inlet135 views
|
|

Thread upload10 viewsImage uploaded in thread 155960
|
|

87 views
|
|

43 views
|
|
147 views
|
|
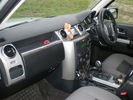
more interior chrome trim167 views
|
|
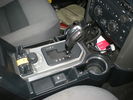
interior chrome trim157 views
|
|

45 views
|
|
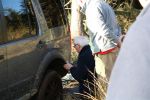
a marshal fixing some trim back on..!64 views
|
|
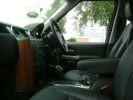
Interior124 viewsThat wood trim is going - to be replaced by piano black before I pick it up
|
|

Thread upload10 viewsImage uploaded in new thread
|
|

Thread upload4 viewsImage uploaded in thread 205597
|
|
Thread upload25 viewsImage uploaded in thread 167901
|
|

Thread upload10 viewsImage uploaded in new thread
|
|

Thread upload6 viewsImage uploaded in new thread
|
|

Thread upload6 viewsImage uploaded in new thread
|
|
Thread upload6 viewsImage uploaded in thread 109113
|
|
Thread upload5 viewsImage uploaded in thread 109113
|
|
Thread upload7 viewsImage uploaded in thread 109113
|
|
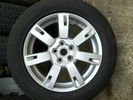
181 views
|
|
Thread upload1 viewsImage uploaded in new thread
|
|
Thread upload0 viewsImage uploaded in new thread
|
|
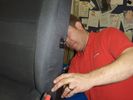
arm rest fit213 viewsthis is gary from trim-line... a job he knows to well as he is in landrover dealers most weeks..
|
|
TRIMLINE SYSTEMS what can i say.... 119 viewsThank you Gary from trimline
|
|

D3 reqar diff lock186 viewsView from right rear tyre well, left rear tire/rim visible on other side. Actuator motor visible
|
|
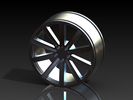
CAD render of a rim I created67 viewsCAD render of a rim I created. Was supposed to look like the 18" style 2 rims.
|
|

Nearside close up shot with boot trim removed251 views
|
|
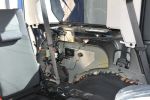
Nearside shot with boot trim removed292 views
|
|
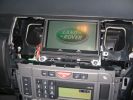
trim removed1210 views
|
|
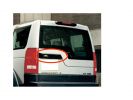
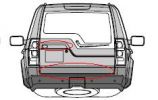
Liftgate Exterior Trim48 views
|
|

FIle con tracce GPS105 viewsFile compresso con le tracce GPS del tour Disco3Romagna 2009.
Istruzioni per l\'uso.
1) Verificare di avere installato Google Earth
2) Scaricare e decomprimere il file
3) Aprire il file cliccandoci sopra: si apre Google Earth con le tracce visibili.
E\' possible fare il tour automatico (Google Earth vi fa vedere il giro (che è stato diviso sui due giorni in vista aerea) oppure semplicemente guardare le zone che più vi interessano dall\'alto.
|
|
Thread upload1 viewsImage uploaded in new thread
|
|

Thread upload0 viewsImage uploaded in new thread
|
|

Rear doors all working with new trim and panels removed61 views
|
|
Thread upload13 viewsImage uploaded in thread 150701
|
|
98 views
|
|

52 views
|
|
Thread upload3 viewsImage uploaded in new thread
|
|

Freelander 1 to Disco 2107 views
|
|
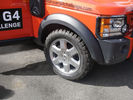
Nice new Rims from Ken130 views
|
|
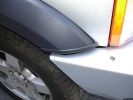
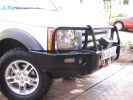
ARB Bull bar - closeup of drivers side showing trim finish.244 views
|
|
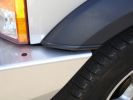
ARB Bull Bar - closeup showing trim finish of Wheel trim.224 views
|
|

420 viewsAlpaca interiro with walnut trim
|
|
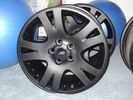
My new 19\' rims40 views
|
|
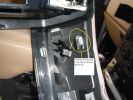
Trim clip 199 viewsthe reason for cout out on dash.
|
|
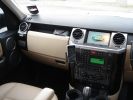
NEW Trim251 views
|
|
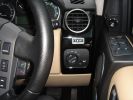
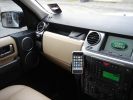
drivers side trim214 views
|
|
passenger side trim214 views
|
|
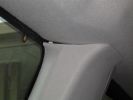
C pillar trim224 viewsnote gap
|
|
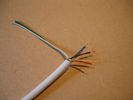
Lenght trimmed and timer ends stripped49 views
|
|
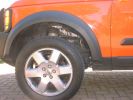
rim128 views
|
|

rear vents trim181 viewsto remove just pull starting from the lower part
|
|
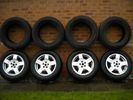
rims and tyres20 views
|
|
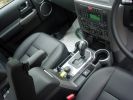
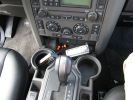
LR chrome gear shift surround and cup holder trim537 views
|
|
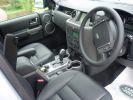
LR chrome gear shift surround and cup holder trim458 views
|
|
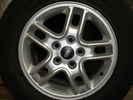
17" rim171 views1x with some kerbing, see close up photo for worst bit.
|
|
17" rim157 viewsclose up of kerbing on 1 rim
|
|
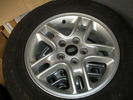
17" rims145 views3x in good condition, used so some minor paint chips, etc.
|
|
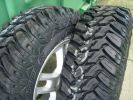
Cooper Discoverer STT tyre on 17" rim300 viewsNew Cooper Discoverer STT 246/70 R17 tyres. 80% off road, 20% on road.
|
|
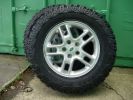
Cooper Discoverer STT tyre on 17" rim282 viewsCooper Discoverer STT 246/70 R17
|
|
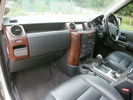
New \'Wood\' Trim76 views
|
|

New \'Wood\' Trim79 views
|
|
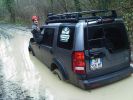
C\'è sempre una prima volta156 views
|
|
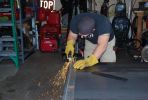
163 viewsUsing the plasma cutter to trim up slider plates
|
|
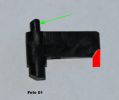
Foto 1 - particolare incriminato142 viewsIl problema del portello di rifornimento che non si chiude pi� � causato dalla rottura di un'appendice della linguetta che fa da guida al movimento (riprodotta in rosso). Un meccanismo simile al click delle penne biro. Un particolare del costo di qualche millesimo (valore della plastica) che in una macchina da �50.000,00 (per lo meno la mia) si sarebbe preferito in fusione di alluminio.
|
|
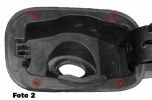
Foto 2115 viewsPer rimuovere in blocco il portello bisogna inserire un tondino del diametro di 2mm. circa nei fori indicati per abbassare le mollette che tengono la struttura alla carrozzeria Vedi foto 3.
Ogni lavoro � fatto a rischio e pericolo di chi lo fa, non mi assumo alcuna responsabilit� per eventuali danni causati a persone o cose.
|
|
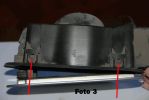
Foto 3 - Rimozione portello143 viewsInserire un tondino metallico di 2mm di diametro per abbassare le mollette che bloccano la struttura del portello.
Bisogna anche rimuovere il dispositivo della chiusura centralizzata indicata dalla freccia grigia della foto 4 premendo le 4 linguette con due pinze.
Ogni lavoro � fatto a rischio e pericolo di chi lo fa, non mi assumo alcuna responsabilit� per eventuali danni causati a persone o cose.
|
|
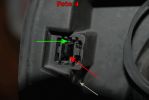
Foto 4 - Rimozione particolare rotto157 viewsUn'alternativa per rimuovere il pezzo rotto (indicato dalla freccia rossa), anzich� smontare tutto il portello si pu� intervenire inserendo un cacciavite piatto come indicato dalla freccia verde, al fine di sollevare la linguetta indicata dalla freccia verde della foto 5. Questa linguetta sblocca il perno del particolare rotto indicato dalla freccia verde della foto 1.
Ogni lavoro � fatto a rischio e pericolo di chi lo fa, non mi assumo alcuna responsabilit� per eventuali danni causati a persone o cose
|
|
212 viewsalmost as from the pro trimmer ;)
|
|

D3 Steel Rim105 views
|
|
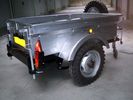
65 viewsCarrello ad uso rimorchio
|
|
195 views
|
|
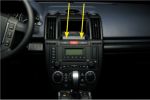
204 views
|
|

Interior Trim471 views
|
|

Interior Trim166 views
|
|

Fluid, Filter/Pan Combo removal and install5979 viewsThese are the LR instructions re removal and install of the plastic pan/filter combo for the ZF 6HP26X transmission on the 4.4L petrol V8 LR3.
The instructions tend to ignore the reason you have to lift the right hand side of the engine about 40 mm. This is because of a frame cross member that interferes with dropping down of the plastic pan. The real problem is a vertical "oil filter spout" that rises out of the filter/pan combo up into the transmission. The spout is the suction pipe for filtered transmission oil back up into the tranny.
On the metal pan versions, the filter is separate from the pan, hence the filter remains with the tranny when the metal pan is dropped. The filter is then removed or installed independent of the metal pan, hence with the metal pan, there is no need to lift the engine.
If one is removing the plastic pan so as to install the metal pan, then some do not lift the engine but just drop the plastic pan enough to gain access to saw off the vertical plastic spout - it is a one time procedure.
Be aware however that the metal pan uses a flat gasket and the plastic pan uses a O ring like perimeter gasket that sits in a half round groove in the tranny casing. Also the metal pan uses 21 shorter torx M6x22.5 metric cap screws for the perimeter bolts. The plastic pan uses longer M6x28.5 torx metric cap screws.
|
|

Rimozione Paraurti Anteriore12 views
|
|

Door Trim and Wing Mirror Removal and Replacement162 views
|
|

Official instructions on how to remove the bumper908 viewsWhen removing the front bumper - you start with the front grill, then the headlamps, then the wheelarch trims, then the bumper...
|
|

disco3.co.uk instructions for removing wheelarches (with photos)644 viewsCourtesy of a senior member of the site - detailed instructs for removing the wheelarch trims and front bumper - use in conjunction with the other 2 documents
|
|

Official instructions on how to remove the wheel arch trims624 viewsWhen removing the front bumper - you start with the front grill, then the headlamps, then the wheelarch trims...
|
|

Thread upload3 viewsImage uploaded in new thread
|
|

223 viewsDesign of 18" rim to fit D4 3.0 ltr
|
|

191 viewsGMAX forged rim in 20" version
|
|
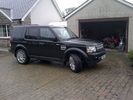
MY D4136 viewsxs, black, 20 alloys, tinred glass, shot roof rails ebony leather, piano black trim, electric/armrest seat, panoramic roof, harmon kardon, rear camera and tow bar.
|
|

10 views
|
|
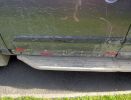
Woops, where has that piece of trim gone?135 views
|
|
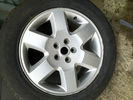
89 views
|
|

Thread upload8 viewsImage uploaded in thread 126959
|
|

Right side of carpeted trim piece38 views
|
|

Left side of tailgate carpeted trim piece41 views
|
|
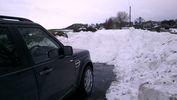
Smowdrift at Brimham28 views
|
|
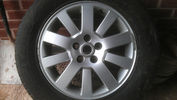
Spare SE rim29 views
|
|
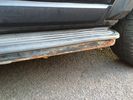
Thread upload4 viewsSide step - missing aluminium trim
|
|
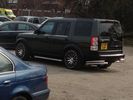
New rims new lights.... Looks like new car77 views
|
|

Completed and fitted272 views
|
|
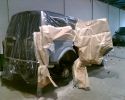
primer finished324 views
|
|
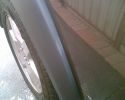
polish on the plastic trim165 views
|
|

Unused Cooper ST on 17" Rim - 11mm tread65 views
|
|

Used Cooper ST on 17" Rim - 8mm tread70 views
|
|
After removal of H-panel95 viewsCrikey, you have to pull HARD to remove this trim!!! Broke one clip and only lost half of it. Fit back with 3 clips ok. Yet to drive it to see if it rattles.
|
|

Finished 1179 views
|
|

Finished 2195 views
|
|

Suspension wire crimped32 views
|
|

Before Modification203 views
|
|
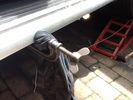
clamp trim30 views
|
|
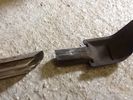
End of trim28 views
|
|
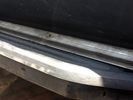
trim that fell off30 views
|
|
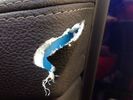
Trim rip 117 views
|
|
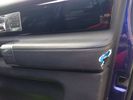
Trim rip 222 views
|
|
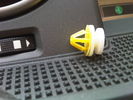
Trim Clip95 views
|
|
Trim Clip88 views
|
|

se rim85 views
|
|
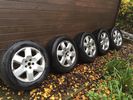
18" 6 spoke rims and tyres37 views
|
|

damaged wheel rim 123 views
|
|

damaged rim 423 views
|
|

damaged rim 320 views
|
|

damaged rim 224 views
|
|

damaged rim 525 views
|
|
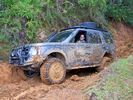
reartire379 viewsRear left tire off the rim! Took 4 guys to get it back in (prefered no to use spare if possible)
|
|
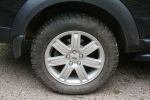
437 viewsFFRR 19" rims (2006 model) with Goodyear MT/Rs.
|
|

Fuel pressure at startup1 viewsFuel pressure starts at about 0.3 bar when ignition is on and lift pump is priming - then it goes off the scale - engine starts but it is not as smooth as normal
|
|
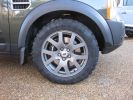
RRS Wheels 01143 viewsGun metal powder coated RRS rims over RRS S/C Brembos
|
|

Sill Trim9 views
|
|
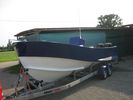
il rimorchio che traino col D3_344 views
|
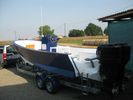
|
il rimorchio che traino col D3_250 views
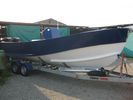
|
|
il rimorchio che traino col D3_140 views
|
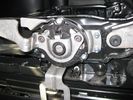
|
meccanismo elevazione rimontato42 views
|
|
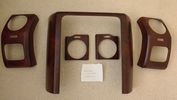
7 viewsWalnut trim
|
|
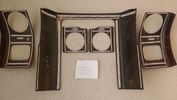
7 viewsWalnut trim
|
|
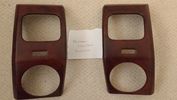
4 viewsWalnut trim
|
|
6 viewsWalnut trim
|
|
6 viewsWalnut trim
|
|
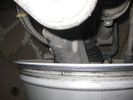
genuine 17 rim suspension view59 views
|
|
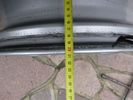
genuine 17 rim width46 views
|
|
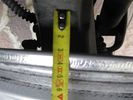
genuine 17 rim suspension clearance70 views
|
|
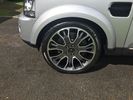
Overfinch rims 94 views
|
|
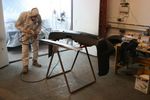
High Build Primer74 views
|
|
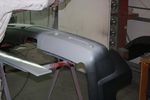
High Build Primer73 views
|
|
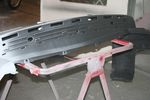
Rear Bumper High Build Primer & Showing Tread Plate Removed & Fixing Points Top84 views
|
|
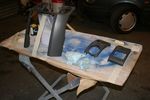
H Trim & Side Vents Plastic Promoted89 views
|
|
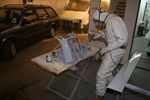
H trim Panel & Side Vents Being High Build Primer89 views
|
|
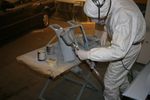
H Trim High Build Primer81 views
|
|
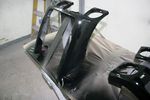
Trim Plain Black & First Coat Of Lacquer104 views
|
|
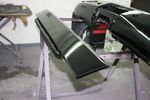
Lower Tailgate Trim Lacquered109 views
|
|
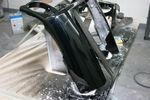
H Trim Finished106 views
|
|
H Trim Side Leg Reflection94 views
|
|
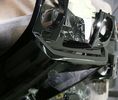
H Trim Polished and Ant Hologram Polished97 views
|
|
H Trim Re Fitted140 views
|
|

H Trim Re Fitted113 views
|
|

CALENDAR ENTRY264 viewsCRIMEA - going up to Chufut-Kale (564,5m) - 2011-07-05 12:47:04 527 m N44 44.006 E33 55.885
|
|

CALENDAR ENTRY249 viewsCRIMEA - between Bahchisaray and Sevastopol - 2011-07-05 19:43:43 220 m N44 38.481 E33 41.940 Winch was a must to get out of there :)
|
|

CALENDAR ENTRY248 viewsCRIMEA - between Alushta and Solechnogorsko 2011-07-07 19:24:29 196 m N44 44.190 E34 28.784
|
|
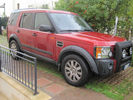
202 viewsil bidone rosso....
|
|
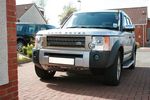
Trial Fit of Grill Mod154 viewsD3 grill cut out and FFRR grill inserted for final cutting of profiles. Next stage to prime and paint grill in finished colour and then bond FFRR section in place.
|
|

Rimozione portaoggeti superiore71 views
|
|
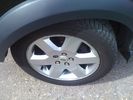
Slight kerbing on wheel rim edge47 views
|
|
Centre console in black62 viewsnew mount installed for tom tom, thanks to Brucey for the use of his skills
|
|
N/S vent in black55 views
|
|
53 views
|
|
57 views
|
|
60 viewsCharger for tom tom, cable running behind H trim
|
|
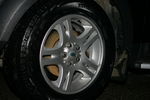
18" RRS rims and Pirelli ATR109 views
|
|
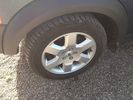
hse rim15 views
|
|
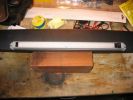
LED light - fitted to trim105 views
|
|
106 viewsCarpet panel pried away from tailgate trim
|
|
Fitted with RRS rim sand 255/55/19 Pirelli scorpions zero41 views
|
|
VA\'s trim...... before!100 views
|
|
313 views
|
|
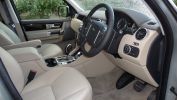
Almond/Arabica with Grand Black Laquer Trim492 views
|
|

HSE Interior148 viewsBlack Leather interior with upgraded Steering Wheel and Wood Trim
|
|
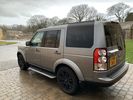
Thread upload0 viewsImage uploaded in thread 178774
|
|

Thread upload6 viewsImage uploaded in new thread
|
|

PCB Trimmed a little38 views
|
|
![Filename=kit804-trim-clip-selection-box-discovery-3-4-rrs-frelander-2-evoque-1238394-p[ekm]270x172[ekm].jpg
Filesize=16KB
Dimensions=270x172
Date added=07.Feb 2019 kit804-trim-clip-selection-box-discovery-3-4-rrs-frelander-2-evoque-1238394-p[ekm]270x172[ekm].jpg](albums/userpics/33392/thumb_kit804-trim-clip-selection-box-discovery-3-4-rrs-frelander-2-evoque-1238394-p%5Bekm%5D270x172%5Bekm%5D.jpg)
Thread upload7 viewsImage uploaded in new thread
|
|

Thread upload2 viewsImage uploaded in thread 13859
|
|

LA501-014 - Technical Bulletin - Front Door Exterior Trim Detachment84 views
|
|
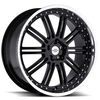
Thread upload0 viewsImage uploaded in thread 181176
|
|

permagrim19 views
|
|

LAND ROVER DISCOVERY 3 istruzioni rimozione pannello porta posteriore Rear Door Trim Panel Removal 7E0186 viewsLAND ROVER DISCOVERY 3 istruzioni rimozione pannello porta posteriore Rear Door Trim Panel Removal 7E0
|
|

LAND ROVER DISCOVERY 3 istruzioni rimozione pannello porta posteriore Rear Door Trim Panel Removal 7E0112 viewsLAND ROVER DISCOVERY 3 istruzioni rimozione pannello porta posteriore Rear Door Trim Panel Removal 7E0
|
|
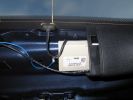
Left Antenna box199 viewsBehind trim left side rear windoa
|
|

53 views
|
|
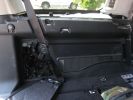
372 viewsHere is the left rear trim panel removed. GTR proved useful in the removal process! The cubby box snaps on to the top of the panel.
|
|
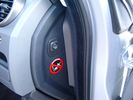
Air Suspension ECU Fuse 35P cut off switch.3820 viewsThis shows the SPST rocker switch mounted in the blank plate installed in lieu of a manual passenger side air bag shut down switch - now automatic via passenger seat pressure switch. Fuse 35P (5 amps) is located in the interior fuse box behind the lower glove box and protects the ignition power supply to the Air Suspension ECU. When the SPST switch is moved to the OFF position, the RAISE /LOWER switch on the centre console is not powered, and hence does not function. As such, some signals from the wheel height sensors and CPU are ignored. By itself however, removing F35P will probably not stop the 3 from self dropping, particularly after the engine is turned off.
Fuse F3E, (5 amps), located in the engine bay fuse box by the starting battery protects the circuit that provides feedback to the Air System ECU indicating that the Compressor Relay has successfully operated and that the Air Compressor is or should be operational, can also be removed, (but is probably not totally necessary), as it gets its power thru F26E. Hence Fuse F26E, (20 amp), also located in the engine compartment fuse box is the fuse that must be removed. This fuse protects the circuit that provides full time battery power to the Air System ECU. When in place, current thru the fuse powers the periodic re-levelling action, (usually lowering a bit with that brief air release noise), that often occurs when the vehicle is parked and the engine is off.
Removing F26E fuse will stop the auto levelling action and also inhibit any other down to the stops signals, (engine running or not). When F26E is removed, no power can flow thru to F3E, hence removing F3E is more for insurance than an absolute requirement. The same with F35P, removing F26E removes primary full time power from the Air Suspension ECU, and hence removing the F35P fuse should not really be required either as long as F26E has been removed.
|
|

Wheel cut thru definitions and specs898 viewsNote the location of REAR SPACING and also OFFSET; probably two of the most important dimensions and not always understood as related to wheel size and relationship to the brake components.
For the 3, Rear Spacing is approximately 6.5 inches or 165 mm for a nominal 8" rim. Offset is 53P or 53mm Positive, which means the distance from the machined hub flat mounting surface to the rim's true centreline is 53 mm in the outboard direction. (The rim illustrated has a negative offset.)
As Positive offset increases, this means the wheel wraps around the disc brake mechanism more deeply, and hence the more the wheel would cover the brake parts. This is why most 18" wheels will not fit with the larger Brembo "supercharged engine" brake calipers.
Pitch circle diameter is 120mm; Pattern is 5 lug, and the tyre load rating is 112 with a recommended tyre speed rating of H or higher along with the XL load rating. For the 3, the stock tyre diameter is about 30 inches. The 255/60/18 or 255/55/19 OEM tyre outside diameter is 30.04 inches; Wheel lug torque is from 130 to 150 Nm or 96 to 110 lbf-ft and the lug nut hex socket size is 22mm.
Max Load High Speed Driving Tyre pressures are Front, 33 psig, (230 Kpa) and Rear, 42 psig, (290 Kpa).
The OEM rims are rated at 940 kgs, the highest that LR makes, hence while rims from other Land Rover products may physically fit, the odds are they are under rated in a weight sense.
|
|

Underhood Fuse and Relay Box drawing 3054 viewsShows the various fuse and relay locations. Fuse 3E, (5 amp), and Fuse 26E, (20 amp), as well as upgraded 70 amp Relay 7, part number YWB500220, locations are displayed. Relay 7 sends battery power to the compressor from the 60 amp fusible link called up as 10E. Fuse 26E is what provides full time always on battery power to the air suspension ECU and hence powers the auto level wakeup when the vehicle is shut down and say parked for the night. Removing F26E is the primary method to disable the air suspension system; Removing F35P is more if you want to experiment with it from inside.
I found it useful when I had a suspension problem, (actually a wheel alignment problem picked up by the steering wheel angle sensor), that only showed itself on the highway but allowed for no trouble light driving in the city. This was because in the city, the steering wheel was always in motion and rarely was the vehicle driven in a near straight line for very much distance.
|
|

LR3 Denso Alternator YLE500390 rear view709 viewsThis picture shows the rear of the YLE500390, the Land Rover part number for a newer design alternator utilizing the Transpo IN6349 regulator with the "hidden" cooling fins. Note the visual difference in the rear view of the next file jpg.
If the alternator is a rebuilt, (service exchange unit), but Land Rover supplied, then the part number is LR008860 or similar. (Note that 0 in LR0 is zero.)
Two Denso part numbers exist for the alternator as well, 4280003690 and 4280003691. The rating of the petrol V8 alternator is nominal 12 VDC and 150 amps. In normal day to day operation, they seem to run about 14VDC - usually between 13.9 and 14.1 volts at the OBD port.
For the petrol V6, the LR service exchange number is LR008862, and the 2.7TDV6 is LR008861.
The bridge rectifier within the alternator is a 12 diode avalanche type, 117mm diameter, as used in Nippondenso 120 to 160 amp alternators with the Hair Pin stator. It is similar to a Transpo INR421 which is rated for 120 to 150 amp alternators. That is probably our primary problem - the rectifier is just too light. Alternate part numbers for the bridge rectifier are Cargo 237607, Mobiltron RM-29 and AS ARC6021.
Re the B+ stud, the INR421 calls it up as an M8 x 1.25 x 30 mm long course threaded stud; some say 34 mm but that may be longer than desirable.
|
|
Thread upload3 viewsImage uploaded in thread 136491
|
|

Thread upload1 viewsImage uploaded in new thread
|
|

Thread upload1 viewsImage uploaded in new thread
|
|

LTB00203 - Technical Bulletin - Driver Air Bag Module Trim Cover Distorted - Repair Procedure76 views
|
|

Moon28 viewsMoon imaged by SLR at prime focus
|
|
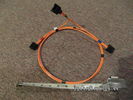
Fibre Optic MOST cable between components.560 viewsThis is a typical section of Plastic Optical Fiber (POF) optic cable with the orange coloured cladding covering the perimeter of the light transparent core. This is used as the MOST (Media Oriented Systems Transport) data transmission medium.
Note that each MOST 1355426 optical connector holds a pair of light conductor cables, one transmitting optical signal in, and the second, optical signal out. When connected to the other cables and devices, the cables form a continuous loop.
The light signal within the cable is red colour as one might expect. One break or disconnect anywhere along the loop shuts down signal transmission to all the connected components.
|
|

Mud is my friend162 viewsArgh...this is the part of cleaning the car I hate the most.
|
|
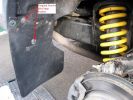
Fitting Land Rover Series 3 Rear Mud Flaps to a Disco 3/4 - A956 viewsUsed Original Screws plus two extras, Had to cut around exhaust. Once first done, laid them back to back and used first as a template to drill and cut second. Used a 5.5mm drill for the holes in the flap for the original screws and a 7mm drill to make the new holes in the plastic wheel-arch trim and lining to take the two-part trim clip (see my gallery for a picture of this style clip) - this photo of the new flap shows two screws but I modified that design to avoid using screws which corrode with time. Ignore the fact the pics are taken on a D3 Coiler, it makes no difference.
|
|
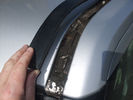
Mud under roofrail trim182 views
|
|
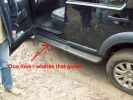
Side Step Trim Lost226 views
|
|

Side Step Trim Found189 views
|
|
Thread upload22 viewsImage uploaded in thread 127702
|
|

Thread upload26 viewsImage uploaded in thread 165652
|
|
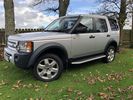
Thread upload6 viewsImage uploaded in thread 173579
|
|
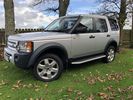
Thread upload3 viewsImage uploaded in thread 180713
|
|

89 viewsI clipped a wallaby\'s tail -on dusk and in rain. There was no apparent damage upon initial inspection - however the flood light surround trim must have fell out on the return trip home.
|
|
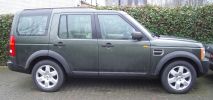
New tyres and \'new\' rims. 79 views
|
|

New leather steering wheel trimmed by JD Trimming in Walsall73 views
|
|
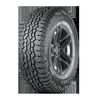
Thread upload0 viewsImage uploaded in thread 183871
|
|
Thread upload11 viewsImage uploaded in new thread
|
|
New rims and tyres taken for a run241 views
|
|

80 viewsOff side floodlight surround trim piece.
|
|

Origional 20 inch Wheels27 views
|
|

Fuel pressure at startup1 viewsFuel pressure starts at about 0.3 bar when ignition is on and lift pump is priming - then it goes off the scale - engine starts but it is not as smooth as normal
|
|
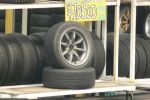
Secondhand Minilites?202 viewsI wish that these were available for the Discovery 3 in 8x17 or 18" sizes.
Lots of secondhand tyres and rims stacked around tyre and motor car dealers yards everywhere we went in Japan from Hokkaido right down to Kyushu.
|
|
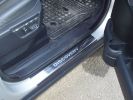
Sill plates309 viewstasmod\'s D3 sill trims
|
|
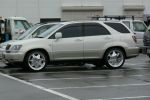
Lexus193 viewsBling factor alive and kicking on a Lexus spotted in the small mountainside village of Takayama. Again with the ultra low profiles. (Duh - how else can you have large shiny rims?)
|
|
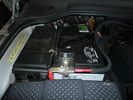
Traxide711 viewsLeft hand drive, primary battery with Traxide cable routed. The battery is on the right.
|
|
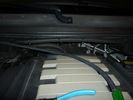
traxide cable run742 viewsTraxide cable between primary and secondary battery.
|
|
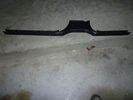
Left hand trim1020 viewsLeft hand trim
|
|
Left hand trim786 viewsLeft hand trim
|
|
Left hand trim752 viewsLeft hand trim
|
|
Left hand trim1014 viewsLeft hand trim
|
|
Left hand trim1060 viewsLeft hand trim
|
|
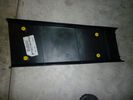
Left hand trim1065 viewsLeft hand trim
|
|
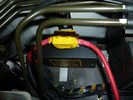
traxide808 viewsThis would be an ideal location for the traxide 80 kit, there are pre threaded holes available here.. would take a bit of fitting, and extending the cable to the primary battery would need to be extended.
|
|
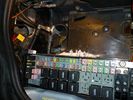
Battery Box Primary186 viewsThis visual is what is next to, behind and under your battery. It is important to note that the negative terminal which is prone to corrosion is in the rear, nearest to everything to maximize damage. The white powder pictured is baking soda. This is carefully used with a damp rag to neutralize any effect of battery acid (hydrochloric acid).
|
|
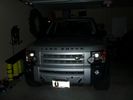
D44 Winch stainless fairlead660 viewsThe completed D44 winch installation, including the stainless fairlead. A stainless trim plate, and NA license plate holder is on the way.
|
|

Rimini Red305 views
|
|

Castello di Zumelle - arrivo prima parte percorso208 views
|
|
Parcheggio dopo termine prima parte - Castello di Zumelle201 views
|
|
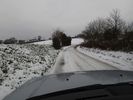
Primrose Lane 19/1/201318 views
|
|
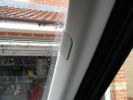
To remove a post trim insert small screwdriver under air bag logo, underneath is a torx screw357 views
|
|
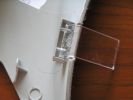
Back of A post trim showing how windscreen ticket holder attaches362 views
|
|
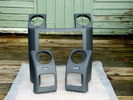
"H" Trim and outter vent trims66 views
|
|
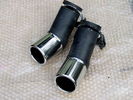
Exhaust Trims68 views
|
|
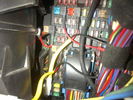
Fuse Panel showing F35P Add A Circuit installed1241 viewsFive amp fuse F35P is located towards the top left in this jpg. The other three Add A Circuit devices are for other items - powering my cell phone base etc.
Note the orientation of the Add A Circuit as this matters. Also one can just see a red tab sticking out from behind the device. The red is the conductor crimp end of a narrow 2.8mm male spade type connector that inserts into one of the "fuse" slots.
|
|
57 views
|
|
35 views
|
|
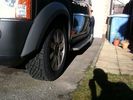
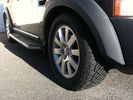
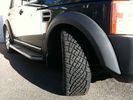
General Tyre AT's on 18" HSE Rims36 views
|
|
General Tyre AT's on 18" HSE Rims37 views
|
|
General Tyre AT's on 18" HSE Rims39 views
|
|
General Tyre AT's on 18" HSE Rims33 views
|
|
33 views
|
|
I love the snow in the rims!!73 viewsAfter the Virginia Blizzard of December 2009.
|
|
206 viewsAssembly, Excess bars still to be trimmed after fitment
|
|
202 viewsExcess bars still to be trimmed - BUT WILL IT FIT IN THE GARAGE??
|
|
233 viewsConsole Trim Removed, as well as the top of the floor console.
|
|
246 viewsAlmost done. All the trim is in, but the controllers are not yet mounted.
|
|
no need to remove this trim - cables easily go underneath them325 views
|
|
remove metal clips from floor panel and reinstall on to the plastic trim295 viewsIf you leave the clips in place and try to force the trim back in the clips are knocked through the floor unit and it takes an hour to get them out!!
|
|
make sure rubber/fleece part are on outside of trim284 views
|
|
Side view ARB bull bar and Coopers STT on 17 inch rims.506 views
|
|
il "MATTO" di Milano PRIMA198 views
|
|

Thread upload0 viewsImage uploaded in new thread
|
|
Thread upload10 viewsImage uploaded in thread 128829
|
|
Thread upload1 viewsImage uploaded in new thread
|
|
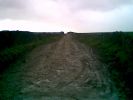
North end of Primrose Lane, Mellor Moor164 views
|
|
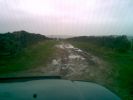
South end of Primrose Lane, Mellor Moor160 views
|
|
stripped back and vactan rust restorer and primer 24 views
|
|

Thread upload1 viewsImage uploaded in new thread
|
|
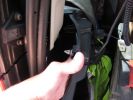
pull off trim here353 views
|
|
pull outwards here347 views
|
|
ciggy lighter with yellow connector386 views
|
|
pulls out enough to get to connector - i put a rubber mallet in there to keep it open376 views
|
|

200 views
|
|

Rear Door Trim Panel Removal.pdf633 views
|
|

74 views
|
|

Rear Door Trim Panel Removal432 views
|
|

Rear Quarter Trim Panel Removal425 views
|
|

Rear quarter panel removal171 viewsThe left hand side has the PDC module amongst others in it.
The one for the bluetooth module is the drivers side pannel.
|
|

Rear Quarter Trim Panel Removal359 views
|
|

Rear Quarter Trim Panel83 views
|
|

Removing rear panel87 views
|
|
26 views
|
|

132 views
|
|
331 views
|
|
Thread upload10 viewsImage uploaded in new thread
|
|
Thread upload12 viewsImage uploaded in new thread
|
|
Thread upload37 viewsImage uploaded in thread 103279
|
|

Rear Quarter Trim panel21 views
|
|

24 views
|
|

113 viewsRear Quarter Panel Removal
|
|
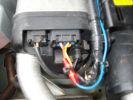
FBH red wire cut and crimped to new blue wire134 views
|
|

Removal of C-Pillar Lower Trim86 views
|
|

100 viewsNo snow in crimond on 02/02/09
|
|

Thread upload4 viewsImage uploaded in thread 13859
|
|
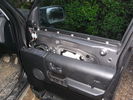
Door Card Removal27 views
|
|
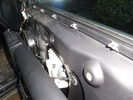
Door Card Removal - Top clips23 views
|
|

Drivers Door Speaker Connection20 views
|
|

Drivers Door Speaker Connection20 views
|
|

19 viewsDrivers Door Speaker connection
|
|

Drivers Door Powerfold wing mirror connection blocks28 views
|
|
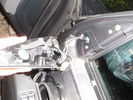
Tweeter removed and wing mirror fixing bolts visible22 views
|
|

Drivers Door wing mirror fixing bolts21 views
|
|

Monty swimming at Rock Beach5 views
|
|

Harry at Rock Beach5 views
|
|

14 views
|
|
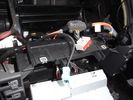
Hi Line stereo on its way out...23 views
|
|
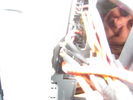
Hi Line stereo with plugs still in place14 views
|
|
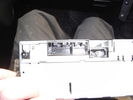
Rear of Hi Line stereo with plugs removed17 views
|
|
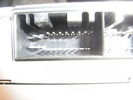
20 pin socket on rear of Hi Line stereo14 views
|
|
| 540 files on 2 page(s) |
 |
1 |  |
|