| Search results - "steering" |

Removal of the trim around the pedals285 views
|
|
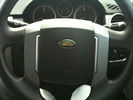
The Before - Standard Steering Wheel73 views
|
|

The Middle - Steering Wheel with Airbag Removed92 views
|
|
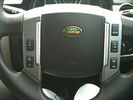
The After - Upgraded Steering Wheel91 views
|
|
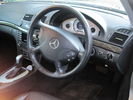
Mercedes E320 Steering Wheel!22 views
|
|

10 views
|
|

52 viewsFront suspension rebuilt in 2009 with reconditioned steering rack, new bushes etc..
|
|
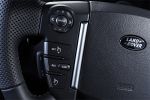
1200 views
|
|

Thread upload3 viewsImage uploaded in thread 154757
|
|

1063 views
|
|
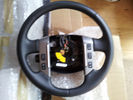
52 viewsHeated Steering Wheel
|
|

265 viewsSmooth leather steering wheel with cruise and Radio switches
|
|

Anti Lock and Traction Control description and operation.1987 viewsNote on page 6 of this 17 page pdf the significance of the Steering Angle sensor mounted on the steering wheel shaft. The paragraph regarding the plausibility check as related to the brake pedal being not depressed is why the clean operation of the second set of contacts on the brake switch matters so much.
|
|

Steering Column detailing Steering Angle Sensor1498 viewsItem 2 in the picture on page 1 of the 9 page pdf shows the location of the steering wheel sensor. Page 5 of the pdf has a paragraph describing the operation of the sensor. When the steering wheel does not point the same direction as the real wheels, then the computers can put the 3 into safe mode and down goes the suspension. See also the 17 page pdf on the Anti Lock and Traction Control pdf.
|
|

9 views
|
|

Thread upload27 viewsImage uploaded in thread 117009
|
|

7 Steering System14 views7 Steering System
|
|
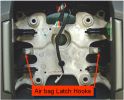
airbag latch hooks342 viewsAirbag retained to steering wheel by 2 latch springs located onto latch hooks of steering wheel
|
|
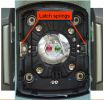
airbag latch springs326 viewsAirbag retained to steering wheel by 2 latch springs located onto latch hooks of steering wheel
|
|
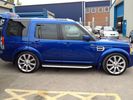
FOR SALE - ONE OFF Land Rover Disco 3 37 viewsOne of a kind Landrover Discovery TDV6 HSE LUX Model 5 door automatic 4x4 diesel evo blue. Upgrades: sidesteps, roof rails, privacy glass, front and rear heated seats/elec seats, landrover tv and headphones, 7 seater black leather, piano black dash/steering wheel, built in fridge, 6 disc changer, sat nav and bluetooth, harman kardon premium entertainment pack, by-xenon adaptive headlights , cruise control and front and rear park distance control, panoramic electric glass roof, 22inch alloy wheels, body kit
|
|

Riparazione attuatore rotante volante - Steering rotary coupling repairing22 viewsCome riparare l'attuatore rotante del volante quando si accende la spia dell'airbag.
How to repair the steering rotary coupling when airbag warning light turns on.
|
|

Brakes Description and Operation2231 viewsThis is a 17 page pdf that describes the operation of the various braking systems: the ABS, CBC, DSC, EBD, ETC, EBA, EDC, and HDC. Also discussed is the yaw rate and lateral acceleration sensor as well as the steering angle sensor.
|
|
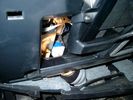
Smooth Talker Amplifier Box mounted below near steering column.180 viewsThe gold look box due to the lighting, (actually black), is the antenna amplifier located near the steering column. It can be put anyway but this seemed an OK location as I ran the antenna connector cable rearward from here to the back corner of the 3 and then up to the underside of the roof glass at the rear. The blue/white thing is the brake light switch that often must be replaced. See the Brake Light Switch file within this Gallery regarding the switch replacement.
|
|
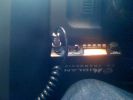
210 viewsCB location under steering wheel to left.
|
|
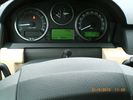
I placed the mic for the hand free at the steering colum - easy install and seems to work fine139 views
|
|
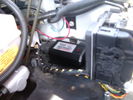
CounterAct Power Supply mounted 248 viewsPicture is blurred, however power supply is 3M two sided tape to the flat black plastic of the second battery compartment just under the antilock brake pipes to the fender side of the brake fluid reservoir. The white wire to the left rear coupler pad runs thru the firewall hole near the steering column. The blue wire to the right front coupler runs across and above the engine following the other wiring looms that cross the vehicle.
|
|
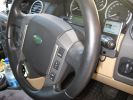
Steering wheel audio controls and iPod dock120 viewsFollowing the instructions I found on Disco3.com.uk it was a breeze the fit the steering wheel audio controls. The iPod dock was a bit more fiddly (took me several hours). Works a treat!
|
|

Steering wheel audio controls and iPod dock103 viewsFitted an iPod dock and steering wheel audio controls. Got then both from Nick at Yeoval Landrover in the UK at a fraction of the price that the Aussie dealer wanted.
|
|
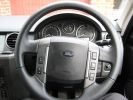
200 views
|
|
179 views
|
|
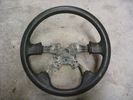
clearout d3 wheel0 views
|
|

Thread upload11 viewsImage uploaded in new thread
|
|

Thread upload12 viewsImage uploaded in new thread
|
|
clearout D4 steering wheel1 views
|
|
Steering wheel black badge148 views
|
|

d44 steering guard132 views
|
|

Thread upload10 viewsImage uploaded in new thread
|
|
Thread upload3 viewsImage uploaded in new thread
|
|

71 views
|
|

419-08 Low and High line radio systems components and operation839 viewsThis 15 page pdf displays the radio components including pinouts for both the low and high line head units and the two Harman Kardon amplifiers including the Logic 7 amp. The steering wheel controls for both the radio and phone system are also outlined along with mention of the Sirius satellite radio feature.
|
|

Thread upload6 viewsImage uploaded in new thread
|
|

Thread upload1 viewsImage uploaded in thread 198362
|
|
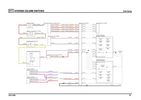
Steering Switches JPG53 views
|
|

Steering Switches51 views
|
|
Thread upload12 viewsImage uploaded in new thread
|
|
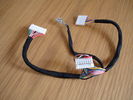
D3 Steering Wheel Wiring34 views
|
|
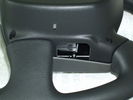
phone fitting on steering wheel17 views
|
|
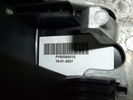
date of manuf. of steering wheel23 views
|
|
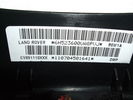
LR parts id on steering wheel19 views
|
|
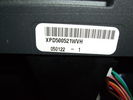
LR parts id on steering wheel20 views
|
|
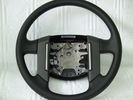
steering wheel c/w horn buttons. No airbag or cruise/audio controls20 views
|
|
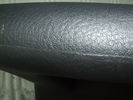
as new condition of steering wheel37 views
|
|
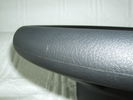
condition of steering wheel26 views
|
|
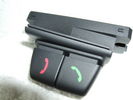
Telephone control fitting for steering wheel28 views
|
|
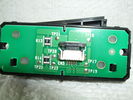
Telephone control fitting for steering wheel ( rear )24 views
|
|
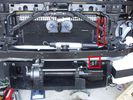
Installed winch with hydraulic hoses178 viewsThe hydraulic hoses are stiff, so I had to run them up the side of the radiator (can just see inside red boxes) to near the top of the radiator, then back down inside the engine compartment, then underneath the engine (behind the radiator) to the D4's power steering rack, where the hoses become metal. This hose routing may not be possible if the fuel-burning heater is in place (we don't have those in Aust and the space allowed room for my hands to bend and run the hoses without kinking).
|
|
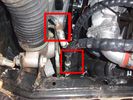
View of both hose connections to power steering system153 viewsBoth connections are shown. My friendly Qantas hydraulic hose expert cut off the elbow and modified it so I can re-install it to the PS rack before warranty work (and certainly before the vehicle is lifted off the body!!).
|
|
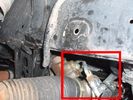
Further detail of attachment of the winch hoses to power steering system145 viewsThis is under the right (looking forward) lower plastic radiator cover.
|
|
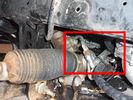
Detail of hydraulic hoses attached to power steering hoses156 viewsHoses are attached to the upstream side of power steering rack. When winch not running, PS rack sees full pressure (ie, no change from design). Biggest challenge is running stiff hoses so that they align with attach points. I got Qantas employee who repairs hydraulic baggage loaders to braise in fittings (very tight spaces and tough access).
|
|
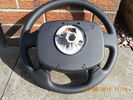
Steering wheel31 views
|
|
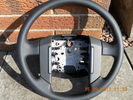
Steering wheel31 views
|
|

Vent near steering wheel450 views
|
|
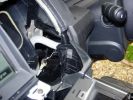
Connections to rear of vent near steering wheel503 views
|
|

Electric steering column181 views
|
|

Megan Fox153 viewsNew steering wheel!
|
|
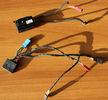
Heated Steering Wheels ECU's97 viewsEarly and Later Heated steering Wheel Control Modules
|
|

Steering Buttons62 views
|
|

Switch is blue colour thing thru the rectangular opening.3177 viewsThe blue coloured plastic bit thru the rectangular opening is the brake light switch. The fist time, I found it easier remove the switch by dropping the horizontal plastic panel, (two screws), and then slipping my hand in and rotating the switch clockwise 1/4 turn. The second time, I was able to remove the switch thru the rectangular opening and did not need to remove the horizontal lower panel. Obviously, I had to remove the sloping knee pad panel, (note sort of hinged at the bottom so pull back from the top.)
Regardless, do not touch the brake pedal - just let it sit where it wants to. One has to first remove the angled knee pad panel that sits under the steering wheel. It can be pulled from the top corner at the door side. Pulling releases a pair of those U shaped metal clips that LR loves so dearly. You have to pull quite hard. The bottom is held by a couple of plastic fingers in a couple of slots so you pull at the top till the two clips release and then rotate the panel and pull upwards a bit.
To remove the switch, you rotate it clockwise and pull outwards. Rotating the switch clockwise automatically retracts the plunger back into the switch body away from the brake pedal arm.
Similarly when you install the new switch, the required 1/4 turn anti clockwise rotation action releases the plunger so it lays up against the brake pedal arm and at the same time, secures the switch in place.
To remove the electrical wires, the switch will drop below the horizontal pad and hang from the wires so unclipping the electrical connector plug is fairly easy to do.
|
|
Steering wheel47 views
|
|
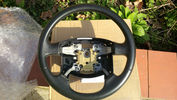
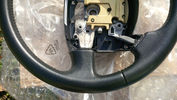
Steering wheel47 views
|
|

3 wheel steering!200 views
|
|
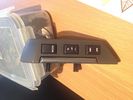
Steering Wheel Stereo Buttons21 views
|
|
steering arm ball joint65 views
|
|
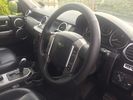
New Leather steering wheel.2 views
|
|
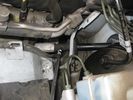
access to steering column 138 views
|
|
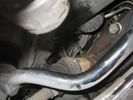
access to steering box shaft29 views
|
|
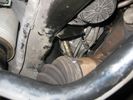
steering box shaft 137 views
|
|
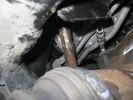
steering box shaft 231 views
|
|
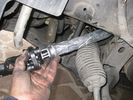
entry route new steering column40 views
|
|
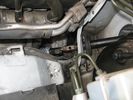
steering column view35 views
|
|
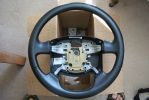
steering wheel front70 views
|
|
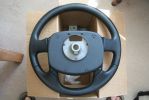
steering wheel back62 views
|
|
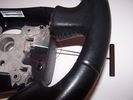
34 viewsInside track of steering wheel.
|
|

HSE Interior148 viewsBlack Leather interior with upgraded Steering Wheel and Wood Trim
|
|

LA204-006 - Technical Bulletin - Steering Wheel Vibration107 views
|
|

LA211-001 - Technical Bulletin - Steering Wheel Alignment93 views
|
|

LR Steering Wheel Removal62 views
|
|

LR3 Air Conditioner Drain Tubes behind centre console2134 viewsThis shows the two air conditioner drain tubes located left and right under the radio stack.
The tube on the left side, (steering wheel side, LHD), disattached itself and the carpet on the floor under the gas pedal etc became soaked. I think rain water from outside that comes in the outside cowl vents also exits via the tubes as I first noticed the carpet was wet after parking outside during a big rain storm.
It was relatively easy to slide up and reattach the rubber hose that runs from the rectangular shaped plastic discharge hole(s) of the heater "pan" down along the transmission hump area and thru the floor pan. There is a hose on each side of the transmission hump, but only one hose had let go on my 3. The rubber hoses just slide over the rectangular plastic openings of the two heater housing drain outlets.
To get at each drain hose, remove the vertical sort of triangle carpeted piece below each side of the radio stack. The triangles of carpet will just pull away as each is held on with those metal U clips Land Rover so likes. Dislodge each triangle at least sufficiently to get ones hand in to slide the rubber hose back on.
You will rarely see AC water on the ground as the front drains pour onto a metal underside protection skid plate and the rear drain onto the top of the left rear muffler.
|
|
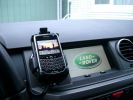
BlackBerry Tour 9630 mounted on air vent265 viewsThe antenna amplifier is mounted lower near the steering column. The amplifier box is painted black but looks sort of gold coloured due to the lighting in the other jpg showing the amp located under/near the steering column.
|
|

Underhood Fuse and Relay Box drawing 3055 viewsShows the various fuse and relay locations. Fuse 3E, (5 amp), and Fuse 26E, (20 amp), as well as upgraded 70 amp Relay 7, part number YWB500220, locations are displayed. Relay 7 sends battery power to the compressor from the 60 amp fusible link called up as 10E. Fuse 26E is what provides full time always on battery power to the air suspension ECU and hence powers the auto level wakeup when the vehicle is shut down and say parked for the night. Removing F26E is the primary method to disable the air suspension system; Removing F35P is more if you want to experiment with it from inside.
I found it useful when I had a suspension problem, (actually a wheel alignment problem picked up by the steering wheel angle sensor), that only showed itself on the highway but allowed for no trouble light driving in the city. This was because in the city, the steering wheel was always in motion and rarely was the vehicle driven in a near straight line for very much distance.
|
|

Thread upload5 viewsImage uploaded in new thread
|
|
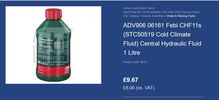
Thread upload5 viewsImage uploaded in new thread
|
|

LTB00097 - Technical Bulletin - Steering Knock102 views
|
|

LTB00105 - Technical Bulletin - Steering Gear Removal and Installation66 views
|
|

55 views
|
|

LTB00154 - Technical Bulletin - Squeak from Steering Gear67 views
|
|

LTB00222 - Technical Bulletin - Steering Gear Tie Rod Tie Rod End Diagnostic Procedure and Required Replacement Parts Information128 views
|
|

LTB0030239 views
|
|
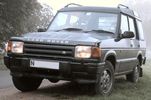
First Discovery10 viewsA battered-to-death-by-farmers and then brought-back-from-the-dead 300TDi Disco. When first seen the driver's seat was a plastic crate. Resprayed in Eastnor Green with replacement front seats and steering column controls that had been chewed off by farmer's dog. In many respects my best Land Rover buy ever!
|
|

New leather steering wheel trimmed by JD Trimming in Walsall73 views
|
|
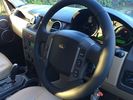
Thread upload38 viewsImage uploaded in thread 103003
|
|
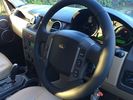
Thread upload41 viewsImage uploaded in thread 103003
|
|
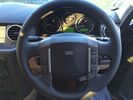
Thread upload48 viewsImage uploaded in thread 103003
|
|

Worn leather steering wheel48 views
|
|

Thread upload40 viewsImage uploaded in thread 103003
|
|

Thread upload21 viewsImage uploaded in new thread
|
|
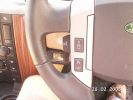
219 viewsDrivers view through the steering wheel.
|
|
Thread upload10 viewsImage uploaded in thread 169405
|
|
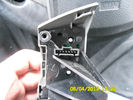
Steering wheel Switches46 views
|
|
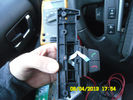
Steering wheel Switches45 views
|
|
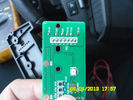
Steering wheel Switches43 views
|
|
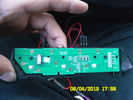
Steering wheel Switches47 views
|
|
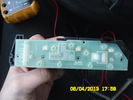
Steering wheel Switches40 views
|
|
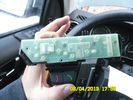
Steering wheel Switches45 views
|
|
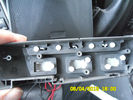
Steering wheel Switches45 views
|
|
Steering wheel Switches42 views
|
|
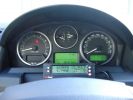
ScanGauge II on steering column of LR3801 viewsMAP is Manifold Absolute Pressure, what I call Vacuum.
The volts is I think the battery charging voltage as it moves around from about 12.4 when shut down to 13.5 when the batteries seems charged; 14.9 is about as high as I have seen it display.
You also have RPM, speed in MPH or KPH, coolant temperature and a bunch of other readings including sort of instantaneous fuel in a variety of units.
Also under some conditions, the ScanGauge will reset the MIL light as well. The background colour of the display can be changed to many different colours. I have it set to match the LR green.
|
|
smooth steering wheel16 views
|
|

steering column66 views
|
|
Steering cutting info99 views
|
|
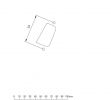
steering cutting template59 views
|
|
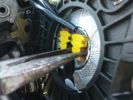
Steering wheel airbag connectors130 views
|
|
93 views
|
|
95 views
|
|
103 views
|
|

96 views
|
|
89 views
|
|
102 views
|
|
120 views
|
|
130 views
|
|
100 views
|
|
98 views
|
|
119 views
|
|
121 views
|
|
113 views
|
|
128 views
|
|
131 views
|
|
127 views
|
|
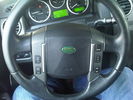
steering wheel for BT project72 views
|
|

steering wheel removal.pdf544 views
|
|
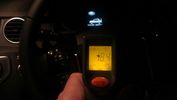
Steering wheel temp18 views
|
|
![Filename=steering-geometry-and-caster-measurement[1].pdf
Filesize=203KB
Dimensions=320x240
Date added=09.Nov 2011 steering-geometry-and-caster-measurement[1].pdf](images/thumb_pdf.jpg)
steering geometry32 views
|
|
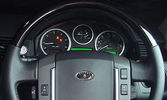
PTI steering wheel90 views
|
|

Thread upload5 viewsImage uploaded in thread 190060
|
|

File - steeringcolumn.pdf438 views
|
|
Thread upload13 viewsImage uploaded in new thread
|
|
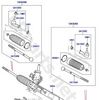
Steering11 views
|
|
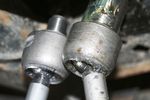
Steering Track Rods153 views
|
|

59 views
|
|
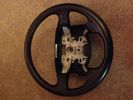
Thread upload22 viewsImage uploaded in new thread
|
|

steering_angle_sensor_removal99 viewssteering_angle_sensor_removal
|
|

Thread upload13 viewsImage uploaded in thread 115007
|
|
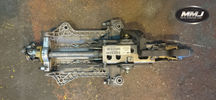
Thread upload6 viewsImage uploaded in new thread
|
|

Thread upload12 viewsImage uploaded in new thread
|
|

Thread upload6 viewsImage uploaded in thread 111261
|
|

374 views
|
|

Thread upload4 viewsImage uploaded in thread 206617
|
|
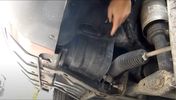
Thread upload5 viewsImage uploaded in new thread
|
|

Thread upload35 viewsImage uploaded in thread 106526
|
|
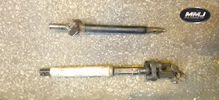
Thread upload12 viewsImage uploaded in new thread
|
|

Thread upload8 viewsImage uploaded in new thread
|
|
Thread upload7 viewsImage uploaded in thread 205523
|
|
Thread upload0 viewsImage uploaded in new thread
|
|
Thread upload9 viewsImage uploaded in thread 133325
|
|
Thread upload2 viewsImage uploaded in new thread
|
|

Thread upload7 viewsImage uploaded in new thread
|
|
9 views
|
|
Thread upload13 viewsImage uploaded in thread 140808
|
|

Thread upload9 viewsImage uploaded in new thread
|
|

Thread upload10 viewsImage uploaded in thread 164399
|
|

Thread upload3 viewsImage uploaded in thread 156055
|
|

Thread upload3 viewsImage uploaded in new thread
|
|

Thread upload11 viewsImage uploaded in new thread
|
|
22 views
|
|
Thread upload7 viewsImage uploaded in new thread
|
|
Thread upload2 viewsImage uploaded in new thread
|
|

Thread upload2 viewsImage uploaded in thread 209420
|
|

Thread upload5 viewsImage uploaded in new thread
|
|

Thread upload2 viewsImage uploaded in new thread
|
|

Thread upload0 viewsImage uploaded in new thread
|
|

Thread upload3 viewsImage uploaded in thread 209420
|
|

Thread upload6 viewsImage uploaded in new thread
|
|

Thread upload4 viewsImage uploaded in new thread
|
|

Thread upload0 viewsImage uploaded in new thread
|
|

Thread upload5 viewsImage uploaded in new thread
|
|

Thread upload6 viewsImage uploaded in thread 120462
|
|
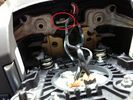
31 views
|
|

Thread upload5 viewsImage uploaded in thread 120462
|
|

Thread upload14 viewsImage uploaded in thread 166168
|
|
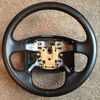
7 views
|
|

Tutankhamun61 viewsOld Steering wheel
|
|
Thread upload2 viewsImage uploaded in thread 181003
|
|
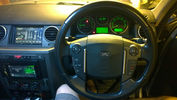
D4 steering wheel in a D3 - BBS kit40 views
|
|
Thread upload11 viewsImage uploaded in thread 117853
|
|
|
|
|
|