| Search results - "with" |
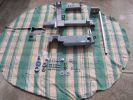
The full complement of bits and pieces, major parts back from the powder coaters, all bolts nuts washers replaced with stainless steel241 views
|
|
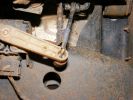
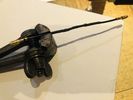
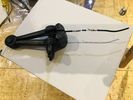
754 viewsNew control rod is carbonfibre/fibreglass hollow tube, with a rubber grommet fitted to one end (screwed and epoxy-ed) and steel rod bent into shape at the other (epoxy-ed).
|
|
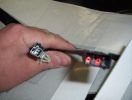
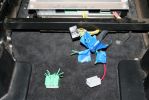
heated seat (base) wiring411 viewsThe Small connector takes the plug from the seat back pad, the larger connector (with red) is fitted into the multiplug casing uder the seat - the male side of this is already pre-wired.
|
|
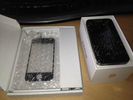
iphone 4 with knackered screen97 views
|
|

Scorched Pad15 viewsThis is where the seat rod made contact with heating element.
|
|
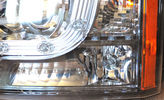
D4 Adaptive Xenon with cornering light90 views
|
|
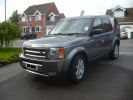
Disco 3 TDV6 GSLE75 viewsLimited Edition. Parking sensors front & rear, Full body skirts with chrome trim fog lights, Twin chrome tail pipes,
|
|
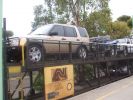
01 D3 on Train184 viewsEasiest method of crossing 2300 km of Nullabor Desert - on the Indian Pacific train. D3 with trailer - effectively have 5 spare tyres if it really gets desperate!
|
|
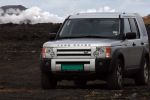
With lava and hot spring at Rekjanes117 views
|
|
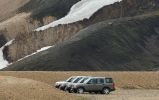
Discovery 4788 viewsCALENDAR 2008 ENTRY - Picture taken at Landmannalaugar in Iceland meeting up with a group Disco3 from safaris.is.
|
|
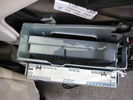
Proper D4 bracket with D4 tv tuner in a D4 ...why is the bracket so big ...?298 views
|
|
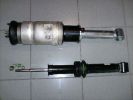
382 views
|
|
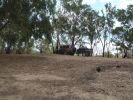
02 Last Photo before the little wheel problem saga222 viewsThis is my D3 with trailer on the banks of the Darling River, literally "back of Bourke" (the regional definition of the start of the Australian Outback). We were the first vehicle in a week to try and drive this route from Bourke to Wilcannia on the account of floods (first water in 7 years). Little did we know that 3 hours later there\'d be a bit of a wheel and tyre problem appearing...
|
|
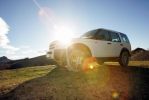
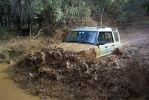
the D3, 17" with stock tyres, working very good in the mud ! Still estonished by this ...618 views
|
|
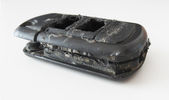
Tagliare lungo il perimetro della chiave - Cut along the key perimeter19 viewsI gusci sono saldati ad ultrasuoni. Con il disco tagliare lungo il perimetro della chiave in corrispondenza della giunta: lo spessore è di circa mm.3. Io non sono andato fino in fondo per evitare di danneggiare qualcosa, una volta inciso il solco per mm.2,7 ho fatto leva col cacciavite e ho strappato il materiale restante.
The body is ultrasonically welded. With the disc cut along the perimeter of the key in correspondence of the joint: the thickness is approximately 3mm. I have not gone all the way down
|
|
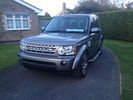
29 viewsdisco 3 with 4 facelift
|
|
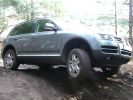
223 viewsThis is the Touareg with the 6cyl engine and rear difflock. did well, useless air-suspension though.
|
|
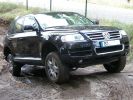
241 viewsThis Toureg is stuck - doesn´t look like it. After 8 hours of driving everyone agreed that with the big 10cyl. diesel engine you should probably oder the rear difflock as well... In this picture the rear left anf front right wheels have no grip, esp or whatever just doesn´t do it.
|
|

194 viewsD3 with wind turbins in background, plus a Toyota
|
|
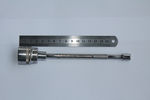
161 viewsOriginal adapter for D3 with thanks to the clever members of the forum
|
|
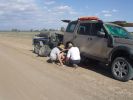
03 The first bit of tyre/wheel problem251 viewsSomewhere in the Australian outback on a 45 deg C day in Jan 08, a D3 had a bit of a flat tyre problem. "No worries, mate" st we had 3 spares (plus 2 more if we abandon the trailer), 150l of water, 4 days of food, and an EPIRB if things really go crook. The first clue that this was not a "normal" flat was when I handled a wheel nut and ended up with a blister from a burning hot nut (the ambient wasn\'t THAT hot).
|
|

Tagliare per eliminare parte del coperchio - Cut to remove part of the cover14 viewsE' meglio prima levare il circuito stampato e poi la lama della chiave, per evitare di danneggiarlo. Tagliare sopra il tasto superiore per rimuovere solo la parte con i tasti.
Is better to remove the printed board first then the key, to prevent damage. Cut over the top button to remove only the part with the buttons.
|
|

Looks nice with the roof down!70 views
|
|
Garmin GPS mount without GPS bracket250 views
|
|

Estrarre il circuito stampato con la batteria - Exctact the printed board with the battery18 viewsRimossa la parte superiore del contenitore, estrarre il circuito stampato sollevandolo leggermente dalla parte della batteria.
Removed the top of the box, pull out the printed circuit board slightly lifting from the battery side.
|
|
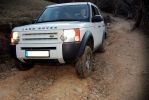
testing "cross axel"652 viewstesting "cross axel" with and without TR on
|
|

Chiave aperta12 viewsUna volta estratto il circuito stampato, facendo leva col cacciavite sulla parte rimasta attaccata ho prelevato la lama della chiave da inserire nel box nuovo.
Once you remove the printed circuit board, leveraging with the screwdriver on the part remained attached, I picked up the blade of the key to be inserted in the new box.
|
|
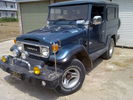
Seriously....anyone want to mess with that bumper71 views
|
|
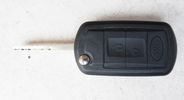
Chiave finita - Finished key18 viewsHo iserito il tutto nel nel nuovo contenitore pagato €4,00, ho incollato con la colla cianoacrilica, ne basta poca, e questo è il risultato.
I put all in the new container paid € 4.00, I glued with super glue, it only takes a little, and this is the result.
|
|
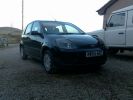
Fiesta with Angel Eyes49 views
|
|
Fiesta with Angel Eyes 348 views
|
|
Fiesta with Angel Eyes 253 views
|
|

07 Back side of failed tyre340 viewsThis is the back of the blown tyre. It looks like any other worn tyre which has run a bit while flat. Note that we were running on wider 19" RRS wheels (have 4 19" MTRs + 1 old A/T on the original 5 wheels). Also have a rear-mount spare tyre holder which is really convenient with the wider rim and the fact that the tyre was still hot (it had some melted rubber on the other side!!)
|
|
Cavo nel morsetto - Cable in clamp48 viewsHo inserito il terminale rotto nel morsetto: bisogna sforzarlo molto e ho praticato una cava attraverso il foro della vite con una punta in modo che il terminale non possa scivolare.
I entered the terminal broke into the clamp: you have to force it a lot, and I practiced a quarry through the screw hole with a bit so that the terminal can not slip.
|
|
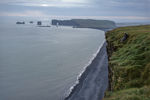
Watching puffins at VÃk21 viewsGreen cliffs with the black lava sand beach as backdrop.
|
|
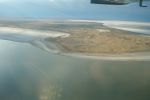
Lake Eyre with water in 2000 79 viewsTook a flight from William Creek to view the lake with water in it.
|
|
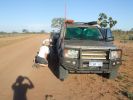
08 D3 stranded with a seized smoking wheel315 viewsAbout 1 hr after replacing the blown tyre, strange noises emanated from the stability control system and speed dropped off. Then I looked in the rear view mirror, and noted a cloud of dust along with a whiff of black smoke. This led to a very quick stop (no traffic on this route for over a week, so no worries about having to signal exiting the road). Took a look and WOW. The right rear wheel was glowing a dull red colour, and burning rubber smoke was wafting from the red glow over the fuel lines.
|
|
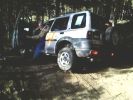
Freelander trying hard.107 viewsStill not stuck but getting there. In the end pulled it out with a Defender. Picture taken at Offroad-Training in Linthe/Germany
|
|
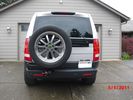
Highlift mount added27 viewsHighlift mounted in this position allows for any length with out overhead clearance issues if stood upright
|
|

09 Starting to remove the seized brake assembly296 viewsBy this time we\'d poured about 8l of water on the dull-red glowing and burning wheel assembly (too close to 140l of 98 octane petrol). Sudden cooling cracked the disk brake which showed mangled park brake parts. How to remove a brake disk without the right star fitting? First remove the caliper then get a sledge hammer?!!
|
|
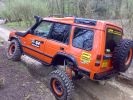
COVER SHOT FOR TOTAL OFF ROAD114 viewsG WAGEN AXELS FITTED WITH HYDRAULIC FRONT + REAR DIFF LOCKS + EXTREAM SUSPENSION SYSTEM FRONT + REAR WARN WINCHES.
|
|
9 views
|
|

The s2a could not make this one - too deep.447 viewsGot towed through with a dead engine by a Tdi Defender - Betsy is petrol and needed a gallon of WD40 to get going after this!
|
|
all lights switched on 80 viewsthis is the Bixenon with LR HID converted spotlights and the rigid SR40 lightbar switched on
|
|

Attuatore rimontato - Actuator reassembled40 viewsAttuatore rimontato col cavo di emergenza.
Actuator riassemble with emergency cable.
|
|

The Middle - Steering Wheel with Airbag Removed92 views
|
|
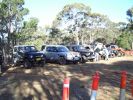
Start of Round 2189 viewsLined up with some of the Class B entries
|
|
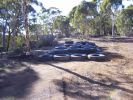
The tyre hill182 viewsWe had to drive over this without stopping. Made it, no problem :)
|
|
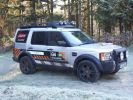
Rally Wales 2008 200 views2009 G4 now with black RRS wheels lightforce lights and strobe lights in bumper and rear lights
|
|

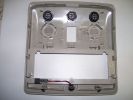
244 viewsThe roof panel (inside) with the internal bracket
|
|
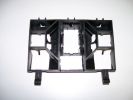
137 viewsThe bracket with sections removed for the switches
|
|
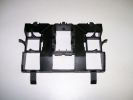
144 viewsThe bracket with sections removed (inside)
|
|
160 viewsRoof panel with the new switches
|
|
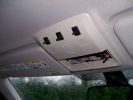
239 viewsPreview of the panel with the switches
|
|
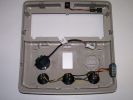
207 viewsRoof panel with wired switches and PTI microphone
|
|
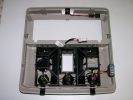
206 viewsRoof panel with switches, PTI microphone and bracket
|
|

197 viewsCable loom with connector
|
|

This picture was taken with garage doors closed.43 views
|
|
TV ariel x2 with built in power amplifier.83 views
|
|
![Filename=100_2785[1].JPG
Filesize=115KB
Dimensions=1280x960
Date added=13.Oct 2014 100_2785[1].JPG](albums/userpics/22146/thumb_100_2785%5B1%5D.JPG)
25 viewsfront cam with swivel head
|
|
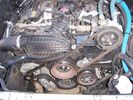
242 viewsWith the viscous fan and other covers removed
|
|
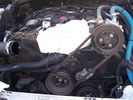
221 viewsRemove the air intake shuttle cut off valve, covering hole with rag
|
|
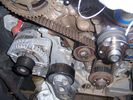
252 viewsThe old belt with rubber crumbs showing
|
|
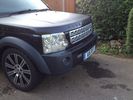
D3 Java black with D4 type grille175 views
|
|
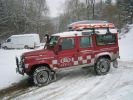
Extreme medics 110232 viewsFull Ambulance spec with extrem offroad cabability, 110 v8
|
|
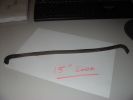
183 viewscame loose when washing car with power washer - its 15" long and hollow
|
|
11207 viewsThe controller components are complete and fit neatly within the boot space.
|
|
MrH with no wheels160 views
|
|
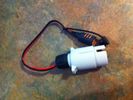
12S plug with Ctek lead attached29 views
|
|

12S plug from eBay and Ctek lead (provided with MXS-10) - before cutting the ring terminals off.28 views
|
|

Virgin Snow134 viewsWent for a play in some new snow so I could practice and get my driving style right on close to zero friction surfces. Hard to tell from this photo, but car is parked on a 1:6 slope heading uphill, with hard packed ice under the fresh snow covering. I stopped here to practice my hill starts on ice...I was there for some time :)
|
|
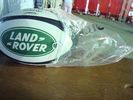
Rugby ball prize17 viewsWon this at the Dubai 7's in 2010. The LR stand had a competition. You had to push a LR4 over a something like an uphill speedbump. A modified bullbar resembling a scrumming machine allowed 3 people to touch, engage and push the beast over the bump. Me and my 2 kids - with a little bit of help, managed it and for our trouble got this ball !!!
|
|
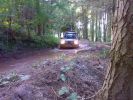
2008 Calendar Entry - DiscoStu at Boughrood with LROI magazine657 views2008 Calendar Entry - DiscoStu in the mud at Boughrood, September 2007 with LROI magazine
|
|
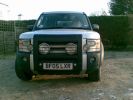
A frame with driving lamps133 views
|
|
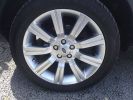
Stormer alloy45 viewsReplica stormer alloy, 20\'\' with 275 45 r20 general grabber uhp.
|
|
90 with new wheels! (avatar)80 views
|
|
90 with new wheels!83 views
|
|
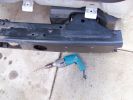
Rea inner bar with end trimmed258 views
|
|
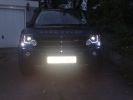
led with guards142 views
|
|
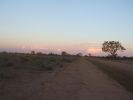
18 Brake "repairs" finished at sunset296 viewsWe just finished the repair at sunset and were driving slowly with 3 brakes. Oddly the D3 didn\'t behave any differently at 50 km/hr than it did normally. We had 4 instances of hitting the (3) skids for kangaroos before arriving in Wilcannia 3 hrs later. The brake light warning was making very distinctive noises and flashing randomly, though.
|
|
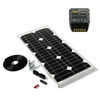
Thread upload9 viewsImage uploaded in new thread
|
|
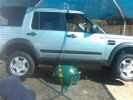
Lifts the D3 with ease "Duck, Barry! "225 views
|
|
Thread upload35 viewsImage uploaded in new thread
|
|

Thread upload7 viewsImage uploaded in new thread
|
|
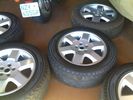
Old 19s44 viewsThese are now safely with Baben
|
|
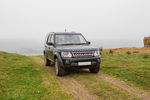
D4 HSE20 viewsOut with All Terrain Tours on their Northumberland Tour
|
|
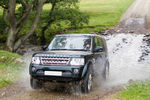
D4 HSE96 viewsOut with All Terrain Tours on their Northumberland Tour
|
|
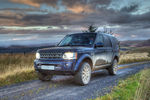
D4 HSE on top of Ogre Hill in Northumberland186 viewsD4 HSE on top of Ogre Hill in Northumberland with the Scottish hills in the background
|
|
Helwith16 views
|
|
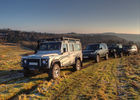
Helwith17 views
|
|
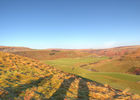
Helwith16 views
|
|
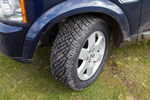
D4 HSE Baltic Blue with 255/55/19 General AT Tyres94 views
|
|
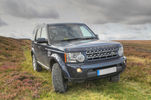
D4 HSE Baltic Blue with 255/55/19 General AT Tyres279 views
|
|
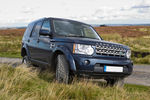
D4 HSE Baltic Blue with 255/55/19 General AT Tyres274 views
|
|
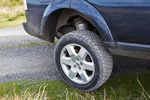
D4 HSE Baltic Blue with 255/55/19 General AT Tyres86 views
|
|
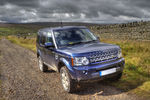
D4 HSE Baltic Blue with 255/55/19 General AT Tyres369 views
|
|
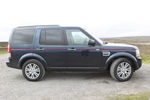
72 viewsD4 With Photoshopped red stripe
|
|
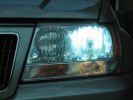
Standard hid bulb - light everywhere and glare caused by light in bottom of bowl97 viewsWhilst the beam pattern is ok the problm is that with 300% more light the spillage into the bottom of the reflector bowl is seen as glare by other motorists. it also is the reason the overhead motorway signs are lit up so well be bad retrofit xenons
|
|
D3 with latest additions - Snorkel & Rack Lights609 views
|
|
Thread upload46 viewsImage uploaded in thread 102519
|
|

34 views
|
|
load bed with hatch (hatch lid not in phone)139 views
|
|

The BIG HILL, with BN at the bottom350 views
|
|
TomTom GO910 with no trailing wires380 views
|
|
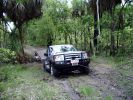
D3 in the Mary River Flood plains50 viewsFamily was down South with the In-laws, so I went for a drive on Boxing Day - which is the monsoon time, or \'The Wet\'. Was doing a test run with the off-raod trailer in preparation for the trip I was planning to the Kimberley six months later. Couldn\'t quite make it out of the creek, so a self-recovery was in order. Good thing it all worked, as I didn\'t see another car in over four hours. They were too smart to drive down the track I was on!
|
|
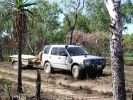
D3 in Kakadu National Park, on the track into the Alligator Billabong47 viewsThis whle area is down on the flood-plain, so in the Wet it is all under a few inches of water. In the dry it has a hard but brittle surface, which is then chewed up in many places by the feral animals with hard hoofs such as buffalo, pigs and horses. This then turns the track into a big dust bowl which is primarily bull-dust - a soft fine powder like talcum powder, which can be many feet deep, and gets into everything. The cover on the trailer is actually black.
|
|

52 viewsFront suspension rebuilt in 2009 with reconditioned steering rack, new bushes etc..
|
|
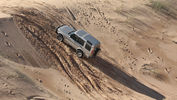
Disco2 Plays with at Brakkeduine88 views
|
|

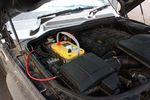
Optima Yellow - with split charge72 views
|
|
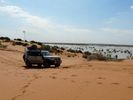
'Big Red' sandune with water!! - Simpson Desert 23 views
|
|
103 viewsEarth stud with earth cables attached
|
|

100 viewsCircuit breaker mounting location. Mounted with industrial velcro
|
|
120 viewsModified aux battery box cover with shape of battery to battery cable. I also removed the tab which was fouling my traxide brain mounting bolts.
|
|
98 viewsCut the original rubber mat to fit flush with the screen
|
|
94 viewsReverse wire stripped. I then soldered the wires which I need to this wire and close up with self amalgamating tape. This way I don't damage any original wires (except for the insulation) and it's easily reversible by desoldering
|
|
91 views12V socket done. This is permanently powered by the Aux battery. Another one was done on the other side, though that one required drilling the hole with a 29mm hole saw as there wasn't an unused hole on that side.
|
|
125 viewsOptima Yellow Top in battery box. This is the version with side terminals so there will be some modifications to be done to fit
|
|

most connector with 4 pin plug for usb/ipod module 57 views
|
|
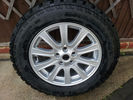
26 views10 Spoke 18" with 255/60/18 AT2
|
|
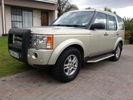
14 viewsOffroad height but with the big tyres.
|
|
Snow drift with D459 views
|
|
Snow drift with D459 views
|
|
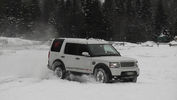
Snow drift with D466 views
|
|
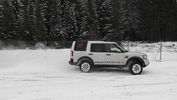
Snow drift with D468 views
|
|
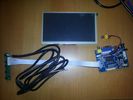
New Touch with HDMI40 views
|
|
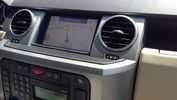
ta-dah! the final result36 viewscomplete GPS satNav system, with iGO software and ALL maps from europe 2012, including POIs speedcams, and personalized land rover skins
|
|
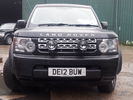
Driving Lamps with home made bracket56 views
|
|
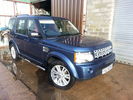
my d3139 viewsMy d3 with d4 front.
|
|
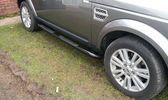
Side Step Bars Tubes with footstep247 views
|
|
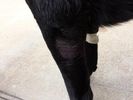
94 views72 hours post bite, 24 hours after treatment with laser therapy.
|
|
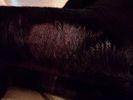
96 views72 hours post bite, 24 hours after treatment with laser therapy.
|
|
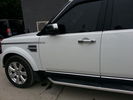
with extra chrome15 views
|
|

Clean169 viewsClean with my new HSE wheels
|
|

Clean24 viewswith my new HSE wheels
|
|

266 viewsSmooth leather steering wheel with cruise and Radio switches
|
|

228 viewsColour coded Tailgate handle with reverse camera
|
|

Opaque switch cover122 viewsKR switch on:off:on used for front and rear spots - but LEDs not visible with coloured switch cover!
(Located in sunroof switch position)
|
|

Terratrip 202 V4 possible discrete location143 viewsAttached to ashtray - allowing removal / unplugging when not in use by pulling out the ashtray.
Terratrip is an odometer for use in rallies / raids - very popular with the French when used in conjunction with a roadbook. A mechanical backup in case GPS signal is lost on modern odometers like the Globe 800 I propose to use.
We'll see if there are reflection issues from the screen.
|
|

KR switch with drilled holes122 viewsResults of drilling holes in opaque switch to see LEDs. Simple ideas can be the best - thanks Dad!
|
|
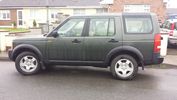
First day with D326 views
|
|
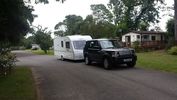
Thread upload196 viewsLR Disco 3 SE Buckingham Blue. along with our Coachman 535/4 caravan.
|
|
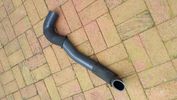
Thread upload128 viewsNew silicone hose with original sleeves refitted.
|
|
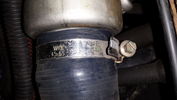
33 viewsNearside hose replaced with silicone type
|
|
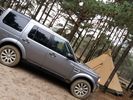
Jänschwalde offroad0 viewsTenTipi safir9 with stove
|
|

Snow with slope21 views
|
|
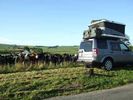
scotland 20151 viewsfirst morning with nosy locals
|
|
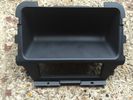
Rear Console trim which i replaced with one with heated rear seats.12 views
|
|
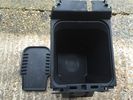
Centre Console Cubby with CD rack Pic29 views
|
|
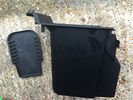
Centre Console Cubby with CD rack9 views
|
|
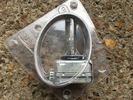
Used Xeno Bulbs from MY2011 Commercial - replaced with Higher capacity7 views
|
|
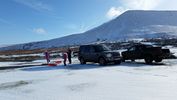
Familly sledging with the disco26 views
|
|
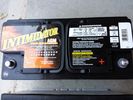
Deka 9A49 AGM Intimidator329 viewsThe Deka 9A49 AGM Intimidator makes an excellent primary battery alternative to the factory or Interstate. Made in US of premium quality. This is an excellent match with the Traxide system w/another Deka or Yellow Top optima.
This will behave properly in your D3/4 LR3 with slightly less wear and tear on your alternator.
|
|
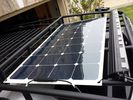
solar roof install444 viewsMore or less wrapped up my solar installation today. I added a Grape Solar Flex 100W panel, it's adequate to keep the vehicle topped off with the Fridge running, and Ham, but it could lose some ground if transmitting depending on how much, 2 would be awesome. One is enough, but barely. I am quite impressed with the Grape Solar flex panel version 2.0.
https://www.facebook.com/DifferentialPartsUS
|
|
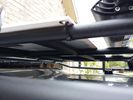
solar panel install356 viewsAt least at this point, I mounted it by using Clear Silicone RTV. This stuff is kind of like glue, but can be removed. If it doesn't hold up after curing and driving, I'll remove it and come up with another plan. I used heavy cable ties on the 4 grommets, in case it lets loose, it won't take out my wiring and the car behind me. 2 Panels are dandy like this, but I don't want to permanently block the roof space. Grape Solar to power my snomaster fridge
|
|
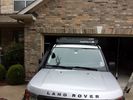
low profile solar panel211 viewsThe low profile solar panel, can be seen here, as the fine white line under the light bar. The way it's laid out, the panel should generate decent power between 10am and 4pm depending on the time of year, from the sides or front, with no shadows. Grape Solar 100W flex panel.
https://www.facebook.com/DifferentialPartsUS
|
|
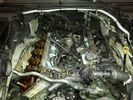
4.4 L Petrol Engine214 viewsIntake removed on V8 4.4L Petrol Engine to remove hose with T in it.
plse like my facebook page https://www.facebook.com/DifferentialPartsUS
|
|
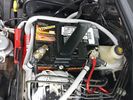
Wiring342 viewsThis is the final wiring configuration. It shows the dual battery wiring, 75A wiring run to the boot, the winch and in the lower right you can see a few turns of coax with a snap on ferrite near the base of a VHF Antenna.
|
|
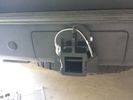
Rhino Hitch431 viewsCover fitted over the 75A Anderson plug with Rhino Hitch fitted which is a Class IV hitch. https://www.facebook.com/DifferentialPartsUS
Fits the Disco 3, Disco 4 and Range Rover Sport
|
|
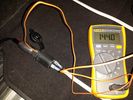
Marine Plug348 viewsRunning a cigarette plug rated at 15a with a plug rated at 20a drawing 5a at 12.8v will generate more heat than you want. Use Anderson or hardware.
|
|
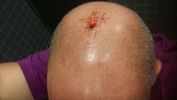
gauged head 15 viewsresult of bending down to pick up LTO tape for robot library and standing backup with door open (
|
|
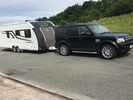
Swift 635 hitched to Disco 410 viewsSecond time out with new 2017 Swift Challenger 635 Hi-Style
|
|
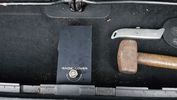
RAW jack2 viewsUnit in place with tools used.
|
|
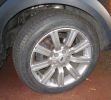
20\'s with 265/50 Yokohams481 views
|
|
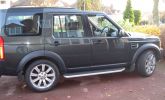
On Stormers with 265/50x20 111W Yokohama Advan ST\'s554 views
|
|
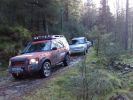
Calendar 2010 - Expidition with LRE Snowdonia417 views
|
|

Bedford CF V868 viewswith a very young me (19) in the bottom pic
|
|
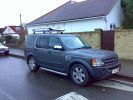
312 viewsThule Xpedition 821 Luggage Basket fitted to 861 Aerobars on 751 Feet with 3027 Fitting Kit. All in £360.00
|
|
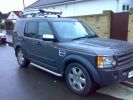
313 viewsThule Xpedition 821 Luggage Basket fitted to 861 Aerobars on 751 Feet with 3027 Fitting Kit. All in £360.00
|
|
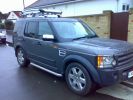
306 viewsThule Xpedition 821 Luggage Basket fitted to 861 Aerobars on 751 Feet with 3027 Fitting Kit. All in £360.00
|
|
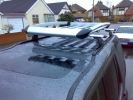
302 viewsThule Xpedition 821 Luggage Basket fitted to 861 Aerobars on 751 Feet with 3027 Fitting Kit. All in £360.00
|
|

Thread upload57 viewsImage uploaded in new thread
|
|

Thread upload53 viewsImage uploaded in thread 102519
|
|
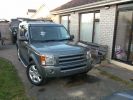
New front bumper with headlamp washers, fogs and PDC complete110 views
|
|

Air con pipe65 viewsIts the brown pipe in the center of the photo. To remove this first you need to remove the "charge air cooler inlet hose" to allow access to the air con pipe securing fixings. But with the "charge air cooler inlet hose" disconnected it can\'t be removed from the veh because the air con pipe is in the way???
|
|
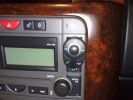
position of buttons for Parrot phone102 viewsthis can be put basically anywhere as it connect via bluetooth to the rest of the system. It is self powered (lithiam battery in it) so just stick it anywhere with no requirements for finding a live wire etc
|
|
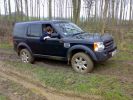
trying all settings but still no sucess even with DSC off281 views
|
|
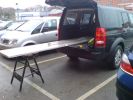
292 viewsNeeded 1.8m of worktop but had to buy 3m length. Took B&D workmate with me and cut it down to size in the car park! Notice how the workmate is exactly level with D3 in normal height!
|
|
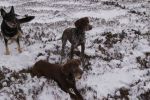
3 old friends79 viewsLaser & Pepper with Oscar (JMC's) on the Cairn
|
|
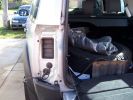
Off with the taillights241 views
|
|

Engine Accessory Drive Description and Operation888 viewsThis 2 page pdf shows both belts for the 4.4L petrol V8; the primary serpentine belt, (the long one), and the shorter secondary that drives only the radiator cooling fan.
The various accessory pulleys the two belts are each associated with are numbered and an included table describes each.
When replacing belts and pulleys, count the number of grooves on both your old items and your new replacement parts. It has been known for an pulley with the wrong number of grooves to come with a replacement part or the replacement belt has the incorrect number of grooves; hence make certain the groove count on the new parts are the same as the removed items.
|
|
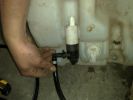
bottle with H/L washer pump and leveling sensor to the right - the space on the far right is for the w/screen pump87 views
|
|
Thread upload3 viewsImage uploaded in new thread
|
|
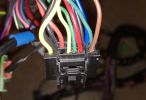
34 Dash Loom35 views
|
|

Training with the army64 views
|
|
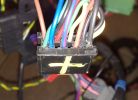
35 Dash Loom42 views
|
|

Billing Off-Road Course Water Splash44 viewsLottie\'s first off-road experience at the Billing off-road course with MikeS providing some vital guidance!
|
|

3 Point Hitch on Series 90152 viewsUsually one sees the Series units with just a conventional field plow hooked to a drawbar hitch, tractor style. This jpg however is the full meal deal - a 3 point hitch, probably off a Fordson tractor, in the long tradition of Ford/Land Rover cooperation.
|
|
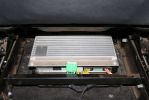
03286 viewsStock amp, underneath passenger front seat. In order to integrate the factory head unit with the V1000 we had to go through the stock amp. This is because of the MOST (fiber optic) connection between the two.
|
|
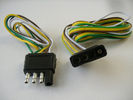
4 pin NAS flat connector from NAS small trailer383 viewsThe connector with the three exposed pins is the end that would commonly be located at the trailer hitch end, (front), of a small NAS lightweight trailer that has no electric brakes. This plug would connect into the flat 4 pin connector at the rear of the 3.
Note the order of the pin functions and wire colours: White is ground; the next pin is for tail/marker lights using the Brown wire; the Yellow conductor is for the left turn signal, and the far pin uses the Green conductor for the right turn signal.
There is no separate brake light conductor as NAS spec vehicles most often combine the brake and signal light functions to the same bulb filament rather separate filaments in different bulbs. The LR factory harness resolves that design difference.
Fortunately, the Land Rover NAS assembly pin order for the 4 pin flat plug maintains the above described conventions.
|
|

Air Distribution and Filtering Systems2089 viewsThis is 3 page pdf with coloured drawings of the air distribution ducting for the front air system.
Also included is a sketch of the pollen filter location within the front heater ducting. Note that two types of filters are available: a) the cheaper dust/pollen filter and b), the activated carbon filter that removes smells from the air. Installing the more expensive activated carbon filter means you never smell a cattle truck or chicken farm again. It really works.
|
|

Front Heater Doors Description and Operation1405 viewsThis 6 page pdf shows with coloured drawings the air flow thru the front heater as well as discusses the operation of the various air flow doors.
|
|

Rear Area Climate Control System1163 viewsThis 14 page pdf describes how the rear heating AC system is supposed to operate in conjunction with the front system.
The air transfer ducts are shown as coloured sketches as is the air flow within the rear blower setup.
|
|

Alternator and Regulator Wiring Diagrams, TDV6 and petrol V8 and V61991 viewsThis is a three page pdf that shows the alternator and regulator wiring for the petrol V6, petrol V8 and TDV6. The pdf can be either printed or by right clicking on the displayed pdf, rotated as required for viewing.
Of interest is that the regulator gets its instructions primarily from the Engine Control Module (ECM) and only secondarily from the vehicles electrical buss. The conductor from the battery thru the 5 amp fuse F20E is to provide initial power to excite the alternator at startup and then secondarily, to instruct it if the PWM signals were not available. Primary instructions to and from the ECM are thru the two other conductors via a digital like Pulse Width Modulated (PWM) signal.
If F20E, the 5 amp engine compartment fuse box fuse is blown, the red alternator light on the dash will be illuminated. This means that the alternator could be OK, but if the F20E fuse is blown, no electricity will be generated. Hence check the F20E fuse if you get a red ALT light or some indication of the alternator not working.
Regarding operation of the red ALT light on the dash, it is not the regulator within the alternator that tells the red light to illuminate, or not, but instead the ECM. This is the reason the red light does not function in the same manner as with older vehicles. With the 3, sometimes you have illumination and sometimes not depending upon what the ECM is thinking. What this means is that you can have an alternator that is failing but the red light does not illuminate as the ECM is compensating for reduced alternator output - maybe by draining the battery and or cutting back on vehicle electrical loads such as shutting off or cycling the radio amplifier or heated seats.
|
|

Alarm System description and Operation1057 viewsThis 9 page pdf explains in detail how the anti-thief, (alarm), system is supposed to operate. The system uses the door ajar switches to provide alarm system signals; as such there are few separate contacts related to the alarm system only.
Page 6 of 9 is of particular interest as it describes the trigger log that is accessible with the dealer T4.
|
|
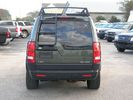
Rear ladder with expedition roof and taillight guards59 views
|
|
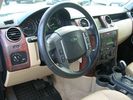
Interior shot with walnut finish57 views
|
|
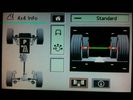
4x4 Info on MY0542 viewsPicture taken of 4x4 info screen on my 2005HSE with no known software updates done.
|
|
04278 viewsThe green wiring harness is the speaker outputs. Green is + and Green with white stripe is -. We tested all the wires with a 9V battery to figure out which went to what speakers then clearly labeled them as we did.
|
|

Wipers, Front and Rear, plus Washers description and operation.820 viewsThis 17 page pdf describes how the wipers, front and rear, plus the washers are intended to operate. Also described is how the rain sensor is designed to function along with a table of the wiper delay timing parameters.
|
|

Siemens VDO Piezo Common Rail injection PCR 2.321 viewsAfter sales info and exact system discription.
Also fault finding and repair.
This is for Ford 3litre 4 cyl. engine ,Ranger 3.0 TDCI, but Disco 3 is the same with 6 cyl.
|
|
Discovery 4 with B24 and TL147 views
|
|

5D on body with d3 in the back!100 views
|
|
Thread upload1 viewsImage uploaded in thread 198354
|
|
Thread upload2 viewsImage uploaded in thread 198354
|
|
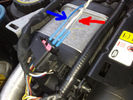
6 FBH Loom75 views
|
|
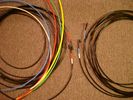
6mm PA12 grade nylon tubing with heat shrink applied 546 viewsShows some of the 6mm air line with heat shrink applied to one end of tubing. Shrink will be applied to the other end once field cut to length. These four tubes, each about 20 ft (6m) long, feed to the rear. Re the front air lines, (not shown), four additional lengths, each about 10 ft (3m) long, are required plus one more 3 metre length for compressor air. The 6mm tubing is a Nylon product specified as PA12. There is also a very similar Transport grade PA11 material, however it seems that PA12 is the more common Transport grade now in use. Also the applicable DIN standard seems to be both DIN 73378 and DIN 74324 for the nylon tubing. The working pressure of the 6mm tubing is about 27 Bar and bursting 82 Bar @ 20C. This is for the 1mm nominal wall thickness material, (4mm ID, 6mm OD).
|
|
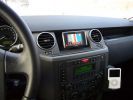
Navi Becker and iPod287 viewsThe Becker Highspeed II was installed in the bin with power connected. Works great, even TMC worked inside the garage right away!
|
|
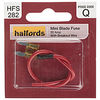
Mini Blade Fuse with Breakout Wire11 views
|
|
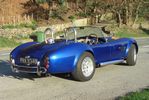
Replica AC Cobra 4276 viewsSelf design & build cobra 427 in a small house garage over a 4 year period. 515bhp & 3mpg if you push hard with the right foot. Track days were the most fun I've had with clothes on. Sadly she's gone to make way for the more sedate "E" type.
|
|
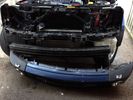
Thread upload42 viewsImage uploaded in thread 102519
|
|

15 views
|
|

Thread upload13 viewsImage uploaded in thread 165406
|
|

143 views
|
|

12 views
|
|
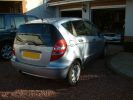
A Class with D3 and SLK134 views
|
|
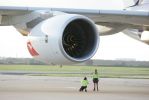
A380160 viewsQANTAS staff pose with the very large A380 whilst it was in Brisbane having some promotional logos attached.
|
|

18 views
|
|
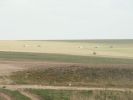
View across the plain113 viewsThis was a shot across the plain taken with my KM Z5 at maximum 12x optical resolution - these vehicles were a long long long way away!
|
|
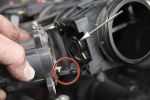
Removing the EGR Butterfly Valve Actuator1538 viewsRemove the 4 TORX screws to remove the actuator. The small black link (circled) connects the actuator drive arm with the butterfly valve spindle (arrowed). The spindle can now be very carefully levered out using a screwdriver inserted beneath the arrowed bit in the photo. A bit scary to do as it takes a fair bit of pressure before the spindle will free itself from the butterfly. Once it starts moving though, it gets easier to pull out.
|
|

Land Rover Aerial Fin images for both Glass and Metal Roof Disco3 / LR3864 viewsAs well as the two different fins, this pdf also shows the plastic blanking plate for glass roof vehicles where no fin is installed.
The glass roof fin is secured by two security screws from the top into a plastic frangible glue on gasket. The hope is that when struck, the fin will shear off and not crack the glass roof. Re the metal roof design, the fin is secured from underneath via two nuts.
The pdf also shows the various electrical bits related to the antennas. In the UK, the fin would house not only a cell phone antenna but the TV and satellite radio antenna electronics as well; in the States, the Sirius sat radio antenna and a G type cell phone antenna if the phone kit was installed would reside within the fin. The SAT NAV GPS antenna is located within the High Mount Brake Light plastic mounted to the upper rear hatch.
|
|

Fin cell phone aerial drawing190 viewsThe factory aerial for the factory NAV / GPS on my 2005 HSE is within the high mounted stop light lens at the top of the upper hatch door. I do not have the factory installed phone kit, and as such, do not have the fin installed; instead there is just a plastic blanking insert to fill the cell phone aerial wiring hole in the metal portion of the roof; hence this requirement for an "external" cell antenna. For those that do have the fin on their glass roof, the fin is screwed on to a glued on plastic gasket, (sort of), and not bolted thru as per the metal roof 3's.
|
|
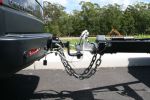
With Mitchell Bros Hitch140 views
|
|

221 viewsSide view of airbag with home made tool connected.
|
|
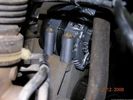
60 viewsOne bolt is visible at the front, but the other two are down the left hand side and best accessed by removing the small plastic guard behind the bumper. I also removed the small metal radiator guard between the bumper and the main sump guard (but that was mostly to retrieve the spanner I dropped!). The only issue with removing the plastic guard is the stupid plastic clips that hold it on may need to be replaced.
|
|

Alternator female plug looking down into top374 viewsThis shows the plug connected to the alternator wiring harness looking down into the top of the plug.
The cavity marked 1 is the AS or BATT SENSE and the wire colour most likely has Brown/Green on it.
The cavity marked 2 is the RC or ALT CON and the wire colour most likely has Red/White on it.
The cavity marked 3 is the L1 or ALT MON and the wire colour likely has Green/White on it.
I say "most likely" as the wire colours are not always the same on all vehicles.
Also the terminal 1 conductor destination is more likely C0570-175 rather than per the jpg.
The #3 pin is located closest to the big B+ terminal.
|
|

Altox WBUS-4 Installation in Discovery 3127 viewsstep by step with pictures how to install the Altox WBUS-4 in the Discovery 3 in footwell
|
|

Thread upload31 viewsImage uploaded in thread 108346
|
|
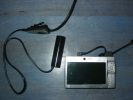
AV5100 with cam192 views
|
|
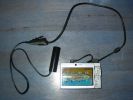
AV5100 with cam196 views
|
|
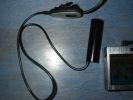
The cam with microphone/control buttons180 views
|
|
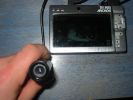
Archos with cam188 views
|
|
208 viewsin its usual state with a 5.6 m trailer weighing anything up to 3.5 tons. it is the best tow vehicle i have ever owned and eve better than my 130 land rover
|
|

D4 with bus accessory85 views
|
|
170 viewsAfter a nice day out with lot of fun at Avon Dasset Quarry.
|
|
Modified Oregon AT2000 Mount - now with captive nut for a standard camera mount82 views
|
|

256 views
|
|

Thread upload13 viewsImage uploaded in thread 138228
|
|

Frame Jacking Points showing where holes are located.1090 viewsThe four points marked with the arrows show where the holes in the underside of the frame are located such than one could insert a trolley jack pin type lifting adapter, (or as designed), the official LR scissors jack.
|
|

TransK9?b1044 views
|
|

TransK9/B10 in Discovery 442 views
|
|

Thread upload13 viewsImage uploaded in new thread
|
|
TransK9/B24 in Discovery 4 with storage48 views
|
|
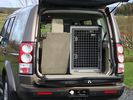
TransK9/B24 in Discovery 4 with 6th seat in use37 views
|
|

13 viewsTransK9/B24 with Lola the Dalmation!
|
|

21 viewsTransK9/B24 with fully grown Boxer
|
|

13 viewsTransK9/B24 with Boxer
|
|
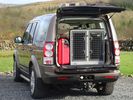
TransK9/B8 in Discovery 4 with storage49 views
|
|
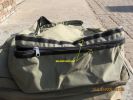
Canvas box bags121 viewsThe fold over lip to cover the zip with welcro.
|
|
Shower at sea102 views
|
|
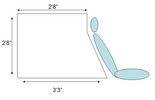
Dimensions67 viewsshown with 2nd row seat rake angle
|
|
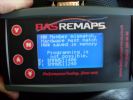
BAS remap interface after dealer software update287 viewsBAS remap interface after dealer software update,This is what you will be presented with after the dealer updates your cars engine software.
This is no problem IF you have returned the car to standard before the dealer visit.
When faced with this screen it will show you tht the dealer has changed the software and NOT let you put the BAS mapping back on your car because of the differences.
|
|
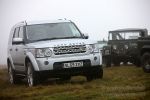
The new with the old694 viewsCALENDAR 2011
The new with the old: a Discovery 4 and a Series 1 during the Scottish Land Rover Owners Club (SLROC) Tyro event at Ballencrieff Farm, Bathgate, Saturday, 5th of December 2009.
|
|
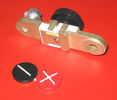
Battery Disconnect side post with + & - caps under view745 viewsThe upper and lower pieces of metal are clamped together but electrically seperate from each other. The connection between the two pieces is via the threaded part attached to the knob. When the knob is turned tight, current will flow between the two sections of metal.
|
|
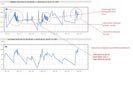
154 viewsRunning a 72L fridge on 100W solar with some driving. Conditions, overcast with some occasional sun. Overnight on Battery power. https://www.facebook.com/snomasterusa
|
|
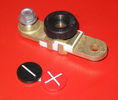
Battery Disconnect side post with + & - caps, top view621 viewsThis disconnect is designed for side post batteries. It can be used on either the + or - terminals. It can also be installed at the "other" end of the battery cable as well. In my install of the Aux battery, I installed this on the negative ground cable where the cable attaches to the body sheet metal. I have never used it but it seemed like a good idea at the time. The main battery hookup is pure stock.
For the hot side of the Aux battery, an Anderson PowerPole was used inline for the cable between the Aux and connecting to the spare bolt hole at the + post of the Main battery cable.
|
|
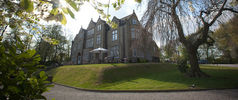
Woodlands Hotel6 viewsGreen Oval Garage would like to say thank you to the Woodlands Hotel in Leeds for allowing us the use of their beautiful grounds for all our future photos shoots.
Woodlands is one of the finest luxury hotels in Leeds. This boutique hotel is set in beautiful landscaped grounds on the outskirts of Leeds city centre, just 2 minutes drive from junction 27 of the M62 motorway, with 23 individually designed bedrooms and an award winning restaurant. Packed with character, this lovingly restored hotel is only three miles from the vibrant, cosmopolitan city of Leeds with superb nightlife and unrivalled shopping.
Woodlands also offers a stylish and contemporary functions venue for all kinds of social and business events. Our three stunning event spaces are suitable for everything from wedding ceremonies and receptions, to corporate meetings and events. The permanent marquee, attached to the hotel, can accommodate up to 150 for dining and 200 for evening parties and receptions, making it one of the most elegant settings for a wedding venue in the Leeds area.
For more information or to make a booking, please contact us on enquire@woodlandsleeds.com or 0113 2381 488
|
|
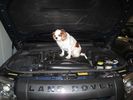
Always start with removing the dog from the engine compartment55 views
|
|

31 views
|
|
With Plow106 views
|
|
Feshly fitted with new BFG 18s48 views
|
|
255/75 R17 BFG MT 98 viewsAccess height with shortened rods & spacers
|
|
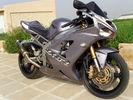
New Bike43 viewsGot bored not having my D3 with me so I went made one day and bought this!
|
|

Wrapped with foam51 views
|
|
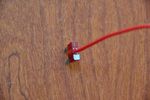
Fuse with cable71 views
|
|
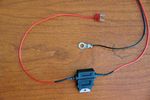
Loom with fuse72 views
|
|
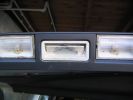
upper tailgate switch without rubber121 views
|
|

Mower blade with new countersink bolts - original dome head at top70 views
|
|
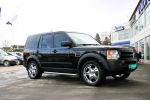
Chrome1445 viewsCerberus 20" Chrome rims with Pirelli Scorpio Zero Asymetrico 295/40/20
|
|
Blitzen with DW\'s A-Bar fitted84 views
|
|
Non Stick Nicks car with a respray!!211 views
|
|
G4 with trailer124 viewsTaken with digital SLR - slow shutter, narrow ap. zoom during exposure - so I\'m told - great effect just don\'t look at it for too long!
|
|
BMW X5 17" Wheel 79 viewsBMW X5 17" V-Spoke wheel with BFG MT 255/75 R17
|
|

BN with Blooming Suitcase260 views
|
|

OLD VERSION - Bodsy's Brake Bible v 1.611198 viewsUSE Version 1.6a
Clarified EPB shoe instructions & corrected references to other sections. Added paypal donations information (requested by users of the guide.) Internationalised wheel location references by removing UK based reference to OS/NS, replaced with physical Front Left or Front Right descriptions.
|
|

59 viewsFun with number plates...
|
|
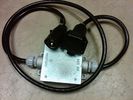
Box Closed with 7 Blade NAS connectors586 viewsBox closed up and ready for use. The box and cable connectors are reasonably weather tight and hence can be submerged for a bit while doing a creek crossing but as with the 3, do not use the creek bed as a parking stall. Similarly, the connector recessed into the bumper will probably remain somewhat dry as long as you keep moving but if you get stopped, well that is another story.
As such, I put a vial of desiccant in the metal box prior to closing it up to reduce corrosion due to moisture build up.
|
|
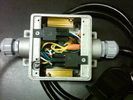
Box open showing Hella Relays and Putco Load Resistors750 viewsInterior of the box - note the two gold coloured 6 ohm 50 watt load resistors are a bit distant from the other items so as to provide some separation for dissipation of the heat generated.
Rather than a moulded plastic weather resistant box which I would have preferred, I used a bulky and much heavier metal weather tight style electrical box so the metal can act as a heat sink.
|
|
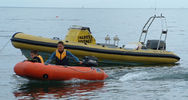
76 viewsThe Smaller Nashers in their SIB which is inflated with an Electric pump mounted in the RIB. Great as a Taxi to and from the beach and for them (and me) to tear about in.
|
|
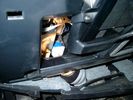
Brake Switch Visible thru Opening4982 viewsThe blue and white bit is the switch; the sort of gold appearing box,(it is really black), you will not see in your 3 as it is a Smooth Talker brand amplifier for my Blackberry phone antenna. This install is detailed in the SmoothTalker phone antenna section of my gallery.
One way to remove and install the switch is to lower the "horizontal" panel above the brake pedal as shown where the flashlight head is located. To actually remove the switch, you slide your hand thru the gap and rotate the switch clockwise 1/4 turn while watching thru the rectangular opening. Installation of the new switch is the reverse of above - 1/4 turn counterclockwise.
Before you remove the switch, note its orientation - horizontal with electrical wires to the left. That is the way it should look after replacement as well.
The second time I replaced the switch, I did it all thru the rectangular opening and did not remove the horizontal panel - that is experience helping out.
The knee kick you have to remove regardless. It is sort of hinged at the bottom so you just pull at the top and sort of rotate the knee panel and then pull upwards for two plastic "fingers" to clear the slots they reside in.
|
|
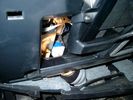
Smooth Talker Amplifier Box mounted below near steering column.180 viewsThe gold look box due to the lighting, (actually black), is the antenna amplifier located near the steering column. It can be put anyway but this seemed an OK location as I ran the antenna connector cable rearward from here to the back corner of the 3 and then up to the underside of the roof glass at the rear. The blue/white thing is the brake light switch that often must be replaced. See the Brake Light Switch file within this Gallery regarding the switch replacement.
|
|

Black Deposits on Brake Light Switch Plunger2764 viewsThis jpg I got off another forum and is typical of what one will see when one opens up the removed brake light switch. The black powder is residue from arcing of one of the pair of contacts within.
Hopefully the newer switches with the FOMOCO logo moulded into the plastic are improved from the Land Rover logo marked early units, however I doubt it.
The Ford part number is SW-6572 and/or 7E5Z-13480-A as used on the 2006 to 2009 Ford Fusion's and Mercury Milan's; the Land Rover part number is XKB500110. Cost of switch could be about twenty five dollars. A previous LR part number for the switch was XKB500030, so hopefully the newer LR part number, XKB500110, reflects some improvement in reliability.
It is possible that the new switches are better as I installed a replacement 72,000 km, (45,000 miles) later, at 195,000 km (121,000 miles). When I took the removed switch apart to inspect, it was clean inside. There was no black dust - the switch looked like new, hence they must be improved now.
|
|
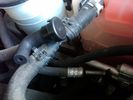
Breather line with factory cap cut off.2329 viewsIf you expand the jpg by clicking on it, in the bottom right corner if you look closely, one can see the black plastic factory vent tubing with the OEM cap cut off.
Note the tubing is cut at a 45 degree angle facing to the rear. Also shown in the top right is the cut off portion sitting on the coolant water hose and on the top left also sitting on the coolant hose, the new to be installed Gore manufactured replacement breather cap.
|
|
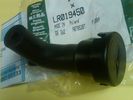
Breather Cap part # LR0194501548 viewsThis is the replacement breather cap as manufactured by the Gore Tex people, (Gore), for the engine compartment end of the front differential breather line.
You can with some difficulty, both blow and suck thru the breather filter material. The Gore Tex filter material has what are called hydrophobic and oleophobic properties. This means the filter material keeps oil in and water out, while at the same time, allowing air pressure to slowly equalize, (air permeable). Additionally, the transfer of dust, salt, and road debris is inhibited.
|
|
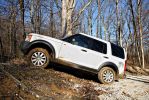
Climbed right up the hill with no hesitation whatsoever, I was shocked, because it took my Dad\'s F150 three tries and a lot of speed to get up it...103 views
|
|
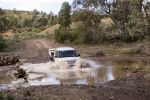
AUS11 with the BT at Swansea (Newcastle) Feb 2008277 views
|
|
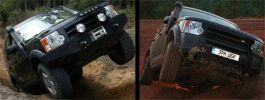
Comparison with OEM bumper, shows approach clearance gained306 views
|
|
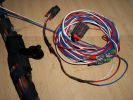
Burnt Bit98 viewsThis bit of wiring going to the connector was so close to bulkhead it got a bit burnt, Its for the clutch switch on a manual used for EPB, It will be replaced connector to pin with the wiring shown.
|
|

Mounting brackets attached51 views
|
|

Thread upload30 viewsImage uploaded in thread 92518
|
|
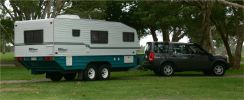
CALENDAR 2008 ENTRY660 viewsAroona Valley
South Australia with camper in tow
|
|
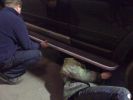
D3 Side Step Repairs169 viewsNearly finished - just the last two rivets to put in. We used a very basic and cheap hand rivet gun which can be bought in places like Halfords for about £10.00 and usually come with a supply of rivets to do the job.
|
|
Thread upload8 viewsImage uploaded in thread 201763
|
|
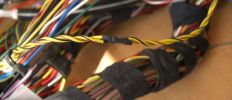
Can Pair After73 viewsThe can pair repaired with twist maintained
|
|

CAN BUS MESSAGE15 viewsError I get when trying to read the Body Control Module Settings with my MSV2
|
|

Can Bus with splice locations2 views
|
|
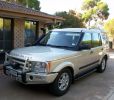
New LR D3 MY2009 TDV6 HSE Auto with Addons.114 views
|
|

Thread upload2 viewsImage uploaded in thread 183462
|
|
Thread upload3 viewsImage uploaded in thread 203155
|
|
Disco and Boroma with Hyland hitch fitted inverted.154 viewsNote that it is now absolutely level.
|
|
Chopper with an Engine147 views
|
|
Phantom with a questionable paint job!57 views
|
|
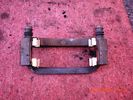
Caliper carrier with new anti rattle clips102 views
|
|
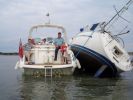
When having a beer with a chum it is wise to check the tide once in a while....107 views
|
|
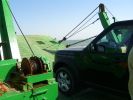
All at sea in an LR3105 viewsThe ferry from the mainland to Mazira Island was packed to the gunnels with vehicles. My LR3 was last on and they left the bow doors partially open for 14 lonnnnng sea miles across the Arabian Gulf!
|
|
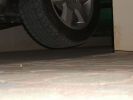
Front wheel off 80% inflation173 views80% inflated and both front and rear wheels are off with suspension in extended mode
|
|
The kit as supplied180 viewsContains carry bag, 2 protector mats, exhaust jack and 7m reinfoced woven hose with bayonet connector to bag (inc non-return valve) and rubber cone for exhaust fitting
|
|
RHS view372 viewsSHows the Front Runner (SA) slimline windcheetah rack which is immensely strong. Takes my 110kg (oh gawd, I must get back on the diet and exercise regime) tramping over it when loading/unloading gear without a problem. Fittings are simply fixed or removed, and IMO very well designed and made. IPF 800 series driving and spots fitted to the front of the rack. IPF cam/reversing fitted each side and to rear of rack for negotiating rocky wadis at night. The G4 stickers were bought off E-bay as a set.
|
|
Front end327 viewsARB deluxe winch bar is very well made. Still allows Mantec sump guard to be used. Warn M8000 winch fitted - (wish I could\'ve found an M15000!) and IPF 900XS Extreme Series mounted with light stays to grille. Fog lights work fine with the replacement bumper, and indicators in bumpoer are effective too.
|
|
Rear end294 viewsLocally made wheel covers. LH is zipped from bottom to top to fit over registration plate with zip fasteners top and bottom. Rear IPF Reversing /camp lights on rack linked to reverse light circuit.
|
|
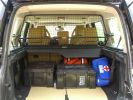
Load space369 viewsShows the SA Front Runner Wolfpack stacking plastic storage boxes that I keep laod straps etc in and the 2nd is tool kit, spare belts, jerry can funnel and tools, plus airline and tyre inflator/deflaotr for ARB on-board compressor, HD jump leads. ARB Winch pack (Orange)with strops, snatch blocks, shackles, gloves, and 2 ARB recovery dampers. Really great 4x4 1st Aid kit from Outdoors warehouse in SA. LRs own loadspace guard - not the best design if you want to store a long load. Mods to be carried out!
|
|
Auxiliary power sockets - TracTronics, Australia383 viewsA complete kit including two outlets, wiring etc connected to auxiliary Optima Blue top battery using their very effective SC40 split charge relay. One outlet between rear and front seats, and 2nd alongside loadspace 12v outlet, enables fridge to run when engine is not running, without affecting start capacity or vehicle functions.
|
|
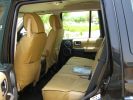
Escape seat covers rear254 viewsJust shwing the good fit of these canvas seat covers made in South Africa. The whole set for a 7 seat HSE £542 with air freight as unaccompanied baggage (inside 5 Front Runner Wolf pack boxes) costing and additional £150 - still a bargain out here!
|
|
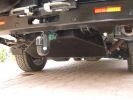
LongRanger auxiliary fuel tank358 viewsThe LR fuel tank imported from ARB in Australia with its 115 litre capacity has more than doubled the range of the car. This is important in the desert where fuel consumption increases at times to 10mpg or less. On a cruise on highways, the car now has a range approaching 850 miles. The tank fits neatly, has not affected handling in a detectable way apart from over speed humps, when a little more bounce from the rear suspension is detected! Suspension copes with the additonal loads without any problem.
|
|
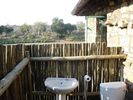
Bathroom No 237 viewsThe view from Bathroom No 2 is realy spectacular. The bathroom is in Botswana and the view is over the Limpopo River with South Africa in the back ground
|
|
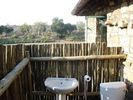
Outside bathroom56 viewsOver looking the Limpopo River with South Africa in the back ground
|
|

Thread upload26 viewsImage uploaded in new thread
|
|
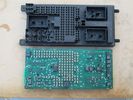
central junction box, without fuses.204 viewsthe print circuit board is easily dropped, after you pull out all the fuses.
|
|
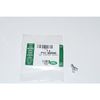
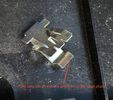
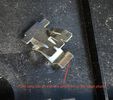
Clip Spring Metal FYC 500040 that holds LR together1750 viewsThe jpg is of the spring metal clip, Land Rover part number FYC 500040 that holds most of our 3 together - well at least most the interior trim parts.
If you are going to remove interior panels, you may as well stock up on a few for replacement as upon panel removal, the clips tend to spring away into deep never to be found voids within your 3.
|
|
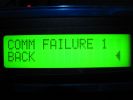
COMM FAILURE in the Faultmate FCR79 viewsThis is ONLY shown if either you have a communication error or in most cases you dont have fitted on your car the module you are trying to communicate with.
|
|
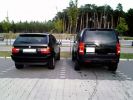
Comparison with X5123 viewsAfter the training - couldn´t resist parking next to the x5...
|
|

Thread upload12 viewsImage uploaded in new thread
|
|

Thread upload7 viewsImage uploaded in thread 199265
|
|
Connector without blanking plug282 views
|
|

23 views
|
|

Cooling system hoses - 4.4L petrol V81113 viewsThese are the cooling system hoses on the 4.4L petrol V8. The little odd shaped bleeder hose, (LR006158), shown in the top right hand corner can give problems. There is a plastic tee with a threaded air bleeder outlet located in the middle of the hose. The plastic tee can or will fail due to I guess heat distress.
A BIC pen can serve as a field fix, however for your parts kit, a nominal 3/8" ID hose size brass hose barb inline connector plus a couple of hose clamps is suggested. Better yet is a threaded hose barb brass coupling or a tee and bleeder valve to allow bleeding of the line. Land Rover now makes the plastic bleeder valve that breaks available as a separate part, # LR027661, where 0 is a zero. As such, one can now purchase that part only for addition to your field fix parts kit.
|
|

Copley 4x4 prepaid service agreement brochure109 viewsWord doc with image of brochure
|
|

This is what happens when you go too deep in a Discovery!578 viewsMy friend Dave was driving Strata Florida, after heavy rain. The Disco 200tdi was kitted for wading, with snorkel etc, but this demonstrates what happens when you submerge the bonnet.
|
|

Titus Canyon120 viewsDirt road with amazing views.
|
|
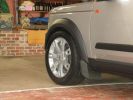
new 20s with 295/45/20 Nexen158 views
|
|

Disco 4 Pricing with Unhidden Columns88 views
|
|
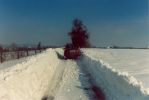
the road between home and work292 viewsthe day before returning from work, I got stuck here in the middle of the snow storm. The plow didn\'t pass yet and wind was blowing snow everywere. Since then I always carry during winter a survival pack consisting of warm coat,cap, warm, high boots and gloves.
It is no fun recovering a car stuck in the snow and sliding down from the road when moving in nothing more than a business outfit (no gloves, city shoes, no coat) with a snowy wind blowing 100km/h..... .
|
|
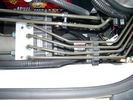
CounterAct Power supply mounted under brake lines.195 viewsThis top view shows where I located the power supply. It is attached with 3M sticky to the black plastic surface that is located under the brake lines.
When the system is operating properly, the red LED pulses about twice per second.
Some users claim they can hear a very slight hum or whine coming from the unit. My unit seems silent.
|
|

Not much left of bonnet!281 viewsCrash in a Renault Scenic
Head on colition with a Nissan Terrano he lost control came over the central reservation & ended coming at us sideways!
We hit him in the back wheel arch & spun him around so he then hit my drivers side, I walked away having a air bag wife had broken solder coursed by the seat belt, but it did save her life!
Our car was trashed but it did its gob (was only 2 weeks old!) the bonnet tacking lots of energy out of the collision & the inertia staying relatively in tacked.
|
|
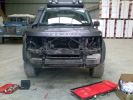
Mantec Plate , Bumper , Lights & Grille removed161 views
|
|
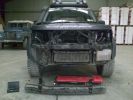
Crash Bar Removed149 views
|
|

Trial with Disco 3351 views
|
|
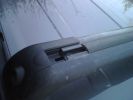
Cross Bar with missing slider184 views
|
|
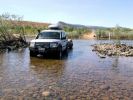
D3 in the Kimberley - on the Gibb River Road, crossing the Pentecost River49 viewsNot too far in on the Western end of the Gibb River Road is the Pentecost River, with the ranges in the back ground - an iconic shot of the Gibb River Road.
|
|

camera60 views
|
|

C pillar cover removed to facilitate removal of bin cover.9 viewsNote the "ribbon" behind the top left corner of the C pillar cover. This is something to do with the curtain air bags, hence do not mess with it. I dislodged the cover to make it easier to pull up and extract the black plastic bin moulding. It is not necessary to totally remove it and would be what I call a big deal - seat belt, air vent and ducting as well as that curtain concern.
|
|
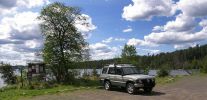
2004 disco, MN near Canadian border193 viewsmy mom out on hiking day with the disco I set up for her.
|
|
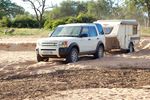
Gona Re Zhou Nationat Park Zimbabwe50 viewsThis is where I got stuck with the Defender in 2009...
|
|
454 viewsMore photos coming soon. 7000 km with NO problem. Only took a 6th spare wheel, a tool box, air compressor, window shades. What a great Disco !
PS: note that my disco has manualy inflatable air sping in addition of the standar terrain response.
|
|
D3 with Warn Power Plant279 views
|
|

U013224 viewsLost Communication With Ride Level Control Module
|
|

U013226 viewsLost Communication With Ride Level Control Module
|
|

U015536 viewsLost Communication With Instrument Panel Cluster (IPC) Control Module
|
|

U015538 viewsLost Communication With Instrument Panel Cluster (IPC) Control Module
|
|
Mrs JMC poses with the D3 line-up238 views
|
|
Lightforce 240 XGTs on ECB nudge bar165 views
|
|
D3 with 3,5 ton trailer.198 views
|
|
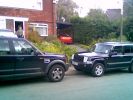
Nose to nose with a Jeep Commander - no contest281 views
|
|
D3 with Radar sensor temporarily mounted61 views
|
|
152 views
|
|

With tints done17 views
|
|

Chris 200100\'s Alarm instructiosn with pic from JKP & Simon496 views
|
|
D3 with rrs wheels24 views
|
|

Hog Rings and Hog Ring Pliers47 viewsHog Rings and Hog Ring Pliers showing an open and closed hog ring with 20p for scale
|
|

Hog ring pliers load with hog ring50 views
|
|
Thread upload0 viewsImage uploaded in new thread
|
|
Thread upload5 viewsImage uploaded in thread 181749
|
|
CB & PMR Aerials on D4 with RLD CB Aerial mount202 views
|
|

D4 with RR Headlamps34 views
|
|
D4 woods Parnitha139 viewsOut on 01-03-2013 at Parnitha forest with a bit of fog and rain - pic 1.
|
|
D4 Woods Parnitha 243 viewsOut on 01-03-2013 at Parnitha forest with a bit of fog and rain - pic 2.
|
|
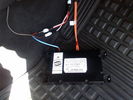
D4 Bluetooth AH42 10F845 AA module connected to 12VDC and MOST1215 viewsThis jpg shows the MOST bus connected to the AH42 10F845 AA module used in the D4 as well as +12VDC power from F58P connected. The power is split with a Y harness as the IHU (radio) for some reason required +12VDC power to the C2115-10 "mute" pin to keep the radio/CD audio from muting all the time.
With power on the pin, the radio audio does mute as it should when the cell phone rings and the hands free connects. The brown conductor feeds to C2115-10 and the blue to the module.
The module tucks up and hides behind the grey plastic section covering the forward portion of the passenger side tranny hump for left hand drive vehicles; for RHD, it would be located on the left side.
The pairing code is 2121 with this setup and not 1234 or 0000.
|
|

Cover with 2 12V sockets, 2 USB sockets and 220V socket20 views
|
|
Thread upload9 viewsImage uploaded in new thread
|
|

Thread upload10 viewsImage uploaded in new thread
|
|
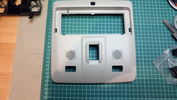
Roof console with cutout for switch(es)60 views
|
|
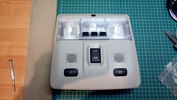
Roof console with mounted switches150 viewsOne switch is for switching the R-750 spot lamps, the other is for additional external lighting using a second Relay kit provided by OEM Plus.
|
|

Thread upload2 viewsImage uploaded in new thread
|
|
Thread upload6 viewsImage uploaded in new thread
|
|

Disco 200tdi with snorkel wading - Strata Florida416 viewsPerfect Bow wave
|
|
My Defender22 viewsDefender TD5 looking to keep it long term with a chassis replacement this year.but the quality / ride contrast between it and our Disco 3 is very apparent.
|
|
Wading African Style with a D2126 views
|
|
Mitac Mio 168 PDA404 viewsPDA with built in satellite reciever mounted into cradle mounted on "l" bracket to avoid drilling the side of recess.
|
|
Bespoke Colour Coded side vent with Racing mesh93 views
|
|

Wheel Stud Aligner for Defender with STEEL wheels2 views
|
|
Defender28 viewsDefender with adjustable tow bar with TrailAir fitted
|
|
Defender22 viewsDefender with adjustable tow bar showing trailair camera fitment
|
|
Defender31 viewsDefender with TrailAir mirror
|
|
Defender32 viewsTrailAir reverse image with distance and hitch guidelines.
|
|

Deka Battery Dimension Data617 viewsThe battery size that I installed for my auxiliary was a BCI 40R battery as it was for me the easiest to fit and was also a cranking battery. The case profile was such that no tie down fins were located on either bottom end, (sides yes), and length wise, it was only about 11" (290 mm) long. As such, I did not have to grind the nibs at the front bottom of the plastic surround.
I did however raise the bottom of the battery above the angled nibs as I set the battery on a 1" (25mm) high plastic spacer. The total height, (battery plus spacer), was about 8" (200mm) so the battery top still fit under the Land Rover factory cover.
For the Aux battery, when I replaced the 40R, I installed an Interstate BCI 47 which is similar in size to a DIN H5. I was therefore able to eliminate the vertical spacer as the Group 47/H5 is the same height as the DIN H7/H8 stock LR spec starting battery. As such, the standard battery tie down bolts can be used without modification. The Group 47 battery is 9 11/16" long x 6 7/8" wide x 7 1/2" (190mm) high.
|
|

419-08 Low and High line radio systems components and operation842 viewsThis 15 page pdf displays the radio components including pinouts for both the low and high line head units and the two Harman Kardon amplifiers including the Logic 7 amp. The steering wheel controls for both the radio and phone system are also outlined along with mention of the Sirius satellite radio feature.
|
|
Thread upload18 viewsImage uploaded in thread 170233
|
|
Thread upload19 viewsImage uploaded in thread 170233
|
|
ipod detail159 viewsipod mounted without lr´s ipod kit. A cable cames from HK back aux input.
|
|
Waffel101 views
|
|

Diesel - Ethanol co-fuel Paper114 viewsInteresting read - one local authority (Redland Shire Council) has 180 vehicles on trial and is pleased with the results; more power, engines run cooler; lower emissions including reduced smoke and it is a renewable resource to boot!
|
|

Difflock225 viewsDifflock with annotations
|
|
224 viewsTyre cleanrances with Bridgestone 265/65/70 -17 AT
|
|

Before I messed with it!109 views
|
|
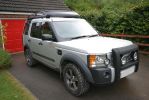
D3 - A few mods, A-bar & Lights, Expo Rack, 18" Wheels with AT2s630 views
|
|

Nearside close up shot with boot trim removed252 views
|
|
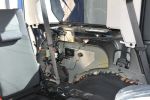
Nearside shot with boot trim removed292 views
|
|
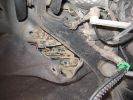
Brake sensor connector ( with 2 red wires connected)302 views
|
|
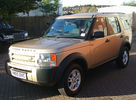
My new D3 Nov. 2010 161 views7 seater base with air.
|
|
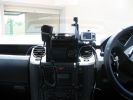
371 viewsHome made console, GPS in clip off mount, 29Mg radio,dual battery moniter,long rang tank gauge & elecric switches.A clip out removable console with no screws.PS also a camera mount.
|
|
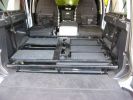
water tank357 viewsFlip up doors for extra storage under sub frame.
L.H.S covered with carpeting.
|
|
| 1335 files on 4 page(s) |
 |
1 |  |
 |
 |
|