
Rear Door Latch Replacement
Contents
Introduction
Following up and extending Iain G's excellent thread (with additions from ridgeback_moor) regarding changing the front door latch, here is a guide for doing the same for the rear doors.
I carried out this work on the rear left hand door (passenger's side in UK).
As of October 2011 the part numbers for the rear door latches for a UK specification car are :
- Rear Left - LR011303
- Rear Right - LR011304
Both retail at £61.50 + VAT before any discount (October 2011).
Mine came from Yeovil Land Rover with a 20% DISCO3 discount :)
This should be read in conjunction with Iain's guide and ridgeback_moor's additions linked to above.
Tools Required
- 10mm socket and ratchet
- T30 Torx bit and ratchet or Torx tool
- Medium sized cross point screwdriver
- Penknife and/or small and medium flat blade screwdrivers are very helpful for releasing clips
- Parcel or duct tape
- Something to prevent tape sticking to bodywork, like a sheet of newspaper or plastic carrier bag
Accessing the latch
Door card removal
See also the official Land Rover service procedure for rear door card removal (up to Step 5).
Door card removal is similar to for the front door.
- Wind the window down to about 1/4 open (i.e. gap of about 4"/10cm above the glass)
- Unclip and remove the top part of the internal door grab handle by freeing the clips underneath it with a medium sized flat blade screwdriver. The plastic is soft and cracks/tears easily so take care.
- Using the penknife blade lever out the round plastic cover behind the door lock handle, it is captive to the door card by a plastic strip so won't drop out.
- Remove the 7 screws from the door card
- 1 from behind the door lock handle
- 4 from the grab handle
- 2 from the bottom of the door (loooong screws!)
- The door card is now loose and can be pulled gently from the door. I could release mine at the bottom quite easily, and the remaining clips (plastic sides/bottom, metal at the top) released easily without breaking. Be careful removing the door card as there is wiring and the door lock cable attached to the door card.
- Remove the electrical plugs - I had the three below but there may be more or fewer depending on your spec (e.g. no puddle lights or rear headphone controls)
- 1 for electric window switch
- 1 for speaker
- 1 for puddle light
- Release the door lock handle cable from the door card.
- With a small flat bladed screwdriver release the clip on the curved black plastic cap from the door lock handle part. Lift the clip end of the plastic cap and unhook the other end.
- Remove the curved black plastic cap from the door lock handle cable by pushing the white cable collar out of the plastic cap and rotate the metal cable end out of the slots in the cap.
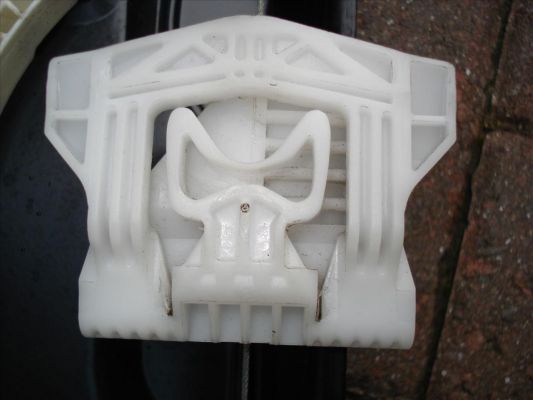
For information the curved cap looks like this: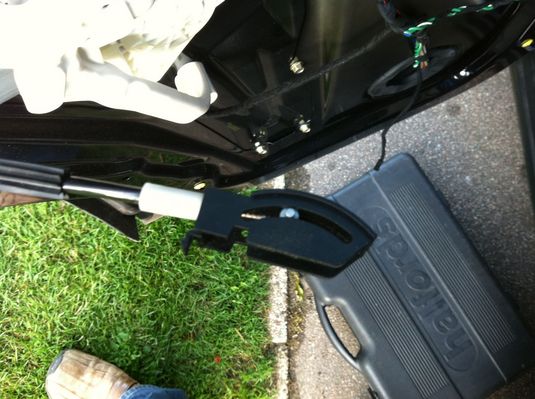
- Remove the door card and put somewhere warm and cosy.
Regulator Removal
You should now have a view similar to this:
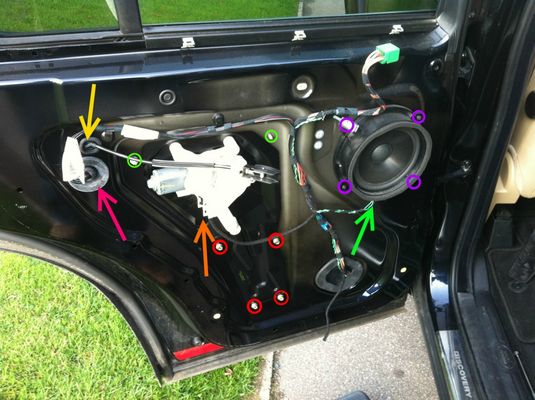
- Unplug the door speaker (green arrow), remove the 4 speaker screws (circled in purple) and remove the speaker, gently levering the speaker from the door if necessary and taking care not to drop it. Put speaker on a luxurious goose down pillow for protection.
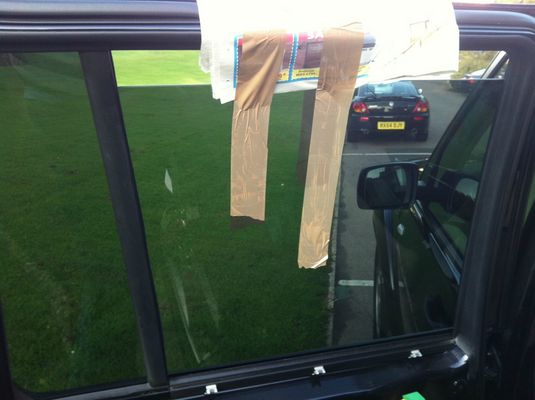
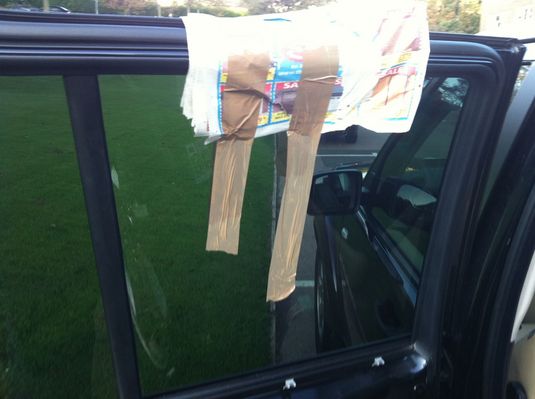
- Apply two strips of tape up and over the door frame with plenty of length on each side of the glass. Put the newspaper or carrier bag under over the top of the door frame to prevent the tape sticking to the paintwork:
- Through the speaker hole you will be able to see (with the help of a torch) and be able to get your hand to the window glass clip. Unlike the front door there is only a single clip which makes releasing the glass easier. Take a look at the clip to see how it comes apart, you will need to release the "bridge" shaped clip at the top which holds in a round stud attached to the glass - the round stud sits in the curved part below:
- Open up the window glass clip, and use either your spare hand or the help of glamorous (or otherwise) helper lift the glass out of the clip. Peel back the ends of the tape on the inside, tension the tape and stick back to the glass to hold it in place at the top of its travel:
- The regulator can now be disconnected and unbolted.
- Remove electrical connector (orange arrow) by squeezing the clips and pulling free.
- Then remove the 4 bolts (circled in red above) and the 2 nuts (circled in green), all require a 10mm socket.
- Using the handy handle on the regulator to stop it dropping into the bottom of the door, push the top of the regulator unit to free the two top bolts from the mounting holes. I couldn't get the regulator out of the hole so I lowered it into the bottom of the door frame.