
User talk:Marco 110
the 6HP26 gearbox spare parts.
TROUBLESHOOTING AND most common symptoms (known)
SUDDEN LOSS OF POWER. Power loss and even stop the car .. may be accompanied by a message on the screen HDC
- Cause 1: the injection pump down:
There was a change campaign of some model VIN. Failure very dangerous if the pump breaks down in the middle of the pipe. ... It may be a broken bearing in the pump ....
Cause 2: EGR valve faulty The EGR valve is faulty. you will stay at low speeds, the car is running but stops ... simply "stands still". We need to change the valve.
Cause 3:: 3 Cause: failure of a sensor: the failure of the expansion tank sensor, sensor failure of oil pressure. The failure of a sensor base for the protection of the engine can cause a defensive stop losing engine power and even going to stop the engine. Solution ... . investigate the sensor head and replace it.
: Cause 4: Restriction of entry of the air filter in the fuel tank: In this case, the car may suffer a shortage in fuel supply, causing a lack of power while accelerating, even to stop. Can occur without any indication on the dashboard.
STEERING COLUMN "VIBRATING * *"
Cause 1: faulty steering column support: change safety campaign (recall land rover)
NOISE IN CLIM: air recirculation: Cause 1: failure of the design: The cam actuator door is plastic and it seems to grind at times. Changing the actuator assembly with a piece of metal with a guarantee ... SEAT DRIVER TO DROP ALL ALONE (manual version) Reason 1: design error: . LR exchange for a seat electrically adjustable "Light" version, ie without souvenirs etc. .... As collateral (hard to obtain in France)
spare tire WINCH: Stall normally produced by raising or lowering the spare tire without tension. This is a design flaw. I will change at the dealership, but it is best to avoid the problem by trying to keep the tension in the cable to raise or lower the wheel.
Cool or rattle NOISE OR Rear suspension: Reason 1: Silenblocks triangles Make a general tightening or changing them one!
Cause 2: worn stabilizer bar Silemblocks: change or "wedges * *" for silentblocks!
The DSC ACTIVATION CURVES .. Tac, tac, tac at full speed: Reason # 1: Status of tires Check the tire pressure.
Cause 2: Failure of a probe of the suspension. Clean the sensors, check the connections.
AIRBAG INDICATOR: airbag indicator): Cause 1: fuse: Change the fuse.
Cause 2: belt pretensioners default Tighten the large black connector under the seat)
Failure to suspension): Reason # 1: "* * heats" of the suspension: . It occurs in situations of extreme heat (desert), in charge ..... Error suspension, but not alarming. compressor failure. Should be allowed to "rest" of the car. Turn the ignition and put it back.
Cause 2: failure or malfunction of the compressor: It is clear that in a car with a breakdown of the air compressor suspension is critical and will fail suspension. "(Not a fault, damage). .. To break or keep a spare compressor, or if you have to inflate the tubes with an emergency kit. (SOS kit)
FAULT INDICATOR
Reason 1: sensor gear (calibration): procedure known: to go short and all speeds without "skating * *" Clutch
Cause 2: Clutch: . If the clutch 'box manual "is cooked ... train the sensor must be "out of control." We need to change the clutch, of course.
multiple failures Christmas tree!
. Many lights are on ... transmission brake, etc. .. like a flying saucer ... One of the failures are difficult to solve because it can be a bad connection many things ....
Reason 1: incandescent light bulbs have to change the brake lights. Always use bulbs LR (it's not a joke) Cause 2: failure of the brake switch Cause 3: Error in bulk by a cable: A cable broke at any point in the car and touch a metal part can wreak havoc "electronic" in D3.
MOTOR SYSTEM The screen is a warning of "failure of the motor system" ... may lose power or not ... can stop the car or not ..... Reason 1: turbo failure: Failure of the valve wastgate .. (Electric drive) Cause 2: Failure EGR, loses power Cause 3:. Injectors dirty or damaged .... Cause 3 low pressure diesel fuel pump may fail. ((Refer to Recall Campaign) 4 out of fuel: default gauge you run out of diesel fuel and not realizing it.
broken engine Failure is recent and unknown to court investigation .... j begins to feel a vibration, even at idle, it seems to fail with an injector or more, but basically what happens is you stop the dealer will not even open the engine. . (If you're lucky and get into the guarantee perfect .... if not, the drama ...).. One of the cases could be seen inside the cylinder and we can say that it is always the sixth. Apparently, a lack of cooling, but not sure. There were four cases.
BREAKING THE TURBO . Symptoms are loss of power and a message of "motor system failed .... May be associated with the EGR, but it is not .... the turbo.
causa1: HS variable geometry actuator motor.
Solution: Change turbo (Translated from Spanish by me be gentle)
-the "super extended mode" the suspension of the D3 is designed such that, if he "poses" in TT on the chassis (eg because there may be other cases, as a "big" bridge crossing) he spends alone (automatically, without any possibility of manual selection), the "up" position to a position even higher (about 5cm), fine, but if that is not enough, put the foot on the brake, and hold the height control to position TT (high). for about 5 sec .. you "get" then raises an additional approximately 5 cm longer ..... a "chime" will confirm the shift in " super extended "and a message will appear on the dashboard! it can "serve
Subject: Replacing rod and rod end on DISCO 3
I propose here a chronology of the steps in photos of this achievement. Feel free to ask questions and make comments, as long as what is constructive.
Tools including:
- Key flare-nut
- Pluck ball
[[[img] [/img]]]
protection: - None
Parts :
- Tie Rod right is left: LR010671
- Tie Rod Right: QFK500020
- Tie Rod Left QFK500010
- 2 plastic collars
[img]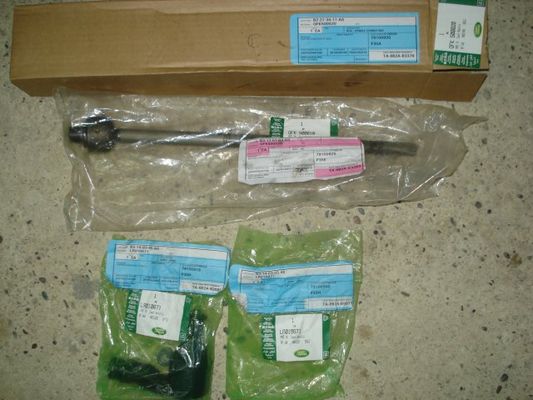 [/img]
Note: Attention - When lifting the vehicle, put a candle, keep the jack lifting protection and placed the wheel lodged under the vehicle in case.
[img]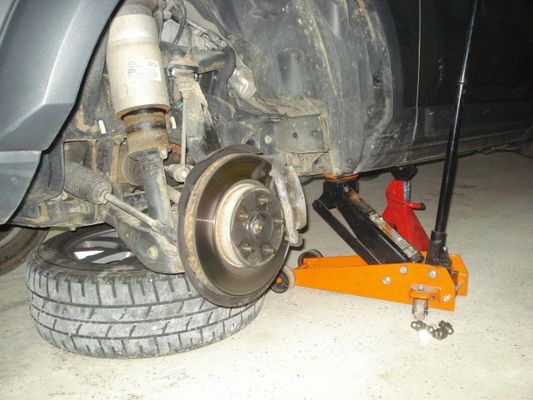 [/img]
Obligatory passage bench alignment adjustment after an exchange of these parts.
difficulty: - 4 / 10, the most painful is to get the ball in their cone holds no hard ball.
Time to complete: - 3 hours for both sides.
1) Remove the wheel and make the vehicle safe. See comment in the box "Remarks" of the first Inter.
1.1) Remove the cover sheet.
[img] [/img]
2) Place the 4 pieces of plastic cards. Using two screwdrivers to nail up the central pawns
[img]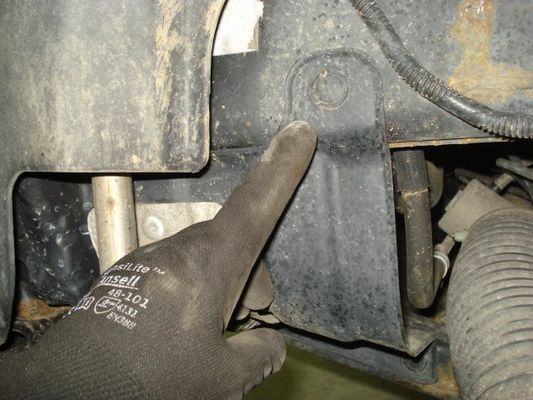 [/img]
3) Asperger of releasing the lock nut to adjust the ball and the base of the bellows on the link rod.
[img]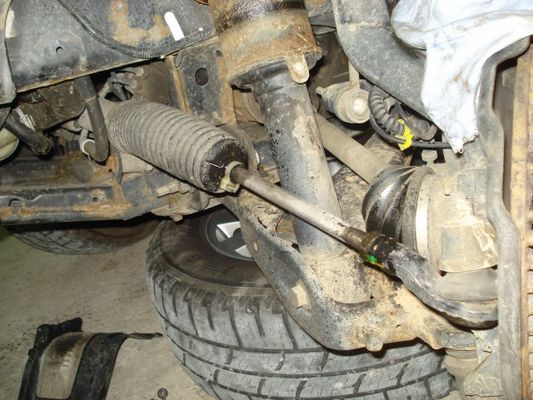 [/img]
4) Using a screwdriver or two, unclip the plastic collar automatically taking care not to damage it and cut the plastic tie side management, taking care not to damage the bellows.
[img]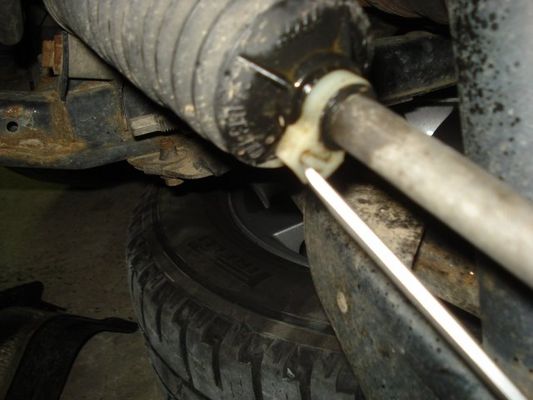 [/img]
5) Pointing the direction to "outside" and loosen the ball joints (side direction) with the key Claw unscrew of the cone of the pivot ball. Using the hard ball, detaching its cone. Remove the link rod.
[img]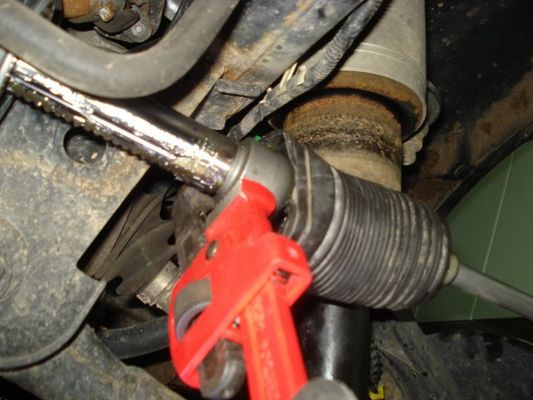 [/img]
6) Pinch the connecting rod in a vise, loosen the nut against the ball and complete estimate it by counting the number of turns until separation of the link rod.
[img]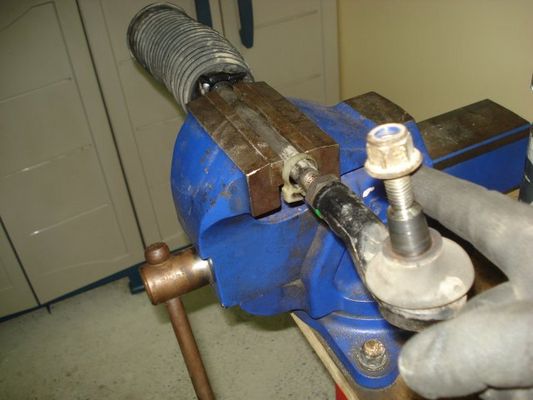 [/img]
7) Slide the bellows to the thread and pull hard to move the thread. In some penetrating oil or grease will facilitate the transition.
[img]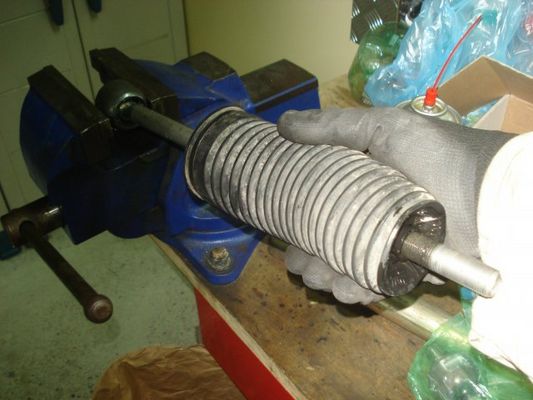 [/img]
8) On the new link rod, the bellows back, against the nut of the ball and the ball by counting the number of round = the number of turns when removing it (phase 6) + cons tighten the nut. :
9) Screw the ball on the direction, tighten without forcing the key with claw.:
[img][/img]
10) Fit the bellows side management and the flange with a plastic tie.:
[img]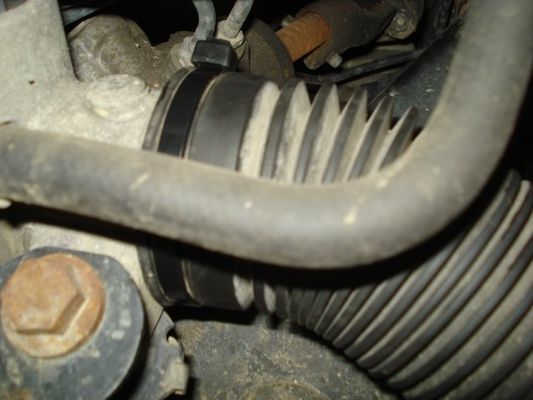 [/img]
11) Fit the other side of the bellows in his throat and up the automatic white plastic collar.:
[img][/img]
12) Fit the cone of the ball joint in its housing (pivot) and tighten the nut "nylstop". If the axis of the ball running and you could not tighten the nut, slide the handle of the key claw like the picture to keep the ball in its cone.
[img]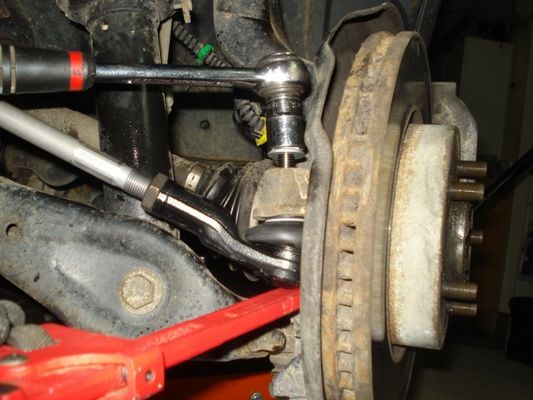 [/img]
[img]
[/img]
[img]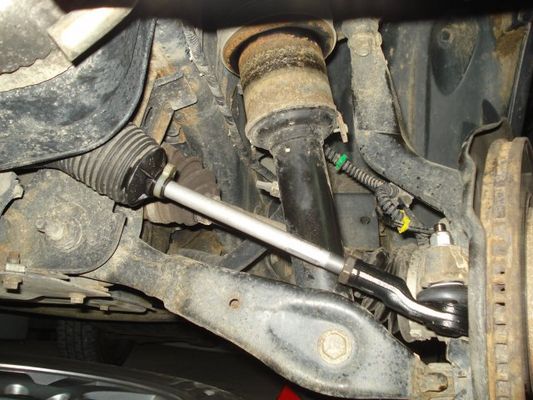 [/img]
13) Replace the plastic cover and four pawns.
[img][/img]
14) Replace the cover sheet metal.
[img] [/img]
Obligatory passage bench alignment adjustment after an exchange of these parts.